Advertisement
Quick Links
R
R
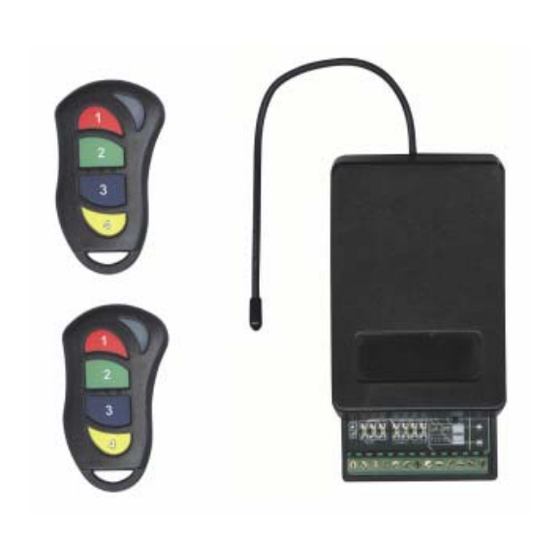
Multi-Function Receiver / Transmitter Set
OVERVIEW
The RXPROR4 is an advanced multi-purpose 4-channel narrow-band UHF
receiver/transmitter set with fully programmable relay outputs (1 amp relays). It is supplied as
standard with 2 x Code Hopping, 4 Button Remote Controls.
All outputs are individually programmable to suit almost any
▪
application (momentary, latched, timed or pulsed).
▪
High Security Code Hopping Remotes (anti-scan, anti-code grabbing)
▪
Compatible with Rhino Wireless Alarm Detectors
▪
Up to 200 meters radio frequency range (line of sight)
Up to 5 Code Hopping remote controls can be used
▪
▪
Up to 4 Wireless Detectors can be used
▪
Step by Step Programming via remote control
▪
Power Supply Requirement: 12VDC @ 500mA
RXPROR4 - 4 Channel Receiver – Wiring Diagram
Remote Control – 4 Channel Code Hopping Transmitter (Individual Part No RCTX4-U)
Optional Programming
Antenna Mounting: For maximum operational range the antenna must be made vertical and straight.
X
P
R
X
P
R
NOTE: By default all channels are 1-second
pulsed outputs (i.e. pressing the button will turn
the output on for 1 second and then turn off). See
PROGRAMMING for modifying to suit your
application.
O
R
4
O
R
4
Remote Button
1
2
3
4
N517
Output Activated
Channel 1
Channel 2
Channel 3
Channel 4
Page 1
Advertisement

Subscribe to Our Youtube Channel
Related Manuals for MCM Electronics RXPROR4
Summary of Contents for MCM Electronics RXPROR4
- Page 1 N517 Multi-Function Receiver / Transmitter Set OVERVIEW The RXPROR4 is an advanced multi-purpose 4-channel narrow-band UHF receiver/transmitter set with fully programmable relay outputs (1 amp relays). It is supplied as standard with 2 x Code Hopping, 4 Button Remote Controls.
- Page 2 The following features are programmable for each individual channel. A description of each feature is included. For programming each feature see the relevant page number in the PROGRAMMING section of this manual. Feature Description Page Allows additional Code Hopping Remote Controls to be Adding New Remotes learnt into the system i.e.
- Page 3 Programming During normal operation the display lights on the unit are scrolling from right to left. When the display lights are not scrolling, this indicates the unit is in programming mode. MANUAL SYMBOLOGY Light is OFF Light is ON and not flashing Light is FLASHING Lights are SCROLLING When looking at the receiver with the terminal...
-
Page 4: Enter Programming Mode
ADDING NEW REMOTES (Your RXPROR4 can utilize a maximum of 5 remotes) Enter Programming Mode See ENTERING PROGRAMMNG MODE (page 3). Press button 3 repeatedly until the channels lights indicate one of the output channels you wish to program. Select a channel that you wish to operate with a remote control i.e. - Page 5 LATCHED OR PULSED OUTPUT Enter Programming Mode See ENTERING PROGRAMMNG MODE (page 3). Press button 3 repeatedly until the channels lights indicate the output channel you wish to program. Press button 2 repeatedly until the feature lights are on as shown. Press button 1 to swap the feature light(s) between flashing and not flashing.
- Page 6 TIMED OUTPUT Enter Programming Mode See ENTERING PROGRAMMNG MODE (page 3). Press button 3 repeatedly until the channels lights indicate the output channel you wish to program. Press button 2 repeatedly until the feature lights are on as shown. Press button 1 will swap the feature light(s) between flashing and not flashing.
- Page 7 MOMENTARY OUTPUT ENABLE Enter Programming Mode See ENTERING PROGRAMMNG MODE (page 3). Press button 3 repeatedly until the channels lights are all on as shown. Press button 2 repeatedly until the feature lights indicate the desired channel for momentary operation. Press button 1 to swap the feature light(s) between flashing and not flashing.
- Page 8 ADDING WIRELESS DETECTORS WIRELESS PIR, REED, SMOKE DETECTOR, EMERGENCY PENDANT. Enter Programming Mode See ENTERING PROGRAMMNG MODE (page 3). Press button 3 repeatedly until the channels lights indicate the output channel you wish to program. Select the channel that you wish to be activated by the detector.
- Page 9 REED MODE ENABLE – if using Wireless Reed Switches this mode should be enabled. When the wireless reed switch sends “open” i.e. when your door or window is opened, then the channel output will be latched on. When door is closed the output turns off. Enter Programming Mode See ENTERING PROGRAMMNG MODE (page 3).
- Page 10 Press and hold button 2 on the remote control until the lights start scrolling RESETTING THE RXPROR4 – This erases all remotes and detectors and returns the programming settings to the factory defaults i.e. 1 sec pulse output for all channels.
- Page 11 3 additional remotes can be added i.e. 5 x Code Hopping remotes in total can be used with the RXPROR4. Remote Control a Rhino Car Alarm or Engine Immobiliser via your RXPROR4 • remote control. Various models are available, so please contact your Rhino Dealer for further information.
Need help?
Do you have a question about the RXPROR4 and is the answer not in the manual?
Questions and answers