Table of Contents
Advertisement
Quick Links
Advertisement
Table of Contents

Subscribe to Our Youtube Channel
Related Manuals for St George 5667100


Summary of Contents for St George 5667100
- Page 1 Gas Cooktops Model No’s 5667100 700mm Gas Cooktop 5669100 900mm Gas Cooktop...
-
Page 2: Table Of Contents
Contents Safety Notes Knowing Your Cooktop Important Points Installation Checks Features And Benefits Using The Appliance For The First Time Control Panel Operation Gas Burner Controls Cooking Instructions Cleaning And Maintenance Recommended Cleaners Routine Cleaning Spills, Spatters And Accidents Troubleshooting Guide Installation Instructions 10-11 Measurements Required Clearances... -
Page 3: Safety Notes
Safety Notes DON’T USE THE APPLIANCE AS A SPACE HEATER. • The appliance must never be used for warming or heating the surrounding room or for drying clothes or textiles or other items not specifically recommended in the operation manual. Combustible materials or products must never be placed on or near the appliance. DO NOT LEAVE CHILDREN ALONE. •... -
Page 4: Knowing Your Cooktop
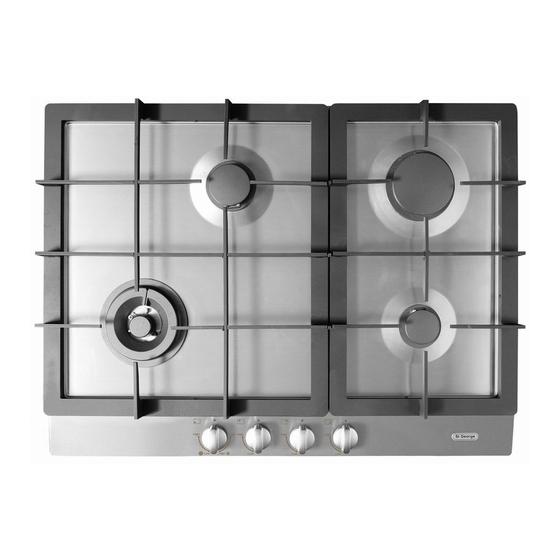
This is critical to appearance, performance and safety. For installation details, please refer to Installation Instructions. Features And Benefits Gas cooktop models incorporate electronic ignition and fast take-off gas burners for effective lighting and heat production. Both gas models have Flame Failure Device control for complete safety. All pan supports are removable and dishwasher safe. Cleaning the cooktop is made simple with high quality vitreous enamel and stainless steel (refer to Cleaning and Maintenance for complete care instructions). 5669100 5667100... -
Page 5: Using The Appliance For The First Time
Using The Appliance For The First Time After installation remove all notification labels (not gas or electrical warning labels), advertising, tape, packaging, etc. A quick wash with diluted soapy water should rinse away any adhesive residue. Eucalyptus oil (small amounts) is also good for removing adhesive residue. Thoroughly rinse cleaned surfaces and wipe them dry using a clean, soft cloth. NOTE: People with sensitivity to cleaning chemicals must take the necessary precautions. It is recommended that protective gloves be worn while cleaning the appliance. INITIAL HEAT UP Some smoke and smell may be noticed during the initial heat up cycle (see Using the Appliance for the First Time). This should quickly dissipate. If abnormal levels of smoke are observed (i.e. it is not food that is burning) have the appliance thoroughly checked. Control Panel Operation Gas Burner Controls The cooktop burners are ignited by the in-built electronic ignition controls. The controls must be turned anti-clockwise to operate and can only be turned clockwise to the off position. Alternatively, the burner may be ignited manually using matches, cooktop gas High lighters or similar devices, being careful not to risk injury or damage. -
Page 6: Cooking Instructions
Cooking Instructions To achieve the best possible cooking results, the following points are recommended: • Make sure that both the cooktop surface and the bottom of your cookware are clean and dry before cooking. Clean and dry surfaces will help prevent scratches and stains on your cooktop and cookware. • Use good quality saucepans with thick ground bases (preferably 5mm thick) that effectively cover the heating area. Pans which have smooth, slightly concave or flat bases when cold will expand and become flat when hot. Thin, warped, dented or ridged bases can cause irregular heat distribution resulting in uneven heating of food. Quality stainless steel pans are recommended. • The size of the pan should closely match the size of the cooking zone to be used –... -
Page 7: Cleaning And Maintenance
After cleaning, make sure cleaned surfaces are thoroughly rinsed to prevent any risk of baked- on cleaner residues, and wipe dry with a clean, soft cloth. NOTE: When cleaning stainless steel surfaces, St George recommends using dedicated stainless steel cleaning agents such as SteelPower by Hillmark, or any other reputable brand cleaners specially formulated for cleaning stainless steel. When cleaning surfaces which have a brushed... -
Page 8: Routine Cleaning
Cleaning And Maintenance (Continued) DO NOT USE ANY ACID OR CAUSTIC CLEANSERS OR ABRASIVE POWDERS OR SCOURERS ON THE INTERIOR OR EXTERIOR OF THE APPLIANCE Spark Probe Gas outlets should Burner Cap be free of obstructions Flame Failure Routine Cleaning If possible, the cooktop should be wiped down after each use to prevent dirt and grease build up. Ensure all controls are off and the appliance is cool before cleaning. To clean the exterior, wipe the knobs, stainless steel and enamel surfaces regularly using a warm, damp, non-abrasive... -
Page 9: Troubleshooting Guide
Troubleshooting Guide Problem Possible Cause Action No ignition No spark See next Problem No gas Check gas is not turned off or empty Spark “escaping” Clean around electrode and burner cap No spark No electric power Check that the cooktop is plugged into the power, and that power is available Switch not pressed Press the knob a bit harder, then try other... -
Page 10: Installation Instructions
This appliance must be installed according to the installation requirements of the local gas authority and the appropriate installation code issued by Standards Australia (Ref. Code AS5601) and the building authorities’ requirements and any other applicable requirements. Measurements Unless otherwise noted, all dimensions provided are in millimetres (mm). The sizes allow for only a small degree of error, so all cut-outs must be precise and square. To ensure the cabinetry is well finished the cut edges must also be square and care taken to ensure the cut edges are free of chips. Note: Cutout is to have square corners. 5667100 5669100 The duplicate rating plate must be attached to an adjacent surface for easy viewing, without the necessity of removal of the appliance. -
Page 11: Required Clearances
Installation Instructions (Continued) Required Clearances (Required Clearances Around Domestic Cooking Appliances – Extract from AS5601) All cooktops, rangehoods and/or exhaust fans shall be installed in accordance with the manufacturer’s instructions. However, in no case shall the clearance between the top of the highest burner on the cooktop to the lowest extruding part of a rangehood be less than 650mm. Minimum clearance for an exhaust fan is 750mm. (Clause 5.12.1.5) Any other combustible materials less than 600mm above the top of the highest burner shall be protected for the full width and depth of the cooking surface. However, in no case shall this clearance be less than 450mm. There shall be a clearance of at least 250mm between the closest edge of any burner and a wall to the left, right or rear of the cooktop. -
Page 12: Gas Connection Instructions
Gas Connection Instructions Gas Supply Connection WARNING: This appliance must be installed by an authorised and qualified person, according to the installation requirements of the local gas authority and the appropriate installation code issued (within Australia) by Standards Australia (reference code AS5601) and the building authorities’ requirements and any other applicable requirements. Check the gas type of the appliance which is identified by a sticker attached to the appliance. Ensure the location of the gas supply and routing of the gas line is appropriate for the appliance (see installation diagrams for gas connection location details). Ensure that the supply connection point will be accessible when the appliance is installed. Use of a hose assembly must comply with AS5601. A restraining wire or chain of adequate strength is to be fixed to the appliance and the wall within 50mm of each connection point. The length of the chain or wire is not to exceed 80% of the length of the hose assembly. It is recommended that a manual shut-off valve be installed in the gas supply line, in an accessible position external to the appliance, such that the gas supply to the appliance can be shut off in the event of an emergency or for servicing without having to remove the... -
Page 13: Gas Consumption
22.0 1.20 + 0.53 22.0 Wok (Inner) 0.75 0.53 Total: Model 5667100 = 43.1 MJ/hr Total: Model 5669100 = 53.3 MJ/hr Electrical Connection Instructions Wiring Rules And Warnings WARNING: All aspects of the installation must conform with the requirements of the Standards Australia Wiring Rules (within Australia) as well as your local electrical and building codes and regulations and any other applicable requirements and conditions of your Local Power Supply Authority. -
Page 14: Servicing And Minor Adjustments
Servicing And Minor Adjustments All service work, minor or not, must be performed by a suitably qualified and licensed person. Setting Gas Pressure A pressure test point is provided on the pressure regulator (for Natural Gas models) or on the inlet adapter (for LPG models) at the gas connection point of the appliance. The pressure should be set with one burner fully on. The set pressure should be 1kPa for Natural Gas or 2.75kPa for LPG Propan. Gas Simmer Flame Adjustment The minimum gas flow for each burner is factory set but can be adjusted if necessary. The minimum flow can be increased or decreased by removing the control knob and hob to gain access to the adjustment screw on the valve body, and then turning the adjustment screw using a small flat bladed screwdriver. Take care to not damage the head of the screw. -
Page 15: Lubricating Gas Valves
Servicing And Minor Adjustments (Continued) Lubricating Gas Valves The gas valves may require periodic lubrication depending on their frequency of use. To lubricate the valves: Turn off the gas and electricity supply to the appliance. Remove the pan supports, control knobs and burner assemblies. Disassemble the pan support locating pins and then remove the hob. Dismantle the valve body by removing the screws retaining the control shaft assembly (refer to diagram if necessary). Remove and clean the cone with a cloth and suitable dilutant. Ensure the cone is clean and dry and slightly grease the outside with Ragosine Moly LM or approved alternative graphite lubricant. Replace the cone, rotate it and remove it. Wipe off any excess grease ensuring that the gas holes are clear. Replace the cone and re-assemble the valve body. Re-assemble the hob and other components. Pressure adjustment screw Pressure test point... -
Page 16: Recipes
Recipes The recipes on these pages are provided to help you enjoy your cooktop. All recipes are © The Margaret Fulton Cookbook. Spaghetti With Clams 1.5kg clams 1 cup white wine 5 small ripe tomatoes, cut into large dice ½ small chilli, seeded and finely sliced 1 large clove garlic, finely chopped 2 tbsp extra virgin olive oil ¼... -
Page 17: Pea And Ham Soup
Recipes Pea And Ham Soup 500g split peas 2 rashers bacon, diced 2 onions, sliced 2.5 litres (10 cups) water ½ tsp freshly ground black pepper 1 sprig fresh thyme 1 bay leaf 1 ham bone 2 carrots, diced 1 cup sliced celery 2 tsp salt or to taste 2 tbsp lemon juice croutons (optional) Cover the peas with cold water and soak overnight. -
Page 18: Paella Valenciana
Recipes Paella Valenciana ½ tsp saffron threads 5 cups chicken stock ½ cup olive oil 4 half chicken breasts 2 onions, chopped 2 cloves garlic, chopped 1 red capsicum, seeded and cut into strips 2½ cups rice, washed and drained 2 tomatoes, peeled and cut into eights 1 cup shelled green peas 500g seafood such as scallops, prawns, calamari or mussels Bring the saffron and stock to the boil and set aside, until ready to use. -
Page 19: Part Numbers
Part Numbers Item No Part No Description Quantity Quantity 5669100 5667100 52243 Trivet Left 52478 Trivet Mid Large 52244 Trivet Right 52479 Wok Ring 52249 52242 52480 Wok Burner GG-503 52482 Medium Burner GG-535A 52481 Large Burner GG-535B 52483 Small Burner GG-535H... - Page 20 52596 V0.1...
Need help?
Do you have a question about the 5667100 and is the answer not in the manual?
Questions and answers