
Related Manuals for NCE NCE5251DVD

Summary of Contents for NCE NCE5251DVD
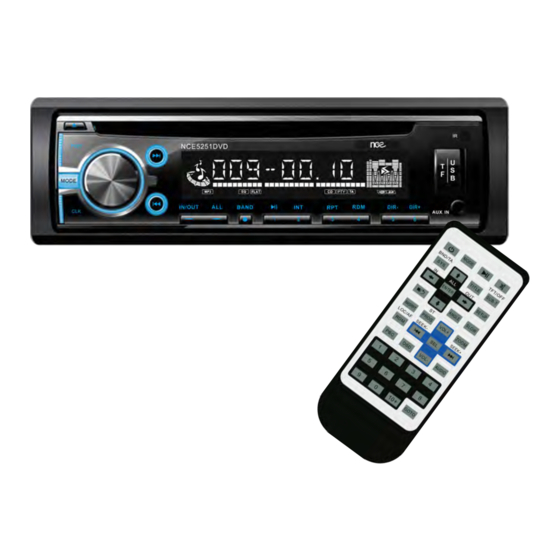
- Page 1 NCE5251DVD Quick Start Guide RV MULTIMEDIA AUDIO SYSTEM *Please read this Quick Start Guide prior to installation 4x50WATT HIGHPOWER MICRO SD IN/OUT EXTERNAL AM/FM RADIO 3.5MM AUX ZONE SPEAKER SWITCH...
- Page 3 NCE5251DVD RV MULTIMEDIA AUDIO SYSTEM...
-
Page 4: Table Of Contents
Contents 1. Precautions 2. Front Panel Operation 3. Front Panel Operation 4. Remote Control 5. Wiring/Installation Diagrams 6. Bluetooth Streaming Operation 7. Troubleshooting 8. Specifications 9. Notes 10. Warranty 11. Warranty... -
Page 5: Precautions
This Quick Guide has been developed to navigate the user through all the key functions. Should you have any other questions or concerns that are not covered in this manual, please feel free to contact NCE on (03) 9308 7444 NCE is constantly reviewing and upgrading products and features which are... - Page 6 Front Panel Basic Operation MICRO SD 14 15 INSERT THIS WAY 1. Eject Press to eject disc 2. PWR Press to power On/Off 3. MODE Press to change the mode as follows: Radio---Disc---USB---SD---BT---AUX1/Front---AUX2/Rear 4. CLK Short press to show current time Long press to enter hour adjustment function, use volume control to adjust, then short press to enter minute adjustment function, use volume control to adjust.
- Page 7 Front Panel Basic Operation 10. BAND Press to change radio band as follows: FM1---FM2---FM3---AM1---AM2 11. 1/Play/Pause - Radio mode, short press to select preset station 1, long press to save preset station 1 - DVD/CD/BT/USB/SD mode, short pres to play/pause 12.
-
Page 8: Remote Control
Remote Control 1. Mode/Source 2. Power On/Off 3. Menu Cursor Up 4. System/Radio Band AM/FM MODE 5. Menu Enter/Hold All Speakers BND/TA TFT/OFF TITLE 6. Menu Cursor Left/Hold Internal Speaker SUB-T 7. Menu Cursor Down ENTER SETUP 8. Stop/Return 9. Program/Radio Stereo/Mono ANGLE SLOW 10. -
Page 9: Wiring/Installation Diagrams
Wiring/Installation Diagram Wiring Diagram 11/20 MODEL: NCE5251DVD YELLOW BATT 12V + 12V + BLUE BLACK POWER GROUND ANTENNA + 12V DC NEGATIVE GROUND Grey Purple Green Blue Yellow White RCA FRONT L OUT RCA FRONT R OUT Grey/Black Purple/Black Green/Black... -
Page 10: Bluetooth Streaming Operation
Bluetooth Streaming Operation Bluetooth Pairing (Music Streaming Only) Before you can use a Bluetooth device, it must be paired and connected. Make sure Bluetooth is activated on your device before you begin the pairing process. 1. Short press the Mode button until you see BT CONNECT 2. -
Page 11: Troubleshooting
Troubleshooting Problem Cause Solution ACC power switch is turned off Turn on ACC power switch There is no power The fuse has blown Check wiring and replace fuse (10A) The disc can Eject the disc and insert the next disc There is a disc already inside not be loaded The disc will only... -
Page 12: Specifications
Specifications General: perating Voltage: DC +12V Negative Ground Operating Voltage range: 10.8V - 16V Max Operating Current: 10A Angle Of Installation: Front and Back tilt less than 30° DVD/CD Player: Compatible Disc: DVD-R, DVD-RW, DVD+R, DVD+RW,CD-R, CD-RW, CD-DA, Mp3, WMA, HDCD, SVCD, VCD, MPEG Audio: Audio S/N ratio: 85 dBu Dynamic range: 95 dBu... -
Page 13: Notes
Notes... -
Page 14: Warranty
About our policy At NCE we want our customers to be completely satisfied with their purchase. We therefore recommend that you read be familiar with our Repair, Return and Refund Policy and our NCE General Terms and Conditions of Trade. - Page 15 This Return, Repair and Refund Policy is applicable to purchases made from NCE Pty Ltd. *Estimated resolution days may vary to circumstances beyond ours/ or our suppliers control. To receive a copy of NCE’s full Terms and Conditions please contact our Head Office (03) 9308 7444 or visit www.nce.com.au/terms-and-conditions...
- Page 16 DISTRIBUTED BY NCE : 34-48 Stanley Drive, Somerton, Vic 3062 Tel: 1300 366 024 Email: sales@nce.com.au V 1.01 www.nce.com.au...
Need help?
Do you have a question about the NCE5251DVD and is the answer not in the manual?
Questions and answers
I need to remove the transport screws from the DVD. How do I remove the device from the cradle and please send a diagram showing the transport screws.
To remove the transport screws from the NCE NCE5251DVD, locate and remove them before attempting to load a disc, as failure to do so may prevent proper disc loading. To detach the device from the cradle, press the area indicated by (A) and slowly slide the battery holder out in the direction indicated by (B).
This answer is automatically generated
How to reset device