Table of Contents
Advertisement
Quick Links
Advertisement
Table of Contents

Subscribe to Our Youtube Channel
Related Manuals for AVM INSPIRATION CS 2.3


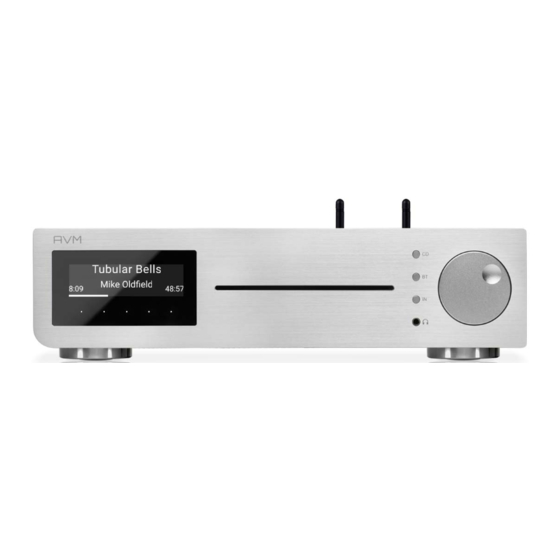
Summary of Contents for AVM INSPIRATION CS 2.3
- Page 1 Instruction Manual INSPIRATION CS 2.3...
- Page 2 We confirm that the device to which these operating instructions belong complies with the EC directives valid at the time of printing for obtaining the mark. The necessary tests have been carried out with positive results. AVM Audio Video Manufaktur GmbH Daimlerstraße 8 D-76316 Malsch WWW.AVM.AUDIO...
- Page 3 CS 2.3 All-in-One system in a comprehensive way and therefore ask you to take a little time to study this manual in detail. Please note: As the functionality of your INSPIRATION CS 2.3 can be extended in no time by future software updates, it is naturaly that the present manual must also be supplemented.
-
Page 4: Table Of Contents
Table of contents Setting up the CS 2.3 ........................5 Scope of delivery ............................5 Overview ................................. 5 Installation and cooling ..........................6 Mains connection ............................6 Connecting analog sound sources ......................7 Connection of digital sound sources ......................7 Connection of analog recording devices .................... -
Page 5: Setting Up The Cs 2.3
1 Setting up the CS 2.3 Scope of delivery • INSPIRATION CS 2.3 Compact Streaming CD Receiver • 2 pcs. WLAN/Bluetooth antennas • 1 Power cord • 3 pairs RCA plugs for PHONO MC adjustment • 1 pair of white gloves •... -
Page 6: Installation And Cooling
In addition to WLAN (16), the CS 2.3 is equipped with another antenna for receiving Bluetooth signals (15). Both antennas are identical and interchangeable, each one may be installed to both antenna connections (15/16). 1.3 Installation and cooling The power amplifiers of your CS 2.3 need cooling. Therefore it is very important that the air intake from below as well as the outflow of the heated air to the rear panel remains unobstructed. -
Page 7: Connecting Analog Sound Sources
IMPORTANT: The USB interface is only intended for USB sticks/thumb drives or hard disks. 1.5 Connecting analog sound sources Connect analog signal sources to the analog inputs (32) using suitable cables. The left channel is connected to the upper row of sockets, the right channel to the lower row of sockets. 1.5.1 Line level sources (RCA) Connect the line sources to the RCA connector (32). -
Page 8: Connection Of Digital Recording Devices
There are two ways to start the pairing process: 1. You can start pairing via the RC X app from AVM. You can find the Start Pairing option in the Settings under the RC 9/10 Remote Control item. Once you have started the pairing process via the app, you need to start the pairing process in the RC 9/10 remote control shortly after using the navigation buttons as well. -
Page 9: Rc X App For Ios And Android
The RC X App for iOS and Android turns your smartphone or tablet into a handy remote control and offers a variety of intuitive functions for using all streaming-capable models from AVM with integrated AVM X-STREAM Engine®. The RC X app is available for free download from the Apple App Store and the Google Play Store. - Page 10 Connect the device to a router in your home network using a network cable (LAN cable) by connecting the LAN cable to the network port of the AVM device (22) on one side and to a free port on your router (LAN) or a network switch on the other side.
- Page 11 WLAN router is equipped with WPS, please refer to your router's documentation of your router. The setup of a WPS connection is done via the Personal Setup menu of your AVM device. For details on the full functionality of the Personal Setup menu, see Section 3.8 Personal Setup.
- Page 12 WLAN configuration that has been performed. 1.13.2.2 Setup via AirPlay2 configuration for iOS First switch off the AVM device completely via the power switch on the back (17) and wait a short moment until you switch it on again via the power switch.
- Page 13 In the WLAN menu, under the SET UP NEW AIRPLAY Speaker menu item, select the AVM device that you want to connect to your WLAN. In the example below, the AVM device is listed as CS 2.3-00c440. Wait a moment if the device is not displayed immediately. Your iPhone or iPad continuously searches for new devices and updates the view of available WLAN networks at short intervals.
- Page 14 To check the network status, download the RC X app for iOS from the Apple App Store and install it on your iPhone or iPad. Then launch the RC X app and select the AVM device from the Start menu.
- Page 15 First perform the pairing procedure as described in section 1.11.1 and then select the newly set up AVM device on the RC 9/10 using the Select device menu item. You can reach this menu item via the System Menu, which you can access by pressing the Settings button (tool icon) on the RC 9.
-
Page 16: Software & Firmware Updates
AVM X-STREAM Engine® and the RC X App up-to-date. You can find the latest version of the RC X App for download in the Apple App Store or the Google Play Store. To check the installed AVM X- STREAM Engine®... -
Page 17: Operation Of The Basic Functions
2 Operating the basic functions 2.1 First switch-on and self-test When the CS is switched on for the first time (mains switch to ON), a so-called self-test is carried out first, if the CS has been completely disconnected from the mains or switched off via the mains switch (16). -
Page 18: Volume Adjustment
NOTE: If a digital input is selected and there is no compatible digital signal, the display will show NO DIG SIGNAL or NO ARC SIGNAL instead of the volume indicator. In this state, the volume setting is not adjustable due to the selected digital input. 2.4 Volume adjustment To adjust the volume, use the rotary control (14). -
Page 19: Bluetooth
The integrated Bluetooth function allows you to wirelessly transmit high-quality music signals from a Bluetooth player such as a smartphone, tablet or PC to your AVM device. To activate and use the Bluetooth function and use it, you must first pair a compatible Bluetooth player with your AVM device (see the following section 2.6.1). -
Page 20: Advanced Settings (Menu)
Pairing additional Bluetooth players Your AVM device can only be paired with one Bluetooth player at a time. To switch to another Bluetooth player, an existing connection must first be disconnected. This can be done in the RC X app for iOS and Android under the Bluetooth item. -
Page 21: Global Settings
Please also note that when the Advanced Settings menu is activated, it is not possible to switch a sound source using the source selector switch (12), change the volume using the volume control (11) or switch off the unit. To do this, first exit the Advanced Settings menu using the menu key marked EXIT. 3.1 Global settings The following settings are available for each input group, no matter if digital, analog, stream, CD, ... -
Page 22: Analog Inputs
effect is supposed to be corrected by the "aurally correct volume setting" (loudness) this effect by boosting bass and treble when playing soft music, and then gradually returning to a linear frequency response as the volume is increased. For this compensation to achieve its full effect, careful adjustment is necessary. -
Page 23: Phono Input 23
3.5 Phono input 3.5.1 Phono Pickup After selecting the phono input (31), you can set which pickup system your cartridge uses (MM or MC) under the item Phono Pickup. For more information, see section 1.5.2. 3.6 Bluetooth Input, Internet Radio, Airplay, Podcast After selecting these inputs, further setting options are available. - Page 24 3.7.1.6 Play Time In this menu you can adjust whether the display shows only the time, only a time bar or both at the same time when playing titles (e.g. via the CD player). By default, the time and the time bar are displayed. 3.7.1.7 Remaining Time Display Here you can adjust whether the total time or the remaining time of the current title is displayed for a played title.
- Page 25 A name consists of a maximum of 8 characters. The name can be changed conveniently via AVM's RC-X APP or via the separately available RC9/10 remote control. NOTE: To rename the input in the APP, go to Inputs in the overview after selecting your CS 2.3 and press the 3-dot symbol on the right side of the input to be renamed.
- Page 26 3.7.6 Standby Mode So that your AVM device can be switched on at any time via the RC X app for iOS and Android, the integrated AVM X-STREAM Engine® also remains in standby in the so-called Network Standby mode and constantly ready for operation.
-
Page 27: Settings Via The Rc X App 29
3.7.11 WPS WPS enables you to easily set up a wireless network connection (WLAN / WiFi). You can start the WPS function under this item. 3.8 Settings via the RC X App Most of the settings you make via the unit menu can also be easily changed alternatively with the new RC X App. -
Page 28: Factory Reset (Factory Settings)
3.8.8.4 Outputs In this menu item, the various settings for the outputs are available as in Personal Setup (see section 3.8.4). 3.8.8.5 Tone Control In this menu item, you can also set in the APP whether bass and treble components are to be adjusted via the tone controls (see section 3.1: Bass, Treble, Loudness) for a single sound source (INDIVIDUAL) or for all sound sources together (GLOBAL). -
Page 29: Failure Search
The prerequisites for your warranty claim are: 1. The device must have been purchased from a specialist dealer authorised by AVM. Devices that come from other sources will not be repaired, not even at a charge. -
Page 30: Technical Data
5. A short description of the fault must be enclosed with the returned unit. Please print out our SERVICE FORM for this purpose. You can find it at www.avm.audio under SERVICE. 6. In cases of doubt, we reserve the right to request a copy of the purchase invoice. In the event of unauthorized return or if there is no damage to the unit, we reserve the right to charge a handling fee. - Page 31 5.1.5 Preamplifier (Phono) Equalisation RIAA ............................... < 0,2dB Gain MM ................................... 40dB Signal-to-noise ratio MM ..........................> 83dB(A) Gain MC………................................60dB Signal-to-noise ratio MC ..........................>74dB(A) Input control MM (1% THD) ..........................30 mV Input control MC (1% THD) ........................... 3 mV 5.1.6 CD-Player Playable formats ..............
- Page 32 NOTE: Energy consumption in standby mode (APD Auto Power Down) To ensure that your AVM device can be switched on at any time via the RC X app for iOS and Android, the integrated AVM X-STREAM Engine® remains in constant standby mode. Please note that this does not result in a power consumption of less than 0.5 VA as usual, but increases it to about approx.
- Page 33 More important infos: This product supports AirPlay 2 and requires iOS 11.4 or later. Apple and AirPlay are registered trademarks of Apple Inc. in the U.S. and other countries. Use of the "Works with Apple" logo means that an accessory has been designed specifically for the technology specified in the logo and has been certified by the developer to meet Apple performance Use your smartphone, tablet, or computer as a remote control for Spotify.
Need help?
Do you have a question about the INSPIRATION CS 2.3 and is the answer not in the manual?
Questions and answers