Table of Contents
Advertisement
Advertisement
Table of Contents

Related Manuals for PO Fung Electronic UV-16 Series

Summary of Contents for PO Fung Electronic UV-16 Series
- Page 1 Amateur Radio UV-16 SERIES USER’S MANUAL...
- Page 2 PREFACE Thank you for purchasing UV-16 Series Amateur Radio, which is a dual band/dual display/dual watch. This easy-to-use radio will deliver you secure, instant and reliable communications at peak efficiency. Please read this manual carefully before use. The information presented herein will help you to derive maximum performance from your radio.
-
Page 3: Table Of Contents
Table of Contents Chapter1. Getting Started 5.3 Making a call 1.1 Regulations and Safety Warnings 5.4 Channel selection 1.2 Content of the packaging 5.5 Frequency (VFO) mode 1.3 Main features 5.6 Channel (MR) mode Chapter2. Charging the Battery Chapter6. Advanced Features 2.1 Charging the Battery Pack 6.1 Frequency scanning 2.2 Charger Supplied... -
Page 4: Chapter1. Getting Started
Chapter1. Getting Started 1.1 Regulations and Safety Warnings Any Changes or modifications not expressly approved by the party responsible for compliance could void the user’s authority to operate the equipment. This device complies with part 15 of the FCC Rules. Operation is subject to the following two conditions: (1) This device may not cause harmful interference, and (2) This device must accept any interference received, including interference that may cause undesired operation. - Page 5 operate the equipment. This device complies with Part 15 of the FCC Rules. Operation is subject to the condition that this device does not cause harmful interference. WARNING! MODIFICATION OF THIS DEVICE TO RECEIVE CELLULAR RADIOTELEPHONE SERVICE SIGNALS IS PROHIBIITED UNDER FCC RULES AND FEDERRAL LAW.
- Page 6 Guidelines and Operating Instructions To control your exposure and ensure compliance with the occupational/ controlled environmental exposure limits, always adhere to the following procedures. Guidelines: • Do not remove the RF Exposure Label from the device. • User awareness instructions should accompany device when transferred to other users. •...
- Page 7 explosive materials. In such location, only an approved Ex-protection model is allowed for use, but any attempt to assemble or disassemble it is strictly prohibited. 2. Do not operate the product near or in any blasting area. 3. Do not operate the product near any medical or electronic equipment that is vulnerable to RF signals. 4.
-
Page 8: Content Of The Packaging
4. Do not charge your battery with an unauthorized charger. 5. Do not charge your battery in a location where strong radiation is present. 6. Overcharge shall always be prohibited for it may shorten the life of your battery. Maintenance Instructions To help your battery work normally or prolong its life, be sure to observe the following instructions: 1. -
Page 9: Main Features
• 1 Radio • 1 Li-Ion battery pack • 1 Fast desktop charger • 1 Wall adaptor • 1 Antenna • 1 Belt clip If any item is missing, please verify with your dealer. 1.3 Main features • Frequency band: VHF/UHF (Frequency limited) •... -
Page 10: Charging The Battery Pack
2.1 Charging the Battery Pack The Li-ion battery pack is not charged at the factory; please charge it before use. Charging the battery pack for the first time after purchase or extended storage (more than 2 months) may not bring the battery pack to its normal maximum operating capacity. - Page 11 WARNING! When keys, ornamental chain or other electric metals contact the battery terminal, the battery may become damage or injure a human. If the battery terminals are short circuited it will generate a lot of heat. Take care when carrying and using the battery. Remember to put the battery or radio into an insulated container. Do not put it into a metal container.
-
Page 12: How To Charge
2.4 How to Charge a. Plug the AC adaptor into the AC outlet, and then plug the cable of the AC adaptor into the DC jack located on the back of the charger. The indicator light blinks orange and is then ready to charge a battery. b. -
Page 13: Chapter3. Installation Of Accessories
Chapter3. Installation of Accessories Before the radio is ready for use we need to attach the antenna and battery pack, as well as charge the battery. 3.1 Installing/ Removing the Antenna a. Installing the Antenna: Screw the antenna into the connector on the top of the transceiver by holding the antenna at its base and turning it clockwise until secure. -
Page 14: Additional Speaker/Microphone (Optional)
3.4 Installing the Additional Speaker/Microphone (Optional) Pry open the rubber MIC-Headset jack cover and then insert the Speaker / Microphone plug into the double jack. -
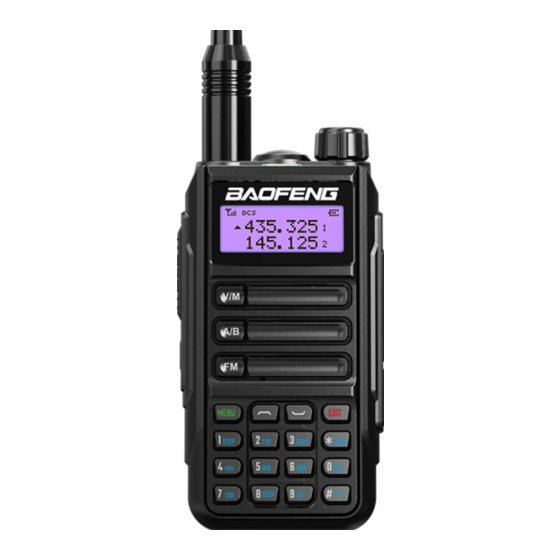
Page 15: Chapter4. Radio Overview
Chapter4. Radio Overview 4.1 Buttons and controls of the radio... - Page 16 1. Antenna 2. Flashlight 3. Power / Switch / Volume control: Rotate to switch on/off the radio and adjust the volume 4. PTT 5. LAMP/MONI: Long press: to activate the Monitor function. Short press: turns the flashlight on. Press it again to issue an emergency light.
- Page 17 4.2 Main controls and parts of the radio LCD Display 1. These symbols show that you set a DCS or CTCSS code in tx or rx. In tx mode it appears while you are transmitting, while in rx mode it is shown also in stand-by condition. 2.
-
Page 18: Status Indications
14. Depending on the setting, it will show the frequency in use, the channel name, the menu setting, etc 15. Indicates the VFO in use and the current menu or function setting. This icon is displayed close to the band in use or to the menu settings. -
Page 19: Main Keypad Controls
4.4 Main keypad controls After press this key, the radio is in the transmitting status and speaks into the microphone to call 【PTT】Transmit button the other party. After releasing this key, the radio is in the receiving status. When short press this key, the radio turn on the flashlight function; Press twice to turn off the 【LAMP/MONI】button flashlight. - Page 20 • Numeric keypad With these keys you can input the information or your selections on the radio. In tx mode, push the number keys to send a corresponding DTMF code. • *SCAN Key A short momentary press of the key enables the reverse function. When listening to broadcast FM a momentary press will start the scanning.
-
Page 21: Chapter5. Basic Operations
Chapter5. Basic Operations 5.1 Power on the radio To turn the unit on, simply rotate the Volume/Power knob clockwise until you hear a "click". If your radio powers on correctly there should be an audible double beep after about one second and the display will show a message or flash the LCD depending on settings for about one second. -
Page 22: Channel Selection
5.4 Channel selection There are two modes of operation: Frequency (VFO) mode, and Channel or Memory (MR) mode. For everyday use, Channel (MR) mode is going to be a whole lot more practical than Frequency (VFO) mode. However, Frequency (VFO) mode is very handy for experimentation out in the field. Frequency (VFO) mode is also used for programming channels into memory. -
Page 23: Channel (Mr) Mode
WARNING! Just because you can program in a channel does not mean you're automatically authorized to use that frequency. You may be tempted to use FRS, GMRS, MURS and PMR446 (in EU) frequencies. Do note however that there are restrictions on these bands that make this transceiver illegal for use. Contact your local regulatory body for further information on what laws, rules and regulations apply to your area. -
Page 24: Cursor▼▲Conversion (A/B)
c. Press any key to stop scanning. Note: for Scan mode, see Menu No.18. 6.3 Search CTCSS/DCS Code With this function you can search and store the CTCSS/DCS code used by other radios. Procedure: a. In frequency mode press [MENU]+[1][1]. b. -
Page 25: Keypad Lock
6.6 Keypad lock This function locks the keypad to prevent accidental pressure of the controls. To unlock the keypad, press [# ] for more than 2 seconds. 6.7 FM Radio (FM) The frequency range to listen to the radio is 76-108MHz. When listening to broadcast FM, press [EXIT] key switches to 76-108 MHz band. -
Page 26: Manual Programming (Channels Memory)
6.10 Manual Programming (Channels Memory) Memory channels are an easy way to store commonly used frequencies so that they can easily be retrieved at a later date. The radio features 128 memory channels that each can hold: Receive and transmit frequencies, transmit power, group signaling information, bandwidth, ANI/ PTT-ID settings and a six character alphanumeric identifier or channel name Frequency Mode vs. -
Page 27: Repeaters Programming
h. [MENU] [2][7] [MENU] [1][0] [MENU] Enter the same channel (Ex 10) -->> [EXIT] TX has been added i. [V/M] Return to MR Mode. Channel number will re-appear. Ex 2. Programming a Simplex Channel with CTCSS tone EXAMPLE New memory in Channel 10: RX = 436.000 MHz TX CTCSS tone 123.0 a. - Page 28 e. Press [MENU] key to select. f. Use the numerical keypad to enter the specified frequency offset. See the section called “26 OFFSET - Frequency shift amount” for details. g. Press [MENU] to confirm and save. h. Enter [2][5] on the numeric keypad to get to offset direction. i.
-
Page 29: Chapter7. Working The Menu System
Chapter7. Working the MENU System For a complete reference on available menu items and parameters, see Appendix C, Shortcut Menu operations. Note: in channel mode, the setting of these features is not possible: CTCSS/ DCS tones, wide/narrow bandwidth, PTT-ID, Busy channel lock out, channel name edit. 7.1 Basic use Using the menu with arrow keys a. -
Page 30: Functions And Operations
a). Use the arrow keys as we did in the previous section; or b). Use the numerical keypad to enter the numerical short-cut code. e. And just as in the previous section; a). To confirm your selection, press [MENU] and it will save your setting and bring you back to the main menu. b). - Page 31 (4) Battery save (SAVE) - MENU No.3 The power save feature enables a reduction in the consumption of the battery when the radio is in standby. You have 5 selections available: OFF / 1:1 / 1:2 / 1:3 / 1:4. For example: 1:1 = 1s’...
- Page 32 (9) Keypad beep (BEEP) - MENU No. 8 When this function is enabled, every time a button is pressed, you will hear a beep tone. (10) Time-Out-Timer (TOT) - MENU No.9 The TOT function is used to prevent a too long transmission and limits the tx time: TOT temporarily stops the transmission if the radio has been used beyond the max pre-set time (for example 15s, 30s, 45s, etc).
- Page 33 (14) Transmitting CTCSS (T-CTCSS) - MENU No.13 In this Menu you can set a CTCSS tone in tx mode. You can choose: OFF or CTCSS (67.0 to 254.1 Hz) Note: there are 50 groups of CTCSS tones. In channel mode the CTCSS tones cannot be changed. (15) Voice function (VOICE) - MENU No.
- Page 34 The radio will stop scanning once a signal is detected. (20) PTT-ID (PTT-ID) - MENU No.19 With this function you can decide when sending the ANI-ID code in tx mode. You can choose amongst 4 possibilities. • OFF: press PTT to turn it off •...
- Page 35 Note: Channel name mode must be set by the programming software. Up to three numbers or characters can be edited. (24) Busy Channel Lock (BCL) - MENU No. 23 When this function is on, it may prevent other radios’ interference. If the selected channel is being used by other radios, when you press key PTT, your radio cannot transmit.
- Page 36 (29) Channel Delete (DEL-CH) - MENU No.28 In this menu you can delete a channel of the radio. (30) Standby backlight (WT-LED) - MENU No.29 In this MENU you can choose the color of the backlight when the radio is in standby mode. You can choose amongst: •...
- Page 37 • TONE: the speaker emits an alarm tone and the radio transmits it; • CODE: the speaker emits an alarm tone and the radio transmits it followed by ANI-ID code. (35) Dual Watch (TDR-AB) - Menu No.34 When this function is on, you may receive signals of A/B channel or frequency. It can also be used for cross band receiving and transmitting.
- Page 38 (38) Delay time of side tone elimination in communication through repeater (RPT-RL) - Menu No.37 With this function you have the confirmation that the repeater has transferred the signal. You can choose amongst: OFF 1,2,3,4,5,….10 to set the delay time. (39) Display mode at the turning on (PONMSG) Menu No.38 With this function you can set the display mode when the radio is turned on.
- Page 39 Appendix A. – Trouble shooting guide Phenomena Analysis Solution The battery may be installed improperly. Remove and reattach the battery. The battery power may run out. Recharge or replace the battery. You cannot turn on the radio. The battery may suffer from poor contact caused by Clean the battery contacts or replace the dirty or damaged battery contacts.
-
Page 40: Appendix A. - Technical Specifications
Appendix B. - Technical Specifications Frequency Range 144-148 & 420-450MHz (Tx, Limited to USA users) 136-174 & 400-520MHz (Rx and Scanning, Limited to USA users) 144-148 & 430-450MHz (Tx, Limited to Canada users) 138-174 & 406-470MHz (Rx and Scanning, Limited to Canada users) 144-146 &... -
Page 41: Appendix C. - Shortcut Menu Operations
Appendix C. - Shortcut Menu operations MENU Name Enter item LCD display Select able (Full Name) 0-9 Levels SQL - Squelch Level MENU+0 0:Lowest 9:Highest 2.5K/5.0K/6.25K/10.0K STEP –Step Frequency MENU+1 12.5K/20.0K/25.0K/50.0K HIGH TXP – Transmit Power MENU+2 OFF: SAVE - Battery Saving MENU+3 OFF, 1-9 OFF: off... - Page 42 BEEP - Keypad Beep MENU+8 *Allows audible confirmation of a key press. 15,30…600S *This feature provides a safety switch that limits transmission time to a programmed value. This will TOT- Time-Out-Timer MENU+9 promote battery conservation by not allowing you to make excessively long transmissions, and in the event of a stuck PTT switch it can prevent interference to other users as well as battery depletion...
- Page 43 67.0HZ…254.1HZ T-CTCS - Transmitter MENU+13 *Transmits a specific and continuous sub audible signal CTCSS to unlock the squelch of a distant receiver (usually a repeater). VOICE - Voice MENU+14 Reminding *Allows audible voice confirmation of a key press. ANI-ID -ANI-ID MENU+15 It can be programmed by software OFF: No DTMF Side Tones are heard...
- Page 44 OFF: No ID is sent BOT: The selected S-CODE is sent at the beginning PTT-ID - PTT-ID MENU+19 EOT: The selected S-CODE is sent at the ending BOTH : The selected S-CODE is sent at the beginning and ending 0,1,2…,50ms PTT-LT –...
- Page 45 OFF: TX = RX (simplex) SFT-D – Frequency MENU+25 +: TX will be shifted higher in frequency than RX Offset Direction - : TX will be shifted lower in frequency than RX 00.000…69.990 OFFSET -Frequency shift MENU+26 *Specifies the difference between the TX and RX amount frequencies 000…127...
- Page 46 TDR-AB - Transmit A band transmit (Upper row frequency) selection while in Dual MENU+34 B band transmit (Bottom row frequency) *When enabled, priority is returned to selected display Watch mode once the signal in the other display disappears. *This function is used eliminate squelch tail noise STE - Squelch Tail between BAOFENG handhelds that are communicating MENU+35...
- Page 47 Declaration of Conformity Baofeng and Pofung hereby declares that the radio equipment type listed in Appendix B is in compliance with Directive 2014/53/EU. The full text of the EU Declaration of Conformity is available at the following link: http://www.pofung.cn/download.asp?EnBigClassName=EU+DOC&EnSmallClassName=&page=3. Via your local Baofeng helpdesk, your dealer from where you purchased this radio or send an email to wangjianhui@baofengradio.com.
- Page 48 We do not guarantee, for any particular purpose, the accuracy, validity, timeliness, legitimacy or completeness of the third-party products and contents involved in this manual. PO FUNG ELECTRONIC (HK) INTERNATIOANL GROUP COMPANY Address: 3/F FULOK BLDG 131-133 WING LOK ST SHEUNG WAN, Hong Kong Http://www.baofengradio.com...
Need help?
Do you have a question about the UV-16 Series and is the answer not in the manual?
Questions and answers