Table of Contents

Related Manuals for myappliances ART28604


Summary of Contents for myappliances ART28604
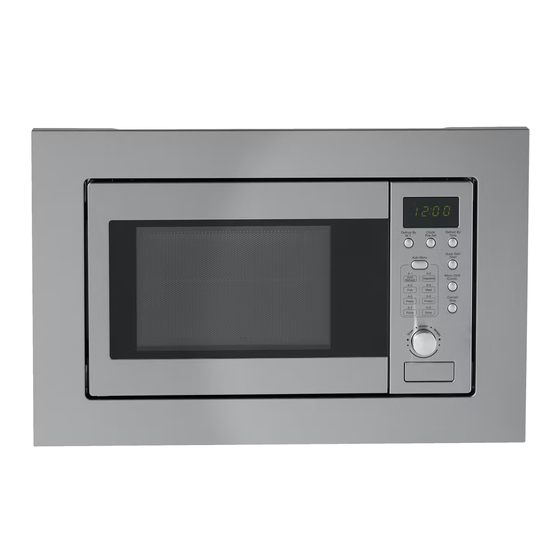
- Page 1 Microwave Oven INSTRUCTION MANUAL MODEL: ART28604 Read these instructions carefully before using your microwave oven , And keep it carefully. If you follow the instructions, your oven will provide you with many years of good service.
-
Page 2: Precautions To Avoid Possible Exposure To Excessive Microwave Energy
PRECAUTIONS TO AVOID POSSIBLE EXPOSURE TO EXCESSIVE MICROWAVE ENERGY (a) Do not attempt to operate this oven with the door open since this can result in harmful exposure to microwave energy. It is important not to break or tamper with the safety interlocks. (b) Do not place any object between the oven front face and the door or allow soil or cleaner residue to accumulate on sealing surfaces. -
Page 3: Important Safety Instructions Warning
IMPORTANT SAFETY INSTRUCTIONS WARNING To reduce the risk of fire, electric shock, injury to persons or exposure to excessive microwave oven energy when using your appliance, follow basic precautions, including the following: 1. Warning: Liquids and other foods must 13. Install or locate this oven only in not be heated in sealed containers since accordance with the installation they are liable to explode. - Page 4 23. Microwave heating of beverages can result in delayed eruptive boiling, therefore take care when handling the container. 24.The appliance is not intended for use by persons (including children) with reduced physical , sensory or mental capabilities, or lack of experience and knowledge, unless they have been given supervision or instruction concerning use of the appliance by a person responsible for their safety.
-
Page 5: To Reduce The Risk Of Injury To Persons Grounding Installation
To Reduce the Risk of Injury to Persons Grounding Installation This appliance must be grounded. In the event of DANGER an electrical short circuit, grounding reduces the risk of electric shock by providing an escape wire Electric Shock Hazard for the electric current. This appliance is equipped Touching some of the internal with a cord having a grounding wire with a components can cause serious... -
Page 6: Materials You Can Use In Microwave Oven
UTENSILS See the instructions on "Materials you can use in microwave oven or to be avoided in microwave oven." There may be certain non-metallic utensils that are not CAUTION safe to use for microwaving. If in doubt, you can test the Personal Injury Hazard utensil in question following the procedure below. -
Page 7: Setting Up Your Oven
Materials to be avoided in microwave oven Utensils Remarks Aluminum tray May cause arcing. Transfer food into microwave-safe dish. Food carton with May cause arcing. Transfer food into microwave-safe dish. metal handle Metal or metal- Metal shields the food from microwave energy. Metal trim may trimmed utensils cause arcing. -
Page 8: Turntable Installation
Turntable Installation a. Never place the glass tray upside down. The glass Hub (underside) tray should never be restricted. b. Both glass tray and turntable ring assembly must always be used during cooking. Glass tray c. All food and containers of food are always placed on the glass tray for cooking. -
Page 9: Clock Setting
Operation Instructions 1. Clock Setting When the microwave oven is electrified, the oven will display "0:00", buzzer will rings once. Clock/ Pre-Set 1) Press " ", the hour figures will flash, and the indicator for clock " " will light. 2) Turn "... -
Page 10: Microwave Power
"Micro./Grill/Combi." Pad instructions Microwave Grill Order LED Display Power Power 100% 100% Note: When half the grill time passes, the oven will pause and beep twice, and this is normal. You can just press" "to continue cooking. But In Quick Start/Start order to have a better effect of grilling food, you should turn the food over, close the door, and then press"... -
Page 11: Defrost By Time
5) Press " ", the minute figures will flash. Clock/ Pre-Set 6) Turn " " to adjust the minute figures, the input time should be within 0--59. Quick Start/Start 7) Press " " to finish setting. The indicator for clock " "... -
Page 12: Start/Quick Start
5) Turn " " to select 80% microwave power. 6) Press " " pad, then turn " " to select cooking Micro./Grill/Combi. time of 80% microwave power. Quick Start/Start Cancel/Stop 7) Press " " to start cooking or press " "... - Page 13 The automatic menu procedure: Menu Order Display Weight 200 g 400 g Auto Reheat 600 g 200 g 300 g Vegetable 400 g 250 g 350 g Fish 450 g 250 g 350 g Meat 450 g 50 g(with water 450ml) Pasta 100 g(with water 800ml) 200 g...
-
Page 14: Troubleshooting
Trouble shooting It is forbidden to run the unit without any food inside. It is very dangerous. According to Waste of Electrical and Electronic Equipment (WEEE) directive, WEEE should be separately collected and treated. If at any time in future you need to dispose of this product please do NOT dispose of this product with household waste. -
Page 15: Installation Instructions
Installation Instructions Please Read the Manual Carefully Before Installation ADJUST SCREW A SCREW B TRIM-KIT PLASTIC COVER Please Note Electrical connection The oven is fitted with a plug and must be only connected to a properly installed earthed socket. In accordance with the appropriate regulations, the socket must only be installed and the connecting cable must only be replaced by a qualified electrician. - Page 16 A. Built-in furniture The built-in cabinet shall not have a rear wall behind the appliance. Minimum installation height is 85cm. Do not cover ventilation slots and air intake points. (45) (45)
-
Page 17: Install The Oven
B. Install the Oven ADJUST SCREW A UPPER AIR TUNNEL ADJUST HEIGHT ADJUST SCREW A TRIM KIT TRIM-KIT 1. Fix ADJSUTSCREW A on the UPPER AIR TUNNEL of the oven, and then install the oven into the cabinet. Adjust the height of ADJUST SCREW A to keep 1mm gap between the ADJUST SCREW A and the top plane of cabinet. -
Page 18: Customer Service
E : e n q u i r i e s @ m y a p p l i a n c e s . c o . u k www.myspareparts.co.uk Republic of Ireland (ROI) – myappliances Customer Care Centre T: 1-800 535542 E: enquiries@myappliances.co.uk... - Page 19 MYAPPLIANCES Unit 3 Normandy Landings, 3 Pope Street NORMANTON West Yorkshire WF6 2AG...
Need help?
Do you have a question about the ART28604 and is the answer not in the manual?
Questions and answers