Table of Contents
Advertisement
Quick Links
Advertisement
Table of Contents

Related Manuals for Topcon OMS-800


Summary of Contents for Topcon OMS-800
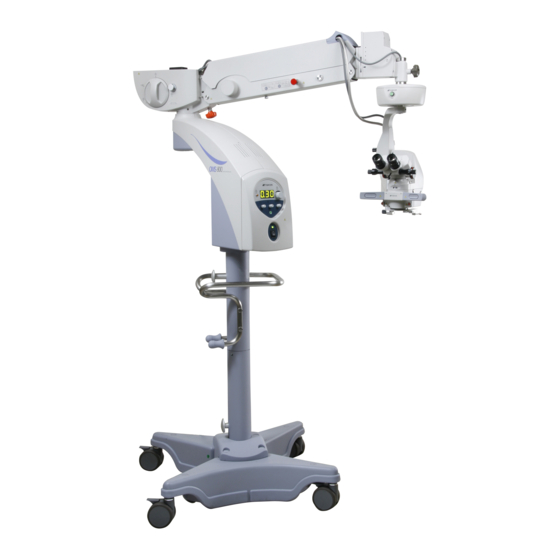
- Page 1 INSTRUCTION MANUAL OPERATION MICROSCOPE OMS-800...
-
Page 2: Introduction
OFFISS Lite, Pro and Pro Lite.) • The 45°~90° variable eyepiece lens is used to set the optimum operation position. This Instruction Manual describes the TOPCON OMS-800 Operation Microscope, and includes outline, operations, troubleshooting, maintenance and cleaning. To get the best use from the instrument, read "DISPLAY FOR SAFE USE" and "SAFETY CAUTIONS". - Page 3 (4) Do not store this instrument in a location where chemicals are stored or gas is generated. 3. Limit of period of use 8 years following delivery, only if regular inspection and maintenance have been carried out (according to self-certification [Topcon's data]).
- Page 4 POINTS FOR INSPECTION AND MAINTENANCE 1. After using this instrument, immediately remove any remaining blood, body fluids, tissues, etc., and clean and sterilize it. 2. Check the instrument and its parts periodically. 3. When using the instrument again after a long time in storage, make sure beforehand that it is operating safely and normally.
-
Page 5: Display For Safe Use
DISPLAY FOR SAFE USE In order to encourage the safe use of the product and prevent any danger to the operator and others or damage to properties, important warnings are placed on the products and included in the instruction manuals. We recommend everyone to grasp the meaning of the following displays and icons before reading the "SAFETY CAUTIONS"... -
Page 6: Safety Cautions
SAFETY CAUTIONS WARNING Icons Prevention Item Page Make sure no-one is too close to the instrument before moving the arm. Anyone touching the instrument may be injured. Use only the specified lamp. 8 33 Otherwise, overheating may cause a fire. 79 97 Before installing the accessories, make sure all the arms are securely locked. - Page 7 Icons Prevention Item Page When installing the front lens unit, make sure that the front lens unit fixing lever is fixed securely at the LOC side. An injury may be caused by the front lens unit falling off. Before setting the front lens, move the microscope at least 200mm upwards. Otherwise, the components may come into contact with each other and cause an injury.
- Page 8 CAUTION Icons Prevention Item Page Handle the lamp house with care during and immediately following operation. 8 33 The lamp house heats up while in operation and can cause burns. 79 97 Before moving the instrument, make sure there is no-one and nothing within collision range.
-
Page 9: Maintenance
ESCAPE CLAUSE • TOPCON shall take no responsibility for damage due to fire, earthquakes, actions by third persons and other accidents, or the negligence and misuse of the user and use under unusual conditions. • TOPCON shall take no responsibility for damage resulting from the inability to use this equipment, such as a loss of business profits or the suspension of business. -
Page 10: Warning Indications And Positions: Offiss
WARNING INDICATIONS AND POSITIONS: OFFISS This instrument provides warnings to ensure safety. Use this instrument correctly, following those warning instructions. If any of the following marking labels are missing, contact your distributor. WARNING Before using this instrument, make sure that the handles, levers, knobs and rings with red marks are securely tightened. - Page 11 WARNING WARNING Before using this instrument, Use only the specified lamp. adjust the balance of the 2nd arm. Otherwise, overheating may cause a fire. The 2nd arm may move up and down suddenly during operation, causing an injury. CAUTION Handle the lamp house with care during and immediately following WARNING operation.
-
Page 12: Warning Indications And Positions: Offiss Lite
WARNING INDICATIONS AND POSITIONS: OFFISS Lite This instrument provides warnings to ensure safety. Use this instrument correctly, following those warning instructions. If any of the following marking labels are missing, contact your distributor. WARNING Before using this instrument, make sure that the handles, levers, knobs and rings with red marks are securely tightened. - Page 13 WARNING WARNING Before using this instrument, Use only the specified lamp. adjust the balance of the 2nd arm. Otherwise, overheating may The 2nd arm may move up and cause a fire. down suddenly during operation, causing an injury. CAUTION Handle the lamp house with care during and immediately following WARNING operation.
-
Page 14: Warning Indications And Positions: Pro
WARNING INDICATIONS AND POSITIONS: Pro This instrument provides warnings to ensure safety. Use this instrument correctly, following those warning instructions. If any of the following marking labels are missing, contact your distributor. WARNING Before using this instrument, make sure that the handles, levers, knobs and rings with red marks are securely tightened. - Page 15 WARNING WARNING Before using this instrument, Use only the specified lamp. adjust the balance of the 2nd arm. Otherwise, overheating may The 2nd arm may move up and cause a fire. down suddenly during operation, causing an injury. CAUTION Handle the lamp house with care during and immediately following WARNING operation.
-
Page 16: Warning Indications And Positions: Pro Lite
WARNING INDICATIONS AND POSITIONS: Pro Lite This instrument provides warnings to ensure safety. Use this instrument correctly, following those warning instructions. If any of the following marking labels are missing, contact your distributor. WARNING Before using this instrument, make sure that the handles, levers, knobs and rings with red marks are securely tightened. - Page 17 WARNING WARNING Before using this instrument, Use only the specified lamp. adjust the balance of the 2nd arm. Otherwise, overheating may The 2nd arm may move up and cause a fire. down suddenly during operation, causing an injury. CAUTION Handle the lamp house with care during and immediately following WARNING operation.
-
Page 18: Warning Indications And Positions: Standard
WARNING INDICATIONS AND POSITIONS: Standard This instrument provides warnings to ensure safety. Use this instrument correctly, following those warning instructions. If any of the following marking labels are missing, contact your distributor. WARNING Before using this instrument, make sure that the handles, levers, knobs and rings with red marks are securely tightened. - Page 19 WARNING WARNING Before using this instrument, Use only the specified lamp. adjust the balance of the 2nd arm. Otherwise, overheating may The 2nd arm may move up and cause a fire. down suddenly during operation, causing an injury. CAUTION Handle the lamp house with care during and immediately following WARNING operation.
-
Page 20: Table Of Contents
CONTENTS INTRODUCTION ............................1 DISPLAY FOR SAFE USE ........................4 SAFETY CAUTIONS ..........................5 MAINTENANCE ............................8 USER MAINTENANCE ........................8 ESCAPE CLAUSE ........................... 8 WARNING INDICATIONS AND POSITIONS: OFFISS ..............9 WARNING INDICATIONS AND POSITIONS: OFFISS Lite ............11 WARNING INDICATIONS AND POSITIONS: Pro ................. - Page 21 ADJUSTING THE OBSERVATION ANGLE: Common ..............54 ADJUSTING THE LIGHT INTENSITY: OFFISS, OFFISS Lite ............55 ADJUSTING THE LIGHT INTENSITY: Pro, Pro Lite, Standard ............55 OPERATION PANEL: Common ......................56 FOOT SWITCH: OFFISS, OFFISS Lite .................... 56 FOOT SWITCH: Pro, Pro Lite ......................57 FOOT SWITCH: Standard .........................
- Page 22 SPECIFICATIONS BASIC SPECIFICATIONS: Common ....................91 ELECTROMAGNETIC COMPATIBILITY ..................91 ELECTRIC RATING .......................... 95 CLASSIFICATION ..........................95 DIMENSIONS AND WEIGHT ......................96 PURPOSE OF USE .......................... 96 OPERATION PRINCIPLE ......................... 96 MAINTENANCE AND INSPECTION: Common REPLACEMENT OF THE SPARE LAMP ..................97 OPERATING THE CIRCUIT BREAKER ...................
-
Page 23: Nomenclature
NOMENCLATURE OFFISS Type with the changeable beam splitter Focusing unit Spectral ratio lever Microscope unit Accessories mount cap Spectral ratio knob Accessories mounting ring Variable illumination Accessories mount aperture manual knob (for emergency) Variable eyepiece lens Illumination angle Pupillary distance manual knob adjustment knob (for emergency) -
Page 24: Standard Accessories: Offiss
STANDARD ACCESSORIES: OFFISS Sterilized cap Material : Silicon (Latex free) Type Position Quantity Optical unit inclination knob Pupillary distance adjustment knob Front lens connecting/disconnecting knob Spectral ratio knob of changeable beam splitter Microscope operation handle Observation angle handle Stereo variator lever Front lens unit fixing lever Spectral ratio lever of changeable beam splitter... -
Page 25: Offiss Lite
OFFISS Lite Type with the changeable beam splitter Focusing unit Spectral ratio lever Microscope unit Accessories mount cap Spectral ratio knob Accessories mounting ring Variable illumination Accessories mount aperture manual knob (for emergency) Variable eyepiece lens Illumination angle Pupillary distance manual knob adjustment knob (for emergency) -
Page 26: Standard Accessories: Offiss Lite
STANDARD ACCESSORIES: OFFISS Lite Sterilized cap Material : Silicon (Latex free) Type Position Quantity Optical unit inclination knob Pupillary distance adjustment knob Front lens connecting/disconnecting knob Spectral ratio knob of changeable beam splitter Microscope operation handle Observation angle handle Stereo variator lever Front lens unit fixing lever Spectral ratio lever of changeable beam splitter... -
Page 27: Pro
Type with the changeable beam splitter Microscope unit Spectral ratio lever Focusing unit Spectral ratio knob Accessories mount cap Accessories mounting ring Illumination angle manual knob Accessories mount (for emergency) Variable eyepiece lens Pupillary distance adjustment knob Optical unit Eyepiece lens inclination knob Zoom manual knob (for emergency) -
Page 28: Standard Accessories: Pro
STANDARD ACCESSORIES: Pro Sterilized cap Material : Silicon (Latex free) Type Position Quantity Optical unit inclination knob Pupillary distance adjustment knob Spectral ratio knob of changeable beam splitter Microscope operation handle Observation angle handle Spectral ratio lever of changeable beam splitter are attached to only the type equipped with the changeable beam splitter. -
Page 29: Pro Lite
Pro Lite Type with the changeable beam splitter Microscope unit Spectral ratio lever Focusing unit Spectral ratio knob Accessories mount cap Accessories mounting ring Illumination angle manual knob Accessories mount (for emergency) Variable eyepiece lens Pupillary distance adjustment knob Optical unit Eyepiece lens inclination knob Zoom manual knob... -
Page 30: Standard Accessories: Pro Lite
STANDARD ACCESSORIES: Pro Lite Sterilized cap Material : Silicon (Latex free) Type Position Quantity Optical unit inclination knob Pupillary distance adjustment knob Spectral ratio knob of changeable beam splitter Microscope operation handle Observation angle handle Spectral ratio lever of changeable beam splitter are attached to only the type equipped with the changeable beam splitter. -
Page 31: Standard
Standard Type with the changeable beam splitter Microscope unit Spectral ratio lever Focusing unit Spectral ratio knob Accessories mount cap Accessories mounting ring Illumination angle manual knob Accessories mount (for emergency) Variable eyepiece lens Pupillary distance adjustment knob Optical unit Eyepiece lens inclination knob Zoom manual knob... -
Page 32: Standard Accessories: Standard
STANDARD ACCESSORIES: Standard Sterilized cap Material : Silicon (Latex free) Type Position Quantity Optical unit inclination knob Pupillary distance adjustment knob Spectral ratio knob of changeable beam splitter Microscope operation handle Observation angle handle Spectral ratio lever of changeable beam splitter are attached to only the type equipped with the changeable beam splitter. -
Page 33: Preparations Before Use
PREPARATIONS BEFORE USE Make sure no-one is too close to the instrument before moving the arm. WARNING Anyone touching the instrument may be injured. Before using this instrument, carry out the daily check. (Refer to "DAILY CHECK" on P.103.) STERILIZED CAP: Common Sterilize caps as follows: Method: High pressure steam sterilization Condition: Leave cap in the saturated steam (134±4°C) for 20 minutes. -
Page 34: Checking The Spare Lamp: Common
CHECKING THE SPARE LAMP: Common WARNING Use only the specified lamp. Otherwise, overheating may cause a fire. Handle the lamp house with care during and immediately following CAUTION operation. The lamp house heats up while in operation and can cause burns. NOTE Check whether the spare lamp indicator is lit up before using this instrument. -
Page 35: Setting Accessories: Offiss, Offiss Lite, Pro, Pro Lite
CAUTION Do not open the instrument, as this may lead to an electric shock. Ask your distributor or the Topcon offices stated on the back cover to repair the NOTE instrument. - Page 36 While pressing the electromagnetic lock release switch of the microscope operation handle, move the 2nd arm to the lower limit position. The 2nd arm is locked. Apply the 2nd arm lower limit lock. (Refer to "LOCKING/UNLOCKING THE 2ND ARM LOWER LIMIT: OFFISS, OFFISS Lite, Pro, Pro Lite" on P.48.) Set the assistant's microscope (optional accessory), inverter, TV camera, TV relay lens (optional accessory) assistant’s coaxial binocular tube (optional accessory), FAG filter unit (optional accessory) and laser protection filter according to the operation details.
-
Page 37: Setting The Accessories: Standard
CAUTION Do not open the instrument, as this may lead to an electric shock. Ask your distributor or the Topcon offices stated on the back cover to repair the NOTE instrument. - Page 38 Tighten and fix the 2nd arm lower limit knob by turning it clockwise at the lower limit lock position (FIX position). While loosening the 2nd arm vertical movement fixing handle, hold the microscope operation handle and move the 2nd arm to the lower limit position. The 2nd arm is locked. Apply the 2nd arm lower limit lock.
-
Page 39: Installing The Inverter: Offiss, Offiss Lite
While pulling the 2nd arm lower limit lock release knob, raise the 2nd arm somewhat. The lock is released. FREE Adjust the balance of the 2nd arm. After installing or removing the accessories, the 2nd arm balance must be readjusted. Refer to "ADJUSTING THE 2ND ARM BALANCE: Standard"... -
Page 40: Removing The Inverter: Offiss, Offiss Lite
Fit the groove of the beam splitter to the pin on the top side of the inverter and tighten the eyepiece lens/beam splitter fixing knob to fix the eyepiece lens/beam splitter. We recommend using a hexagonal screwdriver. Mount the connectors of the connecting cable onto the two connection sections (5 pins/3 pins) of the inverter. - Page 41 We recommend storing the removed connecting cable in the inverter's carry case. Loosen the eyepiece lens/beam splitter fixing knob on the operation microscope OMS-800 and then remove the inverter from the microscope.
-
Page 42: Adjusting The 2Nd Arm Balance: Offiss, Offiss Lite, Pro, Pro Lite
ADJUSTING THE 2ND ARM BALANCE: OFFISS, OFFISS Lite, Pro, Pro Lite Hold microscope operation handle while pressing WARNING electromagnetic lock release switch to unlock it. The arm may rotate or move up and down suddenly, causing an injury. Before installing the accessories, make sure all the arms are securely WARNING locked. -
Page 43: Setting The 2Nd Arm Lower Limit Position: Offiss, Offiss Lite, Pro, Pro Lite
Loosen the 2nd arm vertical movement fixing handle and hold the microscope operation handle. Then move the 2nd arm equally far up and down. If the arm moves upward too lightly, turn the 2nd arm balance adjustment handle clockwise(A). The arm will move heavily. If the arm moves down too heavily, turn the 2nd balance adjustment... - Page 44 While pressing the electromagnetic lock release switch of the microscope operation handle, move the 2nd arm to the upper limit position. Loosen the 2nd arm lower limit knob by turning it counterclockwise and sliding it between 0~8. (0: Up ~ 8: Down) The position of the 2nd arm lower limit knob is a new lower limit position.
-
Page 45: Setting The 2Nd Arm Lower Limit Position: Standard
SETTING THE 2ND ARM LOWER LIMIT POSITION: Standard Limit unnecessary downward movement in order to prevent or reduce accidents caused by a downward movement of the 2nd arm. Always hold the microscope operation handle when loosening either the 2nd arm vertical movement fixing handle, the 2nd arm rotation fixing WARNING handle or the 1st arm rotation fixing handle. - Page 46 Move the 2nd arm downward to check the lower limit position. After reaching the correct lower limit position, tighten and fix the 2nd arm lower limit knob by turning it clockwise. If the lower limit position is not correct, carry out the procedure above again, from "1". PREPARATIONS BEFORE USE...
-
Page 47: Initialization: Offiss, Pro
INITIALIZATION: OFFISS, Pro The illustrations display the OFFISS type. Before moving the instrument, make sure there is no-one and nothing CAUTION within collision range. Injury may result from the instrument colliding with anyone/anything. Press the initial switch on the front of the X-Y translator. The instrument is in the initial set condition. Initial setting Unit Setting... -
Page 48: Initialization: Offiss Lite, Pro Lite, Standard
INITIALIZATION: OFFISS Lite, Pro Lite, Standard The illustrations display the Standard type. Before moving the instrument, make sure there is no-one and nothing CAUTION within collision range. Injury may result from the instrument colliding with anyone/anything. Press the initial switch on the front of the X-Y translator. The instrument is in the initial set condition. Initial setting Unit Setting... -
Page 49: Locking/Unlocking The 2Nd Arm Lower Limit: Offiss, Offiss Lite, Pro, Pro Lite
LOCKING/UNLOCKING THE 2ND ARM LOWER LIMIT: OFFISS, OFFISS Lite, Pro, Pro Lite The illustrations display the OFFISS type. Use this lock when moving/storing this instrument or when installing/removing the accessories. Release the 2nd arm lower limit lock while holding it at the end. The 2nd WARNING arm may move up and down suddenly, causing an injury. - Page 50 Tighten and fix the 2nd arm lower limit knob by turning it clockwise. While pressing the electromagnetic lock release switch of the microscope operation handle, push the 2nd arm down to the lower limit position. The 2nd arm is locked. Releasing the 2nd arm lower limit lock While pressing the electromagnetic lock release switch of the microscope operation handle, push down the 2nd arm and at the same time pull the 2nd arm lower limit lock release knob.
-
Page 51: Locking/Unlocking The 2Nd Arm Lower Limit: Standard
LOCKING/UNLOCKING THE 2ND ARM LOWER LIMIT: Standard Use this lock when moving/storing this instrument or when installing/removing the accessories. Release the 2nd arm lower limit lock while holding it at the end. The 2nd WARNING arm may move up and down suddenly, causing an injury. Always hold the microscope operation handle when loosening either the 2nd arm vertical movement fixing handle, the 2nd arm rotation fixing WARNING... - Page 52 Tighten and fix the 2nd arm lower limit knob by turning it clockwise. While loosening the 2nd arm vertical movement fixing handle, hold the microscope operation handle and move the 2nd arm to the lower limit position. The 2nd arm is locked. Releasing the 2nd arm lower limit lock While loosening the 2nd arm vertical movement fixing handle, hold the microscope operation handle, push down the 2nd arm and at the same time pull the 2nd arm lower limit lock release knob.
-
Page 53: Adjusting The Dioptric Power: Common
ADJUSTING THE DIOPTRIC POWER: Common Operate the zoom up/down switch of the foot switch to set the observation magnification at maximum value. Turn the diopter adjustment ring counterclockwise to its maximum value and gently move the microscope unit up and down with the focus up/down switch until the object is in focus. Operate the zoom up/down switch of the foot switch to set the observation magnification at minimum value. -
Page 54: Installing The Sterilized Cap: Offiss, Offiss Lite
INSTALLING THE STERILIZED CAP: OFFISS, OFFISS Lite Sterilize the sterilized caps and then place them in the specified positions. The following table displays the setting positions of the sterilized caps. Type Position Quantity Optical unit inclination knob Pupillary distance adjustment knob Front lens connecting/disconnecting knob Spectral ratio knob of changeable beam splitter... -
Page 55: Installing The Sterilized Cap: Standard
INSTALLING THE STERILIZED CAP: Standard Sterilize the sterilized caps and then place them in the specified positions. The following table displays the setting positions of the sterilized caps. Type Position Quantity Optical unit inclination knob Pupillary distance adjustment knob Spectral ratio knob of changeable beam splitter Microscope operation handle Observation angle handle... -
Page 56: Adjusting The Light Intensity: Offiss, Offiss Lite
ADJUSTING THE LIGHT INTENSITY: OFFISS, OFFISS Lite The light intensity can be adjusted by the 1st arm operation panel or the foot switch. If you need to use the coaxial illumination during an ophthalmic operation, make sure you use the minimum illumination sufficient for the WARNING operation. -
Page 57: Operation Panel: Common
OPERATION PANEL: Common Adjust the brightness as required with the illumination light intensity adjustment knob. Turn the knob counterclockwise to decrease the light intensity, and clockwise to increase it. The light intensity can be adjusted to 0~0.7 DOWN MAIN SPARE ZOOM FOCUS 2 3 4... -
Page 58: Foot Switch: Pro, Pro Lite
FOOT SWITCH: Pro, Pro Lite Move the illumination light intensity adjustment switch of the foot switch to the left to increase the light intensity. Move the switch to the right to decrease the light intensity. The values of 0.1~0.7 are displayed for the light intensity. FOOT SWITCH: Standard Move the illumination light intensity adjustment switch of the foot switch to the left to increase the light intensity. - Page 59 Place the front lens unit fixing lever at the FRE side in advance. Insert the sterilized front lens unit in the slot. Push in the unit until it stops. Place the front lens unit fixing lever at the LOC side and fix it there. Move up the front lens unit and make sure that connection is carried out correctly.
-
Page 60: Operations In Use
OPERATIONS IN USE Make sure no-one is too close to the instrument before moving the arm. WARNING Anyone touching the instrument may be injured. OPERATION OF FOOT SWITCH: OFFISS The following illustration displays the adjustment of the foot switch. Zoom up/down switch Adjusts the zoom magnification. -
Page 61: Operation Of Foot Switch: Offiss Lite
OPERATION OF FOOT SWITCH: OFFISS Lite The following illustration displays the adjustment of the foot switch. Zoom up/down switch Adjusts the zoom magnification. Magnification can be changed continuously. Magnification is increased with and is decreased with Focus up/down switch The focusing unit moves the microscope unit up and down in order to adjust the focus. -
Page 62: Operation Of Foot Switch: Pro
OPERATION OF FOOT SWITCH: Pro The following illustration displays the adjustment of the foot switch. Zoom up/down switch Adjusts the zoom magnification. Magnification can be changed continuously. Magnification is increased with and is decreased with Focus up/down switch The focusing unit moves the microscope unit up and down in order to adjust the focus. -
Page 63: Operation Of Foot Switch: Pro Lite
OPERATION OF FOOT SWITCH: Pro Lite The following illustration displays the adjustment of the foot switch. Zoom up/down switch Adjusts the zoom magnification. Magnification can be changed continuously. Magnification is increased with and is decreased with Focus up/down switch The focusing unit moves the microscope unit up and down in order to adjust the focus. -
Page 64: Operation Of Foot Switch: Standard
OPERATION OF FOOT SWITCH: Standard The following illustration displays the adjustment of the foot switch. Zoom up/down switch Adjusts the zoom magnification. Magnification can be changed continuously. Magnification is increased with and is decreased with Focus up/down switch The focusing unit moves the microscope unit up and down in order to adjust the focus. -
Page 65: Operation Of Manual Knobs: Offiss, Offiss Lite
OPERATION OF MANUAL KNOBS: OFFISS, OFFISS Lite Zoom manual knob If the zoom mechanism is not working, adjust the zoom manual knob (in an emergency) with a coin, etc. Illumination angle If the illumination angle change mechanism is not working, adjust the manual knob illumination angle manual knob (in an emergency) with a coin, etc. -
Page 66: Operation Of Manual Knobs: Standard
OPERATION OF MANUAL KNOBS: Standard Zoom manual knob If the zoom mechanism is not working, adjust the zoom manual knob (in an emergency) with a coin, etc. Illumination angle If the illumination angle change mechanism is not working, adjust the manual knob illumination angle manual knob (in an emergency) with a coin, etc. -
Page 67: Speed Adjustment Of Zoom/Focus/X-Y Translator: Common
SPEED ADJUSTMENT OF ZOOM/FOCUS/X-Y TRANSLATOR: Common The zoom speed, focus speed and X-Y translator speed can be set individually. Each speed can be adjusted in five steps, 1~5. Adjust the zoom speed with the zoom speed knob. DOWN MAIN SPARE ZOOM FOCUS 2 3 4... -
Page 68: Adjustment Of Focus: Offiss, Offiss Lite, Pro, Pro Lite
ADJUSTMENT OF FOCUS: OFFISS, OFFISS Lite, Pro, Pro Lite The illustration displays the OFFISS type. Before using this instrument, adjust the balance of the 2nd arm. The 2nd WARNING arm may move up and down suddenly during an operation, causing an injury. -
Page 69: Adjustment Of Zoom Magnification: Common
ADJUSTMENT OF ZOOM MAGNIFICATION: Common The illustration displays the OFFISS type. Adjust the zoom magnification with the zoom up/down switch of the foot switch. CHANGE OF ILLUMINATION ANGLE: OFFISS, OFFISS Lite The illustrations display the OFFISS type. If you need to use the coaxial illumination during an ophthalmic operation, WARNING make sure you use the minimum illumination sufficient for the operation. -
Page 70: Change Of Illumination Angle: Pro, Pro Lite, Standard
Light intensity can be set for each illumination type (+2° & -2°/+2° & +4° & -2°/Yellow filter/Use of front lens). The following table shows the initial set values when the power is turned on. Illumination type Illumination light intensity value +2°... -
Page 71: Change Of Spectral Ratio For Beam Splitter: Common
Light intensity can be set for each illumination type (+2° & -2°/+2° & +4° & -2°/Yellow filter). The following table shows the initial set values when the power is turned on. Illumination type Illumination light intensity value +2° & -2° +2°... - Page 72 Setting the front lens Hold the microscope operation handle and press the electromagnetic lock release switch. Then raise the microscope by approx. 200mm or more. Turn the front lens IN/OUT lever clockwise to rotate the front lens toward the bottom of the objective lens.
- Page 73 Setting has been completed. It is impossible to perform initialization (except X-Y translator), to change the illumination angle, to perform the rough focusing operation or to adjust the illumination light intensity with the foot switch. It is possible to operate the variable illumination aperture and to perform the front lens focusing operation.
- Page 74 Bring the observation section into focus by operating the focus up/down switch. Adjusting the stereo variator to IN provides an acute stereo angle for binocular observation. This reduces the shading caused by the cornea, even for microcoria patients. (Refer to "OPERATION OF THE STEREO VARIATOR: OFFISS, OFFISS Lite"...
- Page 75 The front lens fine movement unit moves to the center automatically. The variable illumination aperture is automatically set to OUT. (Refer to "OPERATION OF THE VARIABLE ILLUMINATION APERTURE: OFFISS, OFFISS Lite" on P. 76.) The front lens is in the stored condition. The angle and light intensity of illumination are automatically reset to the last values before using the front lens.
-
Page 76: Operation Of The Stereo Variator: Offiss, Offiss Lite
OPERATION OF THE STEREO VARIATOR: OFFISS, OFFISS Lite Binocular observation of observing the eye ground through the front lens may be difficult, as the patient’s cornea is small. In such a case, use the variator. Move the stereo variator lever to the right to set the stereo variator to IN. Adjusting the stereo variator to IN provides an acute stereo angle for binocular observation. -
Page 77: Operation Of The Variable Illumination Aperture: Offiss, Offiss Lite
OPERATION OF THE VARIABLE ILLUMINATION APERTURE: OFFISS, OFFISS Lite If you need to use the coaxial illumination during an ophthalmic operation, make sure you use the minimum illumination sufficient for the WARNING operation. Exposing the patient’s retina to excessive light may lead to retinal trouble. -
Page 78: How To Use The Anterior Eye Section Observation Lens: Offiss, Offiss Lite
HOW TO USE THE ANTERIOR EYE SECTION OBSERVATION LENS: OFFISS, OFFISS Lite Use this lens to observe the anterior eye section while the front lens is in use. Sterilize the anterior eye section observation lens before operation. While the anterior eye section observation lens is in use, do not operate the front lens IN/OUT lever and the front lens connecting/disconnecting WARNING knob. -
Page 79: Operation Of Inverter: Offiss, Offiss Lite
Turn the peripheral observation prism so that its slope surface direction is opposite to the direction of the periphery to be observed. Turning the peripheral observation prism greatly alters the condensing point of the illumination light emitted from the front lens. Move the microscope horizontally with the X-Y translator so that the condensing point of the illumination light emitted from the front lens is aimed at the pupil of the patient's eye. -
Page 80: Replacing With The Spare Lamp: Common
CAUTION Do not open the instrument, as this may lead to an electric shock. Ask your distributor or the Topcon offices stated on the back cover to repair the NOTE instrument. If the illumination lamp has burned out during operation, the spare lamp can be fitted easily by rotating the lamp house unit. -
Page 81: Procedure In Emergency: Offiss, Offiss Lite
PROCEDURE IN EMERGENCY: OFFISS, OFFISS Lite In an emergency, follow the check list below and contact your distributor. If you do not encounter your problem in the "Status" column, please contact your distributor. Status Procedure Zoom mechanism does not work. Adjust the zoom manual knob with a coin, etc. -
Page 82: Procedure In Emergency: Pro, Pro Lite
Status Procedure The inverter does not work. The manual IN/OUT knob (with sterilized cap) is located on the front of the inverter. Turn this knob clockwise to the “click” position. PROCEDURE IN EMERGENCY: Pro, Pro Lite In an emergency, follow the check list below and contact your distributor. If you do not encounter your problem in the "Status"... -
Page 83: Procedure In Emergency: Standard
PROCEDURE IN EMERGENCY: Standard In an emergency, follow the check list below and contact your distributor. If you do not encounter your problem in the "Status" column, please contact your distributor. Status Procedure Zoom mechanism does not work. Adjust the zoom manual knob with a coin, etc. An error is displayed. -
Page 84: After Use
AFTER USE Make sure no-one is too close to the instrument before moving the arm. WARNING Anyone touching the instrument may be injured. AFTER USE: Common Turn off the power switch. Remove the power plug from the power outlet. Carry out cleaning. Refer to "CLEANING THE OBJECTIVE LENS / THE EYEPIECE LENS"... - Page 85 Please carry out the following procedures for the moving and storing of this instrument. Connect the power plug to the power outlet. Turn on the power switch. MAIN SPARE ZOOM FOCUS 2 3 4 2 3 4 2 3 4 EXIT Press the electromagnetic lock release switch and move the 1st and 2nd arms so as not to hinder storing.
-
Page 86: Moving And Storing: Standard
Hold the base movement handle and move the instrument gently. Lower the caster lock lever to lock it when reaching the destination or storing place. MOVING AND STORING: Standard Before moving the instrument, make sure that no-one is near. Then, WARNING move it carefully. - Page 87 Hang the foot switch on the foot switch hanger. Hang the foot switch cord and the power cord on the cord hanger. Raise the caster lock lever to unlock. Hold the base movement handle and move the instrument gently. Lower the caster lock lever to lock it when reaching the destination or storing place. MOVING AND STORING: Standard...
-
Page 88: Troubleshooting
TROUBLESHOOTING TROUBLESHOOTING GUIDE The lamp is still hot just after turning off the illumination. Therefore, use CAUTION heat-resistant gloves, etc. to replace a lamp. Otherwise, you may be burned. If there seems to be a malfunction, first check the cause, following the steps in the check-list below. If the problem cannot be resolved or the malfunction is not listed in the "Problem"... -
Page 89: Error Codes
ERROR CODES Code Error Cause Remedy Centering error "NG" of centering is detected for one of OFFISS ZOOM, FOCUS and vertical rough movement. "NG" of centering is detected for ZOOM Standard Press the EXIT or FOCUS. switch on the panel. Illumination angle Zero position... -
Page 90: Consumable Parts: Offiss, Offiss Lite
CONSUMABLE PARTS: OFFISS, OFFISS Lite The sterilized cap and the specified lamp are consumable parts. Order them from your distributor or the Topcon offices stated on the back cover. Sterilized cap Q’ty Parts No. Optical unit inclination knob Pupillary distance... -
Page 91: Consumable Parts: Standard
CONSUMABLE PARTS: Standard The sterilized cap and the specified lamp are consumable parts. Order them from your distributor or the Topcon offices stated on the back cover. Sterilized cap Q’ty Parts No. Optical unit inclination knob Pupillary distance adjustment Type A... -
Page 92: Specifications
SPECIFICATIONS BASIC SPECIFICATIONS: Common Item Description Microscope type Galileo type Magnification change type Electric zoom continuous change Eyepiece (Eyepiece magnification) 12.5× Objective lens f = 200mm Display magnification (×) 4.2/5/6/7/8/9/10/11/13/15/17/19/21 Total magnification (×) 4.2 ~ 21× 1st arm length (Distance between shafts) 375mm 1st arm rotation range 300°... - Page 93 Guidance and manufacturer's declaration - electromagnetic emissions The OMS-800 is intended for use in the electromagnetic environment specified below. The customer or the user of the OMS-800 should assure that it is used in such an environment. Emissions test Compliance Electromagnetic environment - guidance The OMS-800 uses RF energy only for its internal function.
- Page 94 Guidance and manufacturer's declaration - electromagnetic immunity The OMS-800 is intended for use in the electromagnetic environment specified below. The customer or the user of the OMS-800 should assure that it is used in such an environment. IEC 60601 Compliance...
- Page 95 Guidance and manufacturer's declaration - electromagnetic immunity The OMS-800 is intended for use in the electromagnetic environment specified below. The customer or the user of the OMS-800 should assure that it is used in such an environment. IEC 60601 Compliance...
-
Page 96: Electric Rating
Recommended separation distance between portable and mobile RF communications equipment and the OMS-800 The OMS-800 is intended for use in an electromagnetic environment in which radiated RF disturbances are controlled. The customer or the user of the OMS-800 can help prevent electromagnetic interference... -
Page 97: Dimensions And Weight
DIMENSIONS AND WEIGHT Dimensions: Base (Base unit): 715 (W) × 715mm (D) Base (Total height): 1,865mm Weight: 250kg: OFFISS 247kg: OFFISS Lite 247kg: Pro 244kg: Pro Lite 244kg: Standard PURPOSE OF USE Microscope to be used for operation, treatment or observation OPERATION PRINCIPLE The illuminator lights the section to be observed. -
Page 98: Maintenance And Inspection: Common
MAINTENANCE AND INSPECTION: Common REPLACEMENT OF THE SPARE LAMP WARNING Use only the specified lamp. Otherwise, overheating may cause a fire. Handle the lamp house with care during and immediately following CAUTION operation. The lamp house heats up while in operation and can cause burns. The lamp is still hot just after turning off the illumination. -
Page 99: Operating The Circuit Breaker
Make sure that the new lamp lights up. The new lamp can now be considered as the spare lamp. The lamp is a consumable part. Contact your distributor or the Topcon offices stated on the back cover to order the lamp. (Refer to "CONSUMABLE PARTS" on P.89~P.90.) - Page 100 If the circuit breaker does not operate after resetting, the instrument may have a NOTE problem. Contact your distributor or the Topcon offices stated on the back cover. Even if the instrument operates normally after resetting the circuit breaker, NOTE contact your distributor or the Topcon offices stated on the back cover.
-
Page 101: Checking The Power Outlet
CHECKING THE POWER OUTLET Check the power outlet where this instrument is used. NOTE Connect the plug to the protective grounding unit. A 2-pole earth plug is used in this instrument. Check that the power outlet is NOTE correct. NOTE If there is no 2-pole earth outlet, ask an electrician to ground it. -
Page 102: Cleaning The Objective Lens / The Eyepiece Lens
CLEANING THE OBJECTIVE LENS / THE EYEPIECE LENS Clean the objective lens / the eyepiece lens as follows if they are dirty. Dampen a soft cloth with sterilizing alcohol and wipe off the dust from the objective lens / the eyepiece lens. -
Page 103: Cleaning The Rest Apart From The Optical System
Do not use a strong cleaning agent, etc. ENSURING THE SAFETY WORK CAUTION Do not open the instrument, as this may lead to an electric shock. Ask your distributor or the Topcon offices stated on the back cover to repair the NOTE instrument. MAINTENANCE AND INSPECTION: Common... -
Page 104: Daily Check
Do not open the instrument, as this may lead to an electric shock. For the disposal of this instrument and consumable parts, contact a waste disposer or call your distributor or the Topcon offices stated on the back cover. MAINTENANCE AND INSPECTION: Common... -
Page 105: System Outline
SYSTEM OUTLINE OFFISS Assistant’s coaxial binocular tube 2nd arm 1/2 TV relay lens 1st arm 2/3 TV relay lens X-Y translator Focusing unit arm 35mm camera relay lens FAG filter unit o Assistant’s microscope assistant’s (-20 o ~ 60 o Variable eyepiece lens) microscope mount Column Foot switch... - Page 106 Pro Lite 2nd arm Assistant's coaxial binocular tube 1/2 TV relay lens 1st arm 2/3 TV relay lens X-Y translator Focusing unit arm 35mm camera relay lens FAG filter unit 0 o assistant's 0 o Assistant's microscope microscope mount (-20 o ~ 60 o Variable eyepiece lens) Column Foot switch Sterilized cap set...
-
Page 107: Permitted Weight For Accessories To Be Installed
PERMITTED WEIGHT FOR ACCESSORIES TO BE INSTALLED Type Allowable weight OFFISS 4.8kg(4.4kg) OFFISS Lite 7.9kg(7.5kg) 6.4kg(6.1kg) Pro Lite 9.5kg(9.2kg) Standard 9.9kg(9.6kg) *( ) shows the weight for the type with the changeable beam splitter. WEIGHT OF OPTIONAL ACCESSORIES Name Weight 0°... - Page 108 Period of use: Please inform us of the date of purchase. • Defective condition: Please provide us with as much detail as possible. OPERATION MICROSCOPE OMS-800 INSTRUCTION MANUAL 2004 version (2004.10-50TH Date of issue: October 1, 2004 Published by TOPCON CORPORATION 75-1 Hasunuma-cho, Itabashi-ku, Tokyo, 174-8580 Japan.
- Page 109 Topcon House,Kennet Side,Bone Lane,Newbury,Berkshire RG14 5PX United Kingdom Phone:01635-551120 Fax:01635-551170 TOPCON SOUTH ASIA PTE.LTD. Blk 192 Pandan Loop, #07-01 Pantech Industrial Complex, SINGAPORE 128381 Phone:62780222 Fax:62733540 www.topcon.com.sg TOPCON INSTRUMENTS (MALAYSIA) SDN.BHD. Excella Business Park Block C,1st Floor,Jalan Ampang Putra,Taman Ampang Hillir, 55100 Kuala Lumpur,MALAYSIA Phone:03-42701192 Fax:03-42704508 TOPCON INSTRUMENTS (THAILAND) CO.,LTD.
Need help?
Do you have a question about the OMS-800 and is the answer not in the manual?
Questions and answers
whats long stereo base?