Table of Contents
Advertisement
Quick Links
Pasta
Magic
™
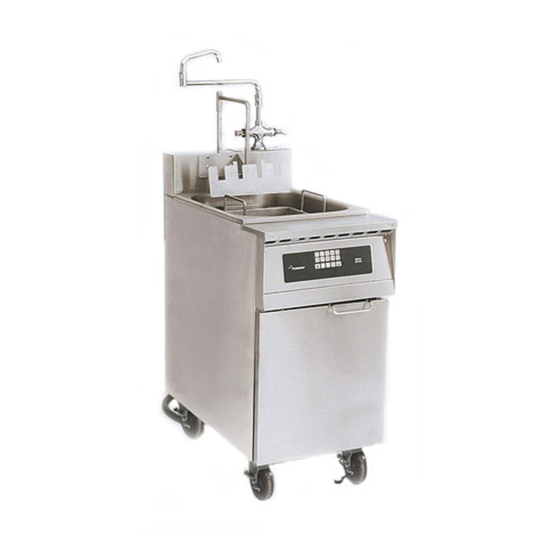
Pasta Cooker
Installation, Operation and Maintenance
Manual
This manual is updated as new information and models are released. Visit our website for the latest manual.
FOR YOUR SAFETY
Do Not Store or use gasoline
or other flammable vapors
and liquids in the vicinity of
this or any other appliance.
*8196889*
Part Number: FRY_IOM_8196889 01/2021
Original Instructions
17/8SMS / 17/8BC / 17/8C
READ THE INSTRUCTIONS BEFORE USING THE FRYER.
Keep these instructions for future reference.
Your Growth Is Our Goal
CAUTION
Advertisement
Table of Contents

Subscribe to Our Youtube Channel
Related Manuals for Frymaster Pasta Magic 17/8SMS

Summary of Contents for Frymaster Pasta Magic 17/8SMS
- Page 1 Your Growth Is Our Goal Pasta Magic ™ 17/8SMS / 17/8BC / 17/8C Pasta Cooker Installation, Operation and Maintenance Manual This manual is updated as new information and models are released. Visit our website for the latest manual. FOR YOUR SAFETY Do Not Store or use gasoline CAUTION or other flammable vapors...
- Page 2 NOTICE IF, DURING THE WARRANTY PERIOD, THE CUSTOMER USES A PART FOR THIS FRYMASTER FOOD SERVICE EQUIPMENT OTHER THAN AN UNMODIFIED NEW OR RECYCLED PART PURCHASED DIRECTLY FROM FRYMASTER OR ANY OF ITS FACTORY AUTHORIZED SERVICERS, AND/OR THE PART BEING USED IS MODIFIED FROM ITS ORIGINAL CONFIGURATION, THIS WARRANTY WILL BE VOID.
- Page 3 DANGER This cooker has a power cord (three-phase) for each cook pot. Prior to movement, testing, maintenance and any repair on your Frymaster cooker; disconnect ALL electrical power cords from the electrical power supply. WARNING This appliance is not intended for use by children under the age of 16 or persons with reduced physical, sensory or mental capabilities, or lack of experience and knowledge, unless they have been given supervision concerning use of the appliance by a person responsible for their safety.
- Page 4 Do not use water jets to clean this equipment. WARNING If the electrical power supply cord is damaged, it must be replaced by a Frymaster Factory Authorized Servicer or a similarly qualified person in order to avoid a hazard. WARNING...
-
Page 5: Table Of Contents
ELECTRIC COOKER MODELS 17SMS, 17BC, 17C TABLE OF CONTENTS CHAPTER 1: General Information Parts Ordering and Service Information Safety Information Equipment Description Installation, Operating, and Service Personnel Definitions Shipping Damage Claim Procedure CHAPTER 2: Installation Instructions General Installation Requirements Caster/Leg Installation Pre-Connection Preparations Connection to the Electrical Power Supply CHAPTER 3: Operating Instructions... -
Page 6: Chapter 1: General Information
CHAPTER 1: GENERAL INFORMATION Parts Ordering and Service Information In order to assist you as quickly as possible, the Frymaster Factory Authorized Servicer (FAS) or Service Department representative requires certain information about your equipment. Most of this information is printed on a data plate affixed to the inside of the door. -
Page 7: Equipment Description
17/8C: Cooker only. Installation, Operating, and Service Personnel Operating information for Frymaster equipment is intended for use by qualified and/or authorized personnel only, as defined in Section 1.5. All installation and service on Frymaster equipment must be performed by qualified, certi- fied, licensed, and or/authorized installation or service personnel, as defined in Section 1.5. -
Page 8: Shipping Damage Claim Procedure
Qualified service personnel are those who are familiar with Frymaster equipment and who are authorized by Frymaster to perform service on Frymaster equipment. All authorized service personnel are required to maintain a complete set of service and parts manuals and to stock a prescribed minimum amount of Frymaster parts. -
Page 9: Chapter 2: Installation Instructions
Frymaster computers have been tested and found to comply with the limits for a Class A digi- tal device, pursuant to Part 15 of the FCC rules. While these devices are verified as Class A devices, they have been shown to meet the Class B limits. -
Page 10: Caster/Leg Installation
If the unit is to be moved frequently (for cleaning or preventive maintenance), Frymaster recommends installing flexible water lines. If the cooker is hard-plumbed then moved, the connections may loosen and eventually cause leaks. - Page 11 NOTE: Depending on specific model ordered, either hot or cold water, or both, may be connected to the unit. If available, connecting hot water will minimize the time required to bring the unit to a boil when filling with fresh water. NOTE: In order for the water level sensors to work properly, a certain amount of mineral content in necessary in the water.
- Page 12 FIELD CONNECTION WIRING DIAGRAMS SINGLE PHASE SINGLE PHASE (NO NEUTRAL) FIELD CONNECTION FIELD CONNECTION NEUTRAL TO L3 FROM FROM TRANSFORMER TRANSFORMER FROM TRANSFORMER FROM TRANSFORMER 3 PHASE 3 WIRE (DELTA) 3 PHASE 4 WIRE (WYE) FIELD CONNECTION FIELD CONNECTION FROM TRANSFORMER FROM TRANSFORMER FROM TRANSFORMER FROM TRANSFORMER...
-
Page 13: Chapter 3: Operating Instructions
ELECTRIC COOKER MODELS 17/8SMS, 17/8BC, 17/8C CHAPTER 3: OPERATING INSTRUCTIONS Spaghetti Magic III Controller Numeric Keypad Skim Switch (w/Autoskim only) Boil Mode Indicator Timer Start Switch Boil Mode Switch Simmer Mode Switch Power Switch Simmer Mode Indicator LED Display 3.1.1 Introduction The Spaghetti Magic III computer allows the operator to specify a specific cook time in minutes and seconds, then initiate a cooking cycle. - Page 14 3.1.2 Operating Instructions CAUTION If this is the first time the unit is being used after installation, refer to Section 3.2, Boil Out Procedure. Before turning the cooker on, ensure that: The unit is connected to the water supply. ...
- Page 15 2. Press the Simmer (right thermometer icon) switch to enter the programming mode; CODE appears in the display. 3. Enter code 1111 (press the 1 button four times). Transition Temperature appears in the display. (NOTE: If transition temperature does not appear, your controller is not configured with this feature.
-
Page 16: Boiling Out The Cookpot
2. Press the Simmer switch again to lock in the setpoint. Press the ON/OFF switch to turn the controller on and return to the normal operating mode. 3.1.5 Toggling Between Fahrenheit and Celsius Temperature Display switch. Code appears in the display, press 1, 6, 5, 8. The display will 1. -
Page 17: Chapter 4: Preventive Maintenance
ELECTRIC COOKER MODELS 17/8SMS, 17/8BC, 17/8C CHAPTER 4: PREVENTIVE MAINTENANCE Daily Preventive Maintenance It is normal for a coating of starch to form on the elements, sensors, and temperature probes during operation. If the coating is allowed to build-up, it will adversely affect the operation of the equipment. -
Page 18: Chapter 5: Operator Troubleshooting
FAS for assistance. If you have doubts as to the proper action to take, do not hesitate to call the Frymaster Technical Service Department or your local Frymaster Factory Authorized Servicer for assistance. -
Page 19: Operator Troubleshooting Guide
Operator Troubleshooting Guide PROBLEM PROBABLE CAUSES CORRECTIVE ACTION A. No power to unit. A. Turn on circuit breaker. Controller does not B. Master Power switch in B. Place Master Power switch in ON activate. OFF position. position. C. Controller not turned on. C. - Page 20 Annual/Periodic System Inspection This appliance should be inspected and adjusted periodically by qualified service personnel as part of a regular kitchen maintenance program. Frymaster recommends that this appliance be inspected at least annually by a Factory Authorized Service Technician as follows: Rethermalizer ...
- Page 21 THIS PAGE INTENTIONALLY LEFT BLANK...
- Page 22 FRYMASTER 8700 LINE AVENUE, SHREVEPORT, LA 71106-6800 800-551-8633 318-865-1711 WWW.FRYMASTER.COM EMAIL: FRYSERVICE@WELBILT.COM ©2021 Welbilt Inc. except where explicitly stated otherwise. All rights reserved. Continuing product improvement may necessitate change of specifications without notice. Part Number FRY_P_8196889 01/2021...
Need help?
Do you have a question about the Pasta Magic 17/8SMS and is the answer not in the manual?
Questions and answers