Table of Contents
Advertisement
Quick Links
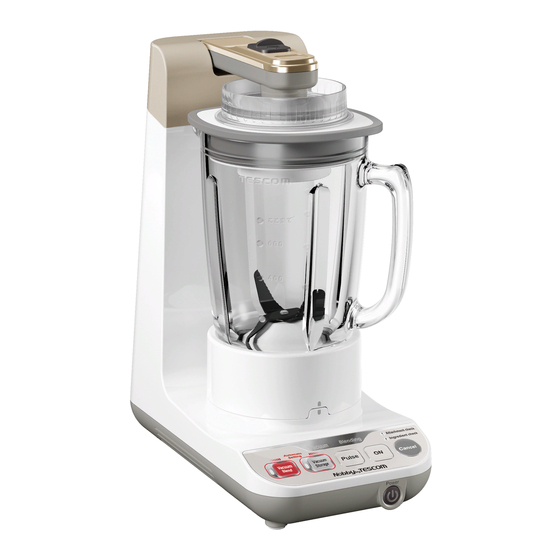
Vacuum Blender
Product Number: TMV1500AU
Instruction
Manual
Thank you for your purchase.
Before using this product,
please read this instruction
manual and use the product
correctly. After reading the
manual, please keep it close
at hand for easy reference.
Table of Contents
Safety Warnings ..................... 1〜4
Part names and functions ...... 5〜6
Before using the product ...... 7〜8
Using the blender ..................9〜16
Using the vacuum storage function ... 17〜21
Advice on processing ............... 22
Maintenance ........................ 23〜26
About error notification ...... 27〜28
Troubleshooting ........................ 29
Specifications ........................... 29
Recipes .................................... 30
For household use
NSW27865
Advertisement
Table of Contents

Related Manuals for Tescom Nobby TMV1500AU

Summary of Contents for Tescom Nobby TMV1500AU
-
Page 1: Table Of Contents
For household use NSW27865 Vacuum Blender Product Number: TMV1500AU Table of Contents Instruction Manual Safety Warnings ..... 1〜4 Part names and functions ..5〜6 Thank you for your purchase. Before using this product, Before using the product ..7〜8 please read this instruction manual and use the product Using the blender ....9〜16 correctly. - Page 2 Precautions ●Before using this product, please read these precautions and use the product correctly. ●The precautions shown below are provided to ensure safe product use and to prevent harm to the user and those nearby, as well as to prevent property damage. Therefore, the precautions should always be followed.
- Page 3 Precautions Warning This appliance shall not be used by children. Keep the appliance and its cord out of reach of children. Please do not use the product under any of the Prohibition Or, please do not use the following states, as the power cord may be product while children are broken due to long-term use or improper use.
- Page 4 Precautions Caution Please never directly push the safety switch or the safety switch pin with your finger, a rod, etc. Please ensure proper care of the cap after Prohibition every use of the product. Doing so may (Please see pp.23–26.) cause injury or failure.
- Page 5 Precautions Please do not put ingredients Please do not use unusable ingredients. of a temperature higher than (Please see p.11.) 40°C into the containers. Doing so may cause the breakage of the product. Doing so may cause Prohibition Prohibition injury due to the breakage of the container or the failure of the product.
- Page 6 Locations and functions of parts First, please check to see if the package has all the necessary parts and accessories. The seal material is already attached to the applicable parts. (Regarding how to remove the seals from the parts, please see p.24.) Blender container unit Smoothie container unit This is used to make smoothies or soups, as well as...
- Page 7 Locations and functions of parts Main body Release lever Vacuumizing arm Connection Safety switch Please do not use Please never detergents, etc. push this directly with your finger, etc. Power cord Attachment guide Power button (power indicator) A sound is emitted after 30 minutes of non-use, and then the power is automatically turned OFF.
-
Page 8: Before Using The Product
Before using the product About the vacuum blender Traditional blenders allow a lot of air to mix in with the ingredients during blending, and for recipes where processing/blending is involved, such as smoothies*, food can become oxidized. On the other hand, vacuum blenders can retard the process of oxidization by controlling incipient oxidization through vacuumization before blending the ingredients. - Page 9 Before using the product * Vacuum: A state of pressure that is lower than atmospheric pressure Please note: If foreign matter is sucked into the main body, a failure may occur. Please use the product by complying with the following instructions. Potential foreign matter To prevent failures sucked into the main body...
-
Page 10: Using The Blender
Using the blender When you use the blender for the first time or when using it after it has been stored for a while, please wash all parts other than the main body before use. (Please see pp.23–26.) Assembling the blender container unit Please note: Please perform assembly after taking due care Please attach each part correctly. - Page 11 Using the blender Attach the blender container to the container base. (1) Fit the blender container seal into the (2) Fit the blender container into the inner groove of the container base. container base, and attach it by rotating it in the direction of the arrow. Blender container Blender container seal Rotating...
- Page 12 Using the blender Unusable ingredients (causes of failure) ★Ingredients with ★Hard or dry ingredients ★Sticky ingredients a temperature ・Frozen food (excluding fruit) ・Boiled red beans ・Commercially available ice ・Japanese yams, etc. higher than 40 ★Meat or fish ・Dried bonito or dried soybeans ★Powdered foodstuffs ★Flour such as ・Dried fruit, etc.
- Page 13 Using the blender Putting the ingredients into the blender container You should put the ingredients into the blender container in the Point to note: Point to note: order of liquids, soft food, and hard food. Do not put too many ingredients When you plan to process food without putting liquid ingredients into the blender container.
- Page 14 Using the blender Using the vacuum blending function This is an automatic setting for processing while retarding oxidization, by vacuumizing* the blender container interior. Please note: Please assemble each part correctly and attach the blender cover firmly. Otherwise, a failure or error may occur.
- Page 15 Using the blender * Vacuum: A state of pressure that is lower than atmospheric pressure (3) Pull down the vacuumizing arm and push on it with the palm of your hand. Pushing * With a clicking sound, the vacuumizing arm is set into the blender cover. Insert the power plug into the outlet, and then turn ON the power by pushing the Power button.
- Page 16 Using the blender Remove the blender container from the main body. (1) Push the Power button to turn OFF the power after the rotation has stopped completely. Lighting OFF (2) While pulling the release lever, stand the vacuumizing arm upright. Stand it upright.
- Page 17 Using the blender Using the blending function Set the blender container unit into the main body and turn ON the power. (Please see procedures 1–3 on pp.13–14.) * Regarding the ingredients, please follow the description on pp.11–12. Processing (1) Push the Pulse button several times, with a push of about 1 second.
-
Page 18: Using The Vacuum Storage Function
Using the vacuum storage function When you use the blender for the first time or when using it after a period of non-use, please wash the parts other than the main body before using it. (Please see pp.23–26.) Assembling the smoothie container unit Please note: Please assemble the parts only after performing proper maintenance and after wiping down any moisture. - Page 19 Using the vacuum storage function Attach the inner cap. Cap seal (1) As shown in the illustration, attach the cap seal to the inner cap. Inner cap Attach the seal to this groove. (2) Fit the inner cap to the center of the Inner cap smoothie container cover.
- Page 20 Using the vacuum storage function Using the vacuum storage function This function is used for the later storage of smoothies, etc., already made using the vacuum storage function. Freshness can be maintain because the smoothie is stored in the vacuum* smoothie container. * This has no anti-bacterial effect.
- Page 21 Using the vacuum storage function * Vacuum: A state of pressure that is lower than atmospheric pressure Attach the smoothie container unit to the main body. Vacuumizing (1) Stand the vacuumizing arm upright. Smoothie container unit (2) Place the smoothie container unit on the main body.
- Page 22 Using the vacuum storage function Remove the smoothie container unit from the main body. (1) Push the Power button to turn the power OFF after you hear the beeps. Lighting off (2) While pulling the release lever, stand the vacuumizing arm upright.
-
Page 23: Advice On Processing
Advice on processing To prevent the unit from going idle liquids such as water are “I want to make thick necessary, but when ingredients themselves provide enough moisture smoothies with no water.” you can perform processing without any liquid. Point to note: (1) Please use soft and moist ingredients as a base (those from which you can make juice by simply crushing them with your hands). -
Page 24: Maintenance
Care of the product Please never forget to turn OFF the power and pull out the power plug from the outlet before you begin product maintenance. Please note: Please do not use benzine, thinner, metal scrubbing Please do not use a dishwasher or a dish dryer. brushes, polishing powder, or chemical-containing Please be careful not to lose seals, etc. - Page 25 Care of the product Dismounting each part (1) Dismount the (2) Dismount the blender container seal container from the container base. base by Container base rotating it in the direction Fear of injury of the arrow. Please be careful not to touch the blade.
- Page 26 Care of the product You must not use a dishwasher or a dish dryer. Main body Squeeze out a soft cloth soaked in soapy water or a neutral detergent diluted with water and Please wipe the wipe down the main body. connections of the main body with a well-squeezed...
- Page 27 Care of the product Smoothie container unit Smoothie container Smoothie container cover Disassemble the container (see p.24), wash Disassemble the cover (see p.24), wash each part with a sponge using neutral each part with a sponge or the detergent, and rinse it well with water or accompanying brush with scraper using lukewarm water (lower than 40 neutral detergent,...
-
Page 28: About Error Notification
About error notification This product stops operation automatically with warning beeps and lighting when it detects an error. Please handle it following the procedures below to prevent injury or failure. (1) Check the lit lamp, and (2) push the Cancel button to release the error. There may be a case where the Power button lamp blinks Check... - Page 29 About error notification Dismount each container unit from the main body. (Please see p.15 and p.21.) Check the probable causes below and handle the unit responding to the causes shown. When the Ingredient check lamp is lit When the motor is overloaded, the Ingredient check lamp becomes lit. After transferring the contents of the blender container to another container, please handle it as below.
-
Page 30: Troubleshooting
Troubleshooting Please check the following, and if a problem still persists, please stop operation immediately. When Probable causes Handling method Please handle the unit following the Even if you push the button, the product doesn’t operate. procedures shown on pp.27–28. The product has stopped operation. -
Page 31: Recipes
Recipes Carrot and tomato smoothies. 1, Water ......300ml Cut all ingredients into 2cm cubes.Put the ingredients in order into the blender container 2, Carrot ......120g and press the “Vacuum blender” button. 3, Tomato ......120g 4, Apple ......120g 5, Syrup ...... - Page 32 Product receipt/proof of purchase. without charge. 9. Any parts of the Products replaced during 4. This warranty only applies to Tescom products repairs or any product replaced remain the purchased in Australia and sold by the property of the manufacturer.
Need help?
Do you have a question about the Nobby TMV1500AU and is the answer not in the manual?
Questions and answers