Table of Contents
Advertisement
Quick Links
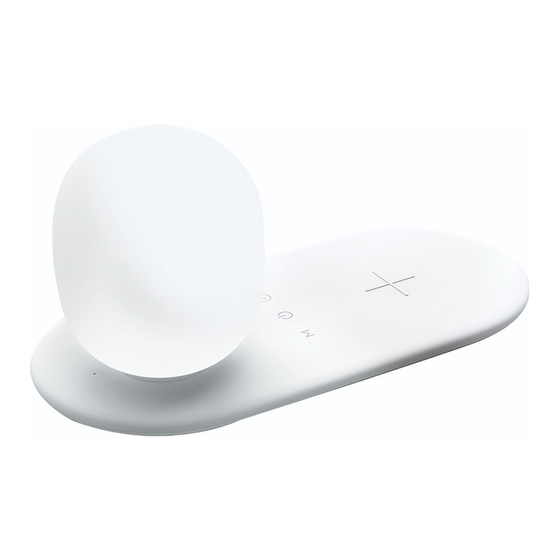
I003867 Mirabella Genio JETSON Desk Lamp
with Wireless Charging
Main Features and Technical Parameters
● Power input: 5V 2A or 9V 1.8A (adaptor are not included)
● Rated power for light: 2.5W
● Dimming type: Capacitive touch control ON/OFF, Step‐less dimming
● Three LED light mode switch: Warm White, Cool White, Day Light
● Color temperature: 2700‐6500K
● Wireless Charging output: 10W (MAX) when use with 9V 1.8A adaptor, 5W when use with 5V 2A Adaptor
IMPORTANT SAFETY INSTRUCTION WARNING ‐ DO NOT EXPOSE THE ADAPTOR TO MOISTURE.
WARNING: USE THIS PRODUCT ONLY ON A FIRM, LEVEL SURFACE AND PREVENT ANY OBJECTS
OR MATERIALS FROM COVERING THE LIGHT SOURCE AND/OR VENTILATION HOLES OF THE
PRODUCT. PLEASE READ THE INSTRUCTIONS BEFORE OPERATING THIS PRODUCT.
Indoor use only. ‐ Do not look directly at the light. ‐ LED module lamp head may get hot after
several hours of continuous use, AVOID placing your hands directly on LED light panel. ‐ Keep
lamp away from materials that may burn. ‐ If the power cord or adaptor is damaged, replace the
power supply cord and adapter.
1 | P a g e
Advertisement
Table of Contents

Subscribe to Our Youtube Channel
Related Manuals for MIRABELLA Genio JETSON


Summary of Contents for MIRABELLA Genio JETSON
- Page 1 I003867 Mirabella Genio JETSON Desk Lamp with Wireless Charging Main Features and Technical Parameters ● Power input: 5V 2A or 9V 1.8A (adaptor are not included) ● Rated power for light: 2.5W ● Dimming type: Capacitive touch control ON/OFF, Step‐less dimming ● Three LED light mode switch: Warm White, Cool White, Day Light ● Color temperature: 2700‐6500K ● Wireless Charging output: 10W (MAX) when use with 9V 1.8A adaptor, 5W when use with 5V 2A Adaptor IMPORTANT SAFETY INSTRUCTION WARNING ‐ DO NOT EXPOSE THE ADAPTOR TO MOISTURE. WARNING: USE THIS PRODUCT ONLY ON A FIRM, LEVEL SURFACE AND PREVENT ANY OBJECTS OR MATERIALS FROM COVERING THE LIGHT SOURCE AND/OR VENTILATION HOLES OF THE PRODUCT. PLEASE READ THE INSTRUCTIONS BEFORE OPERATING THIS PRODUCT. Indoor use only. ‐ Do not look directly at the light. ‐ LED module lamp head may get hot after several hours of continuous use, AVOID placing your hands directly on LED light panel. ‐ Keep lamp away from materials that may burn. ‐ If the power cord or adaptor is damaged, replace the power supply cord and adapter. 1 | P a g e ...
- Page 2 Indoor use only. ‐ Do not look directly at the light. ‐ LED module lamp head may get hot after several hours of continuous use, AVOID placing your hands directly on LED light panel. ‐ Keep lamp away from materials that may burn. ‐ If the power cord or adaptor is damaged, replace the power supply cord and adapter. Operation Instructions Use this product only on a firm, level surface and prevent any objects or materials from covering the light source and/or ventilation holes of the product 1 ‐ Connect the charging cable into the rear of the lamp. Note: Use only with the recommend 5V 2A or 9V 1.8A adapter for best performances. 2 – Touch the On/Off button to turn the lamp On or Off. 3 ‐ To adjust the brightness, Press and hold the On/Off button until the desired level of brightness has been reached. 4 ‐ Touch the mode button to switch between 3 light temperature modes: Warm White, Cool White, Day light. 5 ‐ Timer Function: Press and hold the button to set the 40 minute countdown, the light will flash twice to advise you that the countdown is set. The light will shut down after the 40 mins have lapsed. 6 – Wireless Charging Function: Place your phone in the centre of the charging pad to commence charging. Note your smartphone must be compatible with Qi wireless charging to be able to charge correctly. Please refer to your device instructions for enabled capability. Device case or cover should be removed to ensure a stable connection. 2 | P a g e ...
- Page 3 APP Connection Preparation It is important that your phone is connect to 2.4Ghz Wi‐Fi and not to the 5GHz network. To verify your mobile device is set to a 2.4Ghz Wi‐Fi network, navigate to the Settings menu and click on Wi‐Fi. In this menu you will see all the detectable networks in your area. Locate the SSID (the name of your network), and ensure that the Wi‐Fi SSID does not end with a 5G / 5GHz. Check you have a strong WI‐FI signal (at least two bars) in the location where the light is to be located. If you don’t have at least two bars signal on your phone, then you may need to reconsider the relocating the light to a different location or obtain a Wi‐Fi extender to boost the WI‐FI signal strength. Install the APP and register Account For the best experience, download the "Mirabella Genio" APP to your smartphone from the App Store or Google Play, the Genio APP icon will be displayed after it has been installed successfully. 3 | P a g e ...
- Page 4 Pairing the Light using Mirabella Genio App Bluetooth Pairing Assistant (BK method) Our latest Genio smart Wi‐Fi lighting range has a Bluetooth pairing assistant function, to make the pairing even easier than before, to take advantage of this function, please turn ON the Bluetooth function on your phone. 1. Connect the charging cable and adapter to the light and power on the light 2. Wait for the blue indicator light start to blink rapidly (1 blinks per second) – The light is now ready to pair, if it failed to blink rapidly, press and hold the M key until it to starts to blink, 3. open Mirabella genio APP, tap on + , it will automatically detect the device in the local network, follow the below steps to pair the light into your APP, please make sure you are using the 2.4Ghz Wi‐Fi name and password, do not use the Wi‐Fi Name that end with ‐5G If this method doesn’t work for you, please Turn OFF your Bluetooth on your phone, then re‐try the EZ method or AP method on the following page. 4 | P a g e ...
- Page 5 Fast Blinking EZ method, 1. Connect the charging cable and adapter to the light and power on the light 2. Wait for the blue indicator light start to blink rapidly (1 blink per second) – The light is now ready to pair, if it fails to blink rapidly , press and hold the M key until it to starts to blink, 3. Please ensure your mobile phone is connected to your 2.4Ghz Wi‐Fi network (Genio Smart light is not compatible on 5GHz Wi‐Fi network) 4. Open the Mirabella Genio APP, then tap on “+” symbol, then choose Smart Lighting, and select the Genio desk light from the list 5. Follow the APP’s instruction carefully to complete the network pairing process. Please make sure you are using the correct 2.4Ghz Wi‐Fi name and password. if the fast‐blinking method (EZ method, mentioned above) doesn’t work, please try the slow blinking (AP method) below. Slow Blinking AP method (recommended method if you are using Telstra NBN while the blue indicator light is blinking rapidly, press and hold the M key again, until the blue indicator light is slowly blinking (1 blink every 2 seconds) 5 | P a g e ...
- Page 6 open the APP this time on the reset the device first screen tap on EZ mode in the Top right hand corner just below the battery image , select AP Mode (refer to the 1st and 2nd image below) Now Confirm indicator slowly blinking (refer to image 3), hit Next, then Go to connect and connect to Wi‐Fi named SmartLife_XXXX Note: If you fail to see Wi‐Fi name beginning with the word SmartLife_XXXX, then it is not slowly blinking Please reset the device again 6 | P a g e ...
- Page 7 After connected to SmartLife_XXXX, return to Mirabella Genio, APP will commence the 2 minutes countdown process Please pay attention to the please check and screen to determent the ensure cause of time‐out error 1. You enter the correct If the light never stops 2.4Ghz Wi‐Fi name and blinking, please check your password phone setting, if you are using iPhone IOS 14, please 2.move the light closer make sure Local Network to the router to get permission is turned on better Wi‐Fi signal if light does stop blinking, 3. Manually disable but unable progress to 5Ghz Wi‐Fi signal on the “register on cloud” it router. You can turn it indicates communication back after device is error with your router to our paired ...
- Page 8 FAQs Q. How to connect light to another Wi‐Fi network? A. … tap on Go into the lights settings page, tap on “remove device” to remove it , reset the light and pair it again through the app. Q. Followed the pairing process but received time out error? A. Check the following; 1. 5GHz Wi‐Fi signal on the router setting has been disabled 2. Please ensure you entered the correct 2.4Ghz Wi‐Fi SSID and password 3. Please try using Ipad or Iphone, if you have no luck with android devices 4. Please read the latest FAQs on our website https://www.mirabellagenio.com.au/faqs/ 5. Please move the light closer to the router to get better wifi coverage 6. Please call Mirabella Technical support If you have done all of the above, but still failed to connect, then your modem could be incompatible with smart device. All trademarks are used for reference purposes only. Made in China MIRABELLA INTERNATIONAL PTY LTD 1 MIRABELLA DRIVE TULLAMRINE VICTORIA 3043 AUSTRALIA TOLL FREE: 1800 636 528 WWW.MIRABELLAGENIO.COM.AU 8 | P a g e ...
Need help?
Do you have a question about the Genio JETSON and is the answer not in the manual?
Questions and answers