Table of Contents
Advertisement
Quick Links
1J1iJ
S MART
LIFE SMART ® is a registered trademark of
Supply Chain Sources LLC., All Rights Reserved.
ATTACH YOUR RECEIPT HERE
Purchase Date _____ Serial Uumber
Questions, problems, missing parts?
657-341-0362, 8:00 a.m. - 5 p.m., PST, Monday - Friday
www.lifesmartgrills.com or email us at cs@scsources.com.
Please have your model and serial number ready
REV1-051019
J
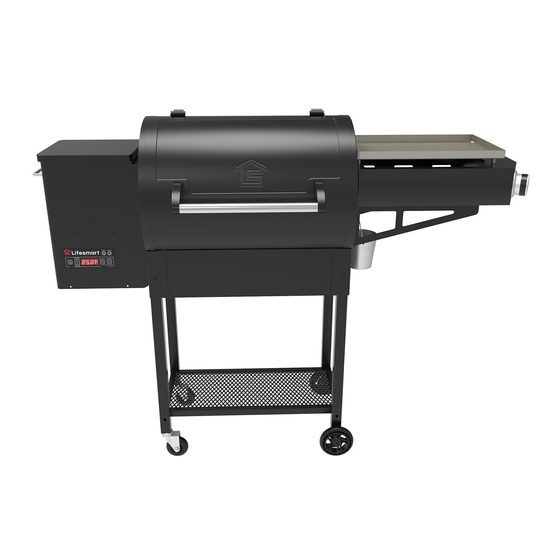
PELLET SMOKER GRILL
[Located on back of unit] _______ _
Contact technical support department at
model/ customer number: SCS-P760G
or visit us on-line at
Advertisement
Table of Contents

Related Manuals for Life Smart SCS-P760G


Summary of Contents for Life Smart SCS-P760G
- Page 1 1J1iJ PELLET SMOKER GRILL S MART LIFE SMART ® is a registered trademark of model/ customer number: SCS-P760G Supply Chain Sources LLC., All Rights Reserved. ATTACH YOUR RECEIPT HERE Purchase Date _____ Serial Uumber [Located on back of unit] _______ _...
-
Page 2: Table Of Contents
TABLE OF CONTENTS Package Contents . . . . . . . . . . . . . . . . . . . . . . . . . . . . . . . . . . . . . . . . . . . . . . . . . . . . . .3 Safety Information . -
Page 4: Safety Information
SAFETY INFORMATION Please read and understand this entire manual before attempting to assemble, operate, or install the product . IMPORTANT SAFETY INSTRUCTIONS WARNING: FOR OUTDOOR USE ONLY! Do not use in any enclosed area . Use only on level surface away from overhanging easements . •... - Page 5 250W(IGNITE); 50W(NORMAL WORK)
-
Page 7: Assembly Instructions
1. To attach the griddle to the pellet grill. Align the mounting brackets to the pre-drilled holes on the pellet body and using the provided screws secure the brackets. 2. Secure the griddle to the pellet body by aligning the pregrilled holes to the bracket and secure using the provided screws and washers. -
Page 8: Troubleshooting
TROUBLESHOOTING PROBLEM POSSIBLE CAUSE CORRECTIVE ACTION Grill will not light / Power Make sure power is plugged into working GFCI turn on outlet, and outlet is not tripped . Unplug grill and check for blown fuse; refer to con- troller schematic on page 20 . Fuse Replace fuse manually and try again . -
Page 10: Initial Setup Procedure
INITIAL SETUP PROCEDURE For your first lighting, follow this Initial Setup Procedure . 1 . Open the main lid and remove the cooking grate, drip pan and flame deflector . Make sure all packing material has been removed . 2 . Open the pellet hopper lid found on the left side of your grill and check for any foreign objects . -
Page 12: Test Modes And Adjustments
Test Mode - With grill OFF, press and hold the Probe Temp and Temp Down buttons to enter the button test Mode until all digital display and LEDs turn on . Press ProbeTemp button it displays “S-1”, press I/O button it displays “S-2”, press Temp Down button it displays “S-3”, press Temp Up button it displays “S-4”, Press Temp Display button it display “S-5”, Each additional press of the Probe Temp button will advance you through below next function test. -
Page 13: Performance Tips
PERFORMANCE TIPS PREHEATING It is important to allow your grill to preheat and achieve your desired cooking temperature before cooking . This allows the entire grill to heat up and quickly return to your desired temperature once your food is introduced . If you do not allow the grill to preheat, you will find that it takes a longer period of time to bring both the grill and the food to your desired cooking temperature . -
Page 14: Temperatures
TEMPERATURES Remember, you can’t tell whether meat is safely cooked by looking at it . Any cooked, uncured red meats including pork may be pink even when the meat is done • Hot foods should be held warmer than 140º F . •... -
Page 15: Manual Start Up
MANUAL START UP In case of igniter failure, you can start your grill manually . 1 . Remove the grate, drip pan and flame deflector . 2 . Clean out fire pot and place no more than 1/2 cup of pellets in the bottom . Add a small amount of solid fuel fire starter, such as those made from sawdust and wax wood shavings . -
Page 16: One-Year Limited Warranty
ONE-YEAR LIMITED WARRANTY The manufacturer warrants this heater against defects in materials and workmanship on functional parts, for a period of 1 year from the original date of purchase . Your sales receipt showing the date of purchase of the product is your proof of purchase . Keep it in a safe place for future reference . This war- ranty is subject to personal use only, commercial or rental applications will not be covered . - Page 17 PLEASE REMEMBER TO REGISTER YOUR WARRANTY: web: www.lifesmartgrills.com email: cs@scsources.com Printed in China LIFE SMART is a registered trademark of ® Supply Chain Sources LLC., All Rights Reserved.
Need help?
Do you have a question about the SCS-P760G and is the answer not in the manual?
Questions and answers