Pioneer AVIC-Z830DAB Operation Manual
Navigation av system
Hide thumbs
Also See for AVIC-Z830DAB:
- Instruction manual (77 pages) ,
- Quick start manual (16 pages) ,
- System firmware update instructions (5 pages)
Table of Contents
Advertisement
Quick Links
Advertisement
Table of Contents

Related Manuals for Pioneer AVIC-Z830DAB


Summary of Contents for Pioneer AVIC-Z830DAB
- Page 1 AVIC-Z930DAB AVIC-Z830DAB AVIC-Z730DAB AVIC-Z630BT AVIC-Z7330DAB AVIC-Z6330BT NAVIGATION AV SYSTEM Operation Manual Be sure to read Important Information for the User first! Important Information for the User includes the important information that you must understand before using this product.
-
Page 2: Table Of Contents
Contents Storing a route in [Saved Routes] ......40 Thank you for buying this Pioneer Receiving real-time traffic information product. (TMC)............... 41 Please read through these instructions Checking useful information about your so you will know how to operate your trip................ - Page 3 ■ Radio settings.............. 81 Vehicle equipment ■ Disc........84 information....118 Inserting and ejecting a disc........84 Using the Vehicle Bus adapter ......118 Basic operation ............85 Displaying obstacle detection information ... 119 ■ Compressed files..... 89 Displaying the operating status of the climate control panel ............
- Page 4 Google™, Google Play, Android ......169 Android Auto ............169 Detailed information regarding connected iPod devices ..............169 Using app-based connected content ....170 HDMI ................171 IVONA Text-to-Speech........... 171 Notice regarding video viewing ......171 Notice regarding DVD-Video viewing ..... 172 Notice regarding open source licenses...
-
Page 5: Precaution
Precaution Notes on internal memory • If the battery is disconnected or discharged, the memory will be erased and must be reprogrammed. • The information will be erased by disconnecting the yellow lead from the battery (or removing the battery itself ). •... -
Page 6: Parts And Controls
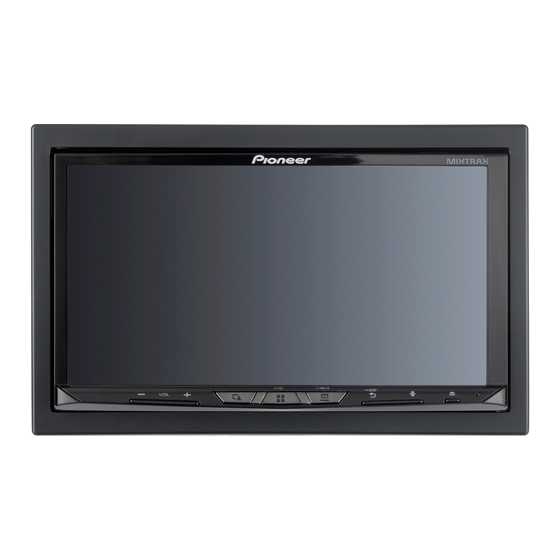
Parts and controls Main unit Z930DAB Z830DAB Z730DAB Z630BT Z7330DAB Z6330BT - 6 -... -
Page 7: Protecting Your Product Against Theft
LCD screen VOL (+/ Press to switch between the Application screen and the AV operation screen. Press and hold to switch to the camera view mode. NOTE To activate the camera view mode with this button, set [Back Camera Input] to [On] or [AV Input] to [Camera] (page 121). - Page 8 Removing the detachable faceplate Press the button. Gently grip the bottom of the detachable faceplate and slowly pull it outward. Detachable faceplate Attaching the detachable faceplate Slide the detachable faceplate all the way into this product. Push the lower part of the detachable faceplate until you hear a click. - 8 -...
-
Page 9: Basic Operation
Basic operation Notes on using the LCD panel Z930DAB Z830DAB WARNING • Keep hands and fingers clear of this product when opening, closing, or adjusting the LCD panel. Be especially cautious of children’s hands and fingers. • Do not use with the LCD panel left open. It may result in injury in the event of an accident. CAUTION •... -
Page 10: Remote Control
Settings and recorded contents are reset to the factory settings. Remote control The remote control CD-R33 is sold separately. For details concerning operations, see the remote control manual. Starting up the unit Start the engine to boot up the system. The [Select Program Language] screen appears. -
Page 11: Starting Up The Navigation System
The top menu screen appears. NOTE Once the speaker mode is set, the setting cannot be changed unless this product is restored to the default settings. Restore the default settings to change the speaker mode setting (page 147). Switching the speaker mode To change the speaker mode, you need to restore this product to the default settings. -
Page 12: Using The Touch Panel
If needed, modify the default route planning options, then touch [Next]. Touch [Finish]. Using the touch panel You can operate this product by touching the keys on the screen directly with your fingers. NOTE To protect the LCD screen from damage, be sure to touch the screen only with your finger gently. Common touch panel keys : Returns to the previous screen. - Page 13 Operating the time bar You can change the playback point by dragging the key. The playback time corresponding to the position of the key is displayed while dragging the key. Operating the menu bar Press The menu bar pops up on the screen. NOTE The menu bar availability may vary depending on the activating source.
- Page 14 The hidden function keys appear. NOTE This key does not appear for some AV sources. Operating the on-screen keyboard Displays the characters that are entered. Moves the cursor to the right or left for a number of characters equivalent to the number of touches.
-
Page 15: Top Menu Screen
Top menu screen Favourite source icons TIPS • When you connect the external navigation system to this unit, the navigation mode key is displayed at the middle of the right side of the display. • If you select [Power OFF], you can turn off almost all functions. The [Power OFF] mode is released in the following cases. - Page 16 Connected device key Displays connected device. Switches the source or application with connected devices such as WebLink, external navigation system, Apple CarPlay, Android Auto. TIPS • When a device with a compatible application is connected, the favourite application key appears. Once the key appears, you can adjust the range of the favourite application key area with the following steps.
-
Page 17: Navigation
Navigation Menu screen view and operations Press Touch The main menu screen appears. Main screen Returns to the map screen. Notifications that contain important information. Displays the previous or next page of the navigation menu. The locations that you saved as favourites. Switches between 2D, 3D, and 2D North up view modes. -
Page 18: Map Screen
Navigation items Searches for a destination using various methods (page 24). Builds your route or edits the route currently set (page 32). Displays the traffic screen (page 41). Displays useful information to support your driving (page 44). Configures the navigation-related settings (page 49). Displays information about your navigation system (e.g. - Page 19 How to read the map screen NOTE Depending on the conditions and settings, some items may not be displayed. Shows the number and name of the street to be used (or next guidance point). Shows the next guidance point (manoeuvre). The type of the event (turn, roundabout, exiting motorway, etc.) is displayed (page 22).
- Page 20 Touch to display the AV source list. Shows the current status of AV source briefly. Touch to display the phone menu screen (page 62). Changing the scale or the map manually By default, even if the map scale is changed on the scrolled map, it will return to the preset scale (according to the setting in [Viewpoint] of the [Navigation Map] settings) when the current position map is displayed.
- Page 21 at a distance, it will zoom out and lower the view angle to be flat so you can see the road in front of you. • When the route is not set: "Smart Zoom" will zoom in if you drive slowly and zoom out when you drive at high speed.
- Page 22 Touch The map returns to the current position. If you press , the map returns to the current position. ▶Control keys on the scrolled map Map screen (scrolled map) Changes the map view mode. The current map mode is shown on the control key. Zooms in or out on the map.
- Page 23 Enter roundabout (manoeuvre after the next manoeuvre). Motorway entrance or motorway exit. Board ferry or leave ferry. Approaching the destination or a waypoint. Lane information When navigating on multilane roads, you will need to make sure to take the proper lane for the recommended route. Signposts Signs are displayed at the top of the map.
-
Page 24: Searching For A Destination
• When the route is set: Distance to final destination, time needed to reach the final destination and estimated arrival time are shown. • When the route is not set: Direction or altitude is shown. NOTES • Touching and holding the field allows you to display the setting screen for the field. For details, refer to page 56. - Page 25 NOTE Some information regarding traffic regulations depends on the time when the route calculation is performed. Thus, the information may not correspond with a certain traffic regulation when your vehicle actually passes through the location in question. Also, the information on the traffic regulations provided applies for a passenger vehicle, and not for a lorry or other delivery vehicles.
- Page 26 Searching for a location by address Search a destination in which the address is specified. Depending on the search results, some steps may be skipped. Touch [Address]. Select the [Country]. Proposes the country where you are as a default. If you want to change the search area, set another country. Select the [Town or Postcode].
- Page 27 If you touch , you can sort the results or show the locations of all facilities on the map. Touch [Select as Destination]. NOTES • When a route is not set, POIs are searched for around the current position. • When the current position is not available either (no GPS signal), POIs are searched for around the last known position.
- Page 28 • [Along Route]: Searches along the current route, and not around a point already set. This is useful when searching for a stopover that results in a minimal detour, such as searching for petrol stations or restaurants. The results will be listed in order of the length of the necessary detour.
- Page 29 Touch [Start Navigation]. You can change the final destination or add waypoints in [Route Planner] (page 32). Selecting a destination from history The places that were previously set as destinations or waypoints have been automatically stored in [History]. Touch [History]. Touch the entry.
- Page 30 When entering the coordinates in UTM format, touch , then [UTM Coordinates]. Enter the longitude value and touch [GO!]. The searched location appears on the map screen. Touch [Select as Destination]. You can change the display format of the latitude and longitude to any of the following formats: decimal degrees;...
- Page 31 Zoom in/zoom out You can also pinch or expand the map to zoom in or out. Cancels the [Map Location] screen and displays the map of the current position. Returns the cursor to the initial position and the map scale to the initial scale. Shows the route setting preferences for route calculation.
-
Page 32: Starting The Navigation
Starting the navigation Once the destination is selected, touch [Select as Destination]. The route summary screen appears and countdown begins. When the countdown ends, the guidance automatically starts. If you touch the screen anywhere during the countdown, the countdown stops and the screen will stay as it is. Touch [Start Navigation]. - Page 33 Starting position (The current vehicle position is set as default and [Current GPS Position] is displayed.) (page 33) Calculates the route and shows the [Route Summary] screen. Displays the options for the location. [Move Up]/[Move Down]: Edits the order you want to visit the locations. [Delete]: Deletes the destination or waypoint.
- Page 34 The system starts route recalculation after [Show Route] is touched, and then the [Route Summary] screen appears. After [Start Navigation] is touched, your navigation system starts the route guidance. NOTE After [Continue Without Route] is touched, the current position map appears. ▶Changing the starting position Press then touch...
- Page 35 If more than three route alternatives have been found, [More Results] appears. Touch [More Results] to show the other routes. Touch [Select]. The selected route is applied as your current route. For more information about route calculation conditions, refer to [Route Planning Method] (page 51). Checking detour routes You can check for detour routes that avoid the selected sections or streets, or that avoid the road ahead.
- Page 36 Menu Item Description [Restore Original Route] Cancels the route with avoidances and restores the previous route. NOTE The route set by [Alternative Routes] cannot be cancelled. Checking route information and preferences Once you set the route, you can check a summary of the current route. Press then touch Touch [Route Summary].
- Page 37 Displays the shortcuts. [Route Preferences]: Shows the route setting preferences. If you change the preferences, the route is recalculated. [Itinerary]: Shows all transit points in detail. Touch a transit point to show its position on the map. If you touch [Avoid] and [Accept] on the map screen, the route is recalculated avoiding the transit point (as much as possible).
-
Page 38: Storing A Location In [Saved Location]
Storing a location in [Saved Location] Storing your favourite locations in [Saved Location] allows you to save the time and effort used on re-entering this information. [Saved Location] can include your home location, workplace, and places you have already registered. Storing your home and your workplace location You can store one home location and one workplace location. - Page 39 Renaming stored locations Press then touch Touch [New Route], and then [Saved Location]. Touch , and then touch [Edit]. The [Select Location to Edit] screen appears. Touch the item you want to rename and touch [Rename]. Enter the name and then touch Touch [Done].
-
Page 40: Storing A Route In [Saved Routes]
NOTE To use this function, activate the warnings beforehand and set the alert types (page 53). Press Scroll the map and select a location. The cursor appears at the selected point. Touch Touch [Add Alert Points]. Set the necessary parameters. Menu Item Description [Alert Type]... -
Page 41: Receiving Real-Time Traffic Information (Tmc)
Press then touch Touch [Route Summary], and then touch Touch [Save Route]. Enter the name if needed and then touch Renaming stored routes Press then touch Touch [New Route], and then Touch [Saved Routes]. Touch , and then touch [Edit]. Touch the item you want to rename and touch [Rename]. - Page 42 Displaying the [Traffic Summary] screen Press then touch Touch [Traffic]. The [Traffic Summary] screen appears. Viewing the traffic list Traffic information is displayed onscreen in a list. This allows you to check how many traffic incidents have occurred, the locations, and the distance from your current position.
- Page 43 Touch [Traffic Map]. Road segments affected by traffic incidents are displayed in an alternate colour on the map, and small symbols above the road show the nature of the incident. The traffic jam lines indicate the degree of the congestion by colour. Traffic notification icon The notification icon shows the status of traffic information reception.
-
Page 44: Checking Useful Information About Your Trip
You can check the details of the traffic incidents. Touch the relevant event to display the location on the map. Turning the traffic information on or off The traffic information feature is turned on by default. To enable or disable the TMC feature, perform the following procedure. - Page 45 Menu Item Description [Help Nearby] Check for POIs in your surroundings. The preset search categories are as follows. • [Car Repair] • [Health] • [Police] • [Petrol Station] [Country Information] Check for useful driving information about the selected country (for example, speed limits and maximum blood alcohol level).
- Page 46 • If you want the system to always activate the trip logger whenever the GPS signal is available, turn on [Enable Auto-Saving]. For details, refer to “Setting the trip logger” (page 46). ▶Browsing the trip log Record the trip log. Press then touch Touch [Useful Information].
- Page 47 Editing a trip log Press then touch Touch [Useful Information]. Touch [Trip Monitor]. Touch and then touch [Edit]. Touch any of the items to edit. Menu Item Description [Delete] Deletes the trip log. [Rename] Renames the trip log. [Change Colour] Changes the colour by selecting another colour from the colour table.
- Page 48 Calculating the fuel consumption The fuel consumption monitor helps you keep track of the fuel consumption of your car even if you do not use the navigation system for all your journeys. Set the initial odometer value and then record the distance driven and the amount of fuel whenever you fill up your car.
-
Page 49: Navigation Settings
▶Setting the car maintenance schedule Press then touch Touch [Useful Information]. Touch [Fuel Consumption]. Touch Touch [Maintenance Schedule]. Touch [Add] or the one of entries. Enter the name, date, and mileage for the reminder. Touch [Done]. To delete an entry, touch to display the shortcut for deletion. - Page 50 Menu Item Description [Vehicle] Set the type of vehicle you will be using on the route. NOTES • The route is planned based on the selected vehicle type. • Depending on the type selected, the route planning may be configured to incorporate dimension, weight, and freight hazard restrictions for maps that contain such data.
- Page 51 Menu Item Description [Lorry] • Manoeuvre restrictions and directional constraints are taken into account when planning a route. • Only roads that allow lorry access are included. • Private roads, resident-only roads and walkways are excluded from routes. • U-turns are not used in routes (turning around on a divided road is not considered a U-turn for the purpose of this system).
- Page 52 Menu Item Description [Period Charge] Set to off to avoid prioritising toll roads for calculating the route. This function is useful when you want to avoid toll roads with restricted time access that require you to purchase a separate pass or vignette to extend the length of time allotted for use.
- Page 53 Menu Item Description [Announce Streets and Select whether to have the navigation system read the Roads in Foreign street names in a foreign country, only the road numbers, Language Area]* or only the manoeuvres. [Early Indication of Select whether you want an immediate announcement for Manouevres] the next manoeuvre or to receive the information when the manoeuvre is near.
- Page 54 Menu Item Description [Visual] Visible warnings will go off when exceeding the speed limit. [Audio and Visual] Audible and visible warnings will go off when exceeding the speed limit. [Speed Limit Always Select whether to see the speed limit sign on the map all Visible] the time.
- Page 55 NOTE When you are driving in France, [Speed Camera Types] is not available and [Dangerous Zone] becomes available instead. If [Dangerous Zone (HVA)] is set to on, alert points that you set are also alerted as dangerous zones. You can also set the distance of the pre-alert zone in [Pre-Alert Zone] and turn the sound alert on or off in [Sound alert].
- Page 56 Menu Item Description [3D Terrain] Shows or hides the 3D elevation of the surrounding terrain. [Track Logs] Turns on or off track log saving which saves the sequence of the locations you go through on your journeys. [Place Markers] Select which POI icons to show on the map while navigating.
- Page 57 Menu Item Description [Offer Congestion Detour When you slow down while driving on a motorway due to on Highways] a traffic jam, this navigation system offers you a detour using the next exit. The message shows you the distance to the exit and the difference in the distance and estimated time compared to the original route.
- Page 58 Menu Item Description [Language] Displays the current language of the user interface. By touching the key, you can select a new language from the list of available languages. This system will restart if you change this setting. [Voice Language] Displays the current voice guidance profile. By touching the key, you can select a new voice guidance language from the list of available languages and speakers.
- Page 59 Menu Item Description [Menu Animations] When animation is turned on, the keys on the menus and keyboard screens are animated. Screen transitions are also animated. [Day Skin Theme] Select the style and colours of the navigation menu used in the daytime. [Night Skin Theme] Select the style and colours of the navigation menu used in the nighttime.
-
Page 60: Updating The Map
Naviextras Toolbox is installed. Then, transfer the data from connected USB memory storage to your navigation system by using [SyncTool] on this product. For details, access the following URL and refer to “HOW TO UPDATE?” GUIDE. https://pioneer.naviextras.com - 60 -... -
Page 61: Bluetooth
Bluetooth® Bluetooth connection Turn on the Bluetooth function on the device. Press Touch then The Bluetooth screen appears. Touch [Connection]. Touch The unit starts to search for available devices, then displays them in the device list. Touch the Bluetooth device name. After the device is successfully registered, a Bluetooth connection is established by the system. -
Page 62: Hands-Free Phoning
Menu Item Description [Connection] Connect, disconnect, or delete registered Bluetooth device manually. Touch to delete registered device. To connect a registered Bluetooth device manually, touch the name of the device. To disconnect the device, touch the name of the connected device in the list. - Page 63 The phone menu screen appears. Touch one of the call icons on the phone menu screen. The following items are displayed. • Name of the current mobile phone • List number of the current mobile phone • Reception status of the current mobile phone •...
- Page 64 Using the preset dial lists ▶Registering a phone number You can easily store up to six phone numbers per device as presets. Press Touch Touch On the [Phone Book] screen, touch the desired name to display the contact’s phone number. Touch ▶Dialling from the preset dial list Touch...
- Page 65 • For using this function with a smartphone, the device must be compatible with Android Auto. For using the voice recognition function with a smartphone, launch Android Auto beforehand. Press Touch Touch The voice recognition function launches and the voice control screen appears. You can also launch the voice recognition function by pressing Minimising the dial confirmation screen Touch...
- Page 66 Adjusting the other party’s listening volume This product can be adjusted to the other party’s listening volume. Touch to switch between the three volume levels. Notes for hands-free phoning ▶General notes • Connection to all mobile phones featuring Bluetooth wireless technology is not guaranteed.
-
Page 67: Bluetooth Audio
• If the phone book in the phone contains image data, the phone book may not be transferred correctly. • Depending on the mobile phone, phone book transfer may not be available. Bluetooth audio Before using the Bluetooth audio player, register and connect the device to this product (page 61). - Page 68 Switches between playback and pause. Skips files forwards or backwards. • By pressing then touch , you can also skip files forwards or backwards. • By pressing then touch and hold , you can also perform fast reverse or fast forwards. Selects a file or folder from the list to playback.
-
Page 69: Wi-Fi
Wi-Fi You can connect your Wi-Fi certified mobile device to this product via Wi-Fi connection. Wi-Fi connection Turn on the Wi-Fi function on the device. Press Touch then Touch [Wi-Fi Settings]. Set [Wi-Fi] to [ON]. Touch [Device Information]. Connect this product with the displayed network name in [Device Information] from the mobile device. -
Page 70: Wi-Fi Audio
Wi-Fi audio Before using the Wi-Fi audio player, connect the device to this product via Apple CarPlay (page 104) or Android Auto wirelessly (page 108). Press then touch Touch [Wi-Fi Audio]. The Wi-Fi audio playback screen appears. NOTES • [Wi-Fi Audio] is displayed as [Android Auto] when the Android Auto is in use. •... -
Page 71: Av Source
• Bluetooth audio • Wi-Fi audio (Apple CarPlay, Android Auto*2) • AV input (AV) • AUX • HDMI*3 • Wireless Mirroring *1 AVIC-Z930DAB/AVIC-Z830DAB/AVIC-Z730DAB/AVIC-Z7330DAB *2 AVIC-Z930DAB/AVIC-Z830DAB *3 AVIC-Z930DAB Displaying the AV operation screen Press then touch the AV operation key. The AV operation screen appears. -
Page 72: Selecting A Source
Displays the source list. Shows the navigation information. This is not displayed for some sources. Recalls equaliser curves (page 133). Selecting a source Source on the AV source selection screen Press then touch Touch the source icon. When you select [Source OFF], the AV source is turned off. Source on the source list Press then touch the AV operation key. -
Page 73: Adjusting The Range Of Favourite Source Icons Area
Changing the display order of source icons Press then touch Touch and hold the source icon and drag the icon to the desired position. Changing the display order of source keys Press then touch the AV operation key. Touch Touch Drag the source key to the desired position. -
Page 74: Setup For Ipod/Iphone Or Smartphone
Setup for iPod/iPhone or smartphone When using an iPod/iPhone or a smartphone with this product, configure settings of this product according to the device to be connected. This section describes the settings required for each device. NOTES • Operation methods may vary depending on the iPod/iPhone model or smartphone and its software version. -
Page 75: Smartphone (Android™ Device)
Touch [Smartphone-related Settings]. Touch [Smartphone Setup]. Touch [iPhone/iPod]. The available function icons are displayed. Touch [OK]. Smartphone (Android™ device) Compatible smartphones Compatibility with all smartphones is not guaranteed. For details about smartphone compatibility with this product, refer to the information on our website. Press Touch then... -
Page 76: Digital Radio
Digital Radio tuner operations For improved Digital Radio reception, make sure a Digital Radio aerial with phantom power input (active type) is used. Pioneer recommends using AN-DAB1 (sold separately) or CA-AN-DAB.001 (sold separately). Current consumption of Digital Radio aerial should be 100 mA or less. -
Page 77: Basic Operation
Basic operation Digital Radio screen Recalls the preset channel stored to a key from memory. Stores the current broadcast frequency to a key. Displays the preset channel list. Select an item on the list to switch to the preset service. Selects the DAB1, DAB2, or DAB3 band. -
Page 78: Dab Settings
Selects a service component. Touch the following category then select each item. [Station]: Displays all service components. [Program Type] (PTY label): Searches from programme type information. [Station Group] (ensemble label): Displays the ensemble list. If you touch [Update Stations], you can update station list information manually. NOTES •... - Page 79 Menu Item Description [TA OFF] Disables this function. [Service Follow]* Searches for another ensemble that supports [On] [Off] the same service component with better reception. If no alternative service component can be found or reception remains poor, the unit will automatically switch to an identical FM broadcast.
-
Page 80: Radio
Radio Starting procedure Press then touch Touch [Radio]. The Radio screen appears. Basic operation Radio screen Recalls the preset channel stored to a key from memory. Stores the current broadcast frequency to a key. Displays the preset channel list. Select an item on the list ([1] to [6]) to switch to the preset channel. Selects the FM1, FM2, FM3, MW, or LW band. -
Page 81: Storing The Strongest Broadcast Frequencies (Bsm)
TIPS • By pressing then touch , you can also switch the preset channels. • By pressing then touch and hold and releasing it, you can also perform seek tuning. Storing the strongest broadcast frequencies (BSM) The BSM (best stations memory) function automatically stores the six strongest broadcast frequencies under the preset channel keys [1] to [6]. - Page 82 Menu Item Description [FM Step]*1 Select the seek tuning step for the FM band. [100kHz] [50kHz] NOTE The tuning step remains at [50kHz] during manual tuning. [Regional]*2 Switches whether the area code is checked [On] [Off] during the Auto PI search. [Alternative FREQ]*2 Allow the unit to retune to a different frequency [On] [Off]...
- Page 83 *3 AVIC-Z930DAB/AVIC-Z830DAB/AVIC-Z730DAB/AVIC-Z7330DAB *4 AVIC-Z630BT/AVIC-Z6330BT - 83 -...
-
Page 84: Disc
Disc Inserting and ejecting a disc You can play a normal music CD, Video-CD, or DVD-Video using the built-in drive of this product. WARNING Z930DAB Z830DAB Keep hands and fingers clear of this product when opening, closing, or adjusting the LCD panel. Be especially cautious of children’s hands and fingers. -
Page 85: Basic Operation
Press Basic operation TIPS • By pressing then touch , you can also skip files/chapters forwards or backwards. • By pressing then touch and hold , you can also perform fast reverse or fast forwards. • If a Video-CD with PBC (playback control) On is being played, appears. - Page 86 Audio source screen 2 Sets a repeat play for the current disc/the current track. Plays or does not play tracks in random order. Video source CAUTION For safety reasons, video images cannot be viewed while your vehicle is in motion. To view video images, stop in a safe place and apply the handbrake.
- Page 87 Performs fast reverse or fast forwards. Touch again to change the playback speed. Stops playback. Performs frame-by-frame playback. Performs slow-motion playback. Each time you touch , it changes the speed in four steps in the following order: 1/16 -> 1/8 -> 1/4 -> 1/2 Displays the DVD menu.
- Page 88 Video source screen 2 Selects the audio output from [L+R], [Left], [Right], [Mix]. This function is available for Video-CDs and DVDs recorded with LPCM audio. Changes the viewing angle (Multi-angle). This function is available for DVDs featuring multi-angle recordings. Sets a repeat play for all files/the current chapter/the current title. Displays the DVD menu keypad.
-
Page 89: Compressed Files
Compressed files SD function is only available for AVIC-Z930DAB/AVIC-Z830DAB. Inserting and ejecting media You can play compressed audio, compressed video, or still image files stored in a disc or an external storage device. WARNING Z930DAB Z830DAB Keep hands and fingers clear of this product when opening, closing, or adjusting the LCD panel. Be especially cautious of children’s hands and fingers. - Page 90 Press Touch to open the LCD panel. Remove the disc and press Z730DAB Z630BT Z7330DAB Z6330BT Press Inserting an SD memory card Z930DAB Z830DAB Press Touch to open the LCD panel. Insert an SD memory card into the SD card slot. Press NOTES •...
-
Page 91: Starting Procedure
• Connection via a USB hub is not possible. • A USB cable is required for connection. USB cable USB storage device Unplugging a USB storage device Pull out the USB storage device from the USB cable. NOTES • Check that no data is being accessed before pulling out the USB storage device. •... -
Page 92: Basic Operation
NOTES • For details on inserting SD card see on Inserting an SD memory card (page 90). • For details on plugging USB storage device, see on Plugging a USB storage device (page 90). Basic operation TIPS • By pressing then touch , you can also skip files/chapters forwards or backwards. - Page 93 Switches the current music information display. Selects a file from the list. Touch a file on the list to playback. Touching a folder on the list shows its contents. You can play a file on the list by touching it. NOTE When you play compressed audio files stored in an external storage device (USB, SD), you can search for a file using Music Browse (page 93).
- Page 94 Touch Touch the [Tag] tab. Touch the desired category to display the file list. Touch the item. Refine the item until the desired song title or file name is displayed on the list. Touch the desired song title or file name to play back. If the selection made with Music Browse has been cancelled, you can switch to Music Browse mode again by touching the [Tag] tab on the file/folder list screen and touching the desired track.
- Page 95 Performs fast reverse or fast forwards. Touch again to change the playback speed. Stops playback. Performs frame-by-frame playback. Performs slow-motion playback. Sets a repeat play range for all files/the current folder/the current file. Switches the audio/subtitle language. Selects a file from the list. Touch a file on the list to playback.
- Page 96 Still image screen Hides the touch panel keys. To display the keys again, touch anywhere on the screen. Switches between playback and pause. Switches the following media file types. [Music]: Compressed audio files [Video]: Compressed video files [Photo]: Image files Skips files forwards or backwards.
-
Page 97: Ipod
iPod Connecting your iPod When connecting an iPod to this product, the settings are automatically configured according to the device to be connected. NOTES • Depending on the generation or version of the iPod, some functions may not be available. •... - Page 98 Audio source Audio source screen 1 Displays the link search screen. Select a song from the list related to the song currently playing. If you touch the artwork, the list of songs in the album is displayed. NOTE This function is not available while playing Apple Music Radio. Switches between playback and pause.
- Page 99 Audio source screen 2 Changes the audiobook speed. Normal—Fast—Slow NOTE The audiobook speed icon may not change depending on the connected iPod/ iPhone. Sets a repeat play range for all in the selected list/the current song. Plays songs within the selected list/album randomly. Apple Music®...
- Page 100 Apple Music Radio screen Switches between playback and pause. Displays the pop-up menu for Apple Music Radio. • Touch [Play More Like This] to play back songs similar to the current song. • Touch [Play Less Like This] to set it not to play back the current song again. •...
-
Page 101: Weblink
Using WebLink Important • Pioneer is not liable for any issues that may arise from incorrect or flawed app-based content. • The content and functionality of the supported applications are the responsibility of the App providers. • In WebLink, functionality through the product is limited while driving, with available functions determined by the App providers. - Page 102 WebLink Displays the main menu of the WebLink source screen. For iPhone users Connect your iPhone to this product via USB. Refer to the Installation Manual. Press Touch Touch [WebLink]. Touch desired icon in the tab. The WebLink app is launched. For smartphone (Android) users NOTE The video playback capability depends on the connected Android device.
-
Page 103: Using The Audio Mix Function
Using the audio mix function You can output the audio mixing AV source and an application for iPhone or smartphone when WebLink is used. NOTE Depending on the application or AV source, this function may not be available. Start up the WebLink. Press VOL (+/-). -
Page 104: Apple Carplay
• Apple CarPlay allows access to applications other than those listed that are subject to limitations while driving. • PIONEER IS NOT RESPONSIBLE AND DISCLAIMS LIABILITY FOR THIRD PARTY (NON-PIONEER) APPS AND CONTENT, INCLUDING WITHOUT LIMITATION ANY INACCURACIES OR INCOMPLETE INFORMATION. -
Page 105: Starting Procedure
Touch [Smartphone-related Settings]. Touch [Driving Position]. [Left] Select for a left-hand drive vehicle. [Right] Select for a right-hand drive vehicle. Starting procedure When connecting an iPhone to this product, settings are required according to the connected device. For details, refer to Setup for iPod/iPhone or smartphone (page 74). Wired connection Connect an Apple CarPlay compatible device to this product via USB. -
Page 106: Adjusting The Volume
The unit configures the connection then start the application. You can also start Apple CarPlay with a desired device by opening the Bluetooth or Apple CarPlay setting menu while displaying the device search or device list screen. You can use Siri function by pressing once Apple CarPlay is activated. -
Page 107: Android Auto
• Android Auto allows access to applications other than those listed that are subject to limitations while driving. • PIONEER IS NOT RESPONSIBLE AND DISCLAIMS LIABILITY FOR THIRD PARTY (NON-PIONEER) APPS AND CONTENT, INCLUDING WITHOUT LIMITATION ANY INACCURACIES OR INCOMPLETE INFORMATION. -
Page 108: Starting Procedure
Touch [Smartphone-related Settings]. Touch [Driving Position]. [Left] Select for a left-hand drive vehicle. [Right] Select for a right-hand drive vehicle. Starting procedure When connecting a smartphone to this product, settings are required according to the connected device. For details, refer to Setup for iPod/iPhone or smartphone (page 74). Wired connection Connect an Android Auto™... -
Page 109: Adjusting The Volume
Touch a desired device on the screen. The unit configures the connection then start the application. You can use voice recognition function by pressing once Android Auto is activated. NOTES • For details on USB connection, refer to the Installation Manual. •... - Page 110 NOTE Android Auto will launch automatically only when an Android Auto compatible device is correctly connected to this product. Press Touch then Touch [Smartphone-related Settings]. Touch [Android Auto Auto-launch] to switch [On] or [Off]. - 110 -...
-
Page 111: Hdmi
HDMI Z930DAB CAUTION For safety reasons, video images cannot be viewed while your vehicle is in motion. To view video images, stop in a safe place and apply the handbrake. NOTE A High Speed HDMI® Cable (sold separately) is required for connection. For details, refer to the Installation Manual. -
Page 112: Aux
You can display the video image output by the device connected to video input. CAUTION For safety reasons, video images cannot be viewed while your vehicle is in motion. To view video images, stop in a safe place and apply the handbrake. NOTES •... -
Page 113: Basic Operation
Basic operation AUX screen Hides the touch panel keys. To display the keys again, touch anywhere on the screen. You can set the screen size for the video image (page 144). Switches between the video input and audio input. - 113 -... -
Page 114: Av Input
AV input You can display the video image output by the device connected or the camera to video input. For details, refer to the Installation Manual. CAUTION For safety reasons, video images cannot be viewed while your vehicle is in motion. To view video images, stop in a safe place and apply the handbrake. -
Page 115: Basic Operation
Basic operation AV source screen Hides the touch panel keys. To display the keys again, touch anywhere on the screen. - 115 -... -
Page 116: Wireless Mirroring
• When Apple CarPlay or Android Auto with wireless connection is activated, the connection switching confirmation screen appears (Android Auto function is only available for AVIC- Z930DAB/AVIC-Z830DAB). Touch [OK] to proceed to Wireless Mirroring. • When the Wi-Fi connection is set to [OFF], the connection confirmation screen appears. Touch [Start] to make the connection. -
Page 117: Basic Operation
Basic operation Wireless Mirroring screen (Example) Displays Full screen. [Disconnect] Disconnects Wireless Mirroring. NOTES • The screen shown in the example may differ from the connected mobile device. • If the Android device is not ready for Miracast UIBC, you cannot perform touch operation. - 117 -... -
Page 118: Vehicle Equipment Information
Vehicle equipment information Z930DAB Z830DAB Z730DAB Z7330DAB Using the Vehicle Bus adapter By connecting the optional Vehicle Bus adapter, you can display the operation status of the vehicle’s parking sensor function and climate control panel on the screen. Important • For information on installing the Vehicle Bus adapter, see the operating manual of the Vehicle Bus adapter. -
Page 119: Displaying Obstacle Detection Information
A/C Control screen Displaying obstacle detection information CAUTION This function is intended solely to assist the driver’s vision. It does not detect all dangers and obstacles and is not a substitute for your attentiveness, judgement, and care while parking your vehicle. NOTES •... -
Page 120: Settings
Settings You can adjust various settings in the main menu. Displaying the setting screen Press Touch Touch one of the following categories, then select the options. System settings (page 120) Theme settings (page 130) Audio settings (page 133) Video settings (page 139) Bluetooth settings (page 61) System settings The menu items vary according to the source. - Page 121 * AVIC-Z930DAB/AVIC-Z830DAB/AVIC-Z730DAB/AVIC-Z7330DAB [Smartphone-related Settings] Menu Item Description [Smartphone Setup] Setting the connected mobile device (page 74). [Driving Position] Setting the driving position. [Right] [Left] • Apple CarPlay (page 104) • Android Auto™ (page 107) [Android Auto Auto- Select [On] to automatically launch Android Auto when an launch]* Android device is connected to the unit.
- Page 122 Touch this key to switch the display between the rear view image and 2nd camera image. CAUTION Pioneer recommends the use of a camera which outputs mirror reversed images, otherwise the screen image may appear reversed. • Immediately verify whether the display changes to the rear view camera image when the gearstick is moved to REVERSE (R) from another position.
- Page 123 Menu Item Description [Ground] The polarity of the connected lead is negative. NOTE If the camera polarity setting is wrong, or wrong camera setting is made, press and hold to release the rear view camera screen and then change the camera polarity setting to [Battery]. [Parking Assist Guide] You can set whether to display the parking assist [On] [Off]...
- Page 124 [Wi-Fi Settings] Menu Item Description [Wi-Fi Settings] (page 69) [Safe Mode] Menu Item Description [Safe Mode] Set the safe mode that regulate operating some functions [On] [Off] only when you stop your vehicle in a safe place and apply the handbrake. [Demo Mode] Menu Item Description...
- Page 125 CAUTION Do not turn off the engine while restoring the settings. NOTE This setting is available only when you stop your vehicle in a safe place and apply the handbrake. Menu Item Description [All Settings] Almost all settings or recorded content returns to the default.
- Page 126 Menu Item Description [Touch Panel Calibration] Touch two corners of the screen along the arrows then touch the centres of the two [+] marks at the same time twice. Press The adjustment results are saved. Press once again. Proceed to 16-point adjustment. Gently touch the centre of the [+] mark displayed on the screen.
- Page 127 Menu Item Description [Dimmer Duration] Adjust the time that the dimmer is turned on or off by dragging the cursors or touching You can use this function when [Dimmer Trigger] is set to [Time]. TIPS • Each touch of moves the cursor backwards or forwards in the 15 minute width.
- Page 128 * With some pictures, you cannot adjust [Hue] and [Colour]. NOTES • When you touch [Rear View] or [2nd Camera], the mode changes to the selected camera mode. By touching [Source], [NAV], or [Apps], you can return to the selected mode. •...
- Page 129 Menu Item Description [Firmware Update] CAUTION • The external storage device for updating must contain only the correct update file. • Never turn this product off, eject the SD memory card or disconnect the USB storage device while the firmware is being updated.
-
Page 130: Theme Settings
[High] or [Low]. The signal displayed varies depending on the vehicle. [Vehicle Bus]* Displays the status of the optional Vehicle Bus adapter. * AVIC-Z930DAB/AVIC-Z830DAB/AVIC-Z730DAB/AVIC-Z7330DAB Theme settings CAUTION Do not turn off the engine while importing an image from the external storage device. - Page 131 Menu Item Description [Background] Select the wall paper from the preset items in this product [Home] [AV] or original pictures via the external device such as USB storage device and SD memory card. The wall paper can be set from selections for the top menu screen and AV operation screen.
- Page 132 Menu Item Description [Splash Screen] Select the splash screen from the preinstalled image in this product or external devices such as USB storage devices and SD memory cards. Preset Images Selects the desired preset splash screen image. (custom)* Displays the splash screen image imported from the external storage device.
-
Page 133: Audio Settings
[Splash Screen] [Select All] Touch [Export]. ▶Importing Theme settings Set the external storage device (page 89). A message confirming whether to import the stored setting data appears. Touch [Import]. Audio settings The menu items vary according to the source. Some of the menu items become unavailable when the volume is set to mute or the source is off. - Page 134 Menu Item Description [ATT] The volume becomes 20 dB lower than the current volume. [Mute] The volume becomes 0. [Off] The volume does not change. [Source Level Adjuster] Adjust the volume level of each source to prevent radical [-4] to [+4] changes in volume when switching between sources other than FM.
- Page 135 Menu Item Description [Listening Position]*1 Select a listening position that you want to make as the [Off] [Front Left] [Front centre of sound effects. Right] [Front] [All] [Time Alignment] Select or customise the time alignment settings to reflect [On] [Off] the distance between the listener’s position and each Listening position*1*2 speaker.
- Page 136 Menu Item Description [Rear Speaker Output] Select the rear speaker output. [Rear] [Subwoofer] NOTES • This function is available when [Standard Mode] is selected as the speaker mode. • If [Subwoofer] is selected, the rear speaker adjustment is not available in [Speaker Level], [Time Alignment] and [Crossover]. [Loudness] Compensates for deficiencies in the low-frequency and [Off] [Low] [Mid] [High]...
- Page 137 CAUTION • Thoroughly check the conditions before performing Auto EQ as the speakers may be damaged if this is performed under the following conditions: – When the speakers are incorrectly connected. (For example, when a rear speaker is connected as a subwoofer output.) –...
- Page 138 Stop the vehicle in a quiet place, close all doors, windows, and sun roof, and then turn the engine off. If the engine is left running, engine noise may prevent correct Auto EQ. NOTE If driving restrictions are detected during measurement, the measurement is cancelled. Fix the microphone for acoustical measurement (sold separately) in the centre of the headrest of the driver’s seat, facing forwards.
-
Page 139: Video Settings
When Auto EQ is completed, a message is displayed. NOTE The measurement time varies depending on the type of vehicle. To stop the measurement, touch [Stop]. Store the microphone carefully in the glove box or another safe place. If the microphone is subjected to direct sunlight for an extended period, high temperatures may cause distortion, colour change, or malfunction. - Page 140 Menu Item Description [Subtitle Language]*1*2 Set a subtitle language preference. When you select [Others], a language code input screen is shown. Input the four-digit code of the desired language then touch [Audio Language]*1*2 Set an audio language preference. When you select [Others], a language code input screen is shown.
- Page 141 Menu Item Description [Parental] Set restrictions so that children cannot watch violent or adult-oriented scenes. You can set the parental lock level in steps as desired. Touch [0] to [9] to input a four-digit code number. Touch Registers the code number, and you can now set the level.
- Page 142 Menu Item Description [DVD Auto Play] Set to display the DVD menu automatically and start [On] [Off] playback from the first chapter of the first title when a DVD disc with a DVD menu is inserted. NOTE Some DVDs may not operate properly. If this function is not fully operable, turn this function off and start playback.
-
Page 143: Favourite Menu
Favourite menu Registering your favourite menu items in shortcuts allows you to quickly jump to the registered menu screen by a simple touch on the [Favorites] screen. NOTE Up to 12 menu items can be registered in the favourite menu. Creating a shortcut Press then touch... -
Page 144: Other Functions
Other functions Setting the time and date Touch the current time on the screen. Touch one of the items to adjust. • You can change the time display format to [12hour] or [24hour]. • You can change the order of date display format: Day-month, Month-day. Changing the wide screen mode You can set the screen mode for AV screen and image files. -
Page 145: Selecting The Video For The Rear Display
• Video files on the external storage device are not available as a source for the rear display when [Apple CarPlay] is activated. • Video files on the external storage device are not available as a source for the rear display when [Android Auto] is activated in [Smartphone Setup].* * AVIC-Z930DAB/AVIC-Z830DAB Press then touch Touch [Rear]. -
Page 146: Setting The Anti-Theft Function
You can set a password for this product. If the back-up lead is cut after the password is set, this product prompts for the password at the time of next boot up. Important If you forgot your password, contact the nearest authorised Pioneer Service Station. Setting the password Press... -
Page 147: Restoring This Product To The Default Settings
Deleting the password The current password and password hint can be deleted. Press Touch then Touch 1, followed by 2, and then touch 3 (page 146). Touch [Clear Password]. Touch [Yes]. Touch [OK]. Enter the current password. Touch [Go]. A message indicating that the security setting is cancelled appears. Restoring this product to the default settings You can restore settings or recorded content to the default settings from [Restore Settings] in the [System] menu (page 124). -
Page 148: Appendix
– Connect the handbrake lead correctly, here, contact your dealer or the nearest and apply the handbrake. authorised Pioneer service facility. → The handbrake interlock is activated. – Park your vehicle in a safe place and Common problems apply the handbrake. - Page 149 – Since this product is compatible with The icon is displayed, and operation is the copy guard analogue copy protect impossible. system, the picture may suffer from → The operation is not compatible with horizontal stripes or other the video configuration. imperfections when a disc with that –...
-
Page 150: Error Messages
– Stop the vehicle in a safe place and record the error message and contact your check the screen on the smartphone. dealer or your nearest Pioneer service centre. The screen is displayed, but operation does not work at all. - Page 151 → GPS reception is lost. correctly. – Check the aerial connection. If the message fails to disappear even after DAB tuner the engine is switched off/on, contact your dealer or an authorised Pioneer Z930DAB Z830DAB Z730DAB Z7330DAB Station for assistance. Check Antenna GPS antenna problem detected.
- Page 152 → This type of file cannot be played on this product. – Select a file that can be played. SD function is only available for AVIC- Skipped Z930DAB/AVIC-Z830DAB. → The inserted disc contains DRM Error-02-9X/-DX protected files. → Communication failed.
- Page 153 Incompatible USB USB1 was disconnected for device → The connected USB storage device is protection. Do not re-insert this USB not supported by this product. memory into the unit. Press reset to – Disconnect your device and replace it restart USB memory. (USB2 was with a compatible USB storage device.
-
Page 154: Positioning Technology
– Turn the ignition switch to OFF and Pioneer Service Station. → The time set in this product is not then to ON. If the error message is still displayed after correct. - Page 155 Pioneer dealer or an ground’s surface. installation professional. The accuracy of the GPS information • Some types of vehicles may not output a depends on how good the reception is.
-
Page 156: Handling Large Errors
With map matching In this case, it is impossible for the system to use GPS positioning. In tunnels or enclosed parking garages Under elevated roads or similar structures Without map matching When driving among high buildings Handling large errors Positioning errors are kept to a minimum by combining GPS, dead reckoning and map matching. - Page 157 • Do not cover the GPS aerial with spray If there is another road very nearby, paint or car wax, because this may block such as in the case of an elevated the reception of GPS signals. Snow motorway. buildup can also degrade the signals, so keep the aerial clear.
- Page 158 If the road has a series of hairpin If you are driving on a long, straight bends. road or a gently curving road. If you are on a steep mountain road with many height changes. If there is a loop or similar road configuration.
- Page 159 If your vehicle is turned on a turntable If trees or other obstacles block the or similar structure. GPS signals for a considerable period. If you drive very slowly, or in a start- and-stop manner, as in a traffic jam. If your vehicle’s wheels spin, such as on a rough track or in snow.
-
Page 160: Route Setting Information
When you drive around a roundabout. • The calculated route is one example of the route to your destination decided by the navigation system while taking the type of streets or traffic regulations into account. It is not necessarily an optimum route. -
Page 161: Handling And Care Of Discs
Route highlighting • To clean a disc, wipe it with a soft cloth, moving outward from the centre. • Once set, the route is highlighted in • Condensation may temporarily impair bright colour on the map. the built-in drive’s performance. •... -
Page 162: Detailed Information For Playable Media
Detailed information for playable media AVCHD recorded discs This unit is not compatible with discs recorded in AVCHD (Advanced Video Compatibility Codec High Definition) format. Do not insert in AVCHD discs. If inserted, the disc Common notes about disc may not be ejected. compatibility •... - Page 163 SD memory card will be SD function is only available for AVIC- deleted when the card is formatted. Back Z930DAB/AVIC-Z830DAB. up any needed data beforehand as • Do not leave the external storage device necessary. A dedicated formatter for SD...
- Page 164 Specifications (page 173). SD function is only available for AVIC- • For more details about DivX, visit the Z930DAB/AVIC-Z830DAB. following site: http://www.divx.com/ General DivX subtitle files • Files may not be played back properly •...
- Page 165 album names and other text information DVD-R/-R SL/-R DL/DVD-RW may not be correctly displayed. CODEC FORMAT MP3, WMA, • There may be a slight delay when starting AAC, MPEG2, playback of audio files encoded with MPEG4 image data. FILE SYSTEM ISO 9660 level •...
- Page 166 WMA compatibility DivX compatibility • This product is not compatible with the • This product is not compatible with the following: Windows Media™ Audio 9 following: DivX Ultra format, DivX files Professional, Lossless, Voice without video data, DivX files encoded with LPCM (Linear PCM) audio codec SAMPLING FREQUENCY USB: 32 kHz to...
-
Page 167: Bluetooth
H.263 word mark and logos are Maximum resolution 1 920 x 1 080 registered trademarks owned by Bluetooth SIG, Inc. and any use of such marks by PIONEER Maximum frame rate 30 fps CORPORATION is under license. Other .mkv trademarks and trade names are those of their respective owners. -
Page 168: Wma/Wmv
INCIDENTAL, SPECIAL, EXEMPLARY, OR WMA/WMV CONSEQUENTIAL DAMAGES (INCLUDING, BUT NOT LIMITED TO, PROCUREMENT OF Windows Media is either a registered trademark SUBSTITUTE GOODS OR SERVICES; LOSS OF or trademark of Microsoft Corporation in the USE, DATA, OR PROFITS; OR BUSINESS United States and/or other countries. -
Page 169: Weblink
App Store is a service mark of Apple Inc. devices • Pioneer accepts no responsibility for data iOS is a trademark on which Cisco holds lost from an iPod, even if that data is lost the trademark right in the US and certain while using this product. -
Page 170: Using App-Based Connected Content
Content application(s) or service by its provider. • Pioneer is not liable for any issues that Android Auto function is only available for may arise from incorrect or flawed app- AVIC-Z930DAB/AVIC-Z830DAB. -
Page 171: Hdmi
The terms HDMI and HDMI High-Definition for the functions that this product is Multimedia Interface, and the HDMI Logo equipped with, please visit are trademarks or registered trademarks of http://www.oss-pioneer.com/car/ HDMI Licensing Administrator, Inc. in the multimedia/ United States and other countries. Map coverage... -
Page 172: Using The Lcd Screen Correctly
LCD visible. In that case, please consult your screen, and cool air from the cooler may dealer or the nearest authorised Pioneer cause moisture to form inside this Service Station. product, resulting in possible damage. - Page 173 (AVIC-Z830DAB) Micro strip flat aerial/right-handed Chassis DIN: helical polarization 178 mm × 100 mm × 158 mm Aerial cable: Nose: 3.55 m 188 mm × 118 mm × 23 mm Dimensions (W × H × D): Chassis D: 33 mm × 14.7 mm × 36 mm 178 mm ×...
- Page 174 500 Hz/800 Hz/1.25 kHz/2 kHz/3.15 LPF (Mid): kHz/5 kHz/8 kHz/12.5 kHz Frequency: Gain: ±12 dB (2 dB/step) 1.25 kHz/1.6 kHz/2 kHz/2.5 kHz/3.15 <Standard Mode> kHz/4 kHz/5 kHz/6.3 kHz/8 kHz/10 kHz/ HPF: 12.5 kHz Frequency: Slope: 25 Hz/31.5 Hz/40 Hz/50 Hz/63 Hz/80 -6 dB/oct, -12 dB/oct, -18 dB/oct, -24 Hz/100 Hz/125 Hz/160 Hz/200 Hz/250 dB/oct, OFF...
- Page 175 MPEG4 video decoding format: MPEG1: Simple Profile, Advanced Simple Profile .mpg, .mpeg, .dat (except GMC) MPEG-2 PS: .mpg, .mpeg (AVIC-Z930DAB/AVIC-Z830DAB) MPEG4 part 2 (visual), MS-MPEG4 Ver. Compatible physical format: Version 2.0 .avi File system: FAT16, FAT32, NTFS USB standard spec: <SD audio>...
- Page 176 Usable sensitivity: 30 μV (S/N: 20 dB) Signal-to-noise ratio: 62 dB (IEC-A network) DAB tuner (AVIC-Z930DAB/AVIC-Z830DAB/AVIC- Z730DAB/AVIC-Z7330DAB) Frequency range (Band III): 174.928 MHz to 239.200 MHz (5A to 13F) Frequency range (L Band): 1 452.960 MHz to 1 490.624 MHz (LA to Usable sensitivity: –100 dBm...
- Page 177 Visit www.pioneer-car.eu/uk/ (or www.pioneer-car.eu/eur/) to register your product. Visitez www.pioneer-car.eu/fr/fr (ou www.pioneer-car.eu/eur/) pour enregistrer votre appareil. Si prega di visitare iI sito www.pioneer-car.eu/it/it (o www.pioneer-car.eu/eur/) per registrare iI prodotto. Visite www.pioneer-car.eu/es/es (o www.pioneer-car.eu/eur/) para registrar su producto. Zum Registrieren Ihres Produktes besuchen Sie bitte www.pioneer-car.eu/de/de (oder www.pioneer-car.eu/eur/).
Need help?
Do you have a question about the AVIC-Z830DAB and is the answer not in the manual?
Questions and answers