Table of Contents
Advertisement
Quick Links
Contents
About these operating instructions ............................................................... 5
Explanation of symbols ......................................................................................5
Safety information .......................................................................................... 7
Never carry out repairs yourself. .......................................................................9
Package contents ............................................................................................ 9
Device parts ....................................................................................................10
Supplied screws.............................................................................................. 12
Exploded view ................................................................................................ 13
Assembly ........................................................................................................14
Supplied tools .....................................................................................................14
Step 1 ....................................................................................................................15
Step 2 ................................................................................................................... 16
Step 3 ....................................................................................................................17
Step 4 .................................................................................................................. 18
Step 5................................................................................................................... 19
Step 6 ..................................................................................................................20
Level out uneven fl oors ................................................................................ 20
LED lighting..................................................................................................... 21
Cleaning and care ...........................................................................................22
Technical specifi cations ..................................................................................22
Declaration of conformity ..............................................................................22
Trademark information .................................................................................... 22
Disposal ..........................................................................................................23
Service information ........................................................................................23
Privacy statement ......................................................................................... 24
Legal Notice ................................................................................................... 24
Warranty Details .............................................................................................25
Repair and Refurbished Goods or Parts Notice ............................................ 26
Contents
3
Advertisement
Table of Contents

Subscribe to Our Youtube Channel
Related Manuals for Medion ERAZER MD89100

Summary of Contents for Medion ERAZER MD89100
-
Page 1: Table Of Contents
Contents Contents About these operating instructions ............... 5 Explanation of symbols ..................5 Safety information ..................7 Never carry out repairs yourself................9 Package contents .................... 9 Device parts ....................10 Supplied screws....................12 Exploded view ....................13 Assembly ......................14 Supplied tools .....................14 Step 1 ........................15 Step 2 ........................ -
Page 3: About These Operating Instructions
About these operating instructions About these operating instructions Thank you for choosing our product. We hope you enjoy using it. Read the safety instructions carefully before using the device for the fi rst time. Note the warnings on the device and in the operating instructions. Always keep the operating instructions close to hand. - Page 4 About these operating instructions Products that feature this symbol meet the requirements of the EC directives (see section ‘Declaration of conformity’) Take note of the information in the user manual. The Australian Regulatory Compliance Mark (RCM) is a single compliance mark used by suppliers after establishing compliance with all applicable regulations, including EMC, telecoms, radiocoms, electromagnetic radiation (EMR) and electrical safety.
-
Page 5: Safety Information
Safety information Proper use The device is only intended for private use and not for industrial/ commercial use. Please note that no liability will be accepted if the device is used for an improper purpose: • The gaming desk is designed for a maximum load of 80 kg. •... - Page 6 Safety information − In order to ensure suffi cient leg room, do not place the gaming desk directly against a wall. − The rear side of the gaming desk with the straight tabletop is not suitable for sitting at, as there is no leg room. Only sit at the side of the tabletop with the concave curve.
-
Page 7: Never Carry Out Repairs Yourself
Package contents − It may overload the USB output, please check the USB output of your PC or notebook before connecting the USB lighting. Never carry out repairs yourself. − Never under any circumstances try to open or repair the LED lighting yourself. -
Page 8: Device Parts
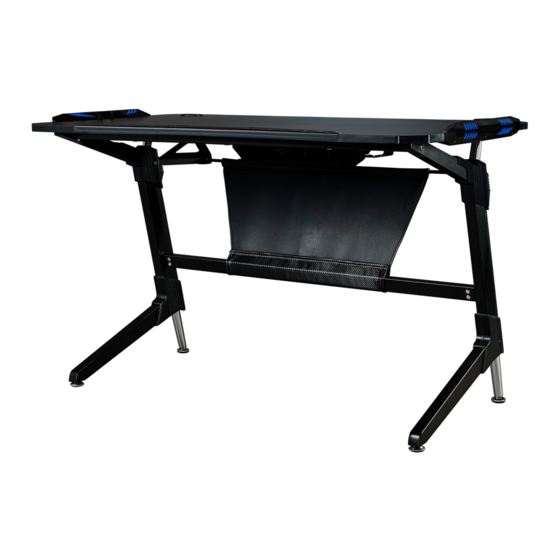
Device parts Device parts 1x tabletop 1x left table leg 1x right table leg 1x cross member for table legs 1x cross member for tabletop (front) 1x cross member for tabletop (rear) 1x banner bracket... - Page 9 Device parts 2x cover for lower table leg (inside, pre-assembled) 2x cover for lower table leg (outside, pre-assembled) 1x left metal connector 1x right metal connector 2x cover for lower table leg (inside, pre-assembled) 2x cover for lower table leg (outside, pre-assembled)
-
Page 10: Supplied Screws
Supplied screws 1x storage tray 2x storage tray brackets 1x headphone holder 1x LED lighting left 1x LED lighting right 1x banner 4x cable clips 4x cable duct covers 2x cable grommets Supplied screws M 6 × 50 M 6 × 14 M 6 ×... -
Page 11: Exploded View
Exploded view Exploded view Cable ducts for LED lighting on (1x on left table leg and 1x on right table leg) -
Page 12: Assembly
Assembly Assembly The gaming desk should be assembled by at least two people, following the steps listed below. − Ensure you have suffi cient space to assemble the gaming desk. − Put a blanket or other covering on the fl oor during assembly to avoid scratching the gaming desk. -
Page 13: Step 1
Assembly Step 1 − Screw the table legs to the cross members for the tabletop shown. Use the M 6 × 50 screws for this. − Now screw the cross member to the table legs as shown. Use the M 6 × 20 screws for this. -
Page 14: Step 2
Assembly Step 2 − Lay the tabletop face down on the fl oor and screw the legs that were assem- bled in Step 1 to the tabletop. Use the M 6 × 35 screws for this. − Use the M 6 × 14 screws to screw the tray brackets into the two pre- drilled holes on the underside of the tabletop. -
Page 15: Step 3
Assembly Step 3 − Now mount the metal connectors so that the opening for the banner bracket points towards the back of the table. Use the M 6 × 14 screws for this. − Route the cable for the LED lighting through the corresponding openings on both table legs (fi... -
Page 16: Step 5
Assembly Step 4 − Place the table carefully onto the table legs. − Route the cable for the LED lighting through the openings on both sides of the table (fi g. 5; B). − Fasten the cable to the cable clip (fi... - Page 17 Assembly Step 5 − Route the cable for the LED lighting through the cable ducts on both sides of the table and place the cable duct covers onto the recesses. − Connect the L1 – L4 plugs to each other (fi g. 6; D). −...
-
Page 18: Step 6
Level out uneven fl oors Step 6 − Place the 2 cable grommets on the corresponding holes in the tabletop as shown in fi g. 7. − Insert the banner bracket into the openings provided on the metal connec- tors −... -
Page 19: Led Lighting
LED lighting LED lighting − Press the button on the right LED lighting to turn on the LED lighting (see fi g. 8). − Select a light setting according to the following table by pressing the button repeatedly: Number of presses Light mode Press once Solid white light... -
Page 20: Cleaning And Care
25 °C Protection standard: IP20 Declaration of conformity MEDION AG hereby declares that the product MD 89100 conforms to all rel- evant Australian requirements. Trademark information The USB™ word mark and logos are registered trademarks of USB Implementers Fo- rum, Inc. and are used by the manufacturer under licence. -
Page 21: Disposal
• In our Service-Community, you can meet other users, as well as our staff, and you can exchange your experiences and pass on your knowledge there. You will fi nd our Service-Community at community.medion.com. • Alternatively, use our contact form at www.medion.com/contact. -
Page 22: Privacy Statement
Privacy statement Dear customer, We wish to inform you that we, MEDION AG, Am Zehnthof 77, D-45307 Essen, Germany process your personal data as a data controller. For matters regarding data protection, we are supported by our company data protection offi cer who can be contacted at MEDION AG, Datenschutz, Am Zehnthof 77, D-45307 Essen;... -
Page 23: Warranty Details
You are also entitled to have the goods repaired or replaced if the goods fail to be of acceptable quality and the failure does not amount to a major failure. AFTER SALES SUPPORT 11/2021 YEAR WARRANTY 1300 884 987 australia@medion.com... -
Page 24: Repair And Refurbished Goods Or Parts Notice
If at any time you feel your repair is being handled unsatisfactorily, you may escalate your complaint. Please telephone us on 1300 884 987 or write to us at: MEDION Australia Pty Ltd Chatswood, NSW 2067; Australia Hotline: 1300 884 987 (Opening hours: Mon - Fri 08:30AM to 06:00PM EST) Internet www.medion.com.au;...
Need help?
Do you have a question about the ERAZER MD89100 and is the answer not in the manual?
Questions and answers