
Related Manuals for Whirlpool AWZ8CDS/PRO


Summary of Contents for Whirlpool AWZ8CDS/PRO
- Page 1 Health & Safety, Use & Care and Installation guide Condenser Dryer AWZ8CDS/PRO www.whirlpool.eu/register...
- Page 2 ORIGINAL INSTRUCTIONS ENGLISH . . . . . . . . . . . . . . . . . . . . . . . . . . . . . . . . . . . . . . . 3...
-
Page 3: Table Of Contents
ENGLISH HEALTH & SAFETY, USE & CARE and INSTALLATION GUIDES THANK YOU FOR BUYING A WHIRLPOOL PRODUCT. In order to receive a more complete assistance, please register your appliance on www.whirlpool.eu/register Index Health and Safety guide . . . . . . . . . . . . . . . . . . . . . . . . . . . . . . . . . . . . . . . . . . . . . . . . . . . . . . . . . . . . . . . . . . . . . . . . . . . . . 4 Use and Care guide . -
Page 4: Health And Safety Guide
Health and Safety guide SAFETY INSTRUCTIONS IMPORTANT TO BE READ AND OBSERVED Before using the dryer carefully following instructions . pads should not be dried in the read, Health and Safety and Failure to observe these tumble dryer . Use and Care guides . instructions may lead to risks . - Page 5 fixed on the washing machine children, during and after the the back towards a wall, to by using an appropriate installation of the dryer . avoid injuries by touching the stacking kit, which can be rear panel, which can become provided through our After- Use protective gloves to hot during the drying process .
- Page 6 a ventilation grid (minimum damaged or dropped . Do not he has access that the plug 45 cm x 8 cm), in the rear part immerse the mains cord or remains removed . of the worktop under which plug in water . Keep the cord SOUND LEVEL the dryer is installed .
- Page 7 SAFEGUARDING THE ENVIRONMENT DISPOSAL OF PACKAGING store where you purchase the requires less energy . You will MATERIALS dryer . save time and energy when running your drying cycle . The packaging material is This dryer is marked in 100% recyclable and is marked compliance with European Always select the correct with the recycle symbol:...
-
Page 8: Use And Care Guide
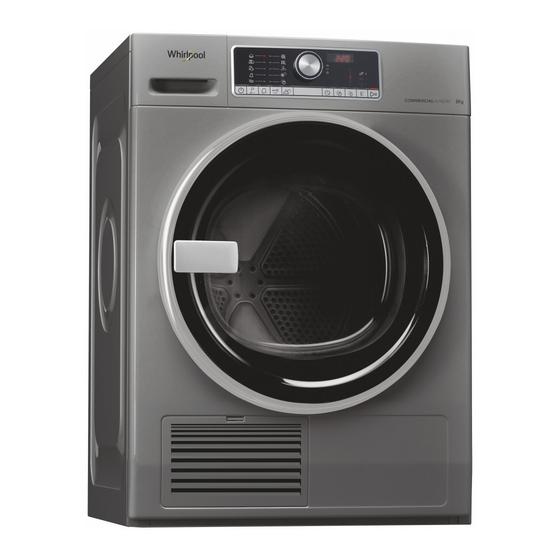
Use and Care guide PRODUCT DESCRIPTION APPLIANCE 1. Worktop 2. Control panel 3. Water tank 4. Door 5. Door handle 6. Door filter (behind door) 7. Bottom filter (behind flap) 8. Adjustable feet (4) CONTROL PANEL 1. On/Off button (Reset if long pressed) 2. - Page 9 REVERSING THE DOOR If you needed the door stop of the dryers can be reversed . Download from the Whirlpool website http://docs . w hirlpool . e u DRUM LIGHT (if available) • During programme selection: the light goes on for •...
-
Page 10: How To Use The Appliance
HOW TO USE THE APPLIANCE FIRST TIME USE CHECK WATER TANK Make sure that the water tank is correctly inserted CHECK DRAIN HOSE Make sure that the drain hose on the back of the dryer is fixed, either to the dryer’s water tank or to your domestic sewage system (see INSTALLATION GUIDE) . - Page 11 DAILY USE Make sure that no lighters Make sure that the WARNING or matches are left in laundry is not soaked with clothing. flammable liquids. LOAD THE LAUNDRY you through setting your programme in the Respect your items’ care labels; make sure following order: selection of programme / that the items to be dried are suitable for drying time (ONLY if Drying time or Airing...
- Page 12 Set dryness level, if needed • Adjust drying time (only if programme If you want to change the dryness level, make Drying time or Airing is selected) sure that the Dryness level button « lights up . • Adjust or cancel Start delay, if a delay option is already in progress .
- Page 13 EMPTY WATER TANK / CLEAN DOOR If not switched off right after programme FILTER / CLEAN BOTTOM FILTER end, the dryer will tumble the laundry for about 10 minutes, to prevent creasing . The Empty display shows an animation . •...
- Page 14 PROGRAMME Type of Drying Care Regulations and Recommendations Labels SYNTHETICS ): 3.5 For drying laundry made of synthetic load fibres . default programme ): 0:55 duration selectable options Steam option, Dryness level, Fresh care, Gentle DELICATES For drying delicate laundry which ): 2.5 load needs gentle treatment .
- Page 15 PROGRAMME Type of Drying Care Regulations and Recommendations Labels STEAM REFRESH ): 1.5 For refreshing laundry with steam . load Specifically designed to refresh default programme ): 0:30 and remove odours from dry and duration clean casual garments like shirts, selectable options blouses, trousers made out of cotton, synthetics and their blends .
- Page 16 OPTIONS OPTIONS WHICH ARE DIRECTLY SELECTABLE BY PRESSING THE RESPECTIVE BUTTON STEAM OPTION Minimises creasing of garments made immediately after programme end of cotton, synthetics and their blends and put them on clothes hangers . by adding a humidifying phase at the end of the drying cycle .
- Page 17 FUNCTIONS ON/OFF To switch the dryer on: press the To cancel a running programme: button until the Start/Pause button press and hold the button until “rES” lights up . appears on the display . To switch the dryer off after programme end: press the button until the lights go off .
- Page 18 START DELAY Enables to have the laundry ready at a The programme starts automatically particular time by moving the start of at the end of the delay period . On the programme to a later time . programme start, the delay on the display is replaced by the remaining Select programme and options .
- Page 19 INDICATORS WATER TANK FULL => empty water tank BOTTOM FILTER CLOGGED => clean bottom filter DOOR FILTER CLOGGED => clean door filter FAILURE For any failure indication on the display, refer to section TROUBLESHOOTING for more information . Find more information in section CARE AND MAINTENANCE, and TROUBLESHOOTING GUIDE . ENERGY SAVING AUTOMATIC SWITCH-OFF FUNCTION The dryer is designed to save energy .
-
Page 20: Cleaning & Maintenance
CLEANING & MAINTENANCE Do not use flammable fluids WARNING to clean the dryer. For any cleaning and maintenance, switch off the dryer . EMPTYING THE WATER TANK Empty the water tank after each programme, provided the drain hose is not connected to your sewage system (refer to INSTALLATION GUIDE) . - Page 21 CLEANING THE DOOR FILTER Clean the door filter after each programme . Make sure that the laundry is unloaded . Open the door . Remove the door filter by pulling it upwards . Clean the filter compartment with a soft cloth, or carefully with a vacuum cleaner .
- Page 22 CLEANING THE BOTTOM FILTER Clean the bottom filter about every month . Clean the bottom filter under running water; wipe away dust and lint . Carefully press down the strap to open the bottom flap . Wipe the bottom filter dry, so that it is not dripping wet anymore .
- Page 23 Push the bottom filter back into the filter Finally close the bottom flap again . compartment; make sure that it is completely integrated . Turn both locking bars (right and left) back into vertical position, to lock the bottom filter . 2°...
-
Page 24: Troubleshooting Guide & After-Sales Service
TROUBLESHOOTING GUIDE & AFTER-SALES SERVICE Your dryer is equipped with various automatic safety functions . These enable failures to be detected in good time and the safety system can react appropriately . These failures are frequently so minor that they can be removed within a few minutes . - Page 25 WATER DROPLETS ARE Bottom filter not inserted • Check position of the bottom BENEATH THE DRYER correctly filter and make sure it is completely integrated in the filter compartment . Lint remaining on bottom filter or • Remove lint residues on the door seal rubber seals of bottom filter and door seal .
- Page 26 FAILURE INDICATOR AND MESSAGES Make sure to • Empty the water tank after each programme • Clean the door filter after each programme • Clean the bottom filter after five cycles Failure Indicator Possible Cause Solution Water tank may be •...
- Page 27 Below is a summary of possible failure causes and solutions . If the problem persists after having followed the instructions as indicated below, press and hold On/Off for at least three seconds . If afterwards the failure indication still appears, switch off and unplug the dryer and contact our After-Sales Service .
- Page 28 The service number is also indicated on the guarantee booklet; • your full address; • your telephone number . Manufacturer: Whirlpool EMEA S.p.A. Via Carlo Pisacane n.1 For any repairs, use our authorized After-Sales 20016 Pero (MI) Service, to ensure proper repairing and use of Italy original spare parts .
- Page 30 max 2 cm max 0.79 inch...
- Page 31 max 100 cm 39 inch...
- Page 32 ....xxxx xxxx xxxx xxx V ~ xx Hz IPX4 xx A 400011046964...
Need help?
Do you have a question about the AWZ8CDS/PRO and is the answer not in the manual?
Questions and answers