Table of Contents
Advertisement
Quick Links
Advertisement
Table of Contents

Related Manuals for Doro ELIZA

Summary of Contents for Doro ELIZA
- Page 1 DORO ELIZA DIGITAL SMARTCARE HUB Service Manual | Technical Handbook v 1.3...
- Page 2 © 2021 Copyright Doro AB, Rev D Doro AB, Jörgen Kocksgatan 1 B, 211 20 Malmö, Sweden Corporate identification number: 556161-9429...
-
Page 3: Table Of Contents
Table of contents REVISIONS ........................5 TERMS AND ABBREVIATIONS ..................5 SAFETY INFORMATION....................7 OVERVIEW Doro Eliza ....................8 Doro Eliza top view ....................8 4.1.1 Indicator lights lit up ................... 8 Doro Eliza back view ....................10 4.2.1 Connection terminals ..................10 Doro Eliza bottom view ................... - Page 4 FAULT INDICATION ....................59 MAINTENANCE ......................60 12.1 Cleaning ......................... 60 12.2 Replacing the battery ..................... 60 12.3 Storing the Doro Eliza .................... 60 ACCESSORIES & SPARE PARTS ................61 TECHNICAL DATA ...................... 62 DECLARATION OF CONFORMITY ................65 ENVIRONMENTAL INFORMATION ................66 APPENDIX 1 –...
-
Page 5: Revisions
Challenge Handshake Authentication Protocol DHCP Dynamic Host Configuration Protocol Domain Name Server DDNS Dynamic Domain Name Server DTMF Dual Tone Multiple-Frequency Eliza Administration Tool FOTA Firmware Over The Air Global System for Mobile HSDPA High-Speed DownLink Packet Access i-care online Internet protocol... - Page 6 TAP-2 Doro Telephone numeric keypad social Alarm/command Protocol, DTMF 0,1,3,4,7,8 To Be Defined Transport layer Security Verklizan UMO-XML protocol UMTS Universal Mobile Telecommunications System (3G) Uniform resource locator Universal Serial Bus Volts Alternating Current Volts Direct Current VoIP Voice over Internet Protocol...
-
Page 7: Safety Information
All systems using radio and telecommunications are subject to interference beyond the user’s control. Products from Doro are designed to minimize the impact of such interference. Nevertheless, the user must be aware that system components can be subjected to interference or other influences that may cause malfunction. -
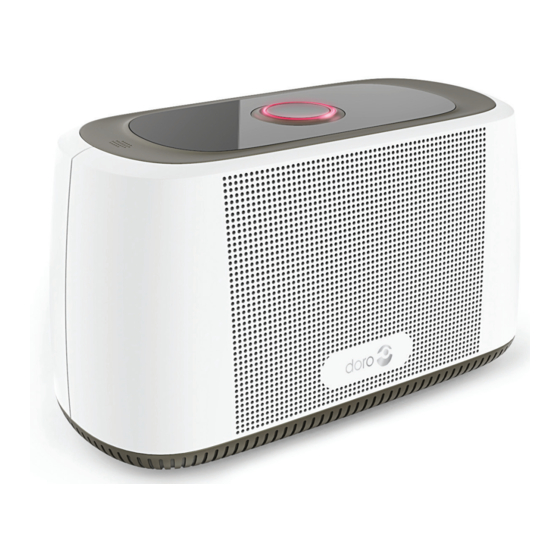
Page 8: Overview Doro Eliza
OVERVIEW Doro Eliza 4.1 Doro Eliza top view Status Yellow/round touch button Green/square touch button Power Integral alarm button Cancel/Service touch button 4.1.1 Indicator lights lit up Each indicator can light up in different colors depending on status and configuration. Example with all indicators activated. - Page 9 Note! Change to a new battery to check if it is a faulty battery causing the indication. If not, replace the adapter and if this does not solve the problem send the DORO Eliza to the Service department at DORO.
-
Page 10: Doro Eliza Back View
Lit up* Lit up Low battery power Flashing *) If configured with an alarm type 4.2 Doro Eliza back view 4.2.1 Connection terminals Lid covering for USB port and radio pairing button and service menu Power in ON/OFF switch Ext. antenna Ethernet Audio OUT/ Alarm INPUT (3.5 mm) -
Page 11: Doro Eliza Bottom View
4.3 Doro Eliza bottom view Bottom with battery-lid in place Bottom lid removed, battery visible Bottom with lid and battery removed. SIM slot visible... -
Page 12: Installation
INSTALLATION 5.1 Power When first plugged in or after storage you should let the Doro Eliza charge to a minimum of 24 hours to reach full battery capacity. Always make sure the battery is connected if the Doro Eliza is new or has been stored. -
Page 13: Connectivity
6. Optional connection to i-care online system. 5.2.1 Cellular Through a subscription and a SIM card Doro Eliza can connect to a cellular network e.g. GSM (2G), UMTS/HSDPA (3G) or LTE (4G) network If Eliza is on 2G only due to network limitations, make sure that SCAIP-GSM is... -
Page 14: Installing The Sim Card
This will take about 25 seconds. See picture below where to place the SIM card (Mini SIM) on the Doro Eliza Slide the SIM card into the SIM card slot past the plastic tab, this tab is to make sure that the SIM card is locked in its SIM holder. -
Page 15: Cellular Signal Strength Check
DORO, shall be used with the Doro Eliza. 5.2.5 Wi-Fi Doro Eliza can communicate via a wireless home network to send an alarm. For example, send an alarm through a wireless router that has a broadband connection. See section 5.4.2 “USB” and section 13 “Accessories and spare... -
Page 16: Connecting External Equipment
5.4 Connecting external equipment 5.4.1 I/O connector Doro Eliza is equipped with a 3.5 mm I/O connector that facilitates both an alarm input and an audio output. The audio output is designed for a connection to a hearing aid loop system. -
Page 17: Usb
5.4.2 USB Doro Eliza is equipped with two USB ports, for example to connect a Wi-Fi adapter, one behind the lid and one on the back panel “Accessories and spare Available Doro USB accessories are listed in the parts” section 13 5.5 External equipment... -
Page 18: Description Of Functions
DESCRIPTION OF FUNCTIONS Doro Eliza is a digital smart hub, capable of sending alarms over the GSM, UMTS and LTE- network Supporting IP based alarm protocols. Doro Eliza can also utilize IP based alarm protocols over a broadband connection via Ethernet or Wi-Fi. -
Page 19: Function Monitoring
“4” key on the telephone or by a keep alive command from the ARC. Note! During the powering up of Eliza the cellular indicator is lit. This indicates that the Eliza is in a process of finding a data network (Cellular and/or IP) therefore no alarm can be sent. 6.5 Function Monitoring 6.5.1 Test alarm... -
Page 20: Heartbeat
6.5.2 Heartbeat Heartbeat is a way to monitor the Doro Eliza’s function, enable remote configuration and FOTA. If set to “Disabled”, the Doro Eliza will turn off this feature. Heartbeat is used with the ICO platform. Value: Disabled or 1-20 minutes, Default=2 minutes Note! If Heartbeat is disabled it won’t be possible to remote access from the ICO platform. -
Page 21: Callback After An Alarm
The function Callback after an alarm means that, after a raised alarm from the Doro Eliza is received by an ARC, the Doro Eliza is set in Callback mode by the ARC and is ready to receive incoming calls from either an ARC or a telephone. -
Page 22: Manual Pairing Of Radio Trigger/Accessories
Steps to erase all radio triggers see section 10 MODE” 7.4 Remote pairing of radio trigger/accessories Via i-care online it is possible to remote program radio triggers and accessories to the Doro Eliza. Note! Important is the following range and function test after any radio trigger/accessories... -
Page 23: I-Care Online (Ico)
To be able to administrate the Doro Eliza you must be logged on to i-care online, username and password are provided by your supplier. A new Doro Eliza must be activated in i-care online; to be able to activate a Doro Eliza you must have the serial number of the Eliza. -
Page 24: Settings I-Care Online
SETTINGS i-care online The following settings can be programmed in Doro Eliza: 8.1 Templates To easily change and configure desired parameters one can use templates that are pre- configured for specific use i.e contacts, ARC etc. Default template • Choose a desired template name •... - Page 26 Template • Choose from previous saved templates • Set a Template Name • Having chosen a template it is possible to change parameters...
- Page 27 • To create a template from an online Doro Eliza:s template • Set a Template Name • Choose an Organization • Set the serial number in the box of the desired Eliza to be used • Press `Read Product` • Change the desired parameters and press Save...
-
Page 28: Cellular, Wi-Fi, Ethernet, I-Care Online Settings
8.2 Cellular, Wi-Fi, Ethernet, i-care online settings Cellular settings Cellular - Network Priority Settings; Disabled, High, Medium, Low Default High Cellular: - Pin Code Pin code for SIM card. Note: You need to use a mobile phone to change or activate a pin code. Cellular –... - Page 29 Cellular - Authentication protocol Settings: CHAP, PAP, CHAP/PAP (Auto) Default value: CHAP/PAP (Auto) Cellular – Authentication Username User name to access APN Cellular - Authentication Password Settings: Max 16 characters Cellular – Mobile Technology Settings: 2G, 3G, 4G Default: 2G, 3G, 4G Cellular - Antenna Settings: Internal, External Default: Internal...
- Page 30 Cellular – SAR backoff (Only with internal antenna) To minimize disturbance if Eliza is GSM-network connected during idle mode or is in voice connected GSM-call. Settings: Disabled, Low, Medium, High Default: Disabled Cellular – Ping address, period and Max Ping loss Ping address Default: 1.1.1.1...
- Page 31 Cellular – Radio access technology Settings: GSM (2G), UMTS (3G), LTE (4G) Default 2G, 3G, 4G If only 4G is set, there is no possibility to raise an alarm to a mobile phone or an analogue phone. Please do not change this parameter if not necessary. Cellular –...
- Page 32 Wi-Fi - Encryption Settings: None, WEP, WPA/WPA2 (strongest encryption) Default: None Wi-Fi - Password Wi-Fi – Manual Network configuration Settings: Manual Static IP adress Netmask set depending on IP-address chosen Gateway: The router interface connected to the local network DNS: Domain Name System: Connects domain name with IP-adresses...
- Page 33 Heartbeat address Address to i-care Management server Heartbeat port Default port: 4060 Heartbeat interval Time between activity messages (ping) to the ICO service. (must be activated if remote administration from i-care online is used). Settings: Disabled, 2-60 minutes Default value: 2. Configuration time-out Default: 60 seconds...
- Page 34 Configuration address The server-address used by ICO to upload/download configuration Configuration port Default port: 443...
- Page 35 Ethernet settings Ethernet priority Settings: High, Medium, Low, Disabled Default: Medium Network configuration Settings: Manual, Automatic (DHCP) Default: Automatic (DHCP) Manual network configuration IP-address Netmask Gateway Primary DNS Secondary DNS...
- Page 36 Ping address Default: 1.1.1.1 Ping period Settings: 5-600 seconds Default 10 Max ping loss Settings: 1-10 Default: 3 Log Settings Settings: 0-10 Default: 5 Rotation size Settings: 0-10240 Default: 2000...
- Page 37 Reduce log size Settings: On, off Default: On Drop duplicates Settings: On, Off Default: On System log Settings: Volatile, Persistent Default: Volatile Device log Settings: Volatile, Persistent Default: Persistent...
-
Page 38: Additional Settings
Sends an audible signal every 30 seconds during set time before call out Settings: 0-99 seconds. Default value: 0. Call attempt duration The time that the Doro Eliza tries to call a contact before it continues with the next contact in the call sequence. Settings: 5-3600 seconds. Default value: 40 seconds. - Page 39 15 seconds before the alarm is disconnected. Selection: 1-999 minutes. Default value: 10. Number of call attempts The number of call attempts the Doro Eliza makes before the alarm is cancelled if it is not getting any answer. Settings: 1-99 attempts. Default value: 15.
- Page 40 Pre-alert time for inactivity alarm If set, the Doro Eliza will raise a signal every 60 seconds for the set time before the inactivity alarm is raised. This provides the user to be able to cancel the alarm during the set time.
- Page 41 If no acknowledge has been executed by pressing the cancel button by user, the Doro Eliza will send a new alarm (Reminder alarm) in the set time. Doro Eliza will emit a beep every 30 seconds until acknowledge is done by pressing the cancel button .
- Page 42 Home/Away • The “Away” function, (Yellow button ) can be used as a way of alerting the receiver of the alarm that one has departed, for example, the apartment. • When Away alarm is activated in conjunction with Inactivity alarm, the Inactivity alarm timer is suspended •...
- Page 43 Check-In/Check-Out Check In/Out function for staff, is a function to indicate arrival and departure from client. The yellow button will now function as a Check-Out and the green button as Check-In. If the Check out has not been done after 4 hours an automatic reset will be done (default). Settings: Default value: Disabled Note.
- Page 44 Time-zone Daylight saving time: automatically updated Settings: European capitals, ETC/UTC, UTC Greenwich, ETC/GMT...
- Page 45 Default value: Yes Pre alert time for inactivity alarm Warning tone that alert before an inactivity alarm is being sent. Doro Eliza gives a tone signal once every minute during the programmed time until the alarm is sent. This prpgrammed time will only be stopped by pressing the CANCEL button , activate a radio device sending radio code “12”...
-
Page 46: Alarm Management
It is mandatory to use international dialing prefixes when using a roaming SIM card or when the location of the Eliza is placed close to the border of the country (making it possible to roam to another network in the neighboring country). - Page 47 Call sequence Settings of what contacts are used, and in which order they shall be called. Settings: 1-10 Default value: Disabled...
- Page 48 SIP accounts A SIP account enables user to make voice calls over the internet using VoIP. Adding to this, via SIP Trunking users/organizations are enabled to place calls through the Public Switched Telephone Network (PSTN) Settings for SIP-account Settings: 5 accounts...
-
Page 49: Configuration Of Paired Radio Triggers
8.5 Configuration of paired radio triggers It is possible to configure the radio triggers that are paired to the Doro Eliza e.g. what alarm type that shall be transmitted when the radio trigger is activated and if test alarm from radio triggers shall be activated. -
Page 50: Alarm Triggers And Radio Devices
8.5.1 Alarm triggers and radio devices Default settings for new radio devices Settings for how radio devices paired with Eliza should be configured, e.g. which alarm type (selectable 1-320) should be sent when the radio device is activated, and if test alarm from the radio triggers should be activated. - Page 51 ARC. Example: If parameter set to 24 hours the Doro Eliza expects at least one radio test alarm signal during this period from the paired and activated radio trigger. If the first radio transmission (11 hour) fails (for example;...
- Page 52 Log Settings* Rotation Settings: 0-10 Default: 5 Rotation size Settings: 0-10240 Default: 2000 Reduce Log Size Settings: On, Off Default: On Drop duplicates Settings: On, Off Default: On System log Settings: Volatile, Persistent Default: Volatile...
- Page 53 Device log Settings: Persistent, Volatile Default: Battery log Settings: Persistent, Volatile Default: Persistent *Note: Do not change if not demanded from Careium development team!
-
Page 54: Alarm Types
ALARM TYPES All events transmitted from Doro Eliza are attached to a DC type (See table) that is mapped to corresponding alarm type/criteria in the selected alarm protocol and ARC. The alarm type informs the recipient/ARC of the cause of the event. Note! There may be variations between different protocols and below descriptions may not be implemented or displayed as is. - Page 55 Bed monitor - occupancy Stove guard activated Pull cord activated Radio Eliza (undefined) Notes: 1. Technical event. Not transmitted as a protocol event to ARC. 2. SCAIP doesn´t contain a door alarm w/o speech so a customer specific status code is used, <sco>900 –...
-
Page 56: Service Mode
SERVICE MODE Eliza is equipped with a “Service mode” to • Check Cellular signal strength. • Erase radio trigger/s (all) • Reset all parameters on Eliza (Default) • Choose between Internal or External antenna • Select speaker volume. • To exit the Service menu at any stage, press Cancel button... -
Page 57: Service Mode Functions
10.1 Service mode functions Check Cellular signal strength 1. Press the radio pairing button twice 2. A synthetic voice will say, -Service Mode! 3. Press the Green square button once 4. A synthetic voice will say, -Signal strength! 5. Press the Main Integral alarm button once 6. - Page 58 Default all parameters on Eliza 1. Press and release the radio pairing button twice 2. A synthetic voice will say, -Service Mode! 3. Press the Green button three times 4. A voice will say, -Default reset! 5. Press Main integral button once 6.
-
Page 59: Fault Indication
FAULT INDICATION Mains power loss – The power indicator starts to flash and Eliza starts to beep. Data connection loss – The sign is lit. Ethernet cable disconnection - The ethernet indicator LEDs turns off... -
Page 60: Maintenance
12.3 Storing the Doro Eliza If Doro Eliza is going to be stored without mains power longer than six months the battery should be unplugged to avoid damage to the Li-ION cell. When cleaning or replacing battery, the Doro Eliza should be turned... -
Page 61: Accessories & Spare Parts
ACCESSORIES & SPARE PARTS Accessories Type Art.no Alarm in/audio out 3.5 mm plug to terminal block 7814 PSU Extension cable DC-DC, 1.2 m 7715 Wi-Fi nano adapter USB Male v2 7723 Network cable Cat. 5e, 3.0 m 7813 USB cable Type A / micro Type B 100062 External antenna... -
Page 62: Technical Data
TECHNICAL DATA Carephone Doro Eliza Dimensions: 197x92x112 mm (LxWxH). Weight: 0,7 Kg Integral alarm button 434 mm² Power supply: 9.0 VDC, 2.0 A, 18.0 W Power consumption (typical): - Off mode: 0.09 W - Networked standby (HiNA): 1.8-2.8 W - Alarm mode with speech... - Page 63 Encryption 64/128-bit WEP, WPA, WPA2 WPS-compatible. ZigBee Complies with radio standard IEEE 802.15.4 (Will be enabled in future releases) USB 2.0 Type A female x 2 (intended for Doro certified adapters) External Power Supply Model (EU): GRT-A30-090200EB / S018BAM0900200 Model (UK):...
- Page 64 Personal alarm trigger Doro Enzo Dimensions: 39x32x11mm (LxWxH). Battery: 3V lithium battery CR 2032. Battery life: Up to five years. Water resistance: Complies with IP67. Radio frequency band: 869.20-869,25MHz. Radio frequency power: Max. 10 mW (10 dBm) Equipment class: Class 1 radio equipment.
-
Page 65: Declaration Of Conformity
(3) years from the date of the distribution of this product by Doro AB, or in the case of code licensed under the GPL V3 as long as Doro AB offers spare parts or customer support for this product model. -
Page 66: Environmental Information
The product can be returned free of charge to a recycling station that is connected, directly or via a recycling system, to DORO or to your distributor. For detailed instructions, please check with your distributor or visit our website, www.doro.com/care/ Note! The WEEE information and recycling instructions applies to European Union member states only. - Page 67 Disposing of the battery in the alarm button Doro Enzo This product complies with the requirements of EU Directive 2006/66/EC (Batteries) and 2012/19/EU (WEEE) and must not be disposed of with other household waste. Always...
-
Page 68: Appendix 1 - Local Configuration
17.1 Local configuration Local configuration can be done by connecting the Doro Eliza to a computer via a USB-cable and start up a console with any web browser e.g., Chrome, Internet explorer, Edge etc. Through a specific address and log-in credentials one can access Doro Eliza and program different parameters. -
Page 69: Connect The Administration Console
Launch the Administration console Open any browser (Google Chrome, Internet Explorer, Microsoft Edge, Mozilla Firefox) and go to page 192.168.2.2 Login to the local configuration tool, user credentials provided by DORO. You will now enter the Doro Eliza administrator console... -
Page 70: Parameters
Change the desired parameters of your choice and click on "Save" at the top right corner of the page to save the changes made to the unit. 17.1.4 Parameters When using the local configuration tool, some parameters must be written in a special way, below are some examples. - Page 71 ScaIP-GSM contact scaip:n,user@host,acode=a,tel:number (ARC number); scaip:0,doro1@doropartner.com,acode=12345678,tel:+44987654321 scaip:0 means no SIP account connected scaip:1 means SIP account 1 is connected Example; ScaIP-GSM contact with specified port number scaip:n,user@host:port,acode=a,tel:number (ARC number); scaip:0,doro1@doropartner.com:5060,acode=12345678,tel:+44987654321 ScaIP-GSM with specified port number and callback number scaip:n,user@host:port,acode=a,tel:number,callback=tel:number (sip or MSISDN number); scaip:0,doro1@doropartner.com:5060,acode=12345678,tel:+44987654321,callback=tel: +44123456789 ScaIP-VoIP with specified port number and callback handled by ARC...
-
Page 72: Sip Accounts
callback number, sip or MSISDN n is a SIP account number, 0=off. Max 5 accounts user is a username. host is a hostname or IP address. port is the port number on the server, if not specified default port 5060 is used. acode is the alarm code. -
Page 73: Radio Triggers
17.1.7 Radio Triggers Example on valid radio trigger string: “12345678: test=on, dnd=22:00-08:00, 1=>054, 2=>010, 3=>320, 4=>012, 6=>009, 7=>035, L=X” “12345678: test=on, dnd=22:00-08:00, 1=>54, 2=>10, 3=>320, 4=>12, 6=>9, 7=>35, L=X” 12345678= ID for radio trigger (8 digits, always end with : ) test=on/test=off (radio test transmission for paired triggers) dnd=22:00-08:00 = do not disturb, alarm will not be active within set time, if time value is the same for example 00:00-00:00 or empty the trigger is always active. -
Page 74: Alarm Type Mappings And Call Sequence
17.1.8 Alarm type mappings and call sequence Example on chosen alarm type and call sequence list; Call sequence list 1 will use Contact “1” Call sequence list 2 will use Contact “3” Call sequence list 4 will use Contact “2” “Alarm type 8,9,14 and 15 will use Call sequence list “1”... - Page 75 To use several contacts in Call sequence list, (only with same alarm type), add a comma sign between the contact numbers. Note! After Eliza has been connected to a computer it may take up to 90 seconds before configuring can be done via Eliza administration console (EAC).
- Page 76 www.doro.com...
Need help?
Do you have a question about the ELIZA and is the answer not in the manual?
Questions and answers