Table of Contents
Advertisement
Quick Links
Advertisement
Table of Contents

Related Manuals for AEG EGC3310NVK


Summary of Contents for AEG EGC3310NVK
- Page 1 EGC3310NVK User Manual...
-
Page 2: Table Of Contents
www.electrolux.com CONTENTS 1. SAFETY INFORMATION..................2 2. SAFETY INSTRUCTIONS..................5 3. INSTALLATION....................7 4. PRODUCT DESCRIPTION................11 5. DAILY USE....................... 11 6. HINTS AND TIPS..................... 13 7. CARE AND CLEANING..................13 8. TROUBLESHOOTING..................14 9. TECHNICAL DATA...................15 WE’RE THINKING OF YOU Thank you for purchasing an Electrolux appliance. You’ve chosen a product that brings with it decades of professional experience and innovation. - Page 3 ENGLISH instructions in a safe and accessible location for future reference. 1.1 Children and vulnerable people safety This appliance can be used by children aged from 8 • years and above and persons with reduced physical, sensory or mental capabilities or lack of experience and knowledge if they have been given supervision or instruction concerning the use of the appliance in a safe way and understand the hazards involved.
- Page 4 www.electrolux.com CAUTION: The cooking process has to be supervised. • A short term cooking process has to be supervised continuously. WARNING: Danger of fire: Do not store items on the • cooking surfaces. Metallic objects such as knives, forks, spoons and lids •...
-
Page 5: Safety Instructions
ENGLISH the manufacturer of the appliance in the instructions for use as suitable or hob guards incorporated in the appliance. The use of inappropriate guards can cause accidents. 2. SAFETY INSTRUCTIONS 2.2 Electrical Connection This appliance is suitable for the following markets: SG WARNING! Risk of fire and electric... - Page 6 www.electrolux.com • Connect the mains plug to the mains • Make sure that the ventilation socket only at the end of the openings are not blocked. installation. Make sure that there is • Do not let the appliance stay access to the mains plug after the unattended during operation.
-
Page 7: Installation
ENGLISH • Use only stable cookware with the • Clean regularly the appliance to correct shape and diameter larger prevent the deterioration of the than the dimensions of the burners. surface material. • Make sure cookware is centrally • Deactivate the appliance and let it positioned on the burners. - Page 8 www.electrolux.com 3.2 Gas Connection • it is no longer than 1500 mm; • it shows no throttles; WARNING! • it is not subject to traction or torsion; The following instructions • it does not get in touch with cutting about installation, edges or corners;...
- Page 9 ENGLISH 2. Turn the knob on the minimum Connection to a good earth position. wiring system is absolutely 3. Remove the knob. essential. The manufacturer 4. With a thin screwdriver, adjust the accepts no responsibility for bypass screw position (A). any inconvenience caused by failure to comply with this rule.
- Page 10 www.electrolux.com 3.6 Assembly A) supplied seal B) assembled bracket min. 650 mm 490 mm 40-50 mm 55 mm 30 mm 270 mm CAUTION! Install the appliance only on a worktop with flat surface. 3.7 Installation of more than one hob If several hobs are to be installed side by side into the same cut out, an assembly kit including a support side bracket and...
-
Page 11: Product Description
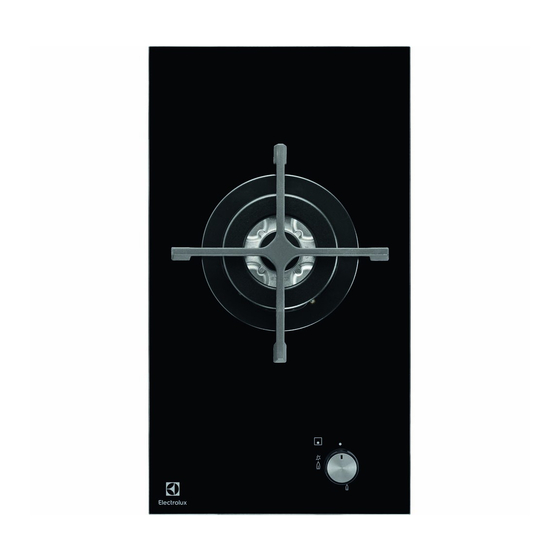
ENGLISH 3.8 Possibilities for insertion A. Removable panel B. Space for connections The panel installed below the hob must be easy to remove and let an easy Kitchen unit with oven access in case a technical assistance The electrical connection of the hob and intervention is necessary. - Page 12 www.electrolux.com 5.1 Burner overview WARNING! Do not keep the control knob pushed for more than 15 seconds. If the burner does not light after 15 seconds, release the control knob, turn it into off position and try to light the burner again after minimum 1 minute.
-
Page 13: Hints And Tips
ENGLISH 6. HINTS AND TIPS WARNING! CAUTION! Refer to Safety chapters. Liquids spilt during cooking can cause the glass to break. 6.1 Cookware 6.2 Energy saving CAUTION! Do not use cast iron pans, • If it is possible, always put the lids on potstones, earthenware, grill the cookware. -
Page 14: Troubleshooting
www.electrolux.com 7.2 Pan supports • Remove when the hob is sufficiently cool: limescale rings, The pan supports are not water rings, fat stains, shiny metallic resistant to washing in a discoloration. Clean the hob with a dishwasher. They must be moist cloth and non-abrasive washed by hand. -
Page 15: Technical Data
ENGLISH Problem Possible cause Remedy The flame ring is uneven. Burner crown is blocked Make sure that the injector with food residues. is not blocked and the burner crown is clean. 8.2 If you cannot find a during the warranty period. The instructions about the Service Centre solution... - Page 16 www.electrolux.com 9.2 Bypass diameters BURNER Ø BYPASS 1/100 mm Triple Crown 9.3 Other technical data Gas original: LPG 30 mbar 3,8 kW / 276 g/h TOTAL POW‐ G110 (1a) 14 mbar 4,0 kW Gas replace‐ ment: Electric sup‐ 220-240 V ~ 50/60 Hz ply: Appliance cat‐...
- Page 17 ENGLISH...
- Page 18 www.electrolux.com...
- Page 19 ENGLISH...
- Page 20 www.electrolux.com/shop...
Need help?
Do you have a question about the EGC3310NVK and is the answer not in the manual?
Questions and answers