Advertisement
Commercial Refrigerator
And Freezer User's Manual
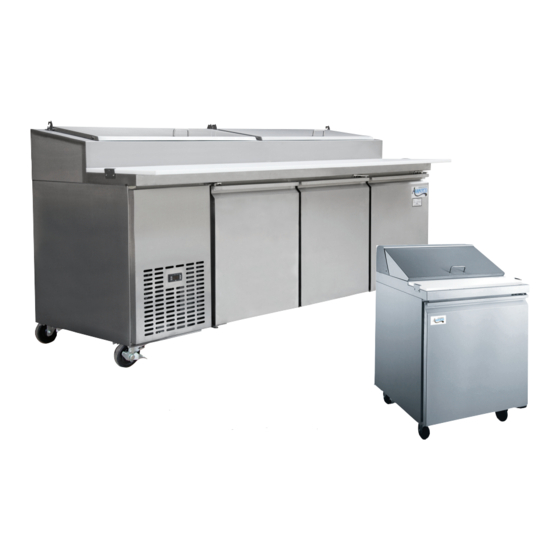
Refrigerated Pizza Prep Units
PICL1, 178 PICL2, 178 PICL3
178
Refrigerated Sandwich Prep Units
SSPT27, 178 SSPT36, 178 SSPT48, 178 SSPT60,
178
SSPT71, 178 SSPT27M, 178 SSPT36M, 178 SSPT48M,
178
SSPT60M, 178 SSPT71M
178
Please read the manual thoroughly prior to equipment set-up,
operation and maintenance.
User Manual
- 1 -
10/2016
Advertisement
Table of Contents

Related Manuals for Avantco Equipment 178PICL1

Summary of Contents for Avantco Equipment 178PICL1
- Page 1 User Manual Commercial Refrigerator And Freezer User’s Manual 10/2016 Refrigerated Pizza Prep Units PICL1, 178 PICL2, 178 PICL3 Refrigerated Sandwich Prep Units SSPT27, 178 SSPT36, 178 SSPT48, 178 SSPT60, SSPT71, 178 SSPT27M, 178 SSPT36M, 178 SSPT48M, SSPT60M, 178 SSPT71M Please read the manual thoroughly prior to equipment set-up, operation and maintenance.
-
Page 2: Installation
User Manual Installation Important!!! Please Read Before Installation • If the unit has recently been transported on its side, please let unit stand still for a minimum of 24 hours before plugging it in. • Make sure that the unit drops down to desired temperature before loading the unit with product. •... - Page 3 User Manual Temperature Controls • Refrigerant LED - Compressor is on • Fan LED - Fan is on • Defrost LED - Defrost cycle is running Functions Adjusting the Temperature Your new refrigerator or freezer is already factory-set to run at optimum temperatures for food safety and should require no adjustments.
-
Page 4: Safety Warning
User Manual Loading Product Before loading shelves, please be sure that all shelf clips are completely fastened in their correct locations. It is important that all shelves rest completely level before stocking your cabinet with product. In order to maintain correct air flow inside the unit, please be sure to leave two to four (2 to 4) inches of space between the back wall and stored product. - Page 5 User Manual Attention • To minimize shock and fire hazards, be sure not to overload outlet. Please designate one outlet for your unit. • Do not use extension cords. • Do not put your hands under the unit while it is being moved. •...
- Page 6 User Manual Food Pan Layouts: SSPT 178SSPT27 178SSPT36 (6) 1/6 Size, (2) 1/9 Size (10) 1/6 Size 33” 24.25” 6.5” 6.5” 6.5” 4.33” 6.5” 6.5” 6.5” 6.5” 6.5” 178SSPT48 (12) 1/6 Size, (6) 1/3 Size 42.5” 7” 7” 7” 7” 7”...
- Page 7 User Manual Food Pan Layouts: SSPT-M 178SSPT27M 178SSPT36M (9) 1/6 Size, (3) 1/9 Size (15) 1/6 Size 24.25” 33” 6.5” 6.5” 6.5” 4.33” 6.5” 6.5” 6.5” 6.5” 6.5” 178SSPT48M (18) 1/6 Size 42.25” 6.5” 6.5” 6.5” 6.5” 6.5” 6.5” 2.5” 178SSPT60M (24) 1/6 Size 56.25”...
- Page 8 User Manual Food Pan Layouts: PICL 178PICL1 (6) 1/3 Size 42.3” 7.15” 7” 7” 7” 7” 7.15” 6” 6” 6” 178PICL2 (9) 1/3 Size 63.3” 7.15” 7” 7” 7” 7” 7” 7” 7” 7.15” 6” 6” 6” 178PICL3 (12) 1/3 Size 84.5”...
- Page 9 User Manual Food Pan Divider Bars: SS-PT ITEM # SIZE SS-PT-27 SS-PT-36 SS-PT-48 SS-PT-60 SS-PT-71 178PTB15354 13 15/16” x 9/16” 12 7/8” x 9/16” 178PTB15327 13 15/16" x 1" 178PTB25354 12 7/8" x 1" 178PTB25327 12 7/8" x 3 9/16" 178PTB90354 Food Pan Divider Bars: SS-PT-M ITEM #...
-
Page 10: Regular Maintenance
User Manual Regular Maintenance WARNING: DISCONNECT POWER CORD BEFORE CLEANING ANY PARTS OF THE UNIT. Cleaning The Condenser Coil • For efficient operation, it is important that the condenser surface be kept free of dust, dirt, and lint. • We recommend cleaning the condenser coil and fins at least once per month. •... -
Page 11: Troubleshooting
User Manual Troubleshooting Compressor Not Running Fuse blown or circuit breaker tripped. Replace fuse or reset circuit breaker. Power cord unplugged. Plug in power cord. Thermostat set too high. Set thermostat to lower temperature. Cabinet in defrost cycle. Wait for defrost cycle to finish. Condensing Units Run For Long Periods of Time. -
Page 12: Warranty Information
User Manual Warranty Information Units in this manual are backed by a 1 year parts and labor warranty, with a 5 year warranty on the compressor. For warranty inquiries or service, first locate: • The model number and cabinet serial number (located on the front of the unit, or inside the door jamb).
Need help?
Do you have a question about the 178PICL1 and is the answer not in the manual?
Questions and answers