Table of Contents
Advertisement
Available languages
Available languages
Quick Links
Advertisement
Chapters
Table of Contents

Related Manuals for GE Profile TRATTORIA PS96PZRSS


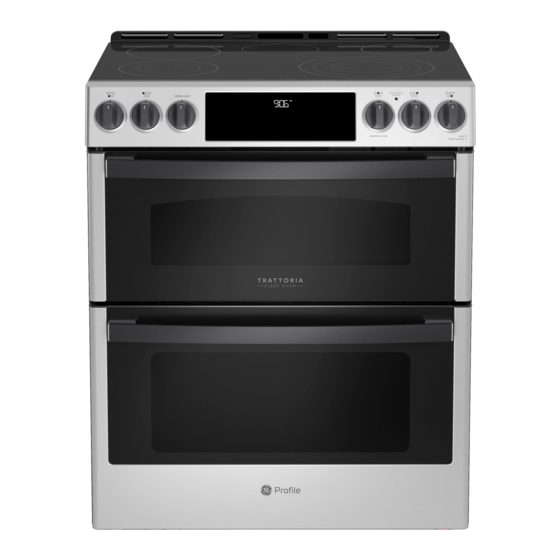
Summary of Contents for GE Profile TRATTORIA PS96PZRSS
- Page 1 Owner’s Manual...
-
Page 2: Table Of Contents
From the front of the range, reach behind the middle of the rear control panel and rotate the rating label up. GE is a trademark of the General Electric Company. Manufactured under trademark license. 49-2000908 Rev. 0 05-21 GEA... - Page 3 THANK YOU FOR MAKING GE APPLIANCES A PART OF YOUR HOME. Whether you grew up with GE Appliances, or this is your first, we’re happy to have you in the family. We take pride in the craftsmanship, innovation and design that goes into every GE Appliances product, and we think you will too.
-
Page 4: Safety Information
IMPORTANT SAFETY INFORMATION READ ALL INSTRUCTIONS BEFORE USING THE APPLIANCE Read all safety instructions before using the product. Failure to follow these instructions may result WARNING in fire, electrical shock, serious injury or death. ANTI-TIP DEVICE WARNING To reduce the risk of tipping the range, the range must be secured by a properly Tip-Over Hazard installed anti-tip bracket. - Page 5 IMPORTANT SAFETY INFORMATION READ ALL INSTRUCTIONS BEFORE USING THE APPLIANCE KEEP FLAMMABLE MATERIALS AWAY FROM THE RANGE WARNING Failure to do so may result in fire or personal injury. or near the cooktop, including paper, plastic, pot not be allowed to accumulate on the hood or filter. holders, linens, wall coverings, curtains, drapes and gasoline or other flammable vapors and liquids.
- Page 6 IMPORTANT SAFETY INFORMATION READ ALL INSTRUCTIONS BEFORE USING THE APPLIANCE WARNING GLASS COOKTOP SAFETY INSTRUCTIONS surface can cause steam burns. Some cleaners can surface of the cooktop will retain heat after the produce noxious fumes if applied to a hot surface. controls have been turned off.
- Page 7 IMPORTANT SAFETY INFORMATION READ ALL INSTRUCTIONS BEFORE USING THE APPLIANCE WARNING SELF-CLEANING OVEN SAFETY INSTRUCTIONS The self-cleaning feature operates the oven at temperatures high enough to burn away food soils in the oven. Follow these instructions for safe operation. oven off and disconnect the power supply. Have it self-cleaning.
- Page 8 IMPORTANT SAFETY INFORMATION READ ALL INSTRUCTIONS BEFORE USING THE APPLIANCE Remote Enable Equipment This device complies with part 15 of the FCC Rules. turning the equipment off and on, the user is encouraged Operation is subject to the following two conditions: (1) to try to correct the interference by one or more of the This device may not cause harmful interference, and following measures:...
-
Page 9: Pizza Oven
Pizza Oven Pizza and Bread Cooking Surface cooking surface Sprinkle your wooden pizza Peel with a tiny amount of flour. This will help the raw dough slide off of the If cooking food on cooking surface, clean before each peel into the oven. See Care and Cleaning Section for use. - Page 10 Pizza Oven Modes (Cont.) NY-Style Pizza This mode is best suited for New York-style pizza, with 2. Ready to Cook. You will be prompted to place food a thin crust that is firm enough to support the toppings in the oven and press START. when folded in half to eat.
-
Page 11: Pizza Oven Tips
Pizza Oven Tips Tips for Great Artisan and NY-Style Pizza Top your pizza right before putting it into the oven. The ones for preparing the pizza before it goes into the longer sauce sits on the dough, the more likely the oven, since pizza dough doesn’t stick to wood as dough is to stick to the peel. -
Page 12: Pizza Oven Menus
Pizza Oven Menus Pizza & Bread Options Menus There are 4 options on the Pizza and Bread Main Menu: 1. Air Fry 2. Proof 3. Pizza 4. Bread Pizza Sub-menu There are 4 options on the Pizza Sub-menu: 1. Artisan 2. - Page 13 Pizza Oven Menus (Cont.) Pizza & Bread Function Screens Once you have chosen your option, the following Ready to Cook Screen screens will display: You will be prompted when it is time to add your Temperature Screen selection to the oven. Once added, press START. This screen will show the selection you have made and the default temperature.
-
Page 14: Surface Units
Surface Units Operating the Cooktop Elements WARNING FIRE HAZARD: Never leave the range unattended with the cooktop on. Keep flammable items away from the cooktop. Turn off all controls when done cooking. Failure to follow these instructions can result in fire, serious injury or death. Before using the cooktop for the first time, clean it with ceramic cooktop cleaner. - Page 15 Surface Units (Cont.) Radiant Glass Cooktop The radiant cooktop features heating units beneath a smooth glass surface. NOTE: A slight odor is normal when a new cooktop is used for the first time. It is caused by the heating of new parts and insulating materials and will disappear in a short time.
- Page 16 Surface Units (Cont.) Cookware for Radiant Glass Cooktops The following information will help you choose cookware which will give good performance on glass cooktops. NOTE: Follow all cookware manufacturer’s recommendations when using any type of cookware on the ceramic cooktop. Recommended Avoid/Not Recommended Stainless Steel...
- Page 17 Surface Units (Cont.) More about Cookware place lids on the surface elements, particularly wet lids. Wet pans and lids may stick to smooth surface when cool. Check pans for flat bottoms by wok will not heat on the cooktop. using a straight edge. You should under the straight edge.
-
Page 18: Oven Controls
Oven Controls 1. Upper Oven and Lower Oven: 7. Timer: Works as a countdown timer. Press the Timer pad and number pads to program the time in Select an oven before following the steps for hours and minutes. Press the Start/Enter pad. The starting a cooking or cleaning mode. -
Page 19: Cooking Options
Cooking Options The options pad opens up a menu of more cooking modes when the oven is off. It opens a menu with additional features if a cooking mode is already in process. You can exit the menu at any time by pressing the Options pad again. You must first select a mode (bake, convection bake, convection roast) and then select Options to get to the following functions. - Page 20 Settings (Cont.) WiFi Connect and Remote Enable (cont.) Connect your oven instructions included with the mating Chef Connect enabled product. The range will cancel pairing mode 1. On your smart phone or tablet visit after two minutes if no mating device is detected. Select GEAppliances.com/connect to learn more about Remove to confirm product is paired or to un-pair from connected appliance features and to download the...
-
Page 21: Sabbath Mode
Sabbath Mode by the consumer include the disabling of tones, disabling of oven lights, and delays of about 30 seconds to one minute on display changes. Only continuous baking or timed baking is allowed in the Sabbath mode. Cooking in the Sabbath mode is a two-step process, first the Sabbath mode must be set and then the bake mode must be set. -
Page 22: Oven Racks
Oven Racks Rack Positions Your oven has two rack positions in the upper oven and four rack positions in the lower oven. Recommended rack positions for various types of foods are provided in the Oven Cooking Guide. Adjusting rack position is one way to impact cooking results. -
Page 23: Cookware
Cookware Cookware Guidelines The material, finish, and size of cookware affect baking Glass and ceramic pans heat slowly but retain heat well. performance. These types of pans work well for dishes such as pies and custards. than light, shiny pans. Pans that absorb heat more Air insulated pans heat slowly and can reduce bottom readily can result in a browner, crisper, and thicker crust. -
Page 24: Oven Probe
Oven Probe (Lower Oven Only) WARNING Consuming undercooked food can result in foodborne illness. Use probe according to the following instructions to ensure all portions of the food reach minimum safe cooking temperatures. Recommendations for minimum safe food temperatures can be found at foodsafety.gov or IsItDoneYet.gov. -
Page 25: Oven Cooking Guide
Oven Cooking Guide Cook food thoroughly to help protect against food borne illness. Minimum safe food temperature recommendations for food safety can be found at IsItDoneYet.gov Oven Cookware Guidelines The material, finish, and size of cookware affect baking Glass and ceramic pans heat slowly but retain heat well. performance. - Page 26 Oven Cooking Guide RECOMMENDED OVEN RECOMMENDED FOOD TYPE MODE(S) (Upper/Lower) RACK POSITION(S) ADDITIONAL SUGGESTIONS Baked Goods Layer cakes, sheet Bake cakes, bundt cakes, Lower muffins, quick breads on a Single Rack Bake Goods Lower Layer cakes* on Multiple Bake Lower 1 and 3 Ensure adequate airflow (see illustration below).
-
Page 27: Air Fry Cooking Guide
Oven Cooking Guide (Cont.) Air Fry Cooking Guide General Tips for Air Fry Mode Air Fry is a special, no-preheat, cooking mode that is • The Air Fry mode is designed for cooking on a single designed to produce foods with a crispier exterior than rack. -
Page 28: Range - Exterior
Range – Exterior Be sure all controls are off and all surfaces are cool before cleaning any part of the range. If your range is removed for cleaning, servicing or any reason, be sure the WARNING anti-tip device is reengaged properly when the range is replaced. Failure to take this precaution could result in tipping of the range and can result in death or serious burns to children or adults. -
Page 29: Range - Upper Oven Interior
Range – Upper Oven Interior Wait for cooking surface to cool before cleaning and clean cooking surface before each use. Only clean cooking steel bristles because this will scratch the cooking surface. Upper Oven Pizza and Bread Cooking Surface water to prevent cracking or warping. You can air-dry your wooden pizza peel on a dish rack. -
Page 30: Glass Cooktop
Range – Lower Oven Interior (Cont.) Self Clean Mode (Lower Oven Only) [Cont.] To Stop a Self-Clean Cycle On Some Models: The surface units are automatically disabled during the below the locking temperature to unlatch the door. You self-clean cycle. Make sure that all surface unit controls will not be able to open the door right away unless the are turned off at all times during the self-clean cycle. - Page 31 Cleaning the Glass Cooktop (Cont.) Heavy, Burned-On Residue 1. Allow the cooktop to cool. a 45° angle against the glass surface and scrape the soil. It will be necessary to apply pressure to the razor scraper in order to remove the residue. 3.
-
Page 32: Oven Probe
Oven Probe (Lower Oven Only) The temperature probe may be cleaned with soap and water or a soap-filled scouring pad. Cool the temperature probe before cleaning. Scour stubborn spots with a soap- filled scouring pad, rinse and dry. To order additional temperature probes, see the Accessories and Consumer Support sections at the end of this manual. -
Page 33: Oven Door
Oven Door Lift-Off Oven Door To Remove the Door: 1. Fully open the door. 2. Pull the hinge locks up and away from the range frame to the unlocked position. 3. Firmly grasp both sides of the door near the top. 4. -
Page 34: Troubleshooting Tips
Troubleshooting tips ... Before you schedule service Save time and money! Review the charts on the following pages first and you may not need to schedule service. Problem Possible Cause What To Do Surface units do not Pan not positioned correctly. Center the pan in the cooking zone. - Page 35 Troubleshooting tips ... Before you schedule service Problem Possible Cause What To Do Oven does not work or Plug on range is not completely inserted in the Make sure electrical plug is plugged into a live, properly grounded appears not to work. electrical outlet.
- Page 36 Troubleshooting Tips ... Before you call for service Problem Possible Cause What To Do Power outage, clock flashes. Power outage or surge. Reset the clock. If the oven was in use, you must reset it by pressing the Cancel/Off pad, setting the clock and resetting any cooking function.
- Page 37 Notes 49-2000908 Rev. 0...
- Page 38 Notes 49-2000908 Rev. 0...
-
Page 39: Limited Warranty
This limited warranty is extended to the original purchaser and any succeeding owner for products purchased for home available, you may be responsible for a trip charge or you may be required to bring the product to an Authorized GE Appliances Service location for service. -
Page 40: Accessories
Accessories Looking For Something More? GE Appliances offers a variety of accessories to improve your cooking and maintenance experiences! Refer to the Consumer Support page for phone numbers and website information. The following products and more are available: Accessories Small Broiler Pan (8 ¾ ” x 1 ¼” x 13 ½ “) Large Broiler Pan (12 ¾... -
Page 41: Consumer Support
Have a question or need assistance with your appliance? Try the GE Appliances Website 24 hours a day, any day of the year! You can also shop for more great GE Appliances products and take advantage of all our on-line support GEAppliances.com... - Page 42 Nº de Modelo ____________ Nº de Serie ______________ Usted podrá encontrar la etiqueta de calificación debajo del panel del colector. GE es una marca registrada de General Electric Company. Fabricado bajo licencia de marca. 49-2000908 Rev. 0 05-21 GEA...
- Page 43 GRACIAS POR HACER QUE GE APPLIANCES SEA PARTE DE SU HOGAR. Ya sea que haya crecido usando GE Appliances, o que ésta es su primera vez, nos complace tenerlo en la familia. Sentimos orgullo por el nivel de arte, innovación y diseño de cada uno de los electrodomésticos de GE Appliances, y creemos que usted también.
- Page 44 INFORMACIÓN IMPORTANTE DE SEGURIDAD LEA TODAS LAS INSTRUCCIONES ANTES DE USAR ESTE ELECTRODOMÉSTICO Lea todas las instrucciones de seguridad antes de utilizar este producto. No seguir estas instrucciones ADVERTENCIA puede generar un incendio, una descarga eléctrica, lesiones corporales o la muerte. DISPOSITIVO ANTI-VOLCADURAS Para reducir el riesgo de volcar la cocina, ADVERTENCIA...
- Page 45 INFORMACIÓN IMPORTANTE DE SEGURIDAD LEA TODAS LAS INSTRUCCIONES ANTES DE USAR ESTE ELECTRODOMÉSTICO MANTENGA LOS MATERIALES INFLAMABLES ALEJADOS DE LA COCINA ADVERTENCIA Si esto no se cumple, se podrán sufrir lesiones personales graves o incendios. cercanía. La grasa dentro del horno o sobre la estufa un horno o cerca de la estufa, tales como papel, plástico, puede encenderse.
- Page 46 INFORMACIÓN IMPORTANTE DE SEGURIDAD LEA TODAS LAS INSTRUCCIONES ANTES DE USAR ESTE ELECTRODOMÉSTICO INSTRUCCIONES DE SEGURIDAD DE LA SUPERFICIE DE COCCIÓN ADVERTENCIA DE VIDRIO Tenga cuidado al tocar la estufa. La superficie de vidrio aplica a una superficie caliente. NOTA: Los derrames de de la estufa retendrá...
- Page 47 INFORMACIÓN IMPORTANTE DE SEGURIDAD LEA TODAS LAS INSTRUCCIONES ANTES DE USAR ESTE ELECTRODOMÉSTICO INSTRUCCIONES DE SEGURIDAD DEL HORNO CON LIMPIEZA ADVERTENCIA AUTOMÁTICA La función de limpieza automática usa el horno en temperaturas lo suficientemente altas como para consumir la suciedad de comida que haya dentro del horno.
- Page 48 INFORMACIÓN IMPORTANTE DE SEGURIDAD LEA TODAS LAS INSTRUCCIONES ANTES DE USAR ESTE ELECTRODOMÉSTICO Equipo de Acceso Remoto Instalado Este dispositivo cumple con la Parte 15 de la Normativa de o televisión, lo cual puede comprobar encendiendo y apagando la FCC. Su funcionamiento está sujeto a las dos condiciones el equipo, se aconseja al usuario que intente corregir la siguientes: (1) Este dispositivo no podrá...
-
Page 49: Horno De Pizza
Horno de Pizza Superficie de Cocción de Pizza y Pan superficie de cocción. Rocíe su pala de madera para pizza con una pequeña cantidad de harina. Esto ayudará a que la masa cruda se deslice fuera de la pala al introducirla en el horno. Consulte misma antes de cada uso. - Page 50 Modos para Horno de Pizza (Cont.) Pizza Estilo NY 1. Precalentamiento. Todavía no coloque la comida en el York, con una capa de masa delgada lo suficientemente horno. firme como para sostener aderezos cuando se doble a la 2. Listo para cocinar. Se le indicará que coloque la comida mitad para comer.
-
Page 51: Consejos Para Horno De Pizza
Consejos para Horno de Pizza Consejos para Pizzas Great Artisan (Gran Artesano) y NY-Style (Estilo NY) Use una pala para pizza. Las palas de madera son mejores que las metálicas para preparar la pizza antes de que ingrese en el horno. Cuanto más tiempo la pizza esté sobre la masa, al horno, ya que la masa de la pizza no se pegará... - Page 52 Cocción de una Pizza Menús de Opciones para Pizza y Pan Existen 4 opciones en el Menú Principal para Pizza y Pan: 1. Air Fry (Freír con Aire) 2. Proof (Leudar) 3. Pizza (Pizza) 4. Bread (Pan) Submenú para Pizza Existen 4 opciones en el Submenú...
- Page 53 Cocción de una Pizza (Cont.) Pantallas de Funciones de Pizza y Pan Una vez elegida su opción, las siguientes pantallas exhibirán: Pantalla de Listo para cocinar Pantalla de Temperatura Se le indicará que es el momento de agregar su selección al horno.
-
Page 54: Unidades De Superficie
Unidades de superficie Uso de los Elementos de la Superficie de Cocción ADVERTENCIA RIESGO DE INCENDIO: Nunca deje la cocina desatendida cuando la superficie de cocción se encuentre encendida. Mantenga los ítems inflamables alejados de la estufa. Apague todos los controles cuando finalice la cocción. - Page 55 Unidades de superficie (Cont.) Estufa de Vidrio Radiante La estufa radiante cuenta con unidades calentadoras debajo de una superficie lisa de vidrio. NOTA: Un ligero olor es normal cuando una estufa nueva se utiliza por primera vez. Es provocado por el calentamiento de piezas nuevas y materiales aislantes y desaparecerá...
- Page 56 Unidades de superficie (Cont.) Utensilio para Placa de Cocción para Vidrio Radiante La siguiente información lo ayudará a elegir los recipientes de cocción que brindan un buen desempeño en estufas de vidrio. Ver el folleto sobre recipientes para usar con estufas de inducción. NOTA: Siga todas las recomendaciones del fabricante de recipientes cuando utilice cualquier clase de recipiente de cocción sobre la estufa cerámica.
- Page 57 Unidades de superficie (Cont.) Más sobre Utensilios superficie. No coloque tapas sobre los elementos de superficie, en especial tapas mojadas. Es posible que las ollas y tapas mojadas se adhieran a la superficie plana cuando se enfríen. Verifique que los recipientes calentará...
- Page 58 Controles 7. Timer (Temporizador): Upper Oven and Lower Oven (Horno Funciona como un temporizador con cuenta regresiva. Presione la tecla Superior y Horno Inferior): Designa qué horno Timer (Temporizador) y las teclas + - para programar el operarán los controles. Seleccione un horno antes de tiempo en horas y minutos.
-
Page 59: Opciones De Cocción
Opciones de Cocción La tecla de opciones abre un menú con más modos de cocción cuando el horno está apagado. Abre un menu con funciones adicionales si un modo de cocción ya está en proceso. Puede salir del menú en cualquier momento presionando la tecla Options (Opciones) nuevamente. - Page 60 Settings (Configuraciones) (Cont.) Conexión WiFi y Acceso Remoto (cont.) dispositivo para emparejar. Seleccione Remove (Retirar) para confirmar que el producto está emparejado o para desemparejar 2. Siga las instrucciones en pantalla de la aplicación para el mismo de su cocina. La Sonda de Cocción de Precisión conectar su horno.
-
Page 61: Modo Sabático
Modo Sabático La función de modo sabático cumple con los estándares establecidos por Stark K. Algunos de estos estándares que serán observados por el consumidor incluyen la desactivación de los tonos, la desactivación de las luces del horno, y retrasos de aproximadamente 30 segundos a un minuto en relación a los cambios en la pantalla. -
Page 62: Estantes Del Horno
Estantes del Horno Posiciones de los Estantes Su horno cuenta con seis posiciones de estantes en el horno principal. En la Guía de Cocción del Horno, se brindan recomendaciones de posiciones de los estantes para diferentes tipos de comidas. Se ajusta un estante en una dirección para afectar los resultados de cocción. -
Page 63: Modos De Cocción En Horno
Modos de Cocción del Horno Su horno posee una variedad de modos de cocción para que pueda obtener los mejores resultados. Estos modos se describen a continuación. Para acceder a recomendaciones para comidas específicas, consulte la sección de la Guía de Cocción del Horno. Recuerde que es posible que su nuevo horno funcione de manera diferente que aquel que está... -
Page 64: Sonda Del Horno
Sonda del Horno (Horno Inferior Únicamente) ADVERTENCIA El consumo de comida semicruda puede hacer que se contraigan enfermedades producidas por la comida. Use la sonda de acuerdo con las siguientes instrucciones, a fin de asegurar que todas las partes de la comida alcancen temperaturas de cocción mínimamente seguras. Puede encontrar recomendaciones de temperaturas de cocción mínimamente seguras en foodsafety.gov o en IsItDoneYet.gov. -
Page 65: Guía De Cocción En Horno
Guía de Cocción del Horno Cocine la comida completamente para evitar que se produzcan enfermedades a partir de la comida. Puede encontrar recomendaciones sobre temperatura mínima para cocinar de forma segura en IsItDoneYet.gov. Use un termómetro de comida para medir las temperaturas de la comida. Pautas de Uso de Utensilios El material, el acabado y el tamaño de los utensilios afectan el Las ollas de vidrio y cerámica calientan con lentitud, pero... - Page 66 Guía de Cocción del Horno HORNO POSICIÓN(ES) MODO(S) (Superior/ DE ESTANTES TIPO DE COMIDA RECOMENDADO(S) Inferior) RECOMENDADA SUGERENCIAS ADICIONALES Productos Horneados Tortas con capas, tortas Hornear Superior Use utensilios brillantes. rectangulares, roscas, Inferior panecillos, pan rápido en un Productos Horneados Inferior Solo Estante Tortas con capas* en...
- Page 67 Guía de Cocción del Horno Consejos Generales sobre el Modo para Modo de Cocción para Freír con Aire Freír con Aire Air Fry (Freír con Aire) es un modo de cocción especial sin precalentamiento, que fue diseñado para producir comidas •...
- Page 68 Cocina - Exterior Asegúrese de que todos los controles estén apagados y que las superficies estén frías antes de limpiar cualquier parte de la cocina. Si se quita la cocina para efectuar una limpieza, reparaciones o cualquier ADVERTENCIA otra razón, verifique que el dispositivo anti-volcaduras se coloque de manera adecuada cuando vuelva a instalarse la cocina.
-
Page 69: Cocina - Interior Del Horno Inferior
Range – Interior del Horno Superior Espere a que la superficie de cocción se enfríe antes de realizar la limpieza, y limpie la superficie de cocción antes de cada uso. Sólo limpie la superficie de cocción con agua caliente y un detergente para utensilios de intensidad media. No use limpiadores ásperos, abrasivos, estropajos o un cepillo de cerda metálica, ya que estos rayarán la superficie de cocción. -
Page 70: Limpieza De La Placa De Cocción De Vidrio
Limpieza de la Cocina - Interior (Cont.) Modo de Limpieza Automática (Horno Inferior Únicamente) [Cont.] Para Detener un Ciclo de Limpieza Automática En Algunos Modelos: Presione la tecla Cancel/Off (Cancelar/ Apagar). Espere hasta Las unidades de superficie se desactivan automáticamente que el horno se haya enfriado por debajo de la temperatura de durante el ciclo de auto-limpieza. - Page 71 Cómo limpiar la estufa de vidrio (Cont.) Residuos pegados rebeldes 1. Deje enfriar la estufa. 2. Utilice el raspador de filo único a un ángulo aproximado de 45 degrees contra la superficie del vidrio y raspe la suciedad. Puede ser necesario aplicar presión al raspador para quitar la suciedad.
-
Page 72: Sonda Del Horno
Sonda del Horno (Horno Inferior Únicamente) La sonda de temperatura se puede limpiar con agua y jabón o con una almohadilla de estropajo llena de jabón. Enfríe la sonda de temperatura antes de su limpieza. Fregue las manchas difíciles con una almohadilla de estropajo llena de jabón, enjuague y seque. -
Page 73: Puerta Del Horno
Puerta del Horno Puerta del Horno Desmontable La puerta es muy pesada. Tenga cuidado al retirar y levantar la puerta. No levante la puerta usando la manija. Para retirar la puerta: 1. Abra la puerta totalmente. 2. Empuje los bloqueos de la bisagra hacia arriba y afuera de la estructura de la cocina, hasta la posición de desbloqueo. -
Page 74: Consejos Para La Solución De Problemas
Consejos para la Solución de Problemas... Antes de solicitar el servicio técnico ¡Ahorre tiempo y dinero! Primero revise los cuadros que aparecen en las siguientes páginas y es posible que no necesite solicitar reparaciones. Problema Causa Posible Qué Hacer Las unidades de superficie no La bandeja no están en contacto completo con la superficie de La bandeja debe ser plana. - Page 75 Consejos para la Solución de Problemas... Antes de solicitar el servicio técnico Problema Causa Posible Qué Hacer El horno no funciona o parece El enchufe de la cocina no está introducido del todo en el Verifique que el enchufe eléctrico esté conectado a un tomacorriente no funcionar.
- Page 76 Consejos para la Solución de Problemas... Antes de solicitar el servicio técnico Problema Causa Posible Qué Hacer Corte de corriente, el reloj Corte o exceso de corriente. Reinicie el reloj. Si el horno estuvo en uso, deberá reiniciar el mismo titila.
- Page 77 Para realizar el servicio técnico de su electrodoméstico, se podrá requerir el uso de datos del puerto de abordaje para su diagnóstico. Esto da al técnico del servicio de fábrica de GE Appliances la habilidad de diagnosticar de forma rápida cualquier problema con su electrodoméstico, y de ayudar a GE Appliances a mejorar sus productos al brindarle a GE Appliances la información sobre su...
-
Page 78: Accesorios
Accesorios ¿Busca Algo Más? ¡GE Appliances ofrece una variedad de accesorios para mejorar sus experiencias de cocción y mantenimiento! Para acceder a números telefónicos e información de sitios Web, consulte la página de Soporte para el Consumidor. Estos y otros productos están disponibles: Accesorios Olla para Asar Pequeña (8 ¾... -
Page 79: Soporte Para El Consumidor
En EE.UU.: GEAppliances.com/register Servicio Programado El servicio de reparación de expertos de GE Appliances está a sólo un paso de su puerta. Conéctese a través de Internet y programe su servicio a su conveniencia cualquier día del año. En EE.UU.: GEAppliances.com/service o comuníquese al 800.432.2737 durante el horario de atención comercial.
Need help?
Do you have a question about the Profile TRATTORIA PS96PZRSS and is the answer not in the manual?
Questions and answers