Advertisement
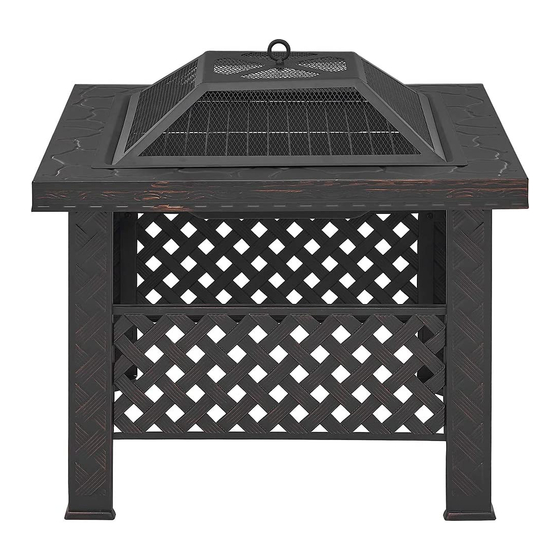
FIRE PIT W/ BBQ GRILL
ITEM # 96810
OWNER'S MANUAL AND SAFETY INSTRUCTIONS
SAVE THIS MANUAL. KEEP THIS MANUAL FOR SAFETY WARNINGS, PRECAUTIONS, ASSEMBLY,
OPERATION, INSPECTION, MAINTENANCE AND CLEANING PROCEDURES. WRITE THE PRODUCT'S
SERIAL NUMBER ON THE BACK OF THE MANUAL, OR THE MONTH AND YEAR OF PURCHASE IF
PRODUCT HAS NO SERIAL NUMBER
FOR QUESTIONS, PLEASE CALL CUSTOMER SERVICE: 909.628.4900
Advertisement
Table of Contents

Summary of Contents for Barton 96810
- Page 1 FIRE PIT W/ BBQ GRILL ITEM # 96810 OWNER’S MANUAL AND SAFETY INSTRUCTIONS SAVE THIS MANUAL. KEEP THIS MANUAL FOR SAFETY WARNINGS, PRECAUTIONS, ASSEMBLY, OPERATION, INSPECTION, MAINTENANCE AND CLEANING PROCEDURES. WRITE THE PRODUCT’S SERIAL NUMBER ON THE BACK OF THE MANUAL, OR THE MONTH AND YEAR OF PURCHASE IF PRODUCT HAS NO SERIAL NUMBER FOR QUESTIONS, PLEASE CALL CUSTOMER SERVICE: 909.628.4900...
- Page 2 SAFETY INFORMATION Read all safety warnings and instructions. Failure to follow the warnings and instructions may result in injury and/or property damage. Save all warnings and instructions for future reference. The warning and safety instructions in this manual are not meant to cover all possible conditions and situations that may occur.
- Page 3 SAFETY INFORMATION...
- Page 4 PARTS INFORMATION...
- Page 5 ASSEMBLY Estimated Assembly Time: 20 Minutes DO NOT over tighten hardware. Step 1: Place parts on a flat surface. Assemble Legs (B) to Top Frame (A) with Bolts (H) as shown. Repeat the same steps for other legs. Tighten all bolts by hand. STEP 2: Attach Frame Support Parts (C) to Legs (B) by Bolts (H) as shown.
- Page 6 OPERATION OPERATING INSTRUCTIONS LIGHTING 1. make sure there is only a small amount of ash in the bottom of the bowl. 2. place a layer of dry kindling or a natural firestarter onto the center of the grate. 3. place above that a layer of dry seasoned hardwood that is cut to lengths no more than 3/4 the diameter of the bowl.
- Page 7 OPERATION CAUTION: DO NOT attempt to inspect this outdoor fire pit unitl the fire is COMPLETELY out. CAUTION: DO NOT use oven cleaner or abrasive cleaners as they will damage this product. CAUTION: DO NOT clean any part of this outdoor fire pit in a self cleaning oven as it may damage the finish.
- Page 8 DISCLAIMER PLEASE READ THE FOLLOWING CAREFULLY THE MANUFACTURER AND/OR DISTRIBUTOR HAS PROVIDED THE PARTS LIST AND ASSEMBLY DIAGRAM IN THIS MANUAL AS A REFERENCE TOOL ONLY. NEITHER THE MANUFACTURER OR DISTRIBUTOR MAKES ANY REPRESENTATION OR WARRANTY OF ANY KIND TO THE BUYER THAT HE OR SHE IS QUALIFIED TO MAKE ANY REPAIRS TO THE PRODUCT, OR THAT HE OR SHE IS QUALIFIED TO REPLACE ANY PARTS OF THE PRODUCT.


Need help?
Do you have a question about the 96810 and is the answer not in the manual?
Questions and answers