Table of Contents
Advertisement
Quick Links
C800
C 800
Owner's Manual
Use and Care
Troubleshooting
Warranty Information
by Prism Medical
Introduction ................................................................... 2
Overview ....................................................................... 2
Components of lift system ............................................. 3
Component List ............................................................. 4
Specifications ................................................................ 4
Cautions ........................................................................ 6
Attaching the airline to the lift ........................................ 7
Turning the lift ON and Automatic OFF .................... 8
Raising/Lowering the carry bar ................................ 9
Moving the lift .......................................................... 9
Moving the "H" system traversing beam .................. 10
Attaching the carry bar to the lift................................11
Return to Charge .......................................................... 12
Basics in transferring an individual ................................ 13
C 800 Tandem Bariatric System.................................16
Charging the lift ............................................................. 18
Constant Charger .......................................................... 19
LCD Display Functionality ............................................ 20
Emergency Stopping ..................................................... 22
Emergency Lowering ..................................................... 22
Emergency Manual Raising or Lowering ....................... 23
Cleaning and Disinfection........................................24
Trouble Shooting ........................................................... 25
General inspection and maintenance ............................ 26
Lift Accessories ............................................................. 27
Service record history .................................................... 28
Warranty ....................................................................... 32
Advertisement
Table of Contents

Related Manuals for Prism Medical UK C800

Summary of Contents for Prism Medical UK C800
-
Page 1: Table Of Contents
C800 C 800 by Prism Medical Introduction ..............2 Overview ............... 2 Components of lift system ..........3 Component List ............. 4 Specifications ..............4 Cautions ................ 6 Attaching the airline to the lift ........7 Operation Turning the lift ON and Automatic OFF ....8 Raising/Lowering the carry bar ........ -
Page 2: Introduction
CAUTION: DO NOT ATTEMPT TO USE THIS EQUIPMENT WITHOUT FIRST UNDERSTANDING THE CONTENTS OF THIS MANUAL. Introduction C 800 Before using this equipment, and to ensure the safe operation of your lift, carefully read this entire Cautions C 800 manual, especially the section on “ ”. -
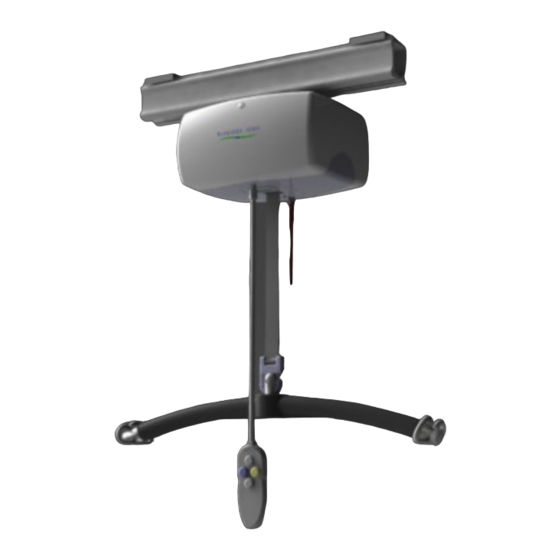
Page 3: Components Of Lift System
Components of lift system CHARGER BAT H BAT H CHARGER LIFT TRACK LIFT BAT HROOM BAT HROOM TRACK BEDROOM BEDROOM Figure 1B - Alternate sample floor plan showing basic Figure 1A - Sample floor plan showing basic components of components of a ceiling lift system. a ceiling lift system. -
Page 4: Component List
Component List C 800 The following components are included with your new lift system: C 800 • lift (Manual or Motorized traverse) • Pneumatic Hand Control • Lift Charger (mounted on the wall or ceiling at the end of the track) •... - Page 5 329190 C800 lbs. Power Traverse 329191 C800 lbs. Power Traverse (Omni) 329192 C800 lbs. Power Traverse -Omni (Rev.G) 329193 C800 lbs. Power Traverse (Rev.A) NOTES: Please use the following type of plug for C 800 lifts installed in the UK: ...
-
Page 6: Cautions
Cautions C 800 ● must be installed prior to use. Contact your local authorized dealer to ensure that it is C 800 properly installed. The must be installed only by persons authorized by Prism Medical Ltd. C 800 ● Under no circumstance should the track, lift and sling (s) or entire system be put in control of a person who has not been properly trained in the use and care of this equipment. -
Page 7: Attaching The Airline To The Lift
Attaching the airline tube to the lift Caution: A sturdy ladder may be required in order to access the underside of the lift to re-attach the rubber airline of the lift. Caution should be used when this is required. Should you have any concerns or questions contact your local authorized Prism Medical dealer. Should the gray rubber airline that connects the lift to the hand control become disengaged from the underside of the lift it must be re-connected in order for the lift to work properly. -
Page 8: Operation
Operation C 800 Caution: Always, before using the lift system, the lift, track and sling (s) must be visually checked for any unusual wear, or damage. Refer to the user manual with each piece of supplied equipment to determine what should be checked. Should anything look unusual contact your local Prism Medical dealer prior to use. -
Page 9: Raising/Lowering The Carry Bar
Operation Raising/lowering the carry bar By pressing the DOWN arrow button, or the UP arrow button, the carry bar can be lowered/ raised to the correct height for attaching the sling or position- ing an individual. Refer to fig- ure 5A and 5B It is recommended that the care- DOWN giver (operator) hold the carry... -
Page 10: Moving The "H" System Traversing Beam
Operation Moving the “H” system traversing beam If the installed track is an “H” system then this sec- tion should be reviewed as it describes how to move TRAV E RS ING BAT H BE AM the traversing beam. If the installed track is not an “H”... -
Page 11: Attaching The Carry Bar To The Lift
C800 Carry Bar Accessory Three sizes carry bar allow users to have multiple op- tions and provide easy attachment with C800 series lift. The part number for three sizes of carry bars: 360770 - 2 Point Carry Bar (520mm) ... -
Page 12: Return To Charge
Return To Charge (If Equipped) If your motorized, traversing lift has a return-to-charge feature (RTC), pressing & holding the blue and yellow colored directional hand control buttons simultaneously for 3-5 seconds (to produce beeping noise) will automatically retract the lift’s carry bar and drive the lift along its track until it docks at the charger. -
Page 13: Basics In Transferring An Individual
Basics in transferring an individual Caution: The following steps are intended to generally illustrate the procedure involved in the lifting and transferring of an individual from one location to another using the lift, track and sling. Track con- figurations will vary by installation. The manual for the sling that was purchased with the lift should be reviewed in detail prior to attempt- ing these steps, as the sling illustrated here may not be the same as the one that was purchased Contact your local authorized... - Page 14 Basics in transferring an individual … continued Step 4) Attach the straps of the sling to the hooks of the carry bar. The straps on each side of the sling are gen- erally attached to the corresponding side of the carry bar. Be sure to double check to ensure that the straps are properly attached to the carry bar, and that the individual being lifted is properly positioned in the sling prior to lifting.
- Page 15 Basics in transferring an individual … continued Step 5) The individual may now be raised with the use of the UP button on the hand control. While lifting is in progress the height required in order for the transfer to be completed safely should be closely observed. En- sure that the individual being lifted will not be injured by any obstructions during the initial lifting.
-
Page 16: C 800 Tandem Bariatric System
C 800 TANDEM BARIATRIC SYSTEM In cases where a client’s weight, size or medical condition requires precise control when transferring or re-positioning, The C-800 Tandem Bariatric Lift provides a safe and reliable solution. The transfer or re-positioning of Bariatric clients can be difficult. A single track can push the legs of a Bariatric client toward the torso, decreasing the hip angle, and compressing the upper body. - Page 17 C 800 TANDEM BARIATRIC SYSTEM CARRY BAR ACCESSORY Tandem Bariatric System Carry Bar allows users to take full advantage of dual motor positioning giv- ing greater control of a client’s weight between the two (torso and leg) lifting motors. The part number for the Tandem Bariatric Carry Bar is 360765.
-
Page 18: Charging The Lift
Charging the lift The charger contacts with two metal charging strips that run along the inside of the track. Whenever the lift is over a section of track with charging strips it will automatically start to charge the lift if its battery is low. The batteries should be charged on a regular basis. -
Page 19: Constant Charger
In addition to the indicator lights on the lift, the charger has an indicator light as well. When ORANGE, it indicates that the that the lift is on the charger and charging. Refer to figure 9A. When the lift is fully charged light on the charger will change to GREEN. -
Page 20: Lcd Display Functionality
LCD Display Functionality Default Display Modes: The lift unit can be set to either of the following as the ‘Default’ display mode: 1. Battery Level (the factory setting for the Default Display Mode); or, 2. Number of Lifts. To change from one operating mode to another please call your local service technician. In Battery Level Mode the lift will: (Factory Setting) 1. - Page 21 LCD Display Functionality If the unit is in the charger the lift will go into Charging Display Mode regardless what the user has selected as ‘Default Display Mode’. Charging Display Mode will over-ride Low Battery Mode. In Charging Display Mode the lift will: 1.
-
Page 22: Emergency Stopping
Emergency Stopping The lift unit also has an Emergency Shut-off feature that allows the operator to shut the power to the lift unit completely off. By pulling down once on the RED emergency lowering cord, located on the underside of the lift unit, the lift will immediately stop and all its functions will be disabled. -
Page 23: Emergency Manual Raising Or Lowering
Emergency Manual Raising or Lowering Caution: The manual emergency raising and lowering system should be used only if the lowering procedures described in the previous section of the manual do not work, or, if the emergency raising function is required. Should you have any concerns or questions contact your local authorized Prism Medical dealer. -
Page 24: Cleaning And Disinfection
Cleaning and Disinfection The exterior of the lift should only be cleaned, disinfected using isopropyl alcohol. Damp a cloth with isopro- pyl alcohol and wipe down entire exterior of lift and hook. No other chemicals and/or liquids should be used to clean, disinfect and sterilize this lift. -
Page 25: Trouble Shooting
Trouble Shooting Should problems arise with the use of the lift review the following chart. Find the fault and complete the rec- ommended solution. If the fault is not found and/or the solution does not correct the problem contact your local Prism Medical authorized dealer for service immediately. -
Page 26: General Inspection And Maintenance
General Inspection and Maintenance A) Each Use - To be completed by User C 800 Prior to each use the lift and associated track, accessories and sling (s), must be visually inspected. Refer to the accessory and sling user guides for specific details regarding their inspection Should any of the these items fail the inspection do not use the lift Contact your local authorized dealer for service. -
Page 27: Lift Accessories
Lift Accessories C 800 The following is a list of available accessories for the lift. Items such as the track, turntables and brack- ets are installed at the time of purchase. Add-on pieces are available to after the initial purchase, however your local authorized dealer must be consulted as to suitability, purchase and installation. -
Page 28: Service Record History
Service Record History - Initial Information Complete the following section on Purchase and Service Information as soon as this equipment is installed. Use the service record history to record to any completed service and repairs. Ensure that the service record is signed and dated each time it is used. ... - Page 29 Service Record History Complete this section after each service, repair inspection and/ or maintenance. Photocopy additional pages as required. Date: _______________________ Time: ________________________ Service Type: □ Periodic Inspection □ Monthly Inspection □ 6 Month Inspection □ Repair □ Yearly Inspection □ Other:_________ _____________________________ _________________________ Completed By:...
- Page 30 Service Record History Complete this section after each service, repair inspection and/ or maintenance. Photocopy additional pages as required. Date: _______________________ Time: ________________________ Service Type: □ Periodic Inspection □ Monthly Inspection □ 6 Month Inspection □ Repair □ Yearly Inspection □ Other:_________ _____________________________ _________________________ Completed By:...
- Page 31 Service Record History Complete this section after each service, repair inspection and/ or maintenance. Photocopy additional pages as required. Date: _______________________ Time: ________________________ Service Type: □ Periodic Inspection □ Monthly Inspection □ 6 Month Inspection □ Repair □ Yearly Inspection □ Other:_________ _____________________________ _________________________ Completed By:...
-
Page 32: Warranty
Warranty This Warranty does not affect or in any way limit your Statutory Rights. 1. Prism Medical guarantees all equipment, which includes Ceiling Lifts, Floor Lifts, Slings, Service Parts and Track and accessories, supplied as new, against failure within the period of 1 year from date of installation or 18 months from date of manufacturing, whichever is shorter, by virtue of defects in material or workmanship.