Table of Contents
Advertisement
Available languages
Available languages
Quick Links
Internet#
Model#
SKU#
302871346
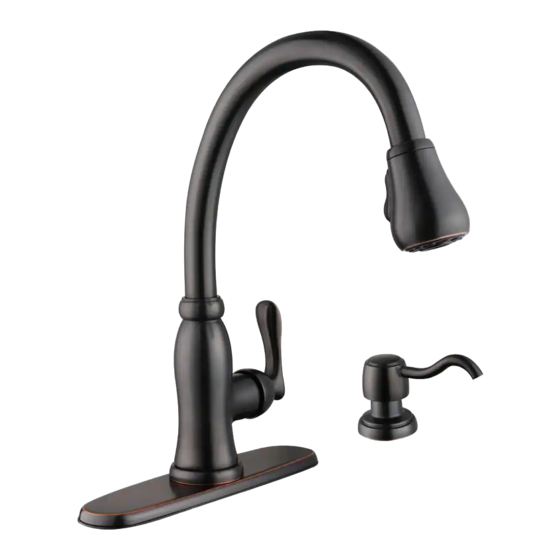
HD67780-0027D
1002707353
INSTALLATION AND CARE GUIDE
PULL-DOWN KITCHEN FAUCET
Questions, problems, missing parts?
Before returning to the store, call Glacier Bay Customer Service
8 a.m. - 7 p.m., EST, Monday - Friday
9 a.m. - 6 p.m., EST, Saturday
1-855-HD-GLACIER (1-855-434-5224)
HOMEDEPOT.COM
THANK YOU
We appreciate the trust and con dence you have placed in Glacier Bay through the purchase of this kitchen
faucet. We strive to continually create quality products designed to enhance your home. Visit us online to see
our full line of products available for your home improvement needs. Thank you for choosing Glacier Bay!
HOMEDEPOT.COM
9/2017 REV.01
Advertisement
Chapters
Table of Contents

Related Manuals for Glacier bay HD67780-0027D


Summary of Contents for Glacier bay HD67780-0027D
- Page 1 HOMEDEPOT.COM THANK YOU We appreciate the trust and con dence you have placed in Glacier Bay through the purchase of this kitchen faucet. We strive to continually create quality products designed to enhance your home. Visit us online to see our full line of products available for your home improvement needs.
-
Page 2: Table Of Contents
Glacier Bay products are manufactured with superior quality standards and workmanship and are backed by our limited lifetime warranty. Glacier Bay products are warranted to the original consumer purchaser to be free of defects in materials or workmanship. We will replace FREE OF CHARGE any product or parts that proves defective. -
Page 3: Package Contents
Pre-Installation (continued) PACKAGE CONTENTS Faucet Assembly Soap Pump Assembly Part Description Quantity Part Description Quantity Faucet assembly Soap pump FastMount™ Soap assembly Quick connector Escutcheon Soap dispenser mounting nut Gasket Soap bottle Weight Weight clip HOMEDEPOT.COM Please contact 1-855-HD-GLACIER for further assistance. -
Page 4: Installation
Installation Installing the faucet assembly Installing the faucet assembly CAUTION: Always shut off the water supply before NOTE: This step is for escutcheon installation (optional). removing an existing faucet or replacing any part of a If the escutcheon will not be used, install the faucet faucet. - Page 5 Installation (continued) Attaching the quick connector Securing the faucet assembly to the receiving block □ From underneath the sink, secure the faucet □ Remove the cap (H) from the quick connect assembly to the sink with the FastMount™ tube (1). system (B).
- Page 6 Installation (continued) Installing the weight Installing the soap dispenser □ □ Install the weight clip (G) at the point of the Insert the soap assembly (J) through the hose marking “weight here”. selected hole in the sink. Secure the soap assembly to the sink with the soap □...
-
Page 7: Operation
Installation (continued) Making the water supply connections NOTE: The hot side inlet tube is indicated by a label. Avoid twisting wires together or placing the wires close to each other and damaging. □ Thread the nut (1) on the supply line onto the outlet of the water supply valve (2) and tighten with a wrench. -
Page 8: Care And Cleaning
Operation (continued) Removing the quick connector □ If it is necessary to remove the quick connector (1), squeeze the tabs (2) on the quick connector and then pull down to disconnect. Squeeze Pull down Care and Cleaning □ To clean, wipe down with a damp cloth and dry with a towel. □... -
Page 9: Troubleshooting
Troubleshooting NOTE: Refer to the service parts section in this manual for a detailed drawing showing the location of the parts listed below. Problem Possible Cause Solution □ There are leaks The bonnet nut has come loose and the Tighten the bonnet nut. Clean underneath the handle. -
Page 10: Service Parts
Service Parts Faucet ID tags can be found on the hot water inlet Part Description Part Number Part Description Part Number Spray head and Hose RP38363* O-ring RP60089 Cartridge & Screw RP20089 Weight RP70525 Bonnet nut RP70582 Weight clip RP70590 RP80184* Escutcheon RP80603*... - Page 11 Questions, problems, missing parts? Before returning to the store, call Glacier Bay Customer Service 8 a.m. - 7 p.m., EST, Monday - Friday 9 a.m. - 6 p.m., EST, Saturday 1-855-HD-GLACIER (1-855-434-5224) HOMEDEPOT.COM Retain this manual for future use.
- Page 12 HOMEDEPOT.COM GRACIAS Agradecemos la con anza que has depositado en Glacier Bay al comprar este grifo para cocina. Nos esforzamos por crear continuamente productos de calidad diseñados para mejorar su hogar. Visítanos en Internet para ver nuestra línea completa de productos disponibles para las necesidades de mejoras de tu hogar. ¡Gracias por...
-
Page 13: Información Importante
GARANTÍA DE POR VIDA LIMITADA Los productos de Glacier Bay están fabricados con normas y mano de obra de calidad superior y están respaldados por nuestra garantía de por vida limitada. Los productos de Glacier Bay están garantizados al comprador consumidor original de estar libres de defectos en materiales o mano de obra. -
Page 14: Contenido Del Paquete
Pre-instalación (continuación) CONTENIDO DEL PAQUETE Ensamblaje de la bomba para jabón Ensamblaje del grifo Pieza Descripción Cantidad Pieza Descripción Cantidad Ensamblaje del grifo Tapa Bomba para jabón FastMount™ Conector rápido Ensamblaje para jabón Placa protectora Tuerca de montaje Junta para el dispensador de jabón Peso Botella de jabón... -
Page 15: Instalación
Instalación Cómo instalar el ensamblaje Cómo instalar el ensamblaje del grifo del grifo PRECAUCIÓN: Cierra siempre el suministro de agua NOTA: Este paso es para la instalación de la placa antes de retirar un grifo existente o reemplazar alguna protectora (opcional). Si no usarás la placa protectora, parte del mismo. - Page 16 Instalación (continuación) Cómo fijar el ensamblaje del Cómo montar el conector grifo rápido al bloque receptor □ Desde abajo del lavamanos, asegura el conjunto □ Quite la tapa (H) del tubo de conexión rápida (1). del grifo a aquel con la sistema FastMount™ (B). Empuja la sistema FastMount™...
- Page 17 Instalación (continuación) Cómo instalar el dispensador Instalar la peso de jabón □ □ Instala el sujetador de la peso (G) en la punta Inserta el ensamblaje para jabón (J) en el de la manguera marcada “weight here” ori cio seleccionado del fregadero. Asegura (peso aquí).
-
Page 18: Funcionamiento
Instalación (continuación) Cómo hacer las conexiones del suministro de agua NOTA: El tubo de entrada del agua caliente se identi ca con una etiqueta. Evita enroscar los cables juntos o colocarlos cerca y evita dañarlos. □ Enrosca la tuerca (1) de la línea de suministro en la salida de la válvula de suministro de agua (2) y aprieta con una llave. -
Page 19: Cuidado Y Limpieza
Funcionamiento (continuación) Cómo quitar el conector rápido □ Si es necesario, retira el conector rápido (1), aprieta las pestañas (2) de la manguera y hala hacia abajo para desconectar. Aprieta Hala hacia abajo Cuidado y limpieza □ Para limpiar, usa un paño húmedo y seca con una toalla. □... -
Page 20: Solución De Problemas
Solución de problemas NOTA: Consulta la sección de piezas de repuesto de este manual para ver un dibujo detallado que muestra la ubicación de las piezas enumeradas a continuación. Problema Posible causa Solución □ Hay ltraciones debajo La tuerca ciega se a ojó y el aro tórico Aprieta la tuerca ciega. -
Page 21: Piezas De Repuesto
Piezas de repuesto Las etiquetas de identi cación de la mezcladora pueden encontrarse en la entrada de agua caliente. Pieza Descripción Número de pieza Pieza Descripción Número de pieza Aro tórico RP60089 Cabezal rociador RP38363* y manguera Peso RP70525 Cartucho y Tornillo RP20089 Sujetador con peso RP70590... - Page 22 ¿Problemas, preguntas o piezas faltantes? Antes de regresar a la tienda, llama al servicio al cliente de Glacier Bay de lunes a viernes entre 8 a.m. y 7 p.m. y los sábados entre 9 a.m. y 6 p.m.(hora estándar del Este) 1-855-HD-GLACIER (1-855-434-5224) HOMEDEPOT.COM...
- Page 23 HOMEDEPOT.COM MERCI Nous vous remercions d'avoir fait con ance à Glacier Bay en achetant ce robinet de cuisine. Nous efforçons en permanence de créer des produits de qualité conçus pour perfectionner votre maison. Vous pouvez visiter notre site en ligne pour consulter notre gamme complète de produits pour vos besoins de rénovation résidentielle.
-
Page 24: Information Importante
GARANTIE À VIE LIMITÉE Les produits Glacier Bay sont fabriqués dans le respect de normes de qualité supérieure et sont protégés par notre garantie à vie limitée. Les produits Glacier Bay sont garantis contre les défauts de fabrication et de matériaux, pourvu que l’acheteur original soit le propriétaire. -
Page 25: Contenu De L'emballage
Pré-installation (suite) CONTENU DE L'EMBALLAGE Ensemble de la pompe Robinet pour distributeur de savon Pièce Description Quantité Pièce Description Quantité Robinet Pompe pour distributeur de savon FastMount™ Ensemble du Raccord à distributeur de savon branchement rapide Écrou de montage Rosace du distributeur de Joint d'étanchéité... -
Page 26: Installation
Installation Installation de l'ensemble de Installation de l'ensemble de robinetterie robinetterie ATTENTION : Fermez toujours l’alimentation en eau CAUTION: Always turn off the water supply before REMARQUE : Cette étape est pour l'installation de la avant de retirer un robinet existant ou d’en remplacer une removing an existing faucet or replacing any part of a rosace (facultatif). - Page 27 Installation (suite) Attacher le raccord à Fixer solidement l'ensemble branchement rapide au bloc de robinetterie récepteur □ À partir du dessous du lavabo, xez solidement □ Retirez le capuchon (H) du tuyau à branchement le robinet au lavabo à l’aide de système rapide (1).
- Page 28 Installation (suite) Installation du distributeur Installation du poids de lest de savon □ □ Installez la pince lestée (G) au point du tuyau Insérez l’ensemble du distributeur de exible avec la marque «weight here (poids ici)». savon (J) dans le trou choisi de l’évier. Fixez solidement l’ensemble du □...
-
Page 29: Utilisation
Installation (suite) Raccordement des conduites d’alimentation en eau REMARQUE : Le tube d’arrivée d’eau chaude est indiqué par une étiquette. Évitez de tordre les ls ensemble ou de les placer trop près les uns des autres, ce qui pourrait les endommager. -
Page 30: Entretien Et Nettoyage
Utilisation (suite) Retirer le raccord à branchement rapide □ S’il est nécessaire de retirer le raccord à branchement rapide (1), appuyez sur (2) les languettes du tuyau et tirez vers le bas pour débrancher. Pressez Tirez vers le bas Entretien et nettoyage □... -
Page 31: Dépannage
Dépannage REMARQUE : Consultez la section pièces de rechange de ce guide pour une illustration détaillée de l’emplacement des pièces énumérées ci-dessous. Problème Cause possible Solution □ Il y a des fuites sous la L’écrou de chapeau s’est desserré et le Serrez l’écrou de chapeau. -
Page 32: Pièces De Rechange
Pièces de rechange Les étiquettes d’identité du robinet se trouvent sur l’arrivée d’eau chaude Pièce Description Numéro de pièce Pièce Description Numéro de pièce Poids RP70525 Tête et tuyau de RP38363* pulvérisation Pince lestée RP70590 Cartouche et Vis RP20089 Rosace RP80603* Écrou de chapeau RP70582... - Page 33 Questions, problèmes, pièces manquantes? Avant de retourner au magasin, appelez le service à la clientèle Glacier Bay entre 8 h et 19 h, HNE, du lundi au vendredi au entre 9 h et 18 h, HNE, le samedi au 1-855-HD-GLACIER (1-855-434-5224) HOMEDEPOT.COM...
Need help?
Do you have a question about the HD67780-0027D and is the answer not in the manual?
Questions and answers