Table of Contents
Advertisement
Available languages
Available languages
Quick Links
Certificación del Sistema de Gestión de la Calidad
Environmental Management System Ce
UNE-EN ISO 14001:2015
ES20/208675
Sistema de Gestión de la
Quality Management Syst
UNE-EN ISO 9001:2015
ES19/86566
www.pando.es
rtification
Calidad
em
PHB-961
PHP-962
Certificado de Garantía
Certificado de Garantia
ES - PT
Manual de uso
Manual de uso
V21.1
Advertisement
Chapters
Table of Contents

Related Manuals for Pando PHB-961


Summary of Contents for Pando PHB-961
- Page 1 PHB-961 PHP-962 ES - PT Certificación del Sistema de Gestión de la Calidad Environmental Management System Ce rtification UNE-EN ISO 14001:2015 Manual de uso ES20/208675 Certificado de Garantía Manual de uso Sistema de Gestión de la Calidad Quality Management Syst Certificado de Garantia...
-
Page 4: Table Of Contents
6.1. Bloqueo de seguridad para niños (bloqueo del panel de control) ........13 6.2. Bloqueo manual de puerta ....................13 7. FUNCIÓN SCS (Stem Clean System by PANDO) ..............14 8. FUNCIÓN DE AUTOLIMPIEZA POR PIRÓLISIS ..............16 9. MODO DEMO (Función especial para exposiciones)............19 10. -
Page 5: Descripción Del Horno
INOXPAN S.L. ES - 5 1. DESCRIPCIÓN DEL HORNO Frente de mandos Bloqueo / Interruptor de puerta (solo para modelos pirolíticos) Resistencia de grill Soporte bandejas Parrilla Bandeja Bisagra Cristal interior Salida de aire de refrigeración Fijación al mueble Lámpara Panel trasero Turbina Junta de horno... -
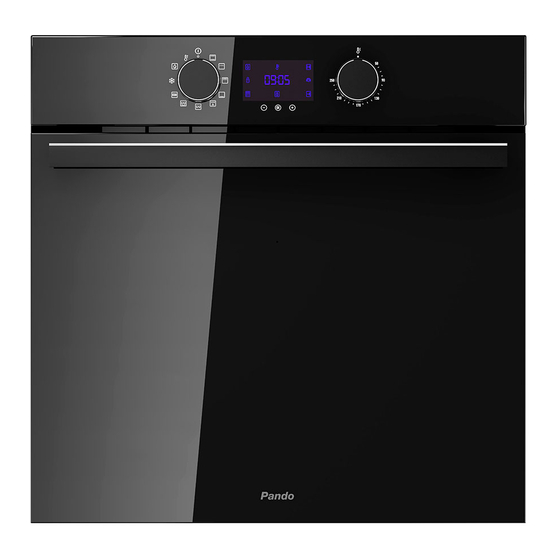
Page 6: Frontal De Mandos
INOXPAN S.L. ES - 6 2. FRONTAL DE MANDOS PHB-961 Selector de funciones. Reloj electrónico. Selector de temperaturas. PHB-962 Pirolítico Selector de funciones. Reloj electrónico. Selector de temperaturas. Símbolos del selector de funciones PHB-961 PHB-962 Pirolítico... -
Page 7: Funciones Del Horno
Para una descripción de uso de cada una de las funciones, consulte la guía de cocinados incluida en su horno. DESCONEXIÓN CONVENCIONAL GRILL MAXIGRILL SOLERA MAXIGRILL CON TURBINA TURBO PIZZA DESCONGELACIÓN SCS (Steam Cleaning System by PANDO) PIRÓLISIS PRECALENTAMIENTO RÁPIDO... -
Page 8: Descripción Del Reloj Electrónico
Otras funciones CALENTAMIENTO: Indica que el horno está transmitiendo calor al alimento. SCS (Steam Cleaning System by Pando): Iluminado durante la función. PIRÓLISIS: sólo para modelos pirolíticos. Iluminado durante la función de limpieza Pirolisis. BLOQUEO DE PUERTA: sólo para modelos pirolíticos. Indica que la puerta se encuentra... -
Page 9: Puesta En Hora
INOXPAN S.L. ES - 9 ATENCIÓN La sensibilidad de las teclas touch se adapta continuamente a las condiciones ambientales. Al conectar el horno a la red tenga la precaución que la superficie del frontal de mandos esté limpia y libre de cualquier obstáculo. Si al tocar las teclas, el reloj no responde correctamente entonces es necesario que desconecte el horno de la red eléctrica y tras un instante vuelva a conectarlo. -
Page 10: Manejo Del Horno
INOXPAN S.L. ES - 10 5. MANEJO DEL HORNO 5.1. FUNCIONAMIENTO MANUAL Tras poner el reloj en hora, su horno está listo para cocinar. Seleccione una función de cocinado y una temperatura. En modelos con regulación electrónica de temperatura, al girar el selector, se mostrará la temperatura en la pantalla del reloj. - Page 11 INOXPAN S.L. ES - 11 PROGRAMACIÓN DE LA DURACIÓN DEL COCINADO 1. Toque hasta que parpadee el símbolo en la pantalla y pulse . En la pantalla se verá la indicación 00:00. 2. Seleccione el tiempo tras el cual desea que el reloj avise, tocando .
- Page 12 INOXPAN S.L. ES - 12 PROGRAMACIÓN DE LA DURACIÓN Y FIN DEL COCINADO 1. Toque hasta que parpadee el símbolo en la pantalla y pulse . En la pantalla se verá la indicación 00:00. 2. Seleccione la duración del cocinado, tocando .
-
Page 13: Funciones De Seguridad
INOXPAN S.L. ES - 13 6. FUNCIONES DE SEGURIDAD 6.1. BLOQUEO DE SEGURIDAD PARA NIÑOS (BLOQUEO DEL PANEL DE CONTROL) Esta función se puede seleccionar en cualquier momento durante el uso del horno. Para activar la función, toque la tecla de forma prolongada, por más de 4 segundos, hasta que escuche 1 beep sonoro y el símbolo aparezca en la pantalla. -
Page 14: Función Scs (Stem Clean System By Pando)
INOXPAN S.L. ES - 14 7. FUNCIÓN SCS (Stem Clean System by PANDO) Esta función facilita la limpieza de la grasa y los restos de suciedad que han quedado adheridos en las paredes del horno. Para una mayor facilidad de limpieza, evite que se acumule la suciedad. Limpie el horno con frecuencia. - Page 15 INOXPAN S.L. ES - 15 3. Encienda el horno, gire el mando izquierdo para seleccionar la función y valide con 4. A continuación se oirá una señal sonora como confirmación de que la función SCS se ha puesto en marcha. En la pantalla se visualizará...
-
Page 16: Función De Autolimpieza Por Pirólisis
INOXPAN S.L. ES - 16 8. FUNCIÓN DE AUTOLIMPIEZA POR PIRÓLISIS Función disponible en los modelos pirolíticos HLB P. Antes de realizar el ciclo de limpieza por pirólisis, lea atentamente las instrucciones de seguridad que encontrará al inicio del libro de Instalación y Mantenimiento. Esta función le permite realizar un ciclo de limpieza por pirólisis, durante el cual, debido a las altas temperaturas que se alcanzan en el interior del horno se produce un proceso de carbonización de las grasas acumuladas. - Page 17 INOXPAN S.L. ES - 17 5. Cuando la puerta esté bloqueada, se iluminará el símbolo en la pantalla del reloj y se mostrará el tiempo restante para la finalización de la pirólisis. Llegado a este punto, el horno está programado y realizando el ciclo de limpieza pirolítica. Durante la realización de este ciclo, no podrá...
- Page 18 INOXPAN S.L. ES - 18 CANCELACIÓN DE LA FUNCIÓN PIRÓLISIS La pirolisis es una función automática y como tal, sólo puede accionarse mediante la programación del reloj. Para cancelar una pirolisis en curso es necesario desprogramar el horno, siguiendo estas instrucciones: 1.
-
Page 19: Modo Demo (Función Especial Para Exposiciones)
INOXPAN S.L. ES - 19 9. MODO DEMO (Función especial para exposiciones) Con el modo DEMO activado, puede manejarse el horno sin calentar. Se recomienda activar este modo si el horno va a instalarse en una exposición con conexión a red. Activación del modo DEMO. -
Page 20: Especificaciones Técnicas
INOXPAN S.L. ES - 20 10. ESPECIFICACIONES TÉCNICAS PHB-961 PHP-962 INSTALACIÓN 220-240 220-240 Tensión (V) 50/60 50/60 Frecuencia (Hz) 1,1 m SIN CLAVIJA 1,1 m SIN CLAVIJA Cable de Alimentación (m) 590-600 x 560-568 x 580 590-600 x 560-568 x 580... -
Page 21: Esquemas Instalación Y Cotas
INOXPAN S.L. ES - 21 11. ESQUEMAS INSTALACIÓN Y COTAS PHB 961 AVISO INSTALACIÓN EN COLUMNA Respetar los huecos de ventilación en el mueble, ver dibujos instalación (200x100mm en zona A y 560x90mm en zona B). De no disponer de estas ventilaciones el producto no funcionará... - Page 22 INOXPAN S.L. ES - 22 11. ESQUEMAS INSTALACIÓN Y COTAS PHP 962 Pirolítico ¡ATENCIÓN! Para la instalación de INSTALACIÓN EN COLUMNA hornos pirolíticos NO realizar las aperturas en el mueble que se muestran sombreadas. 560-568 mín 590 490 * mín 10 mín 580 INSTALACIÓN BAJO ENCIMERA 560-568...
-
Page 23: Certificado De Garantía Pando
ES - 23 12. CERTIFICADO DE GARANTÍA PANDO INOXPAN S.L., le agradece la elección y confianza depositada en un producto de nuestra marca Pando, que se distingue por su Calidad, Diseño e Innovación, siendo fiel a sus orígenes y compromisos. - Page 26 6.1. Bloqueio de segurança para crianças .................. 13 6.2. Bloqueio manual da porta ....................13 7. FUNÇÃO SCS (Stem Clean System by PANDO) ..............14 8. FUNÇÃO DE AUTOLIMPEZA POR PIRÓLISE ................ 16 9. FUNÇÃO DEMO (função especial para exposições) ............. 19 10.
-
Page 27: Descrição Do Forn
INOXPAN S.L. PT - 5 1. DESCRIÇÃO DO FORN Painel de comandos Bloqueio da porta (apenas para modelos pirolíticos) Resistência do grill Apoio dos tabuleiros Grelha Tabuleiro Dobradiça Vidro interior Saída de ar de refrigeração Fixação ao móvel Lâmpada Painel traseiro Turbina Junta de forno Porta... -
Page 28: Painel De Comandos
INOXPAN S.L. PT - 6 2. PAINEL DE COMANDOS PHB-961 Selector de funciones. Reloj electrónico. Selector de temperaturas. PHB-962 Pirolítico Seletor de funções Relógio eletrónico / Temperatura selecionada. Seletor de temperaturas. Símbolos do seletor de funções PHB-961 PHB-962 Pirolítico... -
Page 29: Funções Do Forno
Para uma descrição da utilização de cada uma das funções, consulte o guia de cozinhados fornecido com o seu forno. DESLIGAR O FORNO CONVENCIONAL GRILL MAXIGRILL RESISTÊNCIA INFERIOR SOLERA MAXIGRILL COM TURBINA TURBO PIZZA MODO ECOLÓGICO DESCONGELAÇÃO SCS (Steam Cleaning System by PANDO) PIRÓLISE PRÉ-AQUECIMENTO RÁPIDO... -
Page 30: Descrição Do Relógio Eletrónic
Outras funções CALENTAMIENTO: Indica que o forno está a transmitir calor ao alimento. SCS (Steam Cleaning System by Pando): luminase durante a função. PIRÓLISE: apenas para modelos pirolíticos. Iluminase durante a função de limpeza por pirólise. BLOQUEIO DA PORTA: apenas para modelos pirolíticos. Indica que a porta se encontra... -
Page 31: Acertar A Hora
INOXPAN S.L. PT - 9 A sensibilidade das teclas touch adapta-se continuamente às condições ambientais. Ao ligar o forno à corrente, é necessário ter o cuidado de garantir que a superfície do vidro da parte da frente dos comandos está limpa e livre de qualquer obstáculo. Se, ao tocar nas teclas, o relógio não responder corretamente, é... -
Page 32: Manuseamento Do Forno
INOXPAN S.L. PT - 10 5. MANUSEAMENTO DO FORNO 5.1. FUNCIONAMENTO MANUAL Após acertar a hora do relógio, o seu forno está pronto para cozinhar. Selecione uma função de cozinhado e uma temperatura. Em modelos com regulação eletrónica de temperatura, a temperatura é apresentada no ecrã do relógio ao rodar o seletor. - Page 33 INOXPAN S.L. PT - 11 PROGRAMAÇÃO DA DURAÇÃO DO COZINHADO 1. Prima até que o símbolo fique intermitente no visor e prima . No visor será exibida a indicação 00:00 2. Selecione o tempo, após o qual pretende que o relógio avise, tocando em .
- Page 34 INOXPAN S.L. PT - 12 PROGRAMAÇÃO DA DURAÇÃOE FINALIZAÇÃO DO COZINHADO 1. Prima até que o símbolo fique intermitente no visor e prima . No visor será exibida a indicação 00:00. 2. Selecione a duração do cozinhado, tocan do em .
-
Page 35: Funções De Segurança
INOXPAN S.L. PT - 13 6. FUNÇÕES DE SEGURANÇA 6.1. BLOQUEIO DE SEGURANÇA PARA CRIANÇAS Esta função pode ser selecionada a qualquer momento durante a utilização do forno. Para ativar a função, prima a tecla de modo prolongado, por mais de 4 segundos, até que soe 1 sinal sonoro e o símbolo seja exibido no visor. -
Page 36: Função Scs (Stem Clean System By Pando)
INOXPAN S.L. PT - 14 7. FUN ÇÃO SCS (Stem Clean System by PANDO) Esta função facilita a limpeza de gordura e restos de sujidade que tenham aderido às paredes do forno. Para facilitar a limpeza, evite a acumulação de sujidade. Limpe frequentemente o forno. - Page 37 INOXPAN S.L. PT - 15 e valide com 3. Rode o seletor de funções para a posiçã 4. De seguida, ouvirá um sinal sonoro de confirmação do início da função o símbolo piscará lentamente e será exibi do no visor o tempo restante até à finalização da função. O tempo de duração é...
-
Page 38: Função De Autolimpeza Por Pirólise
INOXPAN S.L. PT - 16 8. FUNÇÃO DE AUTOLIMPEZA POR PIRÓLISE Função disponível para os modelos pirolíticos HLB P. Antes de realizar o ciclo de limpeza por pirólise, leia atentamente as instruções de segurança disponibilizadas no início do manual de Instalação e Manutenção Esta função permite-lhe realizar um ciclo de limpeza por pirólise, durante o qual se produz um processo de carbonização das gordurasacumuladas, devido às elevadas temperaturas que são atingidas no interior do forno. - Page 39 INOXPAN S.L. PT - 17 5. Quando a porta estiver bloqueada, iluminarse-á o símbolo no visor do relógio e será exibido o tempo restante para a finalização da pirólise. Ao chegar a este ponto, o forno está programado e encontra-se a realizar o ciclo de limpeza pirolítica.
- Page 40 INOXPAN S.L. PT - 18 CANCELAMENTO DA PIRÓLISE La pirolisis es una función automática y como tal, sólo puede accionarse mediante la programación del reloj. Para cancelar una pirolisis en curso es necesario desprogramar el horno, siguiendo estas instrucciones: 1. Coloque o seletor de funções na posiçã No visor do relógio será...
-
Page 41: Função Demo (Função Especial Para Exposições)
INOXPAN S.L. PT - 19 9. FUNÇÃO DEMO (função especial para exposições) Com o modo DEMO ativado, o forno pode ser operado sem aquecimento. É recomendável ativar este modo se o forno for instalado em uma exposição com conexão à rede elétrica. -
Page 42: Especificações Técnicas
INOXPAN S.L. PT - 20 10. ESPECIFICAÇÕES TÉCNICAS PHB-961 PHP-962 INSTALAÇÃO 220-240 220-240 Tensão (V) 50/60 50/60 Frecuência (Hz) Cabo de energia (m) 1,1 m SEM PLUGUE 1,1 m SEM PLUGUE Dimensões de montagem 590-600 x 560-568 x 580 590-600 x 560-568 x 580 (altura x largura x profundidade) (mm) Dimensões do produto no painel frontal... -
Page 43: Esquemas Instalação E Cotas
INOXPAN S.L. PT - 21 11. ESQUEMAS INSTALAÇÃO E COTAS PHB 961 ATENÇÃO Respeite os orifícios de ventilação no INSTALAÇÃO EM COLUNA gabinete, consulte os desenhos de instalação (200x100mm na zona A e 560X90mm na zona B). Se essas aberturas não estiverem disponíveis, o produto não funcionará... - Page 44 INOXPAN S.L. PT - 22 11. ESQUEMAS INSTALAÇÃO E COTAS PHP 962 Pirolítico ATENÇÃO! Para a instalação INSTALAÇÃO EM COLUNA de fornos pirolíticos, NÃO faça as aberturas no armário sombreadas* 560-568 mín 590 490 * mín 10 mín 580 INSTALAÇÃO SOB A BANCADA 560-568 mín 600 mín 10...
-
Page 45: Certificado De Garantía Pando
PT - 23 12. CERTIFICADO DE GARANTÍA PANDO INOXPAN S.L., agradece a escolha e a confiança depositada num produto da nossa marca Pando, que se distingue pela sua Qualidade, Design eInovação sendo fiel às suas origens e compromisos CONDIÇÕES DE GARANTIA PANDO: Este aparelho dispõe de uma garantía de 2 anos a partir da data da comprae cobre este aparelhocontra todo o defeito... - Page 46 INOXPAN S.L.
- Page 47 INOXPAN S.L.
- Page 48 Av. El Molí de les Mateves,11 Apdo. Correos nº 21 08310 ARGENTONA (Barcelona - Spain) Tel. +34 93 757 94 11 Fax +34 93 757 96 53 www.pando.es com.pando@pando.es Export: export@pando.es Tel. 902 41 55 11 Certificación del Sistema de Gestión de la Calidad...
- Page 49 PHB-961 PHP-962 FR - EN - DE Manuel d’utilisation Certificación del Sistema de Gestión de la Calidad Certificat de garantie Environmental Management System Ce rtification UNE-EN ISO 14001:2015 ES20/208675 User manual Guarantee certificate Sistema de Gestión de la Calidad Quality Management Syst...
- Page 52 6.1. Verrouillage de sécurité pour les enfants ................13 6.2. Verrouillage manuel de porte ....................13 7. FUNCTION SCS (Stem Clean System by PANDO) ..............14 8. FONCTION D’AUTONETTOYAGE PYROLYTIQUE ..............16 9. MODE DEMO (Fonction spéciale pour les expositions) ............19 10.
-
Page 53: Description Du Fou
INOXPAN S.L. FR - 5 1. DESCRIPTION DU FOU Panneau de commande Verrouillage de porte (pour les modèles à pyrolyse uniquement) Résistance du gril Support plaques Grille Plaque Charnière Vitre intérieure Sortie d’air de refroidissement Fixation au meuble Ampoule Panneau du fond Turbine Joint de four Porte... -
Page 54: Panneau Frontal Des Commandes
INOXPAN S.L. FR - 6 2. PANNEAU FRONTAL DES COMMANDES PHB-961 Sélecteur de fonctions Horloge électronique Sélecteur de températures PHB-962 Pyrolyse Sélecteur de fonctions Horloge électronique / Température sélectionnée Sélecteur de températures Symboles du sélecteur de fonctions PHB-961 PHB-962 Pyrolyse... -
Page 55: Functions Du Four
Consultez le guide de cuisson fourni avec votre four pour lire la description des usages de chacune des fonctions. ARRÊT DU FOUR CUISSON TRADITIONNELLE GRILL MAXI GRILL SOLE MAXI GRILL AVEC TURBINE TURBO PIZZA DÉCONGÉLATION SCS (Steam Cleaning System by PANDO) PYROLYSE PRÉCHAUFFAGE RAPIDE... -
Page 56: Description De L'horloge Electronique
INOXPAN S.L. FR - 8 4. DESCRIPTION DE L’HORLOGE ELECTRONIQUE TOUCHES : Permettent de programmer les fonctions de l’horloge électronique. Dans les modèles à régulation électronique de la température, appuyez sur cette touche pour voir la température pendant la cuisson. SYMBOLES Fonctions de l’horloge AVERTISSEUR : Allumé... -
Page 57: Réglage De L'heure
INOXPAN S.L. FR - 9 4.1. RÉGLAGE DE L’HEURE Pour mettre l’heure sur le four, les commandes du sélectionneur de fonctions et de température doivent être en position Lorsque vous branchez le four, l’indication 12:00 se met à clignoter sur l’horloge. ... -
Page 58: Fonctionnement Du Four
INOXPAN S.L. FR - 10 5. FONCTIONNEMENT DU FOUR 5.1. FONCTIONNEMENT MANUEL Une fois l’horloge réglée, votre four est prêt à fonctionner. Sélectionnez une fonction de cuisson et une température. Dans les modèles avec régulation électronique de la température, lorsque vous tournez le sélecteur, la température s’affiche sur l’écran de l’horloge. - Page 59 INOXPAN S.L. FR - 11 PROGRAMMATION DE LA DUREE DE CUISSON 1. Appuyez sur jusqu’à ce que le symbole se mette à clignoter sur l’écran et appuyez sur . L’écran affiche alors l’indication 00:00. 2. Sélectionnez le temps après lequel vous souhaitez que l’horloge sonne en appuyant sur .
- Page 60 INOXPAN S.L. FR - 12 PROGRAMMATION DE LA DUREE ET FIN DE CUISSON 1. Appuyez sur jusqu’à ce que le symbole clignote sur l’écran et appuyez sur L’écran affiche alors l’indication 00:00. 2. Sélectionnez la durée de cuisson en appuyant sur .
-
Page 61: Fonctions De Securite
INOXPAN S.L. FR - 13 6. FONCTIONS DE SECURITE 6.1. VERROUILLAGE DE SÉCURITÉ POUR LES ENFANTS Cette fonction peut être sélectionnée à tout moment pendant l’utilisation du four. Pour activer la fonction, appuyez de façon prolongée pendant plus de 4 secondes la touche jusqu’à... -
Page 62: Function Scs (Stem Clean System By Pando)
INOXPAN S.L. FR - 14 7. FUNCTION SCS (Stem Clean System by PANDO) Cette fonction facilite le nettoyage des traces de graisse et de saleté pouvant rester collées aux parois du four. Pour un nettoyage plus efficace, évitez que la saleté ne s’accumule. Nettoyez régulièrement le four. - Page 63 INOXPAN S.L. FR - 15 et validez avec 3. Placez le sélecteur de fonctions sur la position 4. Un signal sonore est alors émis pour confirmer la mise en marche de la fonction SCS le symbole se met à clignoter lentement et le temps restant pour que le processus se termine s’affiche à l’écran .
-
Page 64: Fonction D'autonettoyage Pyrolytique
INOXPAN S.L. FR - 16 8. FONCTION D’AUTONETTOYAGE PYROLYTIQUE Fonction disponible sur les modèles à pyrolyse HLB P. Avant de procéder au cycle de nettoyage pyrolytique, lisez attentivement les instructions de sécurité que vous trouverez au début du manuel d’installation et d’entretien. Cette fonction vous permet de réaliser un cycle de nettoyage pyrolytique durant lequel, en raison des hautes températures atteintes à... - Page 65 INOXPAN S.L. FR - 17 Si la porte n’est pas bien fermée, elle ne se bloquera pas, une alarme sonnera et la pyrolyse ne sera pas lancée. Le cas échéant, éteignez l’alarme en touchant n’importe quelle touche de l’horloge, fermez bien la porte, mettez la commande du sélectionneur de fonction en position et sélectionnez à...
- Page 66 INOXPAN S.L. FR - 18 12. Une fois l’intérieur du four propre, n’oubliez pas de remettre les supports et les ustensiles. 13. Le four est prêt pour une prochaine utilisation. Si vous repérez un quelconque problème dans la programmation et l’utilisation de cette fonction, reportez-vous au guide d’utilisation et d’entretien fourni avec votre four.
-
Page 67: Mode Demo (Fonction Spéciale Pour Les Expositions)
INOXPAN S.L. FR - 19 9. MODE DEMO (Fonction spéciale pour les expositions) Lorsque le mode DEMO est activé, le four peut être utilisé sans qu’il ne chauffe. Il est recommandé d’activer ce mode si le four va être installé dans une exposition tout en étant branché... - Page 68 INOXPAN S.L. FR - 20 10. SPÉCIFICATIONS TECHNIQUES PHB-961 PHP-962 INSTALLATION 220-240 220-240 Tension (V) 50/60 50/60 Frequence (Hz) 1,1 m SANS FICHE 1,1 m SANS FICHE Câble Alimentation (m) 590-600 x 560-568 x 580 590-600 x 560-568 x 580...
-
Page 69: Schémas Et Dimensions D'installation
INOXPAN S.L. FR - 21 11. SCHÉMAS ET DIMENSIONS D'INSTALLATION PHB 961 REMARQUE INSTALLATION EN COLONNE Respectez les trous de ventilation du meuble, voir les plans d'installation en zone A et 200x100mm 560x90mm en zone B). Si ces évents ne sont pas disponibles, le produit ne fonctionnera pas correctement et peut subir des dommages qui ne seraient PAS... - Page 70 INOXPAN S.L. FR - 22 11. ESQUEMAS INSTALACIÓN Y COTAS PHP 962 Pyrolyse ATTENTION! Pour l'installation de fours pyrolytiques, NE FAITES PAS INSTALLATION EN COLONNE les ouvertures de l'armoire qui sont ombragées. 560-568 mín 590 490 * mín 10 mín 580 INSTALLATION SOUS PLAN DE TRAVAIL 560-568 mín 600...
-
Page 71: Service Technique Après-Vente (Sat) Et Garantie
Dans le ca que le technicien n'a pas un accès facile au produit, car il y a des éléments qui empêchent son accès facile et sûr. Les moyens nécessaires à mettre en œuvre pour que le technicien Autorisé Pando puisse y accéder selon les conditions spécifiées ci-dessus seront à... - Page 74 6. SAFETY INSTRUCTIONS ......................13 6.1. Safety child lock ........................13 6.2. Manual door lock ......................... 13 7. FUNCTION SCS (Stem Clean System by PANDO) ..............14 8. PYROLYTIC SELF-CLEANING FUNCTION ................16 9. DEMO MODE (SPECIAL FUNCTION FOR SHOP FLOORS) ........... 19 10.
-
Page 75: Description Of The Oven
INOXPAN S.L. EN - 5 1. DESCRIPTION OF THE OVEN Control panel Door lock (only for pyrolytic models) Grill element Tray supports Grid shelf Tray Hinge Inner Glass Air cooling outlet Unit mounting Lamp Back Wall Panel Oven Seal Door... -
Page 76: Control Panel
INOXPAN S.L. EN - 6 2. CONTROL PANEL PHB-961 Function control dial Electric clock/timer. Temperature control dial. PHB-962 Pyrolytio Function control dial Electric clock/timer / Selected temperature. Temperature control dial. Function selector symbols PHB-961 PHB-962 Pyrolytic... -
Page 77: Oven Functions
For a description of how to use each of the features, see the cooking guide that comes with your oven. OVEN SWITCH-OFF CONVENTIONAL GRILL MAXIGRILL SOLERA LOWER ELEMENT MAXIGRILL WITH FAN TURBO PIZZA DEFROSTING SCS (Steam Cleaning System by PANDO) PYROLYSIS FAST PREHEATING... -
Page 78: Electronic Clock/Timer Descriptio
Other functions HEATING: Indicates that the oven is transmitting heat to the food. SCS (Steam Cleaning System by Pando): Lights up while the function is in progress. PYROLYSIS: For pyrolytic models only. Lights up while the Pyrolytic function is in progress. -
Page 79: Setting The Time
INOXPAN S.L. EN - 9 WARNING The sensitivity of the touch keys adapts continually to environmental conditions. Make sure the surface of the control panel is clean and free of obstacles when plugging in the oven. If the clock does not respond correctly when you touch the keys, unplug the oven for a few seconds and then plug it in again. -
Page 80: Oven Use
INOXPAN S.L. EN - 10 5. OVEN USE 5.1. MANUAL OPERATION After setting the clock, the oven is ready for use. Select a cooking function and temperature. In models with an electronic temperature control, when the selector switch is turned, the clock display will show the temperature. - Page 81 INOXPAN S.L. EN - 11 PROGRAMMING COOKING TIME 1. Touch until the symbol on the display starts flashing, then press . The indication ‘00:00’ will appear on the display. 2. Select the time after which you want the alarm to sound by pressing .
- Page 82 INOXPAN S.L. EN - 12 PROGRAMMING COOKING TIME AND COOKING END TIME 1. Touch until the symbol on the display starts flashing, then press . The indication ‘00:00’ will appear on the display 2. Select the cooking time by touching .
-
Page 83: Safety Instructions
INOXPAN S.L. EN - 13 6. SAFETY INSTRUCTIONS 6.1. SAFETY CHILD LOCK This function can be selected at any time while using the oven. To activate the function, touch and hold keyfor several seconds until you hear a beep for more than 4 seconds and the symbol appears on the display. -
Page 84: Function Scs (Stem Clean System By Pando)
INOXPAN S.L. EN - 14 7. FUNCTION SCS (Stem Clean System by PANDO) This function makes it easy to remove grease and other food debris that may have stuck to the sides of the oven. For easier cleaning, do not allow dirt to accumulate. Clean the oven frequently. - Page 85 INOXPAN S.L. EN - 15 position and press 3. Turn the control dial to the 4. 4. You will hear a beep indicating that the SCS cycle has started. The symbol will flash slowly and the time remaining to complete the cycle will appear on the display. The duration time is preset to 24 minutes.
-
Page 86: Pyrolytic Self-Cleaning Function
INOXPAN S.L. EN - 16 8. PYROLYTIC SELF-CLEANING FUNCTION Función disponible en los modelos pirolíticos HLB P. Before setting the pyrolytic cleaning cycle, carefully read the safety instructions, which you will find at the start of the Installation and Maintenance guide. This function allows you to carry out a pyrolytic cleaning cycle during which, due to the high temperatures reached inside the oven, accumulated grease undergoes a carbonisation process. - Page 87 INOXPAN S.L. EN - 17 Si la puerta no está bien cerrada, no se bloqueará, sonará una alarma y la pirólisis no comenzará. Si esto ocurre, apague la alarma tocando cualquier tecla del reloj, cierre bien la puerta, ponga el mando del selector de funciones en posición y vuelva seleccionar el programa de pirólisis siguiendo las instrucciones anteriores.
- Page 88 INOXPAN S.L. EN - 18 CANCELLING THE PYROLYTIC FUNCTION Pyrolysis is an automatic function and therefore it can only be activated from the timer programme. To cancel a pyrolysis in progress it is necessary to reset the oven, following the instructions below: 1.
-
Page 89: Demo Mode (Special Function For Shop Floors)
INOXPAN S.L. EN - 19 9. DEMO MODE (SPECIAL FUNCTION FOR SHOP FLOORS) With the DEMO mode activated, you can control the oven without heating. Activating this mode is recommended if the oven is to be plugged in at a showroom. Activation of the DEMO mode. - Page 90 INOXPAN S.L. EN - 20 10. TECHNICAL SPECIFICATIONS PHB-961 PHP-962 INSTALATION 220-240 220-240 Voltage (V) 50/60 50/60 Frequency (Hz) 1,1 m WITHOUT PLUG 1,1 m WITHOUT PLUG Connecting Wire (m) 590-600 x 560-568 x 580 590-600 x 560-568 x 580...
- Page 91 INOXPAN S.L. EN - 21 11. INSTALLATION DIAGRAMS AND DIMENSIONS PHB 961 NOTE Respect the ventilation holes in the BUILT IN DIAGRAM cabinet, see installation drawings (200X100mm zone 560x90mm in zone B). If these vents are not available, the product not work properly and may suffer damage that would NOT be covered by the warranty.
- Page 92 INOXPAN S.L. EN - 22 11. INSTALLATION DIAGRAMS AND DIMENSIONS PHP 962 Pyrolytic WARNING! For Pyrolitic oven installation DO NOT make the BUILT IN DIAGRAM shaded openings in the cabinet. 560-568 mín 590 490 * mín 10 mín 580 BUILT UNDER DIAGRAM 560-568 mín 600 mín 10...
-
Page 93: After-Sales Service And Guarantee
That the technician does not have easy access to the product, because there are elements that prevent its easy and safe access. All necessary means to access by the Pando authorised engineer shall be on account and responsibility of the user. - Page 96 6. SICHERHEITSFUNKTIONEN ....................13 6.1. Sicherheitssperre für kinder ....................13 6.2. Manuelle türsperre ....................... 13 7. SCS FUNKTION (Stem Clean System by PANDO) ..............14 8. SELBSTREINIGUNGSFUNKTION ANHAND PYROLYSE ............16 9. DEMO-MODUS (SONDERFUNKTION FÜR AUSSTELLUNGEN) ........... 19 10. ESPECIFICACIONES TÉCNICAS ..................20 11.
-
Page 97: Backofenbeschreibu
INOXPAN S.L. DE - 5 1. BACKOFENBESCHREIBU Bedienblende Türsperre (nur für Pyrolyse-Modelle) Grillwiderstand Blechhalterungen Rost Backblech Scharnier Innenscheibe KühlluftaustritT Befestigung am Einbauschrank Lampe Rückwand Umluft Backofendichtung Tür... -
Page 98: Bedienfeld
INOXPAN S.L. DE - 6 2. BEDIENFELD PHB-961 Funktionswahlschalter. Elektronische Uhr. Temperaturwahlschalter. PHB-962 Pyrolyse Funktionswahlschalter. Elektronische Uhr/ Gewählte Temperatur. Temperaturwahlschalter. Funktionswahlschaltersymbole PHB-961 PHB-962 Pyrolyse... -
Page 99: Backofenfunktionen
DE - 7 3. BACKOFENFUNKTIONEN In der zu Ihrem Backofen gehörenden Anleitung zum Garen finden Sie eine Be- schreibung der einzelnen Funktionen. AUSSCHALTEN DES BACKOFENS NORMA GRILL MAXIGRILL UNTERHITZE MAXIGRILL TURBO PIZZA AUFTAUEN SCS (Steam Cleaning System by PANDO) PYROLYSE SCHNELLAUFHEIZUNG... -
Page 100: Beschreibung Der Elektronischen Uh
Sonstige Funktionen HEIZEN: Zeigt an, dass der Ofen Wärme auf die Speisen überträgt. SCS (Steam Cleaning System by Pando): Leuchtet während der funktion. PYROLYSE: Nur für pyrolyse-Modelle. Leuchtet während der Pyrolyse-Reini- gungsfunktion . TÜRSPERRE: Nur für pyrolyse-Modelle. Zeigt an, dass die Tür gesperrt ist. Das kann durch manuelle oder automatische Sperrung während der Pyrolyse-Funktion bedingt sein. -
Page 101: Zeiteinstellung
INOXPAN S.L. DE - 9 4.1. ZEITEINSTELLUNG Um die Backofenuhr einzustellen, müssen die Funktions- und Temperaturwahlschalter auf der Stellung stehen. Wenn Sie den Backofen an das Netz an- schließen, blinkt auf der Uhr die Anzeige 12:00. Durch Berühren von oder werden die Stunden und danach die Minuten eingestellt. -
Page 102: Bedienung Des Backofens
INOXPAN S.L. DE - 10 5. BEDIENUNG DES BACKOFENS 5.1. MANUELLER BETRIEB Nach Einstellung der Uhrzeit ist der Backo- fen funktionsbereit. Wählen Sie eine Gar- funktion und eine Temperatur. Bei Modellen mit elektronischer Tempera- tureinstellung erscheint die Temperatur auf der Uhranzeige, sobald der Wahlschalter gedreht wird. - Page 103 INOXPAN S.L. DE - 11 PROGRAMMIERUNG DER GARDAUER 1. Berühren Sie oder , bis das Symbol auf dem Display blinkt, und drücken Sie . Auf dem Display erscheint 00:00. 2. Wählen Sie die Zeitdauer, nach deren Ablauf der Timer ertönen soll, indem Sie oder drücken.
- Page 104 INOXPAN S.L. DE - 12 PROGRAMMIERUNG DER GARDAUER UND DES GARZEIT-ENDES 1. Berühren Sie oder , bis das Symbol auf dem Display blinkt , und drücken Sie . Auf dem Display erscheint 00:00. 2. Wählen Sie die Gardauer, indem Sie oder berühren.
-
Page 105: Sicherheitsfunktionen
INOXPAN S.L. DE - 13 6. SICHERHEITSFUNKTIONEN 6.1. SICHERHEITSSPERRE FÜR KINDER Diese Funktion kann während des Backofenbetriebs jederzeit gewählt werden. Um die Sperrfunktion zu aktivieren, drücken Sie die Taste und halten diese mindestens 4 Sekunden gedrückt, bis Sie einen Piepton hören und auf dem Display das Symbol erscheint. -
Page 106: Scs Funktion (Stem Clean System By Pando)
INOXPAN S.L. DE - 14 7. SCS FUNKTION (Stem Clean System by PANDO) Mit dieser Funktion wird die Reinigung der Fettund Schmutzreste, die an den Backofenwänden haften, erleichtert. Verhindern Sie die Ansammlung von Schmutz, damit die Reinigung leichter erfolgen kann. Reinigen Sie den Backofen regelmäßig. - Page 107 INOXPAN S.L. DE - 15 und bestätigen Sie mit der Taste 3. Drehen Sie den Funktionswahlschalter auf die Position 4. Im Anschluss ertönt ein akustisches Signal zur Bestätigung, dass die SCS Funktion blinkt langsam und auf dem Display wird die Zeit eingeschaltet wurde.
-
Page 108: Selbstreinigungsfunktion Anhand Pyrolyse
INOXPAN S.L. DE - 16 8. SELBSTREINIGUNGSFUNKTION ANHAND PYROLYSE Bei den Pyrolyse-Modellen HLB P erhältliche Funktion. Bevor Reinigungszyklus anhand Pyrolyse ausführen, müssen Sicherheitsanleitungen im Einbau- und Wartungshandbuch aufmerksam lesen. Mit dieser Funktion erfolgt ein Reinigungszyklus, anhand Pyrolyse, bei dem das angesammelte Fett durch die heißen Temperaturen, die im Backofeninneren entstehen, verbrannt werden. - Page 109 INOXPAN S.L. DE - 17 Sollte die Tür nicht richtig geschlossen sein, wird sie nicht gesperrt, ein Alarmton ertönt und die Pyrolyse startet nicht. In diesem Fall müssen Sie den Alarmton abstellen, indem Sie eine beliebige Uhrtaste drücken. Schließen Sie die Tür richtig, stellen Sie den Funktionswahlschalter auf die Stellung und wählen Sie wieder das Pyrolyseprogramm, indem Sie die o.
- Page 110 INOXPAN S.L. DE - 18 3. Vergessen Sie nach der Reinigung des Backofeninnenraums bitte nicht, die Halterungen und ihre Zubehörteile wieder einzubauen. Sollten Sie das eine Besonderheit bei der Programmierung oder Bedienung dieser Funktion feststellen, müssen Sie das im Einbau- und Wartungshandbuch, das zum Lieferumfang Ihres Backofens gehört, nachlesen.
-
Page 111: Demo-Modus (Sonderfunktion Für Ausstellungen)
INOXPAN S.L. DE - 19 9. DEMO-MODUS (SONDERFUNKTION FÜR AUSSTELLUNGEN) Bei eingeschaltetem DEMO-Modus kann der Backofen ohne Aufheizen bedient werden. Es wird empfohlen, diesen Modus einzuschalten, wenn der Backofen mit Netzanschluss auf einer Ausstellung installiert wird. Einschaltung des DEMO-Modus: Dieser Vorgang muss vor dem Einstellen der Uhr durchgeführt werden Durch gleichzeitiges Drücken des Tasten für mindestens 3 Sekunden wird der Modus... - Page 112 INOXPAN S.L. DE - 20 10. ESPECIFICACIONES TÉCNICAS PHB-961 PHP-962 INSTALLATION 220-240 220-240 Spannung (V) 50/60 Freq. (Hz) 50/60 1,1 m OHNE STECKER 1,1 m SIN CLAVIJA Zuführungskabel (m) 590-600 x 560-568 x 580 590-600 x 560-568 x 580 Abmessungen anpassen (Höhe x Breite x Tiefe) (mm)
- Page 113 INOXPAN S.L. DE - 21 11. INSTALLATION SCHEMES UND ABMESSUNGEN PHB 961 WICHTIG SPALTENINSTALLATION Beachten Sie die Lüftungsöffnungen im Schrank, siehe Installationszeichnungen (200X100mm in Zone *A und 560X90mm in Zone *B). Wenn diese Lüftungsschlitze nicht verfügbar sind, kann das Produkt Schäden erleiden, die NICHT durch die Garantie abgedeckt sind.
- Page 114 INOXPAN S.L. DE - 22 11. INSTALLATION SCHEMES UND ABMESSUNGEN PHP 962 Pyrolitic WARNING! SPALTENINSTALLATION For Pyrolitic oven installation DO NOT make the shaded openings in the cabinet. 560-568 mín 590 490 * mín 10 mín 580 INSTALLATION UNTER ARBEITSPLATTE 560-568 mín 600 mín 10...
-
Page 115: Garantieurkunde Pando
DE - 23 12. GARANTIEURKUNDE PANDO INOXPAN S.L. bedankt sich für den Kauf und für das Vertrauen, das Sie in ein Produkt unserer Marke Pando gesetzt haben. Dieses Produkt ist aufgrund von Qualität, Design und Innovation herausragend und seinem Ursprung und seiner Verpflichtung treu geblieben. - Page 116 INOXPAN S.L. REMARQUES - NOTES - ANMERKUNGEN...
- Page 117 INOXPAN S.L. REMARQUES - NOTES - ANMERKUNGEN...
- Page 118 INOXPAN S.L. REMARQUES - NOTES - ANMERKUNGEN...
- Page 119 INOXPAN S.L. REMARQUES - NOTES - ANMERKUNGEN...
- Page 120 Av. El Molí de les Mateves,11 Apdo. Correos nº 21 08310 ARGENTONA (Barcelona - Spain) Tel. +34 93 757 94 11 Fax +34 93 757 96 53 www.pando.es com.pando@pando.es Export: export@pando.es Tel. 902 41 55 11 Certificación del Sistema de Gestión de la Calidad...
- Page 121 INOXPAN S.L. OVENS-FORNOS-HORNOS-FOURS-ÖFEN Pando Cooking guide Cooking guide Guia de cozinhados Guía de cocinados Guide de cuisson Garanleitung...
- Page 122 Contents Description of the oven functions ..3 Fish ............68 Environmentally-friendly use of the oven Pizza ............69 ..............4 Conventional Functions ......4 Bread ............. 70 Microwave Functions ......5 Entrees and pastas ........ 71 The advantages of microwaves ..... 5 Cake shop ..........
-
Page 123: Description Of The Oven Functions
Description of the oven functions The meat should be placed on the grid shelf with the tray below to collect meat juices. Please remember that the available functions will vary according to each LOWER HEAT (FLOOR) model. Heat only comes from the lower part. To check which functions are available Suitable for warming dishes or letting on your oven, see the User Manual... -
Page 124: Environmentally-Friendly Use Of The Oven
RISING DOUGH MICROWAVE Specially designed for allowing dough for This function is ideal to cook and heat bread and pastry to rise. vegetables, potatoes, rice, fish and meat. FAST PREHEATING MICROWAVE AND COMBINED This function allows the oven to be FUCNTIONS quickly pre-heated... -
Page 125: Microwave Functions
Microwave Functions food, de-freezing it, cooking it or keeping it THE ADVANTAGES OF MICROWAVES hot. In conventional ovens, heat radiated by electrical elements or gas burners slowly Since the heat arises inside the food: • penetrates the food from outside to inside. This can be cooked with little or no On account of this there is a major amount of liquid or fats/oils;... -
Page 126: Cooking With A Microwave Oven
clean up the water coming from the COOKING WITH A MICROWAVE OVEN condensation • When heating liquids, use containers with a wide opening, so that the steam Read the Installation and Maintenance can evaporate easily. booklet before cooking with your Prepare the foods as per the instructions and microwave. -
Page 127: Defrosting With Microwaves
8. Turn or stir the food at regular intervals to 6. Distribute the frozen food as evenly as improve heating uniformity. possible since narrow and thin portions 9. To achieve the best cooking results with defrost more quickly than the thicker and microwaves the rack must be removed, broader parts. -
Page 128: Steam Functions
Steam functions Steam Flow Residual water in the oven It is normal to have an intermittent steam To reduce the residual water in the oven, it is flow, coming out from the oven front. recommended to insert a tray in the bottom rack level. -
Page 129: Type Of Ovenware
Type of ovenware MICROWAVE FUNCTION COMBINED FUNCTIONS For the microwave function, keep in mind In the combined functions, the ovenware that microwaves are reflected by metal used must be suitable for use in both the surfaces. Glass, china, clay, plastic, and microwave and the grill. - Page 130 3. The food does not become dry; 4. The aroma is preserved. For a general idea of what type of The lid should have holes or openings so ovenware is suitable for each situation, that no pressure develops. Plastic bags check the table at the end of this manual must also be opened.
- Page 131 Índice Descrição das funções de cozinhado do Tabelas de temperatura e tempos ..64 forno............12 Carne ............. 65 Utilização ecológica do forno ....13 Peixe ............68 Guia de cozinhados ......... 14 Funções Micro-ondas ......14 Pizza ............69 As vantagens do forno microondas ..
-
Page 132: Descrição Das Funções De Cozinhado Do Forno
Descrição das funções de cozinhado do forno GRILL / MAXIGRILL COM Tenha em consideração que as funções TURBINA disponíveis dependerão do modelo do Proporciona um assado uniforme ao forno. mesmo tempo doura Para saber quais são funções que estão superficialmente. Ideal para grelhados. disponíveis no seu forno, consulte o Especial para peças de grande volume Manual de utilização que acompanha o... -
Page 133: Utilização Ecológica Do Forno
do aquecimento por convecção forçada, MICRO-ONDAS E FUNÇÕES o forno desliga-se alguns minutos antes COMBINADAS de finalizar o cozinhado, permitindo o Esta função é apropriada para cozinhar aproveitamento calor residual lasanha, aves, batatas assadas existente no interior da cavidade e gratinados. -
Page 134: Guia De Cozinhados
Guia de cozinhados As funções de cozinhado variam consoante tempo de cozinhado em relação ao indicado o modelo. As tabelas seguintes indicam na tabela. Caso utilize esta função, deverá quais as mais representativas. esperar que o forno emita a informação de alcançada temperatura Os tempos e as temperaturas indicados nas... -
Page 135: Porque É Que Os Alimentos Aquecem
por um espalhador metálico ou através de ...e são absorvidos pelos alimentos um prato rotativo. Dentro do forno as microondas propagam-se em todos os sentidos e são reflectidas pelas paredes metálicas, penetrando uniformemente nos alimentos. COZINHAR COM MICRO-ONDAS PORQUE É ALIMENTOS AQUECEM A maior parte dos alimentos contêm água... -
Page 136: Descongelação Com Micro-Ondas
• Ao 5. A porta do forno pode ser aberta em aquecer cozinhar alimentos qualquer momento. desliga-se certifique-se atingem automaticamente. micro-ondas só temperatura mínima de 70°C. continua a funcionar se fechar a porta e • Durante cozinhado pode haver prima novamente a tecla start. formação de vapor de água no vidro da 6. -
Page 137: Funções De Vapor
conta o processo de descongelação. 8. Coloque as aves sobre um prato virado Distribua o alimento em partes iguais ao para que o molho da carne possa tamanho do recipiente. escorrer mais facilmente. 4. Distribua o melhor possível o alimento no 9. -
Page 138: Utilização E Dicas
Utilização e dicas O recipiente com furos é usado para cozinhar legumes, carne e aves, frescos ou congelados. É importante que o recipiente sem furos seja introduzido no primeiro nível a contar de baixo. Desta forma, as gotas de líquido que caem são recolhidas e não sujam o aparelho. -
Page 139: Teste À Loiça
Os alimentos quentes transmitem calor à alimentos somente a partir de cima. Em loiça, a qual pode ficar muito quente. Por caso de dúvida, utilize somente loiça isso, utilize sempre uma pega adequada para micro-ondas. • A folha de alumínio pode ser utilizada TESTE À... - Page 140 Indice Descripción de las funciones de cocinado Tablas de temperaturas y tiempos ..64 del horno ..........21 Carnes ........... 65 Uso ecológico del horno ......22 Pescado ..........68 Guía de cocinado ........22 Funciones Microondas ......23 Pizza ............69 Las ventajas de las microondas .....
-
Page 141: Pizza
Descripción de las funciones de cocinado del horno para parrilladas. Especial para piezas con gran volumen como aves, caza… Se Tenga en cuenta que las funciones recomienda colocar la pieza de carne disponibles dependerán del modelo de sobre la parrilla del horno y la bandeja horno. -
Page 142: Uso Ecológico Del Horno
alimento. Indicado para pescados y MICROONDAS Y FUNCIONES asados de todo tipo de carnes. COMBINADAS Esta función es apropiada para cocinar DESCONGELACIÓN lasaña, aves, patatas asadas Esta función apropiada para gratinados. descongelaciones suaves de alimentos. especial aquellos VAPOR consumidos sin calentar, por ejemplo Esta función es apropiada para cocer cremas, pastas, tartas, pasteles, etc. -
Page 143: Funciones Microondas
alimentos en el horno frío. Las recetas que Las alturas de bandeja destinadas a cocinar requieren un precalentamiento del horno en son, comenzando desde abajo: vacío, se indican expresamente. 1: Inferior. Algunos modelos disponen función 2/3: Media. Precalentamiento Rápido. Esta función 4: Superior. - Page 144 • Descongelar, calentar o cocinar en el para microondas (ver capítulo sobre el horno microondas es más rápido que en tipo de vajilla). un horno convencional; • Al cocinar alimentos con poca humedad • Se conservan las vitaminas, los minerales descongelar pan, hacer...
-
Page 145: Cocinar Con Microondas
que estos se coloquen en la bandeja de de cocción y los niveles de potencia cristal y se pongan en el 1er nivel o en indicados en las tablas. niveles superiores. Tenga en cuenta que los valores referidos 8. Voltee revuelva alimentos son sólo indicativos y que pueden variar en... -
Page 146: Funciones De Vapor
6. Distribuya el alimento congelado del 11. Retire el alimento congelado de su modo más uniforme posible, pues las embalaje y no se olvide de retirar los clips partes más estrechas finas de metal, en el caso de que existan. En el descongelan más deprisa que las partes caso de los recipientes que sirven para más gruesas y altas. -
Page 147: Qué Tipo De Vajilla Se Puede Utilizar
La bandeja perforada se utiliza para la cocción al vapor de verduras, carnes y aves frescas o ultracongeladas. Para ello, es importante que la bandeja no perforada se introduzca en el aparato en el primer soporte lateral desde abajo. De este modo, los líquidos que goteen caerán en ella y no ensuciarán el aparato. -
Page 148: Funciones Convencionales
proceso descongelación. FUNCIONES CONVENCIONALES alimentos delicados, tales como aves o En el caso de las funciones Grill o Aire carne picada, se pueden proteger del caliente la vajilla tiene que ser resistente por calor excesivo cubriendo las respectivas lo menos a temperaturas de 300°C. La vajilla extremidades. - Page 149 Sommaire Description des fonctions de cuisson du Couvercles ..........37 four ............30 Tableaux des températures et temps de Utilisation écologique du four ....31 cuisson ............. 64 Guide de cuisson ........32 Viande ........... 65 Funciones Micro-ondes ......32 Les avantages du four micro-ondes ..
-
Page 150: Pizza
Description des fonctions de cuisson du four GRILL / MAXIGRILL AVEC Remarque: fonctions disponibles TURBINE varient selon le modèle du four. Il permet de rôtir uniformément tout en Pour connaître les fonctions disponibles dorant la surface. Idéal pour les grillades. votre four, consultez... -
Page 151: Utilisation Écologique Du Four
ce que ces dernières puissent être MICRO-ONDES introduites dans un four. Cette fonction est idéale pour cuire et chauffer légumes, pommes de terre, riz, MODE ECO poisson et viande. Il permet la cuisson des aliments dans votre four en générant une consommation MICRO-ONDES ET FUNCTIONS énergétique moindre. -
Page 152: Guide De Cuisson
Guide de cuisson Certains modèles disposent d’une fonction Les fonctions de cuisson varient selon les modèles. Vous trouverez dans les tableaux de préchauffage rapide. Cette fonction réduit cijoints les fonctions les plus représentatives. le temps de cuisson qui est indiqué sur le tableau. -
Page 153: Comment Les Aliments Chauffent
FR FR COMMENT LES ALIMENTS CHAUFFENT CUISINER AUX MICRO-ONDES La plupart des aliments contiennent de l’eau, dont les molécules vibrent sous l’action des Lisez attentivement manuel micro-ondes. l'installation et la Maintenance avant de Le frottement entre les molécules entraîne la cuisiner avec votre micro-ondes. -
Page 154: Cuisiner Aux Micro-Ondes
• Assurez-vous que les aliments que vous fonctionnement, fermez porte chauffez ou que vous cuisinez atteignent appuyez sur la touche Start (démarrer). une température de 70ºC. 6. Quand ils sont couverts, les aliments • Pendant la cuisson, il est possible que de cuisent plus rapidement et leur qualité... -
Page 155: Fonctions Vapeur
FR FR Distribuez l'aliment morceaux 8. Mettez les volailles dans un plat creux pour hauteur égale à celle du récipient. que le jus de la viande s'écoule plus facilement. 4. Distribuez le mieux possible l'aliment à l'intérieur du four. Les parties les plus 9. -
Page 156: Conseils
nourriture et goutte en eau résiduelle dans le utilisation. Une accumulation de liquide dans plateau. Ce qui reste d'eau résiduelle peut peut rapidement déborder être facilement essuyée avec un chiffon. endommager les placards environnants. il est possible d’y accéder par la porte ouverte. Veillez à... -
Page 157: Testez La Vaisselle
• Le temps de cuisson est plus long car les fragiles doivent être utilisés, peu de temps, pour décongeler ou chauffer des aliments micro-ondes entrent dans les aliments déjà confectionnés. seulement par le dessus. Dans le doute, n'utilisez que de la vaisselle adaptée aux La vaisselle peut être très chaude car les micro-ondes. - Page 158 Inhaltsverzeichnis Beschreibung der Garfunktionen des Temperatur- und Zeittabellen ....64 Backofens ..........39 Fleisch ........... 65 Umweltfreundliche Backofennutzung ..40 Fisch ............68 Anleitung zum Garen ....... 41 Mikrowellenfunktionen ......41 Pizza ............69 Die Vorteile eines Mikrowellengerätes ... 41 Brot ............
-
Page 159: Beschreibung Der Garfunktionen Des Backofens
Beschreibung der Garfunktionen des Backofens zum Grillen. Besonders für große Stücke Geflügel, Wild usw. wird Beachten Sie bitte, dass die verfügbaren empfohlen, das Grillgut auf den Rost zu Funktionen Backofenmodell legen und die Fettpfanne darunter zu abhängig sind. stellen, Bratensaft Fett verfügbaren Funktionen... -
Page 160: Umweltfreundliche Backofennutzung
sich der Backofen einige Minuten vor MIKROWELLE UND KOMBINIERTE Ende der Garzeit ab und nutzt die FUNKTIONEN Restwärme im Ofeninneren, um die Mit dieser Funktion können benutzen um Speisen fertig zu garen. Geeignet für Lasagne, Geflügel, Bratkartoffeln und Fisch und Braten aller Art. Aufläufe zuzubereiten. -
Page 161: Anleitung Zum Garen
Anleitung zum Garen Garfunktionen sind Modell Einige Modelle verfügen über eine abhängig. In den beiliegenden Tabellen sind Schnellvorheizfunktion. Mit dieser Funktion die repräsentativsten Funktionen dargestellt. reduziert die sich Garzeit im Verhältnis zu den Tabellenangaben. Wenn Sie diese Bei den in den Tabellen angegebenen Zeiten Funktion nutzen, müssen Sie die Speisen und Temperaturen handelt es sich lediglich erst dann in den Backofen stellen, wenn er... -
Page 162: Wie Sich Die Speisen Erwärmen
und breiten sich durch einen Metallverteiler ...und werden von den Lebensmitteln oder einen Drehteller aus. absorbiert. Im Garraum breiten sich die Mikrowellen in alle Richtungen aus und werden von den Metallwänden reflektiert. Dadurch wird das Gargut gleichmäβig erhitzt. WIE SICH DIE SPEISEN ERWÄRMEN MIT DER MIKROWELLE GAREN Lebensmittel enthalten mehrheitlich Wasser, dessen Moleküle durch Einwirkung der... -
Page 163: Die Zubereitung In Der Mikrowelle
• Verschließen Sie die Plastiktüten nicht Je geringer die Temperatur ist, desto Metallklemmen sondern länger ist die Zubereitungszeit. Plastikklemmen. Durchlöchern Sie die Die flüssigen Nahrungsmittel erwärmen Tüte mehrfach, damit der Dampf leicht sich schneller. entweichen kann. Eine gute Verteilung der Lebensmittel •... -
Page 164: Auftauen Mit Mikrowellen
Für ein besseres Erwärmungsergebnis dünnsten Teile tauen schneller auf als legen Sie das Lebensmittel oder den die dickeren und höheren Stellen. Behälter Lebensmittel/der 7. Fettreiche Lebensmittel, Butter, Flüssigkeit immer über die Glasschale. Weißkäse und Rahm, brauchen nicht 11. Kleiden Sie den Boden des Garraums völlig aufgetaut werden. -
Page 165: Dampffunktionen
Dampffunktionen Dampfaustoss Restwassermenge im Garraum wechselnder Dampfaustoss Um die Restwassermenge im Garraum zu diesem Gerät normal, dieser wird besonders reduzieren, bietet es sich an, in die unterste Winterzeit oder feuchten Einschubebene ein geschlossenes Blech Umgebungen deutlich. einzuschieben. Dieses fängt das von dem Gargut abtropfende Kondensat auf und vermindert zum Einen die Restwassermenge im Gerät. -
Page 166: Welche Art Von Geschirr Kann Benutzt Werden
Wir empfehlen beim Kochen den Rost mit dem Backblech zu benutzen umso das tropfen Lebensmittel Innenraum des Gerätes zu vermeiden. Welche Art von Geschirr kann benutzt werden? FUNKTION MIKROWELLE KOMBINIERTE FUNKTIONEN Beachten Sie bei der Funktion Mikrowelle, Bei Kombinierten Funktionen muss das dass die Mikrowellen von den metallischen benutzte Geschirr sowohl für die Mikrowelle Flächen reflektiert werden. -
Page 167: Deckel
Berührung kommen, da diese einen Die Deckel dürfen nicht luftdicht abschließen, Lichtbogen hervorrufen kann. damit keinerlei Druck entsteht. Plastiktüten müssen gleichermaßen Öffnungen haben. DECKEL Sowohl Saugflaschen als auch Gläschen mit Babynahrung und ähnliche Gefäße dürfen Es wird die Benutzung von Deckeln aus nur ohne Deckel erwärmt werden, da sie Glas, Plastik oder Klarsichtfolie empfohlen, platzen können. - Page 168 Inhoud Beschrijving van de ovenfuncties ..49 Vlees ............65 Milieuvriendelijk gebruik van de oven ... 50 Vis ............68 Bakgids ............. 51 Magnetronfuncties ........51 Pizza ............69 Voordelen van microgolven ....51 Brood ............. 70 Hoe werkt de magnetronoven? ..... 51 Voorgerechten en pasta ......
-
Page 169: Beschrijving Van De Ovenfuncties
Beschrijving van de ovenfuncties voor platte gerechten zoals biefstuk, koteletten, vis en toast. Houd rekening beschikbare functies afhankelijk zijn van GRILL / MAXIGRILL MET het ovenmodel. VENTILATOR Kijk in de gebruikersgids die bij de bak- Om gelijkmatig te braden en tegelijkertijd gids wordt geleverd over welke functies de buitenkant lichtbruin te bakken. -
Page 170: Milieuvriendelijk Gebruik Van De Oven
MAGNETRON Hiermee kunnen de gerechten in uw oven Deze functie is ideaal om groenten, minimum energieverbruik aardappelen, rijst, vlees worden bereid. oven gebruikt bereiden en op te warmen. geforceerde convectie en afhankelijk van het model wordt hij enkele minuten voor MAGNETRON EN beëindiging bakproces... -
Page 171: Bakgids
Bakgids De bakfuncties zijn afhankelijk van ieder Sommige modellen beschikken over de model. In de bijgevoegde tabellen worden de snelle voorverwarmingsfunctie. Deze functie meest gebruikelijke bakfuncties aangegeven. ver laagt de baktijd ten opzichte van wat er in De in de tabellen aangegeven tijden en de tabel is aangeduid. -
Page 172: Koken Met De Magnetron
Volg de volgende aanwijzingen bij het koken De wrijving tussen de moleculen veroorzaakt met de magnetron: warmte die de temperatuur van het voedsel • Vóór het opwarmen of bereiden van verhoogt en het ontdooit, kookt of warm houdt. voedsel met schil of vel (bijvoorbeeld appels, tomaten, aardappelen, worsten) Aangezien de warmte binnenin het voedsel prik de schil of het vel door zodat het niet... -
Page 173: Ontdooien Met Microgolven
• Als deze op de glazen schotel te plaatsen op vloeistoffen opwarmt gebruik het 1ste of hoger niveau. serviesgoed met een grote opening, zodat stoom makkelijk kan ontsnappen. 8. Draai of meng het voedsel regelmatig voor gelijkmatige verwarming. Bereid het voedsel volgens de aanwijzingen en neem de in de tabellen aangegeven 9. -
Page 174: Stoomfuncties
ontdooien dan de grotere en dikkere 11. Haal het diepgevroren voedsel uit de delen. verpakking vergeet hierbij niet eventuele metalen haakjes 7. Vetrijk voedsel zoals boter, kwark en verwijderen. verpakking room mag niet helemaal ontdooien. Als voedsel in de diepvriezer te bewaren ook het op kamertemperatuur staat, is het voor opwarmen en bereiden kan dienen, binnen... -
Page 175: Gebruik, Tabellen En Suggesties
Gebruik, tabellen en suggesties De geperforeerde bak is geschikt voor het bereiden verse diepgevroren groenten, vlees en gevogelte. Het is hierbij belangrijk dat de niet-geperforeerde bak op het eerste niveau wordt geschoven. Zo wordt druppelend vocht opgevangen en wordt de oven niet vies. -
Page 176: Conventionele Functies
bovenaf binnendringen. In geval van twijfel, gebruik alleen serviesgoed dat geschikt is voor de magnetron. Als u een magnetron gebruikt, zorg er • Aluminiumfolie kan gebruikt worden om dan voor dat er geen ongeschikte microgolven te werkaatsen tijdens het voorwerpen in de oven staan, inclusief ontdooiproces. - Page 177 المحتويات وصف وظائف الفرن السمك ....................استخدام صديق للبيئة للفرن ........البيتز ............الوظائف التقليدية ..........الميكروويف وظائف البيتز ....................مزايا المايكرويف .......... الت والباستا المقب ........... الطهي باستخدام فرن مايكرويف ......
- Page 178 وصف وظائف الفرن )ألقل (الحد األدنى درجة الحرارة ا ال تأتي الحرارة إال من الجزء السفلي، مناسبة لتسخين .يرجى تذكر أن الوظائف المتوفرة تتغير وف ق ً ا لكل طراز .األطباء أو السماح للعجين أو المنتجات المشابهة باالنتفاخ للتحقق من الوظائف المتوفرة في الفرن الخاص بك، انظر ."دليل...
- Page 179 استخدام صديق للبيئة للفرن • :الطاقة نصائح توفير (الوظيفة إذا كان الفرن لديك يحتوي على • .االقتصادية)، فاستخدم هذه الوظيفة متى تسمح الوصفة بذلك .قم بإزالة أي إكسسوارات ليست قيد االستخدام من الفرن • استخدم أطبا ق ً ا مناسبة لالستخدام في الفرن، و ي ُ فضل أن تكون •...
- Page 180 • الطهي الضروري ويتعين عليك مراقبة عملية الطهي عن يتم الحفاظ على الفيتامينات والمواد المعدنية والغذائية .كثب الموجودة في الطعام؛ • .ال يتغير اللون الطبيعي ورائحة الطعام • ) في التقليب ( ال يمكن تسخين كميات كبيرة من الزيت .المايكرويف تمر...
- Page 181 األطعمة المغطاة تتطلب وقت طهي أقل وتحتفظ بخواصها يجب أال تالمس رقائق :مهم .منيوم بقطع من رقائق األلو بصورة أفضل. يتعين أن تسمح األغطية المستخدمة األلومنيوم تجويف الفرن من الداخل حيث قد يتسبب ذلك في غيرة للموجات الدقيقة بالمرور وأن تحتوي على فتحات ص .تقوس...
- Page 182 المتبقية في الفرن لمياه ا إدخال صينية في ب ينصح ،إلنقاص المياه المتبقية في الفرن من الطعام الصادرة الكثافة حيث أن ،مستوى الرف السفلي المياه المتبقية تجفيف ويمكن ،تبدأ بالتنقيط على الصينية بسهولة باستخدام قطعة من القماش اإلستخدام و النصائح واللحوم...
- Page 183 • يجب عدم استخدام الخزف أو الزجاج رفيع السمك أو الهش إال سم 3 من أكبر المعدنية الحاويات ارتفاع يكون أن يمكن ال .)لفترات زمنية قصيرة (على سبيل المثال، التسخين سم الحد األدنى للمسافة أو أن تالمس جدران التجويف ينقل الطعام الساخن الحرارة إلى األطباق التي يمكن أن تصبح .األلومنيوم...
-
Page 184: Tables Of Temperatures And Times
BIRDS / AVES / AVES DOMÉSTICAS / VOLAILLE / GEFLÜGEL / الطيور GEVOGELTE / WEIGHT LEVEL FUNCTION TEMPERAT. TIME RECEPTACLE PESO NÍVEL FUNCIÓN TEMPERAT. TIEMPO RECIPIENTE PESO NIVEL FUNÇÃO TEMPERAT. TEMPO RECIPIENTE POIDS NIVEAU FONCTION TEMPÉRAT. TEMPS RÉCIPIENT GEWICHT NIVEAU FUNKTION TEMPERAT ZEIT... -
Page 185: Meat
اللحوم MEAT / CARNES / CARNE / VIANDE / FLEISCH / VLEES / WEIGHT LEVEL FUNCTION TEMPERAT. TIME RECEPTACLE PESO NÍVEL FUNCIÓN TEMPERAT. TIEMPO RECIPIENTE PESO NIVEL FUNÇÃO TEMPERAT. TEMPO RECIPIENTE POIDS NIVEAU FONCTION TEMPÉRAT. TEMPS RÉCIPIENT GEWICHT NIVEAU FUNKTION TEMPERAT ZEIT GEFÄß... - Page 186 اللحوم MEAT / CARNES / CARNE / VIANDE / FLEISCH / VLEES / WEIGHT LEVEL FUNCTION TEMPERAT. TIME RECEPTACLE PESO NÍVEL FUNCIÓN TEMPERAT. TIEMPO RECIPIENTE PESO NIVEL FUNÇÃO TEMPERAT. TEMPO RECIPIENTE POIDS NIVEAU FONCTION TEMPÉRAT. TEMPS RÉCIPIENT GEWICHT NIVEAU FUNKTION TEMPERAT ZEIT GEFÄß...
- Page 187 اللحوم MEAT / CARNES / CARNE / VIANDE / FLEISCH / VLEES / WEIGHT LEVEL FUNCTION TEMPERAT. TIME RECEPTACLE PESO NÍVEL FUNCIÓN TEMPERAT. TIEMPO RECIPIENTE PESO NIVEL FUNÇÃO TEMPERAT. TEMPO RECIPIENTE POIDS NIVEAU FONCTION TEMPÉRAT. TEMPS RÉCIPIENT GEWICHT NIVEAU FUNKTION TEMPERAT ZEIT GEFÄß...
-
Page 188: Poisson
السمك FISH / PESCADO / PEIXE / POISSON / FISCH / VIS WEIGHT LEVEL FUNCTION TEMPERAT. TIME RECEPTACLE PESO NÍVEL FUNCIÓN TEMPERAT. TIEMPO RECIPIENTE PESO NIVEL FUNÇÃO TEMPERAT. TEMPO RECIPIENTE POIDS NIVEAU FONCTION TEMPÉRAT. TEMPS RÉCIPIENT GEWICHT NIVEAU FUNKTION TEMPERAT ZEIT GEFÄß... -
Page 189: Pizza
السمك FISH / PESCADO / PEIXE / POISSON / FISCH / VIS WEIGHT LEVEL FUNCTION TEMPERAT. TIME RECEPTACLE PESO NÍVEL FUNCIÓN TEMPERAT. TIEMPO RECIPIENTE PESO NIVEL FUNÇÃO TEMPERAT. TEMPO RECIPIENTE POIDS NIVEAU FONCTION TEMPÉRAT. TEMPS RÉCIPIENT GEWICHT NIVEAU FUNKTION TEMPERAT ZEIT GEFÄß... -
Page 190: Pain
البيتز BREAD / PAN / PÃO / PAIN BROT / BROOD / WEIGHT LEVEL FUNCTION TEMPERAT. TIME RECEPTACLE PESO NÍVEL FUNCIÓN TEMPERAT. TIEMPO RECIPIENTE PESO NIVEL FUNÇÃO TEMPERAT. TEMPO RECIPIENTE POIDS NIVEAU FONCTION TEMPÉRAT. TEMPS RÉCIPIENT GEWICHT NIVEAU FUNKTION TEMPERAT ZEIT GEFÄß... -
Page 191: Plats Et Pâtes
ENTREES AND PASTAS / ENTRANTES Y PASTAS / ENTRADAS E MASSAS / PLATS المقبالت ET PÂTES / VORSPEISEN UND PASTA / VOORGERECHTEN EN PASTA / والباستا WEIGHT LEVEL FUNCTION TEMPERAT. TIME RECEPTACLE PESO NÍVEL FUNCIÓN TEMPERAT. TIEMPO RECIPIENTE PESO NIVEL FUNÇÃO TEMPERAT. -
Page 192: Süsswaren
CAKE SHOP / REPOSTERÍA / CONFEITARIA / CONFISERIE / SÜSSWAREN / GEBAK / الحلويات WEIGHT LEVEL FUNCTION TEMPERAT. TIME RECEPTACLE PESO NÍVEL FUNCIÓN TEMPERAT. TIEMPO RECIPIENTE PESO NIVEL FUNÇÃO TEMPERAT. TEMPO RECIPIENTE POIDS NIVEAU FONCTION TEMPÉRAT. TEMPS RÉCIPIENT GEWICHT NIVEAU FUNKTION TEMPERAT ZEIT... - Page 193 CAKE SHOP / REPOSTERÍA / CONFEITARIA / CONFISERIE / SÜSSWAREN / GEBAK / الحلويات WEIGHT LEVEL FUNCTION TEMPERAT. TIME RECEPTACLE PESO NÍVEL FUNCIÓN TEMPERAT. TIEMPO RECIPIENTE PESO NIVEL FUNÇÃO TEMPERAT. TEMPO RECIPIENTE POIDS NIVEAU FONCTION TEMPÉRAT. TEMPS RÉCIPIENT GEWICHT NIVEAU FUNKTION TEMPERAT ZEIT...
- Page 194 CAKE SHOP / REPOSTERÍA / CONFEITARIA / CONFISERIE / SÜSSWAREN / GEBAK / الحلويات WEIGHT TEMPERAT. TIME RECEPTACLE LEVEL FUNCTION PESO TEMPERAT. TIEMPO RECIPIENTE NÍVEL FUNCIÓN PESO TEMPERAT. TEMPO RECIPIENTE NIVEL FUNÇÃO POIDS TEMPÉRAT. TEMPS RÉCIPIENT NIVEAU FONCTION GEWICHT TEMPERAT ZEIT GEFÄß...
-
Page 195: Auftauen Nach Zeit
DEFROSTING BY TIME / DESCONGELACIÓN POR TIEMPO / DESCONGELAÇÃO POR TEMPO / DÉCONGÉLATION EN FONCTION DU TEMPS / AUFTAUEN NACH ZEIT / إذابة التجمد حسب الوقت المحد د ONTDOOIEN VOLGENS TIJDSDUUR / WEIGHT TIME STANDING TIME FOOD FUNCTION PESO TIEMPO TIEMPO DE ALIEMNTO FUNCIÓN... -
Page 196: Poisson
األسماك FISH / PEIXE / PESCADO / POISSON / FISCH / Vis / FUNCTION TEMP. TIME QUANTITY LEVEL RECEPTACLE FUNCIÓN TEMP. TIEMPO QUANTIDADE NÍVEL RECIPIENTE FUNÇÃO TEMP. TEMPO CANTIDAD NIVEL RECIPIENTE FONCTION TEMP. TEMPS QUANTITÉ NIVEAU RÉCIPIENT FUNKTION TEMP. ZEIT MENGE NIVEAU GEFÄß... -
Page 197: Viande
األسماك FISH / PEIXE / PESCADO / POISSON / FISCH / Vis / FUNCTION TEMP. TIME QUANTITY LEVEL RECEPTACLE FUNCIÓN TEMP. TIEMPO QUANTIDADE NÍVEL RECIPIENTE FUNÇÃO TEMP. TEMPO CANTIDAD NIVEL RECIPIENTE FONCTION TEMP. TEMPS QUANTITÉ NIVEAU RÉCIPIENT FUNKTION TEMP. ZEIT MENGE NIVEAU GEFÄß... - Page 198 اللحوم MEAT / CARNE / CARNE / VIANDE / FLEISCH / VLEES / FUNCTION TEMP. TIME QUANTITY LEVEL RECEPTACLE FUNCIÓN TEMP. TIEMPO QUANTIDADE NÍVEL RECIPIENTE FUNÇÃO TEMP. TEMPO CANTIDAD NIVEL RECIPIENTE FONCTION TEMP. TEMPS QUANTITÉ NIVEAU RÉCIPIENT FUNKTION TEMP. ZEIT MENGE NIVEAU GEFÄß...
-
Page 199: Eieren
البيض EGGS / OVOS / HUEVOS / ŒUFS / EIER / EIEREN / FUNCTION TEMP. TIME LEVEL RECEPTACLE FUNCIÓN TEMP. TIEMPO NÍVEL RECIPIENTE FUNÇÃO TEMP. TEMPO NIVEL RECIPIENTE FONCTION TEMP. TEMPS NIVEAU RÉCIPIENT FUNKTION TEMP. ZEIT NIVEAU GEFÄß FUNCTIE TEMP. TIJD NIVEAU BAKVORM... - Page 200 SIDE DISHES / ACOMPANHAMENTOS / GUARNICIONES / Garniture / Beilagen / األطباق الثانوية Bijgerechten / FUNCTION TEMP. TIME QUANTITY LEVEL RECEPTACLE FUNCIÓN TEMP. TIEMPO QUANTIDADE NÍVEL RECIPIENTE FUNÇÃO TEMP. TEMPO CANTIDAD NIVEL RECIPIENTE FONCTION TEMP. TEMPS QUANTITÉ NIVEAU RÉCIPIENT FUNKTION TEMP.
-
Page 201: Dampf
DUMPLINGS / KNÖDEL / BOLAS DE MASA / QUENELLES / KLÖßE / KNOEDELS / الزالبية FUNCTION TEMP. TIME LEVEL RECEPTACLE FUNCIÓN TEMP. TIEMPO NÍVEL RECIPIENTE FUNÇÃO TEMP. TEMPO NIVEL RECIPIENTE FONCTION TEMP. TEMPS NIVEAU RÉCIPIENT FUNKTION TEMP. ZEIT NIVEAU GEFÄß FUNCTIE TEMP. - Page 202 الخضار الخضار VEGETABLES/ LEGUMES / VERDURAS/ LÉGUMES / GEMÜSE / GROENTEN / VEGETABLES / LEGUMES / VERDURAS / LÉGUMES / GEMÜSE / GROENTEN / FUNCTION TEMP. TIME LEVEL RECEPTACLE FUNCIÓN TEMP. TIEMPO NÍVEL RECIPIENTE FUNÇÃO TEMP. TEMPO NIVEL RECIPIENTE FONCTION TEMP.
- Page 203 الخضار VEGETABLES/ LEGUMES / VERDURAS/ LÉGUMES / GEMÜSE / GROENTEN / FUNCTION TEMP. TIME LEVEL RECEPTACLE FUNCIÓN TEMP. TIEMPO NÍVEL RECIPIENTE FUNÇÃO TEMP. TEMPO NIVEL RECIPIENTE FONCTION TEMP. TEMPS NIVEAU RÉCIPIENT FUNKTION TEMP. ZEIT NIVEAU GEFÄß FUNCTIE TEMP. TIJD NIVEAU BAKVORM وضع...
- Page 204 FUNCTION TEMP. TIME LEVEL RECEPTACLE FUNCIÓN TEMP. TIEMPO NÍVEL RECIPIENTE FUNÇÃO TEMP. TEMPO NIVEL RECIPIENTE FONCTION TEMP. TEMPS NIVEAU RÉCIPIENT FUNKTION TEMP. ZEIT NIVEAU GEFÄß FUNCTIE TEMP. TIJD NIVEAU BAKVORM وضع الطهي درجة الحرارة الوقت المستوى اإلناء (ºC) Perforated Snow peas Com furos Vagens de ervilhas Judías...
- Page 205 الخضار VEGETABLES/ LEGUMES / VERDURAS/ LÉGUMES / GEMÜSE / GROENTEN / FUNCTION TEMP. TIME LEVEL RECEPTACLE FUNCIÓN TEMP. TIEMPO NÍVEL RECIPIENTE FUNÇÃO TEMP. TEMPO NIVEL RECIPIENTE FONCTION TEMP. TEMPS NIVEAU RÉCIPIENT FUNKTION TEMP. ZEIT NIVEAU GEFÄß FUNCTIE TEMP. TIJD NIVEAU BAKVORM وضع...
- Page 206 DESSERTS / SOBREMESAS / POSTRES / DESSERTS / DESSERTS / NAGERECHTEN / الحلويات FUNCTION TEMP. TIME QUANTITY LEVEL RECEPTACLE FUNCIÓN TEMP. TIEMPO QUANTIDADE NÍVEL RECIPIENTE FUNÇÃO TEMP. TEMPO CANTIDAD NIVEL RECIPIENTE FONCTION TEMP. TEMPS QUANTITÉ NIVEAU RÉCIPIENT FUNKTION TEMP. ZEIT MENGE NIVEAU GEFÄß...
- Page 207 FRUIT (STERILISING/BOILING DOWN) / FRUTA (ESTERILIZAR, FAZER CONSERVAS) / FRUTA (ESTERILIZAR/COCINAR) FRUITS (STÉRILISER/RÉDUIRE) OBST )الفاكهة ( التعقيم/الغلي (STERILISIEREN/EINKOCHEN) / FRUIT (STERILISEREN/INKOKEN) / FUNCTION TEMP. TIME QUANTITY LEVEL RECEPTACLE FUNCIÓN TEMP. TIEMPO QUANTIDADE NÍVEL RECIPIENTE FUNÇÃO TEMP. TEMPO CANTIDAD NIVEL RECIPIENTE FONCTION TEMP.
- Page 208 BLANCH / BRANQUEAR / ESCALDAR / BLANCHIR / BLANCHIEREN / BLANCHEREN السلق FUNCTION TEMP. TIME QUANTITY LEVEL RECEPTACLE FUNCIÓN TEMP. TIEMPO QUANTIDADE NÍVEL RECIPIENTE FUNÇÃO TEMP. TEMPO CANTIDAD NIVEL RECIPIENTE FONCTION TEMP. TEMPS QUANTITÉ NIVEAU RÉCIPIENT FUNKTION TEMP. ZEIT MENGE NIVEAU GEFÄß...
-
Page 209: Ontdooien
DEFROST / DESCONGELAR / DESCONGELACIÓN / DÉCONGELER / AUFTAUEN / إزالة الجليد ONTDOOIEN / FUNCTION TEMP. TIME LEVEL RECEPTACLE FUNCIÓN TEMP. TIEMPO NÍVEL RECIPIENTE FUNÇÃO TEMP. TEMPO NIVEL RECIPIENTE FONCTION TEMP. TEMPS NIVEAU RÉCIPIENT FUNKTION TEMP. ZEIT NIVEAU GEFÄß FUNCTIE TEMP. - Page 210 DEFROST / DESCONGELAR / DESCONGELACIÓN / DÉCONGELER / AUFTAUEN / إزالة الجليد ONTDOOIEN / FUNCTION TEMP. TIME LEVEL RECEPTACLE FUNCIÓN TEMP. TIEMPO NÍVEL RECIPIENTE FUNÇÃO TEMP. TEMPO NIVEL RECIPIENTE FONCTION TEMP. TEMPS NIVEAU RÉCIPIENT FUNKTION TEMP. ZEIT NIVEAU GEFÄß FUNCTIE TEMP.
- Page 211 DEFROST / DESCONGELAR / DESCONGELACIÓN / DÉCONGELER / AUFTAUEN / إزالة الجليد ONTDOOIEN / FUNCTION TEMP. TIME LEVEL RECEPTACLE FUNCIÓN TEMP. TIEMPO NÍVEL RECIPIENTE FUNÇÃO TEMP. TEMPO NIVEL RECIPIENTE FONCTION TEMP. TEMPS NIVEAU RÉCIPIENT FUNKTION TEMP. ZEIT NIVEAU GEFÄß FUNCTIE TEMP.
- Page 212 OVENWARE Operating Microwave mode Conventional Combined Type of functions functions Defrost / Cook dish heat Glass and porcelain 1) Domestic, non fire-resistant, may be washed in dishwasher Glazed ceramic Fire-resistant glass and porcelain Ceramic, earthenware dishes unglazed glazed without metallic decorations Earthenware dishes glazed unglazed...
- Page 213 LOIÇA Micro-ondas Modo de Funções Funções Descongelar/ funcionamento convencionais combinadas Cozinhar aquecer Tipo de loiça Vidro e porcelana 1) Doméstico, não resistente ao fogo, pode ser não não lavado na máquina de lavar loiça Cerâmica vidrada Vidro e porcelana resistente ao fogo Cerâmica, loiça de grés 2) Sem vidrados ou vidrados sem decorações não...
- Page 214 VAJILLA Modo de Microondas funcionamiento Funciones Funciones Descongelar/ Tipo de convencionales combinadas Cocinar calentar vajilla Cristal y porcelana 1) Doméstico, no resistente al fuego, se puede sí sí lavar en lavavajillas Cerámica vidriada sí sí sí sí Cristal y porcelana resistente al fuego Cerámica, vajilla de gres 2) Sin vidriados o vidriados sin decoraciones sí...
- Page 215 VAISSELLE Mode de Micro-ondes fonctionnement Fonctions Functions Decongeler/ Type conventionnelles combinées Cuisiner rechauffer vaisselle Verre et porcelaine 1) Vaisselle non résistante au feu, peut être lavée au lave-vaisselle Céramique vitrée Verre et porcelaine résistant au feu Céramique, vaisselle en grès 2) Avec ou sans verre, sans décorations métalliques Vaisselle en terre cuite 2)
-
Page 216: Geschirr
GESCHIRR Mikrowelle Konventionelle Kombinierte Betriebsart Auftauen/ Geschirrtyp Funktionen funktion Zubereiten erwärmen Glas und Porzellan 1) nein nein Für den Haushalt bestimmt, nicht feuerfest, kann im Geschirrspüler gereinigt werden. Glasierte Keramik Feuerfestes Glas und Porzellan Keramik, Steingutgeschirr 2) nein nein Ohne Glasur bzw. Glasur ohne Metalldekors Tongeschirr 2) Glasiert nein... -
Page 217: Serviesgoed
SERVIESGOED Magnetron Ingestelde functie Conventionele Gecombineerde Ontdooien/ functies functies Koken Serviesgoed opwarmen Glas en porselein 1) Huishoudelijk, niet vuurvast, mag in de vaatwasser Geglazuurd aardewerk Vuurvast glas en porselein Gres serviesgoed 2) Geglazuurd of niet, zonder metalen versieringen Terracotta 2) Geglazuurd Ongeglazuurd Plastic 2) - Page 218 آنية المائدة المايكرويف وضع التشغيل الوظائف وظائف تقليدية نوع الطبق المشتركة / إذابة التجمد الطهي التسخين الزجاج والخزف الصيني نعم نعم ال ال منزلي، غير مقاوم للحريق، يمكن غسله في غسالة صحون خزف مزجج نعم نعم نعم نعم زجاج وخزف صيني مقاوم للحريق أطباق...
- Page 221 INOXPAN S.L. HORNOS-FORNOS-OVENS-FOURS-ÖFEN Pando Installation & Maintenance Instalación y Mantenimiento Instalação e Manutenção Installation & Maintenance Installation et Entretien Installation und Wartung Installatie en onderhoud Installazione e manuntenzione...
- Page 222 Índice instrucciones de instalación y mantenimiento INSTRUCCIONES DE SEGURIDAD ..ACCESORIOS ......... Montaje de las guías telescópicas..Seguridad eléctrica ......Guías telescópicas con clip abatible Seguridad para los niños ....Guías telescópicas con clip directo .. Seguridad en el uso del horno .... lImpIEzA y mANTENImIENTO ....
-
Page 223: Instrucciones De Seguridad
Español INSTRUCCIONES DE SEGURIDAD Lea atentamente estas instrucciones para obtener el máxi- mo rendimiento de su horno de una forma correcta y segura. Guarde este manual de cara a que pueda leerlo un nuevo pro- pietario. Seguridad eléctrica • En el caso de que el horno no lleve cable de alimentación, los cables que se pueden utilizar en hornos no pirolíticos son los siguientes: H05RR-F / H05VV-F / H05V2V2-F / H07RN-F / H05SS-F. -
Page 224: Seguridad Para Los Niños
• Desconecte su horno cuando esté averiado. • En hornos combinados con encimera, sólo se podrán mon- tar las recomendadas por el fabricante, a fin de evitar un posible riesgo. Seguridad para los niños • Impida que los niños se acerquen al horno durante el coci- nado o la limpieza por pirólisis, ya que se alcanzan tempe- raturas elevadas. -
Page 225: Seguridad En La Limpieza Y Mantenimiento
Español • No guarde aceites, grasas ni materiales inflamables en el interior, ya que puede ser peligroso si pone el horno en fun- cionamiento. • No se apoye ni se siente en la puerta abierta, podría dañarla además de poner en peligro su seguridad. •... -
Page 226: Seguridad En El Uso Del Ciclo De Limpieza Por Pirólisis
Seguridad en el uso del ciclo de limpieza por pirólisis Antes de comenzar el ciclo de limpieza: • MUY IMPORTANTE: Retirar todos los accesorios y vajilla del horno, incluyendo los soportes de bandejas y/o guías telescópicas. • Retirar cualquier derrame o resto excesivo de suciedad, ya que durante el proceso de pirólisis podrían inflamarse co- rriendo peligro de incendio. -
Page 227: Instalación
Español Instalación Esta información va dirigida exclusivamente al Instalación bajo encimera. Horno de 60 cm: Figura 9*. instalador, ya que es el responsable del monta- Horno de 45 cm: Figura 10*. je y conexión eléctrica. Si usted mismo instala el horno, el fabricante no se hará responsable de los posibles daños. -
Page 228: Información Medioambiental
horno fijado al mueble, éste podría vencerse ATENCIóN hacia delante y caer al suelo. No se apoye en la puerta abierta del horno durante los pasos 4 y 5, ya que al no estar el Información medioambiental RETIRADA DEL EMbALAjE ECOLóGICO Para obtener información más detallada sobre el reciclado del aparato, póngase en El embalaje está... -
Page 229: Accesorios
Español Al cerrar la puerta del horno durante el cocina- do a la presión que ejerce la puerta al cerrarse do, se puede llegar a apreciar el sonido del aire para garantizar la estanqueidad de la cavidad. en el interior. Esto es un efecto normal, debi- Accesorios No deposite recipientes ni alimentos en el suelo Guías telescópicas con clip abatible... -
Page 230: Limpieza Y Mantenimiento
Limpieza y mantenimiento Con el paso del tiempo, determinados tipos de alimentos como el tomate, el vinagre, asados a la ATENCIóN sal… provocan cambios de coloración en el es- Debe desconectar el aparato de la red eléc- malte. Esto es normal y no afecta al funcionamien- trica para realizar cualquier intervención. -
Page 231: Hornos Con Grill Abatible
Español 4. Asiendo la puerta con ambas manos y por ATENCIóN los costados, levante la puerta hasta sacarla Por su seguridad, nunca ponga en funcio- totalmente de las bisagras Figura 25. namiento el horno sin el panel de fondo que protege el ventilador. -
Page 232: Desmontaje/Montaje De Los Cristales Interiores De La Puerta
Desmontaje/montaje de los cristales 6. Coloque el cristal n.º 2 con la parte impresa interiores de la puerta hacia el interior de la puerta. 7. Coloque de nuevo el cierre superior de la puerta, asegurando que los botones latera- ATENCIóN les encajan en su alojamiento. -
Page 233: Si Algo No Funciona
Español Si algo no funciona En este apartado encontrará algunas de las cirse en su horno, junto con las causas más incidencias más habituales que pueden produ- comunes y posibles soluciones. El horno no funciona No se obtienen los resultados esperados en el cocinado •... -
Page 234: Información Técnica
• Desactive el bloqueo de puerta siguiendo las El programa de pirólisis ha terminado y instrucciones que encontrará en la Guía de el horno está frío, sin embargo la puerta Uso que acompaña a este manual. está bloqueada y en la pantalla se muestra encendido el símbolo y 0:00 •... - Page 235 Português Índice - Instruções de Instalação e Manutenção INSTRUÇÕES DE SEGURANÇA ..... 16 ACESSóRIOS .......... 22 Segurança elétrica ........16 Montagem das guias telescópicas..22 Segurança para as crianças ..... 17 Guias telescópicas com clipe rebatível ........22 Segurança na utilização do forno ....17 Segurança na limpeza Guias telescópicas com clipe direto 22 e manutenção ........
-
Page 236: Figuras
INSTRUÇÕES DE SEGURANÇA Leia atentamente as instruções para tirar o máximo partido do seu forno de uma forma correta e segura. Guarde este ma- nual para que possa ser consultado por um novo proprietário. Segurança elétrica • Caso o cabo de alimentação não seja fornecido com o for- no, os seguintes cabos poderão ser utilizados em fornos não-pirolíticos: H05RR-F / H05VV-F / H05V2V2-F / H07RN-F / H05SS-F. -
Page 237: Segurança Na Utilização Do Forno
Português • Desligue o forno se este estiver avariado. • Em fornos combinados com bancada, poderão ser instala- das apenas bancadas recomendadas pelo fabricante, evi- tando, assim, possíveis riscos. Segurança para as crianças • Não deixe que as crianças se aproximem do forno em funcio- namento, uma vez que este atinge temperaturas elevadas. -
Page 238: Segurança Na Limpeza E Manutenção
• Não se apoie nem se sente na porta aberta, poderá danificá- -la e colocar em perigo a sua segurança. • O tabuleiro e a grelha possuem um sistema para facilitar a sua extração parcial e para manipular os alimentos. Colo- que sempre estes acessórios no interior do forno, conforme indicado na secção Acessórios. - Page 239 Português • Remova qualquer substância vertida ou qualquer resto ex- cessivo de sujidade, dado que durante o processo de piróli- se podem inflamar-se e provocar um incêndio. • Remova os restos de sujidade da junta do forno. • Siga atentamente as instruções para programar o ciclo de limpeza por pirólise.
-
Page 240: Instalação
Instalação Estas informações destinam-se exclusivamen- Instalação por baixo de bancada. Forno de 60 cm: figura 9*. te ao instalador, já que este é o responsável Forno de 45 cm: figura 10*. pela montagem e ligação elétrica. Caso seja o próprio utilizador a instalar o forno, o fabricante não se responsabilizará... -
Page 241: Informações Ambientais
Português não está preso ao móvel, pode cair para a ATENÇÃO frente no chão. Não se apoie na porta aberta do forno du- rante os passos 4 e 5, pois, como o forno Informações ambientais RETIRAR DA EMbALAGEM ECOLóGICA Para obter informações mais detalhadas sobre a reciclagem do aparelho, contacte a A embalagem foi produzida com materiais to- administração local da sua cidade, o serviço... -
Page 242: Acessórios
Ao fechar a porta do forno durante a coze- porta exerce ao fechar para que o forno fique dura, é possível ouvir o som do ar no interior. estanque. Este efeito é normal devido à pressão que a Acessórios Não coloque recipientes nem alimentos no fun- Guias telescópicas com clipe rebatível do do forno. -
Page 243: Limpeza E Manutenção
Português Limpeza e manutenção Com o passar do tempo, determinados tipos de alimentos, como tomate, vinagre, assados ATENÇÃO em sal, etc., provocam uma alteração de cor Deve desligar o aparelho da rede elétrica no esmalte. Isso é normal e não afeta a fun- para realizar qualquer intervenção. -
Page 244: Fornos Com Grill Rebatível
4. Segurando a porta pelos lados e com as ATENÇÃO duas mãos, levante a porta até que esta saia Para sua segurança, nunca coloque o forno totalmente das dobradiças. Figura 25. em funcionamento sem o painel de fundo Para montar a porta que protege o ventilador. -
Page 245: Montagem/Desmontagem Dos Vidros Interiores Da Porta
Português Montagem/desmontagem dos vidros 6. Coloque o vidro n.º 2 com a parte impressa interiores da porta voltada para o interior da porta. 7. Coloque novamente o fecho superior da porta, certificando-se de que os botões la- ATENÇÃO terais encaixam no respetivo orifício. Se desmontar os vidros com a porta monta- da no forno, faça-o sempre com a dobradi- ça na posição de bloqueio. -
Page 246: Se Alguma Coisa Não Funcionar
Se alguma coisa não funcionar Nesta secção são apresentadas algumas das no seu forno, juntamente com as causas mais situações mais habituais que podem ocorrer comuns e possíveis soluções. O forno não funciona Não se obtêm os resultados esperados no cozinhado •... -
Page 247: Informações Técnicas
Português • Desative o bloqueio de porta seguindo as O programa de pirólise terminou e o forno está frio, mas a porta continua instruções fornecidas no Guia de Utiliza- bloqueada e aparecem no ecrã o ção que acompanha este manual. símbolo e a indicação 0:00 •... - Page 248 Installation and maintenance instructions index SAfETy INSTRUCTIONS ......29 ACCESSORIES ........35 Assembling the telescopic runners ..35 Electrical safety ........29 Telescopic runners with folding clip . 35 Child safety ......... 30 Telescopic runners with direct clip .. 35 Oven use safety ........
-
Page 249: Safety Instructions
English SAFETY INSTRUCTIONS Read these instructions carefully to obtain the best perfor- mance from your oven, safely and correctly. Keep this manual so that it can be read by a new owner. Electrical safety • If the power cable is not supplied with the oven, the follow- ing cables may be used in non-pyrolytic ovens: H05RR-F / H05VV-F / H05V2V2-F / H07RN-F / H05SS-F. -
Page 250: Child Safety
• In combined ovens with countertops and to avoid potential risks, only those recommended by the manufacturer may be assembled. Child safety • Do not allow children to come near the oven while in use or during the pyrolytic cleaning cycle as it can reach very high temperatures. -
Page 251: Safety In Cleaning And Maintenance
English • The tray and rack have a system for easy partial removal and handling of food. Always place these accessories inside the oven, as indicated in the Accessories section. • The oven heats up when in use, so always use oven gloves when performing operations inside the oven and avoid touching the heating elements. - Page 252 • Clean any spillages or excess dirt, as during the pyrolytic cleaning cycle these could ignite and become a fire hazard. • Remove any dirt from the oven gasket. • Carefully follow the instructions for programming the pyro- lytic cleaning cycle. During the pyrolytic cleaning process: •...
-
Page 253: Installation
English Installation This information is exclusively for the installer Undercounter installation. who is responsible for assembly and electrical 60 cm oven: Figure 9*. 45 cm oven: Figure 10*. connection. The manufacturer will not accept liability for possible damage caused if you install the oven yourself. - Page 254 is not secured to the unit and it could move WARNING forwards and fall to the floor. Do not lean on the open door of the oven while executing steps 4 and 5, as the oven Environmental information DISPOSAL OF THE ECOLOGICAL PACK- disposal service or the establishment where AGING you bought the product from for more infor-...
-
Page 255: Accessories
English When closing the oven door during cooking, the door when it is closed, guaranteeing the the sound of the air inside it can be heard. This sealing of the cavity. effect is normal due to the pressure exerted by Accessories Do not leave any containers or food on the oven Telescopic runners with folding clip... -
Page 256: Cleaning And Maintenance
Cleaning and maintenance toes, vinegar and salt-baked dishes may cause the enamel to change colour. This is normal and WARNING does not affect the functioning of the oven. Do Disconnect the appliance from the mains not try to remove these stains using aggres- power supply before any operation. -
Page 257: Ovens With A Folding Grill
English 4. Hold the door with both hands holding on to WARNING both sides, lift up and pull out the oven door For your safety, never operate the oven with- until the hinges are fully detached Figure 25. out the back panel (that protects the fan) in place. -
Page 258: Changing The Oven Light Bulb
Dismantling/assembling the interior glass 6. Insert pane no. 2 with the printed part facing of the door toward the iner side of the door. 7. Re-attach the top seal of the door, making sure that the side tabs fit into their housings. WARNING If dismantling the glass panes with the door fitted in the oven, always do it with the hinge... -
Page 259: Trouble Shooting
English Trouble shooting This section describes some of the most fre- along with the most common causes and pos- quent problems that can affect your oven, sible solutions. The oven stops working The expected cooking results are not achieved • Check the power connection. -
Page 260: Technical Specifications
• Deactivate the door lock following the in- The pyrolysis programme has ended and structions in the User’s guide supplied with the oven is cold, but the door is locked this manual. and symbol and 0:00 are flashing • To continue cooking, re-select the desired •... - Page 261 Français Indice des instructions d’installation et d’entretien INSTRUCTIONS DE SÉCURITÉ ....42 ACCESSOIRES ........48 Montage des rails télescopiques ..48 Sécurité électrique ......42 Rails télescopiques à rabattement . 48 Sécurité des enfants ......43 Rails télescopiques Sécurité lors de l'utilisation du four ..43 à...
-
Page 262: Sécurité Électrique
CONSIGNES DE SéCURITé Lisez attentivement ces instructions afin d’obtenir de votre four les meilleurs rendements en l’utilisant de façon correcte et sécurisée. Conservez ce manuel afin qu'un nouveau pro- priétaire puisse le lire. Sécurité électrique • Si le câble d’alimentation n’est pas fourni avec le four, les câbles suivants peuvent être utilisés dans les fours non py- rolytiques : H05RR-F / H05VV-F / H05V2V2-F / H07RN-F / H05SS-F. -
Page 263: Sécurité Des Enfants
Français un tiers peut endommager l’appareil ou engendrer son dys- fonctionnement et mettre votre sécurité en péril. • Débranchez votre four en cas de panne. • Pour les fours combinés aux plaques de cuisson, il sera uni- quement possible de monter les plaques recommandées par le fabricant afin d’éviter tout risque éventuel. -
Page 264: Sécurité Du Nettoyage Et De L'entretien
• Ne vous appuyez pas sur la porte ouverte, ceci pourrait l’en- dommager ou mettre votre sécurité en danger. • La plaque et la grille disposent d'un système facilitant leur extraction partielle et la manipulation des aliments. Repla- cez toujours ces accessoires à l'intérieur du four, comme l’indiquent les instructions du paragraphe Accessoires. - Page 265 Français • TRÈS IMPORTANT : Retirer du four tous les accessoires et la vaisselle, y compris les supports des plaques et/ou les rails télescopiques. • Retirer tout écoulement ou résidu de saleté majeurs, car ces derniers pourraient prendre feu et déclencher un incendie pendant le cycle de pyrolyse.
-
Page 266: Installation
Installation Ces informations sont destinées exclusivement Installation sous les plaques de cuisson. à l’installateur, responsable du montage et du Four de 60 cm : Figure 9*. branchement électrique. Si vous installez vous- Four de 45 cm : Figure 10*. même votre four, le fabricant n’assumera pas la responsabilité... -
Page 267: Informations Environnementales
Français au meuble, pourrait s’affaisser vers l’avant et MISE EN GARDE tomber au sol. Ne vous appuyez pas sur les portes du four durant les étapes 4 et 5, car le four, non fixé Informations environnementales RETRAIT DE L'EMbALLAGE éCOLOGIQUE Afin d’obtenir plus d’informations concer- nant le recyclage de cet appareil, prenez L’emballage est réalisé... -
Page 268: Importantes
Il est possible que vous entendiez le son de l’air effet normal, dû à la pression qu'exerce la porte à l’intérieur du four lors de la fermeture de sa en se fermant afin de garantir l’étanchéité de porte du four pendant la cuisson. Il s’agit d’un la cavité. -
Page 269: Nettoyage Et Entretien
Français Nettoyage et entretien Certains aliments comme la tomate, le vinaigre, les sauces salées de rôtis, etc. peuvent altérer MISE EN GARDE l’aspect de l’émail. C’est normal et n’affectera Avant toute intervention, débranchez l’appa- pas son fonctionnement. Ne tentez pas d’éli- reil du réseau électrique. -
Page 270: Fours À Gril Rabattable
4. Des deux mains, agrippez la porte par les MISE EN GARDE côtés, soulevez-la du four jusqu’à la sortir Pour votre sécurité, ne mettez jamais le four totalement des charnières. Figure 25 en marche sans le panneau du fond qui pro- tège le ventilateur. -
Page 271: Démontage/Montage Des Vitres Intérieures De La Porte
Français Démontage/montage des vitres 6. Placez la vitre nº2, partie imprimée dirigée intérieures de la porte vers l’intérieur de la porte. 7. Placez de nouveau le montant supérieur en haut de la porte en vous assurant que les MISE EN GARDE boutons latéraux sont à... -
Page 272: En Cas De Dysfonctionnement
En cas de dysfonctionnement Vous trouverez dans ce paragraphe certains produire sur votre four, ainsi que les causes les des incidents les plus communs pouvant se plus répandues et d’éventuelles solutions. Le four ne fonctionne pas Les résultats espérés ne sont pas atteints lors de la cuisson •... -
Page 273: Informations Techniques
Français • Désactivez le verrouillage de la porte en Le programme de pyrolyse est terminé et le four est froid, cependant la porte suivant les instructions que vous trouverez est verrouillée et l’écran affiche le dans le Guide d’utilisation fourni avec ce symbole allumé... - Page 274 Inhaltsverzeichnis Installations- und Wartungsanleitung SIChERhEITShINWEISE ......55 zUbEhöR ..........61 Montage der Teleskopauszüge ... 61 Elektrische Sicherheit ......55 Teleskopauszüge mit Kindersicherheit ........56 ausklappbarer Klammer ....61 Sicherheit beim Gebrauch Teleskopauszüge mit des Backofens ........56 direkter Klammer ......61 Sicherheit bei Reinigung REINIGUNG UND WARTUNG ....
-
Page 275: Sicherheitshinweise
Deutsch SICHERHEITSHINWEISE Lesen Sie die vorliegende bedienungsanleitung aufmerksam durch, um eine optimale Leistung Ihres backofens auf ord- nungsgemäße und sichere Art und Weise sicherzustellen. be- wahren Sie diese Anleitung auf, damit sie ein neuer besitzer lesen kann. Elektrische Sicherheit • Wurde mit dem Ofen kein Netzkabel mitgeliefert, dürfen für Öfen ohne Pyrolysefunktion folgende Kabeltypen verwendet werden: H05RR-F / H05VV-F / H05V2V2-F / H07RN-F / H05SS-F. -
Page 276: Kindersicherheit
• Trennen Sie Ihren backofen vom Stromnetz, wenn er defekt ist. • bei backöfen, die mit Kochfeldern kombiniert sind, dürfen, um mögliche Risiken zu vermeiden, nur die vom Hersteller empfohlenen Kochfelder eingebaut werden. Kindersicherheit • Halten Sie Kinder während des backofenbetriebs oder des Reinigungsvorgangs durch Pyrolyse vom Gerät fern, da sehr hohe Temperaturen erreicht werden. -
Page 277: Sicherheit Bei Reinigung Und Wartung
Deutsch • backblech und Rost verfügen über ein System, welches das teilweise Ausziehen und die Handhabung des Garguts er- leichtert. Die Zubehörteile müssen immer gemäß den An- weisungen im Abschnitt Zubehör angebracht werden. • Während des betriebs erhitzt sich das Gerät. Ziehen Sie Schutzhandschuhe an, wenn Sie im Inneren hantieren und vermeiden Sie es, die Heizelemente zu berühren. - Page 278 • Entfernen Sie Speisereste oder übermäßigen Schmutz, denn diese könnten sich bei der Selbstreinigung entzünden. • Entfernen Sie Schmutzreste von der backofendichtung. • befolgen Sie aufmerksam die Anweisungen zum Program- mieren des pyrolytischen Selbstreinigungsvorgangs. Während des pyrolytischen Selbstreinigungsvorgangs: • Lassen Sie keine Tücher oder anderen Textilien am backo- fengriff hängen oder mit ihm in Kontakt geraten.
-
Page 279: Installation
Deutsch Installation Diese Informationen sind ausschließlich für den Installation unter der Arbeitsplatte. Backofen 60 cm hoch: Abb. 9*. Monteur bestimmt, da er für den Einbau und den Backofen 45 cm hoch: Abb. 10*. Elektroanschluss verantwortlich ist. Wenn Sie den Backofen selbst anschließen, übernimmt der Her- steller keinerlei Haftung für eventuelle Schäden. -
Page 280: Umweltinformationen
Backofentür auf, da der Backofen noch ACHTUNG nicht befestigt ist und nach vorne überkip- Stützen Sie sich während der Ausführung pen und auf den Boden fallen könnte. der Schritte 4 und 5 nicht auf die offene Umweltinformationen ENTSORGUNG DER Weitere Informationen zur Entsorgung des ÖKOLOGISCHEN VERPACKUNG Gerätes erhalten Sie bei Ihrer zuständigen Gemeindeverwaltung, bei Ihrem zuständi-... -
Page 281: Zubehör
Deutsch Beim Schließen der Backofentür während des Drucks, den die Tür beim Schließen ausübt, Garvorgangs kann es sein, dass man das Ge- auftritt, um die Dichtigkeit des Innenraums zu räusch des Luftzugs im Inneren hört. Dies ist gewährleisten. ein ganz normaler Effekt, der aufgrund des Zubehör Stellen Sie keine Behälter oder Lebensmittel auf Teleskopauszüge mit ausklappbarer Klammer... -
Page 282: Reinigung Und Wartung
Reinigung und Wartung Lebensmittel wie Tomaten, Essig, in Salzkruste Gebratenes usw. verursachen Verfärbungen in ACHTUNG der Emaillebeschichtung. Die wirkt sich nicht auf Das Gerät muss vom Stromnetz getrennt die Funktionsweise der Beschichtung aus. Ver- werden, bevor daran gearbeitet wird. suchen Sie nicht, diese Flecken mit aggressiven Reinigungsmitteln zu entfernen, da diese die Oberfläche dauerhaft schädigen könnten. -
Page 283: Backöfen Mit Ausklappbarem Grill
Deutsch 4. Halten Sie die Tür mit beiden Händen an ACHTUNG den Seiten und heben Sie sie an, bis Sie sie Zu Ihrer eigenen Sicherheit: Backofen nie- vollständig aus den Scharnieren gehoben mals in Betrieb nehmen, wenn die Rück- haben (Abb. 25). wand nicht eingebaut ist. -
Page 284: Aus- Und Einbau Der Innengläser Der Tür
Aus- und Einbau der Innengläser 6. Bringen Sie Scheibe Nr. 2 mit der bedruck- der Tür ten Seite in Richtung Innenseite der Tür an. 7. Bringen Sie den oberen Riegel der Tür wie- der an und stellen Sie sicher, dass die seitli- ACHTUNG chen Knöpfe in ihre Aufnahmen einrasten. -
Page 285: Vorgehensweise Bei Funktionsstörungen
Deutsch Vorgehensweise bei Funktionsstörungen In diesem Abschnitt finden Sie einige der am bleme zusammen mit den häufigsten Ursachen häufigsten in Ihrem Backofen auftretenden Pro- und möglichen Lösungen. Der backofen funktioniert nicht. Es werden nicht die erwarteten Garresultate erreicht. • Überprüfen Sie den Stromanschluss. •... -
Page 286: Technische Informationen
Der backofen ist eingeschaltet, das Ich habe den Funktionswahlknopf auf Symbol leuchtet und die Tür lässt Position gedreht und die Pyrolyse- sich nicht öffnen. Funktion P1, P2 bzw. P3 gewählt, aber das Symbol leuchtet nicht auf und • Die Türverriegelung ist aktiviert. der backofen heizt nicht. - Page 287 Nederlands Inhoudsopgave Installatie- en onderhoudsinstructies vEIlIGhEIDSINSTRUCTIES ....68 ACCESSOIRES ........74 Montage van de uitschuifbare rails ..74 Elektrische veiligheid ......68 Uitschuifbare rails met Veiligheid voor kinderen ....... 69 inklapbare clip ........ 74 Gebruiksveiligheid van de oven ... 69 Uitschuifbare rails met inklapbare clip ........
-
Page 288: Veiligheidsinstructies
VEILIGHEIDSINSTRUCTIES Lees deze instructies aandachtig door om op juiste en veili- ge wijze het maximale rendement uit uw oven te halen. bewaar deze handleiding zodat een nieuwe eigenaar hem ook kan lezen. Elektrische veiligheid • Als de oven niet is uitgerust met een voedingskabel, kun- nen de volgende kabels worden gebruikt in niet-pyrolyti- sche ovens: H05RR-F / H05VV-F / H05V2V2-F / H07RN-F / H05SS-F. -
Page 289: Veiligheid Voor Kinderen
Nederlands apparaat of een verkeerde werking veroorzaken en uw vei- ligheid in gevaar brengen. • Zet de oven uit wanneer hij kapot is. • bij ovens gecombineerd met een werkblad kunnen alleen de door de fabrikant aanbevolen werkbladen worden gemon- teerd om mogelijke risico’s te vermijden. -
Page 290: Veiligheid Bij De Reiniging En Het Onderhoud
• De bakplaat en het rooster hebben een systeem waardoor zij gedeeltelijk uit de oven getrokken en de etenswaren bewerkt kunnen worden. breng deze accessoires altijd in de oven aan zoals wordt aangegeven in het hoofdstuk Accessoires. • Tijdens het gebruik wordt het apparaat heet. Gebruik hand- schoenen wanneer u iets in de oven wilt bewerken en raak de verwarmingselementen niet aan. - Page 291 Nederlands • ERG bELANGRIjK: Verwijder alle accessoires en vaatwerk uit de oven, met inbegrip van de houders voor de bakplaten en/of telescoopgeleiders. • Verwijder gelekt vocht of buitensporige vuilresten. Deze kunnen tijdens het pyrolyseproces ontvlammen waardoor brandgevaar ontstaat. • Verwijder de vuilresten van de ovenpakking. •...
-
Page 292: Installatie
Installatie Deze informatie is uitsluitend bestemd voor de Installatie onder een werkblad. installateur, aangezien hij verantwoordelijk is Oven van 60 cm: Afbeelding 9*. voor de montage en elektrische aansluiting. Als Oven van 45 cm: Afbeelding 10*. u zelf de oven installeert, dan is de fabrikant niet aansprakelijk voor mogelijke schade. -
Page 293: Milieu-Informatie
Nederlands aan het meubel is vastgemaakt, kan deze LET OP naar voren schieten en op de grond vallen. Leun tijdens stap 4 en 5 niet op de geopen- de ovendeur. Aangezien de oven nog niet Milieu-informatie MILIEUVRIENDELIjKE VERWIjDERING Voor meer gedetailleerde informatie over het VAN DE VERPAKKING hergebruik van het apparaat kunt u contact opnemen met de gemeente, de huisafval-... -
Page 294: Accessoires
Als de ovendeur tijdens het bakken wordt ge- ten aan de druk die wordt uitgeoefend door de sloten, is het geluid van de lucht in de oven te deur wanneer deze wordt gesloten. Dit om de horen. Dit is een normaal effect dat is te wij- luchtdichtheid van de oven te garanderen Accessoires Zet geen ovenschalen of etenswaren op de bo-... -
Page 295: Reiniging En Onderhoud
Nederlands Reiniging en onderhoud Na verloop van tijd veroorzaken bepaalde etens- waren zoals o.a. tomaten, azijn en in zout be- LET OP reide gerechten verkleuringen van het email. Dit Sluit het apparaat van de stroom af alvorens is normaal en is niet van invloed op de werking er handelingen aan te verrichten. -
Page 296: Ovens Met Neerklapbare Grill
4. Pak de deur met beide handen aan de zij- LET OP kanten beet, til de deur helemaal uit de Zet de oven, voor uw veiligheid, nooit aan scharnieren Afbeelding 25. zonder het achterpaneel dat de ventilator beschermt. De montage van de deur 5. -
Page 297: Demontage/Montage Van De Binnenglazen Van De Ovendeur
Nederlands Demontage/montage van de 6. Breng glas nr. 2 aan met het bedrukte deel binnenglazen van de ovendeur naar de binnenkant van de deur gericht. 7. Breng de bovenste deurvergrendeling op- nieuw aan en zorg ervoor dat de zijknoppen LET OP op hun plaats passen. -
Page 298: Als Iets Niet Werkt
Als iets niet werkt In deze paragraaf vindt u een aantal van de de meest gebruikelijke oorzaken en de mogelij- meest voorkomende incidenten met uw oven, ke oplossingen. De oven werkt niet bij het bakken en braden worden niet de gewenste resultaten bereikt •... -
Page 299: Technische Gegevens
Nederlands • Schakel de deurvergrendeling uit volgens de Het pyrolyseprogramma is klaar en de oven is afgekoeld. De deur is echter vergrendeld aanwijzingen in de gebruikershandleiding die en op het scherm licht het symbool bij deze handleiding wordt geleverd. 0:00 op •... - Page 300 Indice delle istruzioni di installazione e manutenzione ISTRUzIONI SUllA SICUREzzA .... 81 ACCESSORI ..........87 Montaggio delle guide telescopiche ..87 Sicurezza elettrica ....... 81 Guide telescopiche con clip apribile ..87 Sicurezza per i bambini ....... 82 Guide telescopiche con clip diretta..87 Sicurezza nell’uso del forno ....
-
Page 301: Istruzioni Sulla Sicurezza
Italiano ISTRUZIONI SULLA SICUREZZA Si prega di leggere attentamente le presenti istruzioni per ot- tenere il massimo rendimento dal forno e farne un uso corret- to e sicuro. Conservare il presente manuale in caso di futura cessione dell’apparecchio. Sicurezza elettrica •... -
Page 302: Sicurezza Per I Bambini
• Al fine di evitare eventuali rischi, nei forni con piano cottura incorporato sarà possibile montare esclusivamente i piani cottura raccomandati dal fabbricante. Sicurezza per i bambini • Impedire ai bambini di avvicinarsi al forno durante le opera- zioni di cottura o pulizia mediante pirolisi, poiché l’apparec- chio raggiunge temperature elevate. -
Page 303: Sicurezza Nell'uso Del Ciclo Di Pulizia Mediante Pirolisi
Italiano no attenendosi sempre alle indicazioni riportate nella sezio- ne Accessori. • Durante l’uso, l’apparecchio si riscalda. Servirsi di guanti di protezione per manipolare gli oggetti al suo interno ed evi- tare di toccare le fonti dirette di calore. • Utilizzare unicamente la sonda di temperatura in dotazione (nei modelli che ne sono provvisti). - Page 304 • MOLTO IMPORTANTE: Rimuovere tutti gli accessori e i piatti dal forno, compresi i supporti dei vassoi e/o le guide di scor- rimento. • Rimuovere eventuali resti di cibo o di sporcizia in eccesso, in quanto durante il processo di pirolisi potrebbero prendere fuoco e dar luogo a un rischio d’incendio.
-
Page 305: Installazione
Italiano Installazione Queste informazioni sono rivolte esclusivamente Installazione sottopiano. Forno da 60 cm Figura 9*. all’installatore, in quanto responsabile dell’instal- Forno da 45 cm Figura 10*. lazione e del collegamento dell’apparecchio alla rete elettrica. Il fabbricante declina ogni respon- sabilità per eventuali danni derivati da un’instal- ATTENZIONE lazione eseguita da personale non qualificato. -
Page 306: Tutela Dell'ambiente
il forno, non essendo fissato, potrebbe sci- ATTENZIONE volare in avanti e cadere. Durante l’esecuzione delle operazioni 4 e 5, non appoggiarsi allo sportello aperto, poiché Tutela dell'ambiente SMALTIMENTO DELL'IMbALLAGGIO Per informazioni più dettagliate su come rici- ECOSOSTENIbILE clare l’apparecchio, contattare i servizi muni- cipali competenti, il servizio di raccolta rifiuti I materiali d'imballaggio sono riciclabili e posso- o il rivenditore presso cui è... -
Page 307: Accessori
Italiano Durante la cottura di cibi con alto contenuto di tutto normale ed è dovuto alla pressione eserci- liquidi è normale che si generi uno strato di con- tata dallo sportello chiuso per garantire l’erme- densa sullo sportello. ticità dell’interno dell’apparecchio. Il rumore della ventola del forno dovrebbe sen- tirsi anche con lo sportello chiuso. -
Page 308: Pulizia E Manutenzione
Pulizia e manutenzione Con il tempo, alcuni alimenti come pomodori, aceto, pietanze cotte al sale ecc..possono ATTENZIONE causare alterazioni nella colorazione dello smal- Scollegare l’apparecchio dall’alimentazione to. Queste variazioni non influiscono sulla sua elettrica prima di effettuare qualsiasi intervento. funzionalità... -
Page 309: Forni Con Grill Apribile
Italiano 4. Afferrare lo sportello sui lati con entrambe le ATTENZIONE mani e tirare fino a estrarlo completamente Per ragioni di sicurezza, si raccomanda di dalle cerniere. Figura 25. non mettere mai in funzione il forno senza il pannello del fondo che protegge la ventola. Montaggio dello sportello 5. -
Page 310: Smontaggio/Montaggio Dei Vetri Interni Dello Sportello
Smontaggio/montaggio dei vetri interni 6. Collocare il vetro n.º 2 con la scritta rivolta dello sportello verso l’interno della porta. 7. Collocare di nuovo la chiusura superiore del- la porta, avendo cura che i pulsanti laterali ATTENZIONE entrino nelle rispettive sedi. Se i vetri vengono rimossi senza smontare lo sportello, assicurarsi che le cerniere sia- no in posizione di blocco. -
Page 311: Risoluzione Dei Problemi
Italiano Risoluzione dei problemi In questa sezione vengono descritte le anoma- ni e le possibili soluzioni. lie più frequenti indicandone le cause più comu- Il forno non funziona Non si ottengono i risultati di cottura desiderati • Controllare il collegamento alle rete elettri- •... - Page 312 • Disattivare il blocco dello sportello seguen- Il ciclo di pirolisi si è concluso e il forno do le istruzioni fornite nella Guida rapida si è raffreddato, ma lo sportello resta del forno allegata al presente manuale. bloccato e sul display viene visualizzato il simbolo e 0:00 •...
- Page 313 Figuras / Figuras / Figures / Figures / Abbildungen / Afbeeldingen / Figure Fig. / AFb. 1 Fig. / AFb. 2 Fig. / AFb. 3 mín 5 Fig. / AFb. 4 Fig. / AFb. 5 Fig. / AFb. 6 Instalación y Mantenimiento / Instalação e Manutenção / Installation & Maintenance / Installation et Entretien / Installation und Wartung / Installatie en onderhoud / Installazione e manuntenzione...
- Page 314 Fig. / AFb. 7 Fig. / AFb. 8 Fig. / AFb. 9 Fig. / AFb. 10 Fig. / AFb. 11 * Para hornos pirolíticos NO realizar las aperturas. * Para fornos pirolíticos, NÃO faça as aberturas. * For pyrolytic ovens, DO NOT drill any holes. * NE PAS réaliser d’ouverture pour des fours pyroly- tiques.
- Page 315 Fig. / AFb. 12 Fig. / AFb. 13 Fig. / AFb. 14 Fig. / AFb. 15 Fig. / AFb. 16 Fig. / AFb. 17 Fig. / AFb. 18 Instalación y Mantenimiento / Instalação e Manutenção / Installation & Maintenance / Installation et Entretien / Installation und Wartung / Installatie en onderhoud / Installazione e manuntenzione...
- Page 316 Fig. / AFb. 19 Fig. / AFb. 20 Fig. / AFb. 21 Fig. / AFb. 22 Fig. / AFb. 23 Fig. / AFb. 24 Fig. / AFb. 25 Fig. / AFb. 26 Instalación y Mantenimiento / Instalação e Manutenção / Installation & Maintenance / Installation et Entretien / Installation und Wartung / Installatie en onderhoud / Installazione e manuntenzione...
- Page 317 Fig. / AFb. 27 Fig. / AFb. 28 Fig. / AFb. 29 Fig. / AFb. 30 Fig. / AFb. 31 Fig. / AFb. 32 Fig. / AFb. 33 Fig. / AFb. 34 Instalación y Mantenimiento / Instalação e Manutenção / Installation & Maintenance / Installation et Entretien / Installation und Wartung / Installatie en onderhoud / Installazione e manuntenzione...
- Page 321 INOXPAN S.L. HORNOS-FORNOS AVISO • El esmalte, está especialmente pensado para su limpieza con agua. • ATENCIÓN: No vierta agua en el interior del horno caliente, puede dañar el esmalte de su horno. • No utilice en ningún caso productos antical, productos específicos para limpieza de horno, ni en general, productos con un pH superior a 12.
- Page 322 INOXPAN S.L. OVENS-FOURS READ CAREFULLY • The enamel is especially designed to be cleaned with water. • CAUTION: Do not pour water inside the oven when hot because it may damage the enamel inside. • Never use anti-limescale products or specific oven cleaning products, or in general, products with a pH above 12.
- Page 323 INOXPAN S.L. ÖFEN BITTE AUFMERKSAM LESEN • Die Emaille ist speziell für die Reinigung mit Wasser gedacht. • ACHTUNG: Gießen Sie kein Wasser auf Innenwände und Boden des heißen Backofens. Dadurch könnte die Emaillierung beschädigt werden • Verwenden Sie auf keinen Fall weder Entkalker noch spezielle Ofenreinigungs-Produkte und generell keine Produkte mit einem pH-Wert über 12.
- Page 324 Cod. 3370753-00...
Need help?
Do you have a question about the PHB-961 and is the answer not in the manual?
Questions and answers