
Related Manuals for Signatrol Cadmus CTX-203

Summary of Contents for Signatrol Cadmus CTX-203
- Page 1 Cadmus & Ratifi Operating Manual. The Ultimate Cloud Based Data Logging System X-0036-01-07 Cadmus & Ratifi Operating Manual Document Reference: Drawn: 13 November 2020 Page 1 of 66...
-
Page 2: Table Of Contents
Contents GENERAL VERVIEW 1.1.1 About Signatrol 1.1.2 The System 1.1.3 The Manual DMINISTRATOR ODEL ECURITY 1.3.1 Introduction 1.3.2 WI-FI Connection 1.3.3 Data Security INSTALLATION GUIDE ECEIVING AND NPACKING REATE RATIFI CLOUD ACCOUNT REATE LOUD ROJECT DDING THE DEVICE TO THE... - Page 3 1.18 ATIFI REDITS RATIFI 1.19 ATIFI VERVIEW 1.20 DMINISTRATOR UNCTIONS LREADY OVERED ARLIER 1.20.1 Options 1.20.2 Automatic Reports 1.20.3 Auxiliary Admin email List 1.20.4 Audit Trails 1.21 VENTS USER FUNCTIONS 2.1.1 Project Selection. 2.1.2 Overview 2.1.3 Devices 2.1.4 Health 2.1.5 Graph 2.1.6 Sensor Alarms...
-
Page 4: General
1.1.1 About Signatrol Signatrol is a UK based company who are experts in data logging solution with over 20 years of experience in the design, manufacture and sales of Data Loggers and Data Logging systems, primarily for the food and pharmaceutical industries. -
Page 5: The Administrator/User Model
The Administrator/User Model Ratifi.cloud uses an Administrator/User model whereby the Administrator is the ‘Responsible Person’ within your organisation. He or she has sole control of the system and sets up all the functionality. They can add and block users and enter all relevant data, alarm settings etc. The user receives alarm messages (as determined by the Administrator) and can access the data but cannot implement any changes. -
Page 6: Installation Guide
Installation Guide Receiving and Unpacking Set Up ratifi.cloud Account* Add Device to Project* Create/Add Project* Connect External Sensors Setup device cloud configuration* (If Required) Insert Power Link Set Up Device using Cadmus-config * Add Cloud Users* Purchase* Tokens * Available In Administrator Role. Receiving and Unpacking Congratulations you have just purchased the most comprehensive WI-FI enabled data logging and alarm monitoring system available today. -
Page 7: Create Ratifi Cloud Account
Create ratifi.cloud account Before setting up your device, you must first create a ratifi.cloud account. Using your preferred web browser, go to URL: https://www.ratifi.cloud and then select “JOIN US”. Your email address will be used to validate the new account. Complete the form and then select “SUBMIT”. - Page 8 Click the link within the email and ratifi.cloud will open in your web browser. Create and enter your new password and then select “SAVE”. Once the password has been set, Login to the administer section using your credentials. Document Reference: X-0036-01-07 Cadmus & Ratifi Operating Manual Drawn: 13/11/2020 Page 8 of 66...
-
Page 9: Create/Add Cloud Project
Create/Add Cloud Project Under “PROJECTS” enter the new project details in the form as shown below. Once the project has been created, click on the on the project line. Document Reference: X-0036-01-07 Cadmus & Ratifi Operating Manual Drawn: 13/11/2020 Page 9 of 66... -
Page 10: Adding The Device To The Cloud
Adding the device to the Cloud Each Cadmus device is supplied with a registration card, which allows the administrator to register the device against their project. The project will be credited (Free of Charge) 1 credit for each device registered. 1 credit will allow access for 1 device/month. The administrator will receive email notification when your credits are running low. -
Page 11: Setup Device Configuration
Setup Device Configuration Select the “DEVICE CONFIGURATION” from the left hand menu (shown below). The list of current devices allocated to the project will display. Select “Edit” (as shown below). Note: Do not select “Remove”. Removing a device will remove the device from the current project. Refer to moving devices to another project in this manual. Select from the pop-up how to configure your device. -
Page 12: Configuration Wizard
Configuration Wizard 1.9.1 Main Tab. The main tab contains parameters related to the general functionality of the Cadmus device. Parameter Name Description Options ENABLE/DISABLE Changes the state of the Cadmus device ON = Active Monitoring State , OFF = NAP mode (device is sleeping) In NAP mode the device will connect every 90 minutes to check if a new configuration packet has... -
Page 13: Channel 1 (Internal Temperature)
1.9.2 Channel 1 (Internal Temperature). The Channel 1 tab contains parameters related to the internal temperature channel only. On the CTX-203 and CTX-213 this sensor is mounted under the lower vents as shown to the right. This channel is ideally suited to monitoring ambient office and warehouse temperatures, which are slow changing. -
Page 14: Channel 2 (Internal Relative Humidity) (Ctx-213 Only)
1.9.3 Channel 2 (Internal Relative Humidity) (CTX-213 only) The Channel 2 tab contains parameters related to the internal humidity channel only. This optional sensor is mounted within the enclosure, approximately at the position of the star. When mounted on a wall, air will enter the enclosure as shown in the image to the right. -
Page 15: Channel 3 And 4 (External Temperatures, Pt1000 Sensor)
Lead resistance compensation can be applied via the USB Cadmus-Config software. Various probe assemblies are available from Signatrol to cover the range -200 to +400°C, with varying cable types and lengths. Image shown are for CTX-203 and CTX-213, refer to section 1.11.1 for more information and connecting to... -
Page 16: Channel 5 And 6 (Discrete Input)
1.9.5 Channel 5 and 6 (Discrete Input) Parameter Name Description Options TYPE discrete Interrupt/Counter Read only. CHANNEL NAME Channel descriptor text. 16 Characters maximum. CONFIG Select channel mode OFF, Discrete or Counter. Channels 5 and 6 can function in two different modes. •... - Page 17 1.9.5.1 Counter Mode Configuration Parameter Name Description Options ELECTRICAL HIGH Maximum counts per “Store Rate” period. 0 to 65535, integer value. *note 1 ELECTRICAL LOW Minimum counts per “Store Rate” period. 0 to 65535, integer value *note 1 ENGINEERING HIGH Engineering value equating to “ELECTRICAL HIGH”...
-
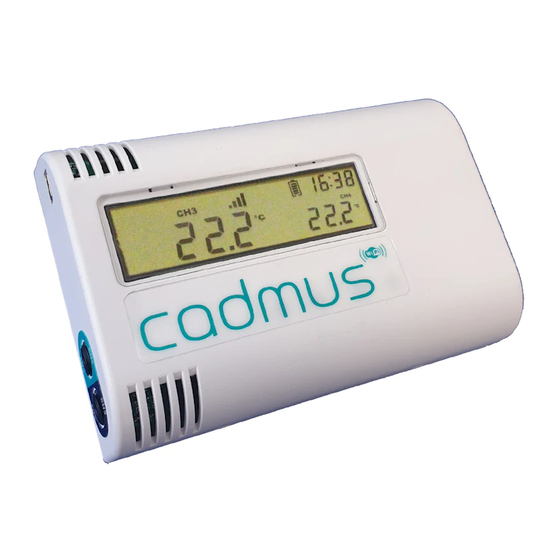
Page 18: Lcd Display (Ctx-203 And Ctx-213 Models Only)
1.9.6 LCD Display (CTX-203 and CTX-213 models only) Devices fitted with displays can be configured to display channels 1 to 4. The configuration wizard will only allow enabled channels to be shown on the main or sub displays. If more than 1 channel is enabled, the device will automatically scan the selected channels. -
Page 19: Opening The Device Enclosure
1.10 Opening the device enclosure. 1.10.1 CTX-203 and CTX-213 To open the device enclosure, use a narrow flat screwdriver to release the two clips shown above. To close the enclosure, locate the top edge of the enclosure over the base and then push down. 1.10.2 CTX-303 Document Reference: X-0036-01-07 Cadmus &... -
Page 20: Connect External Sensors
Connecting Pt1000 temperature sensors. Channels 3 and 4 are designed for 2-wire Pt1000 sensors. These sensors can be purchased directly from Signatrol Ltd. There are two connection methods for Pt1000 sensors show below. Pt1000 sensor are non-polarised and be connected either way around. If a sensor is disconnected or becomes open-circuit the channel will indicate +400°C (+752°F), if a sensor becomes short-circuit the channel will indicate -200°C (-328°F). -
Page 21: Connecting External Digital Output To Discrete Channels
1.11.2 Connecting external digital output to discrete channels. Channels 5 and 6 are designed for external voltage signals and dry contacts. Please refer to the hardware specification for voltage specifications. Both channels are capable of measuring counts or logic levels. CTX-203 and CTX-213 models Connection via enclosure base terminal strip. -
Page 22: Setup Power Source
1.12 Setup Power Source The unit arrives with the batteries pre-installed and power off (Jumper link fitted in PARK position). Moving the jumper link from the PARK position to J9 will select the required power source. J9 ( Power Source ) Operation Device powered by internal batteries Device power by external dc power source,... -
Page 23: Usb Configuration Via Cadmus-Config
1.13.2 Loading Cadmus-Config Launch Cadmus-Config from the start menu. The application maybe pinned to your start menu, or located in applications under “Signatrol Ltd”. When opening Cadmus-Config the application will connect to the cloud to check the applications version. 1.13.3 Connecting your device to the computer The device uses standard windows drivers to operate. -
Page 24: Cadmus-Config Basics
1.13.4 Cadmus-Config basics Opening Cadmus-Config will present you with the screen below. Only two tabs are available, Device and Release. Release shows information about the current application version. Device is used to make connection to the device. Select “Connect” to make the USB connection active. Note: connection may fail if Windows is currently installing the default driver; in this case you just need to wait a few moments until Windows has completed the task. -
Page 25: Cadmus-Config Information Screen
1.13.5 Cadmus-Config Information screen The information screen automatically loads information from the device after the connection has been made. This screen gives information on the all the basic device parameters and status information on the battery and Wi-Fi connection status. Additional information is added to the screen once the Wi-Fi network has been configured. - Page 26 When prompted to create a new pin the following popup will appear. Once the device has been locked with a pin, the status of the device security can always be viewed from the Security tab. Depending on the pin status, various functions will be available. Either to set, change or remove the current pin. Document Reference: X-0036-01-07 Cadmus &...
-
Page 27: Cadmus-Config Settings Tab
1.13.7 Cadmus-Config Settings Tab The Settings Tab contains groups of parameters which can be configured based on your locale. These settings should be checked before configuring your Wi-Fi network. 1.13.7.1 Wi-Fi Settings. Amend your Wi-Fi settings and the click “Set Wi-Fi Settings”. Parameter Name Description Options... -
Page 28: External Temperature Sensor Tab
1.13.8 External Temperature Sensor Tab External temperature channels 3 and 4 on the device are RTD Pt1000 type sensors, which are connected using 2 wires. It is possible to compensate for the lead resistance of the cable lengths to the sensor element using the screen below. Generally, there is a change of approximately 3.8Ω/°C for this type of element, and sensor cables are normally about a 40th of this. -
Page 29: Real Time Clock
1.13.10 Real Time Clock This screen shows the current time within the device, including the time-zone and daylight saving status. The device has an accurate crystal real time clock, but in addition to this the device automatically keeps in sync with a very accurate clock located on the ratifi.cloud. So there is no need for periodic re-syncing of the clock. But the clock must be accurately set before first use, as some enterprise networks which use digital certificates require date validation. -
Page 30: Wi-Fi Connection
1.13.11 Wi-Fi Connection 1.13.11.1 Preparing your Wi-Fi connection The Cadmus device supports the following connection methods. • Open • • WPA or WPA2 Personal • WPA2 Enterprise 1.13.11.2 Using Personal Networks Using Personal Networks you will only need the following: •... -
Page 31: Wi-Fi Connection Wizard
1.13.11.4 Ports The Cadmus device communicates with the cloud using UDP packets, using Port 49152 (Bi-Directional). The device will also use port 53 for DNS lookup. 1.13.11.5 IP Addresses The ratifi.cloud is hosted on 2 independent servers. Both servers at located in the UK, and both at different geographic locations. The address of each server is listed below. - Page 32 1.13.12.1 Network Scan Once the network scan has completed, Cadmus-Config will display a list of available access points. On the image below sensitive information has been blurred for confidentiality purposes. The device will scan up to 30 profiles. The list is sorted with the highest signal strengths are the top of the screen. The BSSID number is the MAC Address of the access point advertising the network.
-
Page 33: Wpa2- Personal Connection - Network Settings
1.13.13 WPA2- Personal Connection – Network Settings The WPA2-Personal connection only requires a network key. Enter the key twice as shown. The application will confirm you wish you continue. At this point the old Wi-Fi settings (if present) will be deleted. The application will now transfer all the new settings to the device and test the Wi-Fi connection. - Page 34 Saving new settings….. Testing connection…. Connected. If your device will not connect. Please check all your settings. If the application reports the device is being actively refused. It is most probable that the password is being incorrectly entered. Your device is now connected to the WiFi network, please close Cadmus-Config and move on to section 1.14 Document Reference: X-0036-01-07 Cadmus &...
-
Page 35: Wpa2-Enterprise Connection (Eap-Tls) - Network Settings
1.13.14 WPA2-Enterprise Connection (EAP-TLS) – Network Settings. Ensure the EAP type is set to the correct type. In this case we are using TLS. Then enter your username. Then click “Select Root Certificate” The file browser will open. The file must me in PEM format. But the file name and extension are not important. Only the file contents will be used. Document Reference: X-0036-01-07 Cadmus &... - Page 36 The application will validate the file is valid X509 format. The valid from and valid to dates are clearly shown. The application will refuse files which are currently not valid. It will also display a warning if a certificate will expire in less than 60 days. Select next to return to the previous screen. Repeat the procedure for the client certificate and the client key.
- Page 37 The application will now transfer all the new settings and certificates to the device and test the Wi-Fi connection. The whole process takes approximately 3 minutes. Deleting current settings….. Transferring certificate files to the device. Saving new settings….. Continues over the page… Document Reference: X-0036-01-07 Cadmus &...
-
Page 38: Product Positioning
Testing connection…. Connected. If your device will not connect. Please check all your settings. Your device is now connected to the Wi-Fi network; please close Cadmus-Config and move on to section 1.14 1.14 Product Positioning The Cadmus product has a wide range of applications and some simple guidelines will help the installer achieved the best from the device. Guidelines: •... -
Page 39: Device And Cloud Interaction
1.15 Device and Cloud interaction Once the device has been successfully setup with a valid Wi-Fi configuration. The device will be in either of the following states. • NAP (Sleep) • Monitoring (Active) The initial cloud configuration is created in section 1.8. The cloud will be waiting for the device to connect. Once the connection is made the cloud configuration will be downloaded to the device. -
Page 40: Add Cloud Users
1.17 Add cloud users You have already created an Administrator for your account, which has access to Admin and User areas. It is now time to create User accounts. Login via the Administrator login and select “User List” from the left-hand menu. Select “ADD NEW USER”... -
Page 41: Ratifi Credits
1.18 Ratifi Credits When adding a new device to Ratifi, the cloud will automatically credit the project with 1 credit. The project requires 1 credit per device / Month to operate. Credits are decremented on the 1st of each new month, based on the number of devices available to the project. The credit balance for each project can be found in the administer login. - Page 42 1.18.1.1 Purchasing Credits Credit can be purchased in one of two ways. • Instant purchase using Credit or Debit Card via a PayPal Portal. • Raise a purchase order, which will be manually invoiced. This method will not be instant, please allow 2~3 working days for the credits to appear. The credit unit price is based upon the number of credits purchased at one time.
-
Page 43: Ratifi
Ratifi Ratifi is a cloud-based operating system that runs on multiple servers so that you will never lose any of your important data. Ratifi can be accessed via the internet from anywhere in the world with the appropriate log in details. 1.19 Ratifi Overview The Ratifi software is our premium software platform;... -
Page 44: Administrator Functions Not Already Covered Earlier
1.20 Administrator Functions Not Already Covered Earlier. 1.20.1 Options Once logged into the administrator screen, select a project, and then select “Options” from the menu on the left. Parameter Name Description Options TEMPERATURE UNITS Temperature units for screens, emails and reports. Celsius, Fahrenheit and Kelvin AUTOMATIC REPORT SETTINGS REPORT DAY... -
Page 45: Automatic Reports
1.20.2 Automatic Reports Automatic reports can be generated to email users with PDF report every Day/Week or Month. The type of report that is run and who receives them is set below. • Daily reports are sent every 24 hours, at the Report Time. See section 1.20.1. •... -
Page 46: Audit Trails
1.20.4 Audit Trails This page can be used to provide a complete Audit Trail of all activity and events over a particular period. Items available within the Audit Trail: • Login/Logout – this report captures every project user login and logout time. •... -
Page 47: User Functions
User Functions 2.1.1 Project Selection. After login, the user will be prompted to select a project. Only projects allocated by the Administrator will be visible to the user. Document Reference: X-0036-01-07 Cadmus & Ratifi Operating Manual Drawn: 13/11/2020 Page 47 of 66... -
Page 48: Overview
2.1.2 Overview Once logged in, the Overview screen will be loaded. The Overview screen gives the most simplified view of your devices, without showing too much detail. Each device will be allocated a row in the table. Any devices in an alarm state will appear with a pink background colour. The following parameters are displayed: Column Name Description... -
Page 49: Devices
2.1.3 Devices The Devices screen shows the latest readings per channel. Displayed channels will display “N/A” (Not applicable). Each device will be allocated a row in the table. Any devices in an alarm state will appear with a pink background colour. The following parameters are displayed: Column Name Description... -
Page 50: Health
2.1.4 Health The Health screen shows information on the status of the calibration, battery level and battery status. All of these parameters are updated each time the cloud receives new information from the device. The following parameters are displayed: Column Name Description Column Sort able. -
Page 51: Graph
2.1.5 Graph Previously it has been shown how to generate a graphs or tables via the “LOCATION” link in OVERVIEW/DEVICES or HEALTH. The Graph screen allows the user to save preconfigured graphs, where multiple device and/or channels can be overlaid on the same graph. 2.1.5.1 Add Graph Select “ADD GRAPH”... - Page 52 2.1.5.3 Using the graph By default the graph will load with the last 7 days data. If you wish to see data period outside the last 7 days, you must amend the “Data Period” and then select “RELOAD”. The graph allows the user to zoom into the data by using the “Zoom Period” buttons or the “Manual Zooming” slider below the main graph. As the mouse position moves over the graph, popup information windows will appear showing when data was received from a device.
-
Page 53: Sensor Alarms
2.1.6 Sensor Alarms Sensor alarms are alarms generated by the device when an input being monitors goes above or below an alarm limit. The Cadmus devices support the following 4 alarm types per channel (Channels 1 to 4): “Hi Hi”, “Hi”, “Lo” and “Lo Lo”. “Hi Hi”... -
Page 54: System Alarms
2.1.7 System Alarms System alarms are alarm generated on the device or via the cloud. These cover the following triggers: • Calibration Due or Overdue. • Low Battery • Late Alarms (Cloud have not received data within a specified time). •... - Page 55 2.1.9 Table Data The table data screen shows all data since the project was created, with the newest data at the top. The screen below has been modified to fit this document; the screen is normally very wide and will require left or right scrolling. The table may also have many rows.
-
Page 56: Pdf Report
2.1.10 PDF Report This screen generates an instant pdf report based on the parameters selected. The user is limited to a maximum 30 day period for the report contents, this is due to the amount of data generated. The report generated will contain a summary of the measurements taken over the report period, and list any sensor alarms which have occurred. Document Reference: X-0036-01-07 Cadmus &... -
Page 57: Hardware Specifications@ 25°C
Hardware Specifications@ 25°C Model Number CTX-203 CTX-213 CTX-303 WI-FI COMMUNICATION Connection Type: Wi-Fi 2.4GHz, Station Mode Wireless Lan Standards: IEEE 802.11 b/g/n & IEEE 802.1X Supported Encryption Methods: WEP/WPA/WPA2/WPA2 Enterprise Supported Enterprise Networks: EAP-TLS/EAP-TTLS-TLS/EAP-TTLS-MSCHAPv2/EAP-TTLS- PSK/EAP-PEAP0-TLS/EAP-PEAP0-MSCHAPv2/ EAP-PEAP0-PSK/EAP-PEAP1-TLS/EAP-PEAP1-MSCHAPv2/EAP- PEAP1-PSK Data Packet UDP, Port 49152 (Bi-directional) Firewall The Cadmus device requires connection to the following Cloud IP address using UDP Port 49152. - Page 58 Model Number CTX-203 CTX-213 CTX-303 CHANNELS 3 & 4. ±0.1°C ±0.05% of Reading (Electronics Only) EXTERNAL TEMPERATURE Range: -200 to +400°C ACCURACY CHANNELS 3 & 4. EXTERNAL TEMPERATURE SYSTEM ACCURACY SYSTEM ACCURACY ±0.25°C ±0.25% of Reading STANDARD (Meets EN12830: 2018 Class 0.5) SYSTEM ACCURACY ±0.1°C ±0.15% of Reading “A”...
- Page 59 Model Number CTX-203 CTX-213 CTX-303 29 Months @ 10 Minute Store Rate & 60 Minute Upload Rate 16 Months @ 5 Minute Store & 30 Minute Upload Rate TYPICAL BATTERY LIFE @ 20°C (CADMUS-ACC-01 Batterties only) Document Reference: X-0036-01-07 Cadmus & Ratifi Operating Manual Drawn: 13/11/2020 Page 59 of 66...
- Page 60 When Wi-Fi connection not available, internal clock drift < 60 Seconds / Month 2 x (3.6V @ 2.6h) AA Size BATTERY TYPE Pulse Current 250mA, Continuous Current 50mA Lithium Thionyl Chloride Battery (User Replaceable) To ensure correct battery life calculation, only replace with Signatrol Part: CADMUS-ACC-01 LOCAL Connector Type Function CONFIGURATION USB Mini-B Required to set device clock, Wi-Fi Credentials, Enterprise Certificates (if required), Battery reset and Cable compensation.
-
Page 61: Trouble Shooting
Trouble Shooting. LCD Error messages (CTX-203 and CXT-213 only) Cadmus devices have an internal self test routine and models fitted with LCD will show any self test failures as below. Displayed Value Error Type Action Err rtCn Reset clock using Cadmus Real Time Clock Error. -
Page 62: Useful Information
Useful Information Firewalls Cadmus communicates with the cloud using the following IP address and port. UDP Port 49152 (bi-directional) Server 1 3.8.223.231 Server 2 35.177.84.149 The device will also make a DNS lookup to determine which of the 2 addresses above to use. National NHS Firewalls Implementation Date BT N3... -
Page 63: Regulatory Information Related To Wi-Fi Transceiver
Regulatory Information related to Wi-Fi transceiver. RF Function and Frequency Range The device is designed to operate in the WLAN 2.4-GHz band, and supports the following channels dependent on the region of operation: • FCC and IC: Channels 1 through 11 (2142 MHz to 2462 MHz) •... -
Page 64: Fcc And Ic Certification
FCC and IC Certification. The device must be installed so 20cm of space is maintained between antenna and users. 4.3.1 FCC CAUTION FCC RF Radiation Exposure Statement: This equipment complies with FCC radiation exposure limits set forth for an uncontrolled environment. This equipment should be installed and operated with a minimum distance of 20 cm between the radiator and your body. -
Page 65: Can Ices-3(B) And Nmb03(B) Certification And Statement
4.3.2 CAN ICES-3(B) and NMB03(B) Certification and Statement The device contains a TI CC3220MODA module which is certified for IC as a single-modular transmitter. The TI CC3220MODA modules meet IC modular approval and labelling requirements. The IC follows the same testing and rules as the FCC regarding certified modules in authorized equipment. This device complies with Industry Canada license-exempt RSS standards. -
Page 66: Support And Contacts
Support and contacts For additional support or help, please contact Signatrol Ltd using the details below. Web Page: https://www.signatrol.com Email Sales: sales@signatrol.com Email Support: support@signatrol.com Telephone: +44 (0)1684 299 399 Registered Office: Signatrol Ltd. Unit E2, Green Lane Business Park,...
Need help?
Do you have a question about the Cadmus CTX-203 and is the answer not in the manual?
Questions and answers