Advertisement
Assembly Instructions
& User's Manual
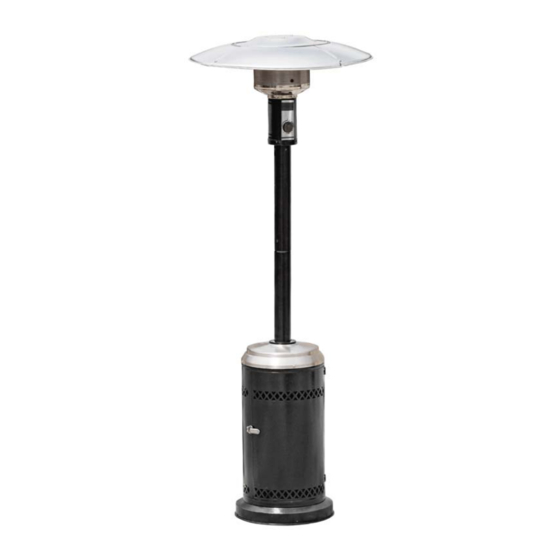
Propane Patio Heater
Item #FSPTMV5004
Model #SRPH32-XXXX
Please keep this instruction manual for future reference
Warning:
READ INSTRUCTION MANUAL BEFORE ATTEMPTING TO ASSEMBLE OR
OPERATE THIS PRODUCT.
Adult assembly required.
Keep screws and parts out of reach of children.
Customer Service: (866) 814-0585, 8:00am to 8:00pm,
Monday thru Friday Eastern Standard Time
8:00am to 5:00pm, Saturday Eastern Standard Time
--------------------------------------OR-------------------------------------
Customer Service: (888) 922-2336 7:00 am to 12:00 am CST (daily)
Live Chat at: www.academy.com
Email: customerservice@academy.com
(Made in China)
Advertisement
Table of Contents

Related Manuals for Mosaic SRPH32 Series

Summary of Contents for Mosaic SRPH32 Series
- Page 1 Assembly Instructions & User's Manual Propane Patio Heater Item #FSPTMV5004 Model #SRPH32-XXXX Please keep this instruction manual for future reference Warning: READ INSTRUCTION MANUAL BEFORE ATTEMPTING TO ASSEMBLE OR OPERATE THIS PRODUCT. Adult assembly required. Keep screws and parts out of reach of children. Customer Service: (866) 814-0585, 8:00am to 8:00pm, Monday thru Friday Eastern Standard Time 8:00am to 5:00pm, Saturday Eastern Standard Time...
- Page 2 WARNINGS AND CAUTIONS Read the instructions before use. This appliance must be installed in accordance with such regulations as are enforced. Standard: ANSI Z83.26-2014 / CSA 2.37-2014 Gas-Fired Outdoor Infrared Patio Heater. CAUTION WARNING Installer: Leave the manual with the For Outdoor Use Only user for future use.
-
Page 3: Table Of Contents
TABLE OF CONTENTS Warnings and Cautions..............Table of Contents................... Tools and Parts...................6 Hardware....................8 Assembly Instructions...............9 Safety Check ..................14 Operation..................16 Heater Placement ................19 Maintenance and Storage..............20 Trouble Shooting..................22 Warranty Information................23 REMINDER BEFORE ASSEMBLY Verify that all parts are included with your heater BEFORE you begin assembly by checking the Parts and Hardware List. -
Page 4: Warnings And Cautions
WARNINGS AND CAUTIONS NOTE:PLEASE READ THE FOLLOWING SAFETY RULES WARNING: Any guard or other protective device The installation must conform with local codes or, in the absence of local codes, with the removed for servicing the heater must be National Fuel Gas Code, ANSI Z223.1/NFPA 54, replaced prior to operating the heater. - Page 5 WARNINGS AND CAUTIONS NOTE:PLEASE READ THE FOLLOWING SAFETY RULES WARNING: ithin a partial enclosure which includes an The pressure regulator and hose assembly supplied with the appliance must be used, overhead cover and three side walls, as long replacement pressure regulators and hose as 30 percent or more of the horizontal assemblies must be those specified by the periphery of the enclosure is permanently...
- Page 6 WARNINGS AND CAUTIONS Before beginning assembly of product, make sure all parts are present. If any part is missing or damaged, do not attempt to assemble the product. Contact customer service for replacement parts. SPECIFICATION Certification 90.55" (2.30m) Height Diameter of reflector 32.28"...
-
Page 7: Tools And Parts
TOOLS AND PARTS Please check the contents of the packaging to ensure all parts are included. If missing parts please contact customer service. Page 6 of 23... - Page 8 TOOLS AND PARTS Part Description Picture Quantity Center Reflector Cap Reflector Shields Burner Head Upper Pole Lower Pole Decorative Cap Base Cylinder Locking Bar Wheel Gas Hose and Regulator (pre-installed) TOOLS REQUIRED (Not included): Adjustable open end wrench Phillips Screwdriver Page 7 of 23...
-
Page 9: Hardware
HARDWARE Please check the contents of the packaging to ensure all parts are included. Part Quantity Description Picture M6 x 10 Screw 6mm Washer M6 Nut M6 x 14 Bolt M5 x 12 Flat Bolt M6 x 20 Bolt M6 x 20 Bolt Assembly M6 x 70 Double Pointed Bolt Page 8 of 23... -
Page 10: Assembly Instructions
ASSEMBLY INSTRUCTIONS WARNING: THIS APPLIANCE REQUIRES INSTALLATION BY A COMPETENT PERSON. PROPER ASSEMBLY IS THE RESPONSIBILITY OF THE INSTALLER. Step 1 Step 1 Attach the wheel (I) to the base (G) with (2) M6 x 20 bolts assembly (GG). Hardware Used M6 x 20 Bolt Assembly Step 2 Step 2... - Page 11 ASSEMBLY INSTRUCTIONS WARNING: THIS APPLIANCE REQUIRES INSTALLATION BY A COMPETENT PERSON. PROPER ASSEMBLY IS THE RESPONSIBILITY OF THE INSTALLER. Step 3 Step 3 Insert gas hose and regulator (J) of the burner head (C) into the upper pole (D), then tighten the burner head (C) to the upper pole (D) with (4) M6 x 14 bolts (DD).
- Page 12 ASSEMBLY INSTRUCTIONS WARNING: THIS APPLIANCE REQUIRES INSTALLATION BY A COMPETENT PERSON. PROPER ASSEMBLY IS THE RESPONSIBILITY OF THE INSTALLER. Step 5 Step 5 Fan open the reflector shields (B) and align holes to attach the center reflector cap (A) on the top of the four reflector shields (B) with (12) M6 x 10 screws (AA), (12) 6mm washers (BB) and (12) M6 nuts (CC).
- Page 13 ASSEMBLY INSTRUCTIONS WARNING: THIS APPLIANCE REQUIRES INSTALLATION BY A COMPETENT PERSON. PROPER ASSEMBLY IS THE RESPONSIBILITY OF THE INSTALLER. Step 7 Step 7 Place the reflector assembly onto the top of the burner head (C) and tighten with (3) 6mm washers (BB) and (3) M6 nuts (CC).
- Page 14 ASSEMBLY INSTRUCTIONS WARNING: THIS APPLIANCE REQUIRES INSTALLATION BY A COMPETENT PERSON. PROPER ASSEMBLY IS THE RESPONSIBILITY OF THE INSTALLER. Step 9 Step 9 Place the gas cylinder (not included) into the base (G) and secure with the cylinder locking bar (H). Step 10 Step 10 Attach the regulator to the cylinder and turn...
-
Page 15: Safety Check
SAFETY CHECK WARNING: ONLY AN AUTHORIZED GAS TECHNICIAN SHOULD INSTALL THIS PRODUCT. Check for leaks All connections of the patio heater have been checked for leakage. Follow these steps to check the gas hose/regulator/cylinder connections: 1) Make leakage solution by mixing 1 part liquid dish soap and 3 parts water. - Page 16 SAFETY CHECK WARNING: ONLY AN AUTHORIZED GAS TECHNICIAN SHOULD INSTALL THIS PRODUCT. PROPER ASSEMBLY IS THE RESPONSIBILITY OF THE INSTALLER. Annual check operation: a. Remove the observation window panel by un-screwing two bolts. b. Turn on LP gas cylinder valve. c.
-
Page 17: Operation
OPERATION WARNING: DO NOT ATTEMPT TO OPERATE HEATER UNTIL YOU HAVE READ AND UNDERSTAND ALL PRECAUTION. FAILURE TO DO SO CAN RESULT IN SERIOUS PERSONAL INJURY, DEATH, OR PROPERTY DAMAGE. Before turning gas supply ON Your heater was designed and approved for OUTDOOR WARNING USE ONLY. - Page 18 OPERATION 5) If burner does not stay lit, repeat steps 3 and 4 after 5 minutes. 6) If burner still does not stay lit, then: a) Push in gas control knob and turn counter clockwise to the LOW” position. “ b) Keep depressing the control knob, put long stem lighter into the ignition hole on the emitter screen to light the burner.
- Page 19 OPERATION CAUTION: AVOID INHALING FUMES EMITTED FROM THE HEATER’S FIRST USE. SMOKE AND ODOR FROM THE BURNING OF OILS USED IN MANUFACTURING WILL APPEAR. BOTH SMOKE AND ODOR WILL DISSIPATE AFTER APPROXIMATELY 30 MINUTES. THE HEATER SHOULD NOT PRODUCE THICK BLACK SMOKE. NOTE: The burner may be noisy when initially turned on.
-
Page 20: Heater Placement
HEATER PLACEMENT CAUTION: WHEN CERTAIN MATERIALS OR ITEMS ARE LEFT, ABOVE, BESIDE OR UNDER THIS HEATER WHILE IN USE, THEY WILL BE SUBJECT TO RADIANT HEAT AND COULD BE SERIOUSLY DAMAGED. This heater is primarily used for the heating of outdoor patios, decks, spas, pools and open working areas. -
Page 21: Maintenance And Storage
MAINTENANCE AND STORAGE CLEANING AND MAINTENANCE : Visually Check To enjoy years of outstanding performance from your heater make sure you perform the following maintenance Emitter Screen activities on a regular basis: Yellow Tip Keep exterior surfaces clean. Primarily Blue Use warm soapy water for cleaning. - Page 22 MAINTENANCE AND STORAGE Spiders and insects can nest in burner or orifices. This dangerous condition can damage heater and render it unsafe for use. Clean burner holes by using a heavy-duty pipe cleaner. Compressed air may help clear away smaller particles. Carbon deposits may create a fire hazard.
-
Page 23: Trouble Shooting
TROUBLE SHOOTING PROBLEM PROBABLE CAUSE SOLUTION Connection between valve and Tighten the connection between Burner can be ignition pin is loose ignition pin and valve lit manually, The distance between ignition Adjust the distance between the can not be lit pin and flame orifice is too ignition pin and flame orifice with control... -
Page 24: Warranty Information
WARRANTY INFORMATION The appliance has been manufactured under the highest standard of quality and workmanship. We warrant to the original consumer purchaser that all aspects of this product will be free of defects in material and workmanship for one (1) year from the date of purchase. A replacement for any defective part will be supplied free of charge for installation by the consumer. - Page 25 SRPH32-XXXX color material & base pole & wheels reflector material & base reflector pole & wheels 1. 1PC pole w/o wheels 1. Steel w/ bigger base 1. 1PC reflector 2. 1PC pole w/ wheels 2. S/S w/ bigger base 2. 2PCS reflector 3.
Need help?
Do you have a question about the SRPH32 Series and is the answer not in the manual?
Questions and answers