Table of Contents
Advertisement
Quick Links
Advertisement
Table of Contents

Related Manuals for Bosch HBF134BS0K


Summary of Contents for Bosch HBF134BS0K
- Page 1 Oven HBF134BS0K [en] Instruction manual...
-
Page 3: Table Of Contents
Initial use ........12 replacement parts and services can be found at www.bosch-home.com and in the online shop Cleaning the cooking compartment and accessories 12 www.bosch-eshop.com... -
Page 4: Intended Use
Intended use 8Intended use (Important safety information R ead these instructions carefully. Only then I n t e n d e d u s e will you be able to operate your appliance G eneral information safely and correctly. Retain the instruction I m p o r t a n t s a f e t y i n f o r m a t i o n manual and installation instructions for future Warning –... -
Page 5: Halogen Lamp
Causes of damage Water in a hot cooking compartment may Risk of scalding! ]Causes of damage ■ create hot steam. Never pour water into the hot cooking compartment. G eneral information C a u s e s o f d a m a g e Warning –... -
Page 6: Installation And Connection
Installation and connection Measures to be noted during transport 5Installation and connection Secure all mobile parts in and on the appliance using an adhesive tape that can be removed without leaving T his appliance is only intended to be fully fitted in a any traces. -
Page 7: Environmental Protection
Environmental protection Open the appliance door as infrequently as possible 7Environmental protection ■ when the appliance is in use. Y our new appliance is particularly energy-efficient. E n v i r o n m e n t a l p r o t e c t i o n Here you can find tips on how to save even more energy when using the appliance, and how to dispose of your appliance properly. -
Page 8: Getting To Know Your Appliance
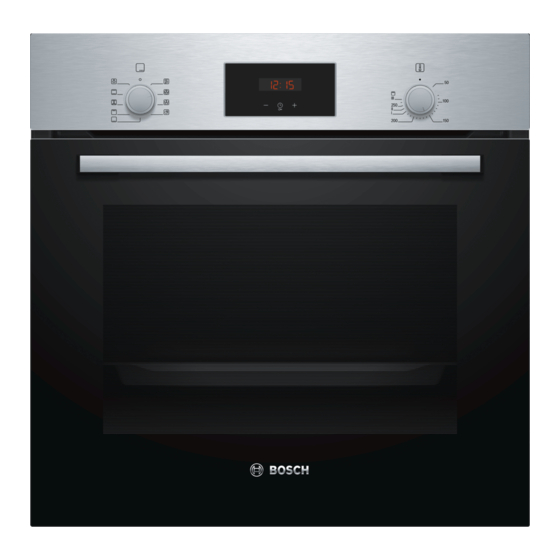
Getting to know your appliance Depending on the appliance model, individual Note: *Getting to know your details and colours may differ. appliance Control panel I n this chapter, we will explain the indicators and You can set your appliance's various functions on the G e t t i n g t o k n o w y o u r a p p l i a n c e controls. -
Page 9: Types Of Heating And Functions
Getting to know your appliance Types of heating and functions Use the function selector to set the types of heating and To make sure you always use the right type of heating other functions. to cook your food, we have explained the differences and applications below. -
Page 10: Cooking Compartment
Accessories Cooking compartment _Accessories Various functions in the cooking compartment make your appliance easier to use. For example, the cooking Y our appliance is accompanied by a range of compartment is well lit and a cooling fan prevents the A c c e s s o r i e s accessories. -
Page 11: Optional Accessories
Accessories When sliding accessories into the cooking Baking tray, non-stick compartment, ensure that the kink in the side rail is at For tray bakes and small baked items. the back. Only then will they lock in place. Allows baked items to be removed more easily from the baking tray. Professional pan For preparing large quantities of food. -
Page 12: Before Using For The First Time
Before using for the first time KBefore using for the first 1Operating the appliance time Y ou have already learnt about the controls and how O p e r a t i n g t h e a p p l i a n c e they work. -
Page 13: Rapid Heating
Time-setting options Rapid heating OTime-setting options With Rapid heating, you can shorten the heat-up time. Y our appliance has different time-setting options. Then, for best results, use: T i m e - s e t t i n g o p t i o n s 3D hot air <... -
Page 14: Setting The End Time
Time-setting options Use the button to set the cooking time. Use the button to delay the end time. The appliance will start heating after a few seconds. The remaining time will count down on the display. The cooking time has elapsed An audible signal will sound. -
Page 15: Setting The Time
Childproof lock Touch the button until the timer symbol AChildproof lock highlighted. Use the button to set the timer duration. After a few seconds, the timer duration will start to Y our appliance is equipped with a childproof lock so C h i l d p r o o f l o c k count down. -
Page 16: Cleaning
Cleaning DCleaning Door panels Hot soapy water: Clean with a dish cloth and then dry with a soft cloth. W ith good care and cleaning, your appliance will retain Do not use a glass scraper or a stainless steel C l e a n i n g its appearance and remain fully functioning for a long scouring pad. -
Page 17: Surfaces In The Cooking Compartment
Cleaning Surfaces in the cooking compartment Keeping the appliance clean The back wall in the cooking compartment is self- Always keep the appliance clean and remove dirt cleaning.You can tell this from the rough surface. immediately so that stubborn deposits of dirt do not build up. -
Page 18: Rails
Rails qAppliance door pRails W ith good care and cleaning, your appliance will retain W ith good care and cleaning, your appliance will retain R a i l s A p p l i a n c e d o o r its appearance and remain fully functional for a long its appearance and remain fully functional for a long time to come. -
Page 19: Removing And Installing The Door Panels
Appliance door Lift the panel up and pull it out (fig. C). Attaching the door Reattach the oven door in the reverse sequence to removal. When attaching the oven door, ensure that both hinges are inserted straight into the opening (figure A). -
Page 20: Trouble Shooting
Trouble shooting Replacing the bulb in the top of the cooking 3Trouble shooting compartment If the cooking compartment light bulb fails, it must be I f a fault occurs, there is often a simple explanation. replaced. Heat-resistant, 25 watt, 230 V halogen bulbs T r o u b l e s h o o t i n g Before calling the after-sales service, please refer to the are available from the after-sales service or specialist... -
Page 21: Customer Service
Customer service 4Customer service JTested for you in our cooking studio O ur after-sales service is there for you if your appliance C u s t o m e r s e r v i c e needs to be repaired. We will always find an H ere, you can find a selection of dishes and the ideal appropriate solution, also in order to avoid after-sales T e s t e d f o r y o u i n o u r c o o k i n g s t u d i o... -
Page 22: Cakes And Pastries
Tested for you in our cooking studio Cakes and pastries Baking on one level When baking on one level, use the following shelf Your appliance offers you a range of heating types for positions: the preparation of cakes and small baked items. You Position 2 –... - Page 23 Tested for you in our cooking studio Cakes in tins Dish Accessories/cookware Shelf posi- Heating Tempera- Cooking tion function ture in °C time in mins Sponge cake, simple Vienna ring tin/loaf tin 160-180 50-60 Sponge cake, simple, 2 levels Vienna ring tin/loaf tin 140-160 60-80 <...
- Page 24 Tested for you in our cooking studio Dish Accessories/cookware Shelf posi- Heating Temperature Cooking tion function in °C time in mins Choux pastry Universal pan 190-210 35-50 Choux pastry, 2 levels Universal pan + baking tray 190-210 35-45 < Biscuits Dish Accessories/cookware Shelf position...
- Page 25 Tested for you in our cooking studio Pizza, quiche and savoury cakes Dish Accessories/cookware Shelf posi- Heating Temperature Cooking tion function in °C time in mins Pizza, fresh Universal pan 170-190 20-30 Pizza, fresh, 2 levels Universal pan + baking tray 160-180 35-45 <...
-
Page 26: Bakes And Gratins
Tested for you in our cooking studio The baked item looks good, but is not Use a lower temperature and bake slightly longer; if necessary, add slightly less liquid. For baked items with a cooked properly in the middle. moist topping, bake the base first. Sprinkle it with almonds or breadcrumbs and then place the topping on top. The baked item cannot be turned out Allow the baked item to cool down for 5 to 10 minutes after baking. - Page 27 Tested for you in our cooking studio Do not add salt to the meat until it has been grilled. Salt Meat draws water from the meat. Baste lean meat with fat as required or cover it with strips of bacon. Notes The grill element switches itself on and off When roasting, add a little liquid if the meat is lean.
- Page 28 Tested for you in our cooking studio Poultry Dish Accessories/cookware Shelf position Heating Temperature in Cooking time function °C in mins Chicken, 1.3 kg Wire rack 200-220 60-70 Small chicken portions, 250 g each Wire rack 220-230 30-35 Chicken goujons, nuggets, frozen Universal pan 190-210 20-25...
-
Page 29: Vegetables And Side Dishes
Tested for you in our cooking studio Tips on roasting and braising The cooking compartment becomes Prepare your food in an enclosed roasting dish with higher temperature or use the grill tray. You will achieve very dirty. the best roasting results if you use the grill tray. The grill tray can be bought later as a special accessory. The roast is too dark and the crack- Check the shelf position and temperature. -
Page 30: Acrylamide In Foodstuffs
Tested for you in our cooking studio Acrylamide in foodstuffs crisps, chips, sliced bread, bread rolls, bread or fine baked goods (biscuits, gingerbread, spiced biscuit). Acrylamide is mainly produced in grain and potato products prepared at high temperatures, such as potato Tips for keeping acrylamide to a minimum General Keep cooking times as short as possible. -
Page 31: Preserving
Tested for you in our cooking studio Preserving Seal the jars with the clips. Place no more than six jars in the cooking For preserving, the jars and rubber seals must be clean compartment. and intact. If possible, use jars of the same size. The information in the table is for round, one-litre jars. -
Page 32: Prove Dough
Tested for you in our cooking studio Prove dough Condensation builds up during the proving process, which steams up the door panel. Wipe out the cooking Your yeast dough will prove considerably more quickly compartment after dough proving.Remove any using this heating function than at room temperature limescale with a little vinegar and wipe with clean water. -
Page 33: Test Dishes
Tested for you in our cooking studio Test dishes These tables have been produced for test institutes to facilitate appliance testing. As per EN 60350-1. Baking Items that are placed in the oven on baking trays or in baking tins/dishes at the same time will not necessarily be ready at the same time. - Page 36 Robert Bosch Hausgeräte GmbH Carl-Wery-Straße 34 81739 München, GERMANY www.bosch-home.com *9001352852* 9001352852 171097(A)
Need help?
Do you have a question about the HBF134BS0K and is the answer not in the manual?
Questions and answers