
Subscribe to Our Youtube Channel
Related Manuals for Sammic 5


Summary of Contents for Sammic 5
- Page 1 Abbattitori di temperatura - Manuale di istruzione Blast Chillers - Instruction manual Armoires de Refroidissement - Notice d'instructions Abatidores Ultracongeladores - Instrucciones de Uso 5 10 15...
- Page 2 Gentile Cliente, Sehr geehrter Kunde! La ringraziamo per aver preferito uno dei Wir danken Ihnen für Ihre Wahl eines nostri prodotti, frutto di lunga esperienza unserer Produkte, welches das Ergebnis e di una continua ricerca per un prodotto einer langen Erfahrung und stetiger superiore in termini di affidabilità, Forschungsarbeit ist.
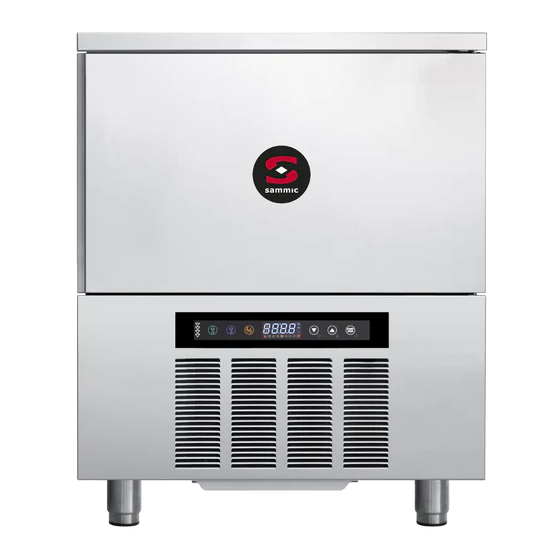
- Page 3 PULSANTI E LED Start/Stop Stato ciclo Tasto abbattimento positivo (+3°c) soft/hard Tasto surgelazione (-18°c) / Ciclo gelato Tasto modalità abbattimento Tasto decremento valori Tasto incremento valori ICONE DI STATO Led allarme porta Led ciclo a tempo (giallo) Led ciclo a temperatura (giallo) Led ciclo abbattimento positivo (verde) Led ciclo abbattimento hard (giallo) Led ciclo surgelazione (verde)
- Page 4 PREFAZIONE ATTENZIONE • Il presente manuale costituisce parte inte- LE OPERAZIONI EVIDENZIATE CON QUESTO SIMBOLO grante del prodotto, e fornisce tutte le indi- SONO STRETTAMENTE RISERVATE cazioni necessarie per una corretta AL TECNICO PATENTATO. istallazione, un corretto uso e manuten- zione della macchina.
-
Page 5: Table Of Contents
CONSIGLI PER IL BUON FUNZIONAMENTO MODI DI ARRESTO ....... . . 5 CONSIGLI D’USO . -
Page 6: Documentazione Generale
è cura dell’installatore verificare tutti i collegamenti 1.5 NORME DI SICUREZZA in accordo con le istruzioni fornite per l’installazione degli im- La responsabilità delle operazioni effettuate sulla macchina, pianti e delle macchine. -
Page 7: Installazione
Collocare la machina nel luogo previsto. • Effettuare il livellamento dell’apparecchiatura attraverso i 2.5.1 Collegamento dell’apparecchiatura alla rete elettrica piedi di regolazione. Per la messa in piano delle macchine Nei casi in cui il cavo di alimentazione elettrica dell’apparec- più pesanti, utilizzare appositi sollevatori (fig. A - Cap. 1.3). -
Page 8: Allacciamento Frigorifero
4. Verificare gli assorbimenti elettrici. La raccolta differenziata della presente apparec- 5. Verificare le pression standard dell’impianto frigorifero. chiatura giunta a fine vita è organizzata e gestita dal produt- 6. Verificare il collegamento idrico con la regolazione della val- tore. -
Page 9: Consigli Per Il Buon Funzionamento
Se la macchina non viene completamente caricata, ripartire le teglie ed il carico su tutta l’altezza utile evitando concetra- zioni. 0.5 - 2cm. c) Posizionare le teglie nella parte più interna del portateglie, avendo cura che siano il più vicino possibile all’evaporatore. -
Page 10: Istruzioni Di Programmazionee Funzionamento
4. ISTRUZIONI DI PROGRAMMAZIONE E FUNZIONAMENTO 4.3 FUNZIONAMENTO IN CASO DI MALFUNZIONAMENTO Si consiglia di eseguire sempre un preraffreddamento CHIAMARE IL TECNICO PATENTATO della macchina la prima volta che si esegue un abbatti- mento o surgelazione. In questo modo si ottimizza il ciclo di lavoro riducendo il tempo (vedi cap. - Page 11 H, che indica la selezione di un ciclo Hard. Nella fase di conservazione verrà rappresentata la tempera- tura cella. 4.3.5 Selezione ciclo di surgelazione a tempo Con macchina in standby selezionare il tasto surgelazione Per incrementare o decrementare il tempo di abbattimento comparirà...
-
Page 12: Ciclo Asciugatura
UP eDOWN 5" e poi per 5" quella della sonda evaporatore se abilitata (in presenza di allarme con buzzer, tacita anche l'allarme). quando l’utente apre la porta (per inserire il gelato) e poi la richiude, verrà... -
Page 13: Parametri
5. PARAMETRI 5.1 ACCESSO MODIFICA PARAMETRI 5.4 DISPOSITIVO DI REGISTRAZIONE DATI USB (OPTIONAL) L'accesso parametri può avvenire solo in modalità di mac- • Il dispositivo di registrazione dati USB registra in un file .txt china OFF. Basta premere per 3" il tasto modalità di abbatti-... -
Page 14: Il Grande Valore Della Tecnologiae Del Processo
6 IL GRANDE VALORE DELLA TECNOLOGIA E DEL PROCESSO • È sbagliato mettere il cibo appena cotto direttamente nel 6.3 SURGELAZIONE RAPIDA conservatore! Il raffreddamento è statico e poco potente, il Funzione disponibile solo in alcuni modelli. tempo di abbattimento troppo lungo ed i batteri si svilup- Da +70°C a -18°C al cuore del prodotto il più... -
Page 15: Lista Allarmi
7 LISTA ALLARMI Nota: Guasti sonde Una volta sostituita la sonda l'allarme Allarme spillone non inserito scompare dopo 10 secondi. Gli allarmi sonda a -50°C sono inibiti Causa: Mancato inserimento della sonda a spillone all’in- durante la surgelazione a -18°C e durante la funzione di induri- terno del prodotto durante l’esecuzione di un ab- mento superficiale gelato. -
Page 16: Manutenzione Ordinaria
8 MANUTENZIONE ORDINARIA Il condensatore presenta bordi taglienti. Du- QUESTE OPERAZIONI DEVONO ESSERE rante le sopracitate operazioni indossare EFFETTUATE ESCLUSIVAMENTE sempre guanti prottetivi, occhiali e ma- schere di protezione delle vie respiratorie. DA UN INSTALLATORE PATENTATO Le informazioni e le istruzioni di questo capitolo sono desti- 8.3 PULIZIA CELLA nate a tutto il personale che opera sulla macchina: l’utilizza- •... -
Page 17: Scarico Acqua Di Sbrinamento
Pulizia evaporatore 8.5 SCARICO ACQUA DI SBRINAMENTO • È necessario effettuare periodicamente la pulizia interna del- • L’impianto è predisposto per degli sbrinamenti automatici l’evaporatore procedendo nel modo seguente: (nei modelli previsti) e manuali quando necessario. • Verificare il corretto drenaggio dell’acqua dell’evaporatore Fig. - Page 18 Gentile Cliente, Sehr geehrter Kunde! La ringraziamo per aver preferito uno dei Wir danken Ihnen für Ihre Wahl eines nostri prodotti, frutto di lunga esperienza unserer Produkte, welches das Ergebnis e di una continua ricerca per un prodotto einer langen Erfahrung und stetiger superiore in termini di affidabilità, Forschungsarbeit ist.
- Page 19 BUTTONS AND LEDS Start/Stop Cycle status Soft/hard positive blast chilling button (+3°c) Blast freezing button (-18°c)/ice cream cycle Blast chilling mode Decrease value key Increase value key STATUS ICONS Door alarm LED Timed cycle LED (yellow) Temperature cycle LED (yellow) Positive blast chilling cycle LED (green) Hard blast chilling cycle LED (yellow) Blast freezing cycle LED (green)
- Page 20 PREFACE CAUTION • This manual is an integral part of the pro- duct, providing all the information required to ensure correct installation, operation and THE FOLLOWING OPERATIONS AND THOSE HIGHLIGHTED maintenance of the machine. BY THIS SYMBOL MUST NOT BE PERFORMED BY THE APPLIANCE USER •...
- Page 21 3.2.1 Pre-chilling ........
- Page 22 In the event that the machine is fitted with a remote con- denser unit, the installation technician is responsible for 1.5 GENERAL SAFETY REGULATIONS checking all connections in compliance with the instructions Failure to observe the recommendations made by the pre- given by for plant and machine installation.
- Page 23 • The installation technician bears the responsibility of ensu- 2.5.1 Connecting the appliance to the power supply ring compliance with fire safety requirements; seek all neces- In the event of damage to the power supply cable on the ap- sary advice from the local fire-fighting authorities.
- Page 24 The crossed out wheeled bin symbol indicates the 4. Check electrical input. product must be collected separately from other 5. Check the standard pressure in the refrigerant system. waste when it has become redundant. Differentia- 6. Check the water connections and efficiency of the pressure...
- Page 25 If the appliance is not completely full, distribute the trays and foods evenly throughout the available space. 0.5 - 2cm. c) Position trays inside the tray compartment as far as they will go, as close as possible to the evaporator.
- Page 26 4. PROGRAMMING AND OPERATION INSTRUCTIONS 4.3 OPERATION IN THE EVENT OF A MALFUNCTION, It is recommended always to pre-cool the machine the CALL THE CERTIFIED TECHNICIAN first time blast-chilling or deep freezing is performed. The work cycle is optimized in this way by reducing the time (see chap.
- Page 27 In the storage phase the cell temperature will be displayed. 4.3.5 Selecting blast freezing timed cycle With the machine in standby, select the freezing button To increase or decrease the blast chilling time, use the up the display will show the value 240 min.
- Page 28 During any blast chilling cycle, pressing the up button diately. splays the value of the cell sensor for 5" and then the evapo- rator sensor for 5", if enabled (if there is a buzzer alarm, it also silences the alarm). 3 sec The user can modify the hardening cycle time using the up 4.6 SANITIZING CYCLE (optional)
- Page 29 (see point 2.) will increase from some seconds to several mi- nutes, depending on how much data is stored on the recor- 5.3 DEFROSTING MANAGEMENT (only in certain models) der. IT’S VERy Manual defrosting is started by pressing the Defrost button WAIT UNTILL ALL THE DATA IS RECORDED ON THE PEN for 3 seconds when the panel is in standby.
- Page 30 6 GREAT TECHNOLOGY AND PROCESS VALUE • Putting freshly cooked food directly in the storage unit is a 6.3 QUICK BLAST FREEZING mistake! Cooling is static and not very powerful, the chilling function available only in certain models time is too long and bacteria develop rapidly in large quan- From +70°c to -18°c at the product core as quickly as possibly tities.
- Page 31 7 ALARMS LIST Note: Faults probes Once the sensor is replaced, the alarm di- Probe not inserted alarm sappears after 10 seconds. The sensor alarms at -50°C are disa- Cause: failure to insert the probe inside the product du- bled during freezing at -18°C and during the ice cream ring execution of temperature controlled blast chilling hardening function.
- Page 32 8 ORDINARY MAINTENANCE The condenser has sharp edges. During the THESE OPERATIONS MUST BE above-mentioned operations, always wear PERFORMED ExCLUSIVELY safety gloves, safety glasses and masks to protect the respiratory tract. BY A CERTIFIED INSTALLER The information and instructions in this chapter are intended 8.3 CELL CLEANING for all personnel who operate the machine: the user, main- •...
- Page 33 Evaporator cleaning 7.5 DEFROST WATER DRAINING • The interior of the evaporator must be cleaned periodically • the system is set up for automatic (in certain models) in the following manner: and manual defrosting when necessary. • make sure that the evaporator water is correctly draining in Fig.
- Page 34 Gentile Cliente, Sehr geehrter Kunde! La ringraziamo per aver preferito uno dei Wir danken Ihnen für Ihre Wahl eines nostri prodotti, frutto di lunga esperienza unserer Produkte, welches das Ergebnis e di una continua ricerca per un prodotto einer langen Erfahrung und stetiger superiore in termini di affidabilità, Forschungsarbeit ist.
- Page 35 BOUTONS ET DEL Marche/Arrêt État de cycle Touche refroidissement positif (+3°c) soft/hard Touche refroidissement rapide (-18°c) / Cycle gelé Touche modalité refroidissement Touche diminution des valeurs Touche augmentation des valeurs ICÔNE D’ÉTAT Del alarme de la porte Del cycle à temps (jaune) Del cycle à...
- Page 36 PRéFACE ATTENTION • La présente notice contient des instructions qui fournissent des indications importantes pour l’installation, l’utilisation et l’entretien LES OPERATIONS SUIVANTES ET LES OPERATIONS MARQUEES DU de la machine. La présente notice fait partie SYMBOLE CI-CONTRE SONT intégrante du produit. STRICTEMENT INTERDITES AUX UTILISATEURS DE LA MACHINE •...
- Page 37 MODE D’ A RRêT ........5...
- Page 38 Si la machine n’est pas fournie avec l’unité de condensation 1.5 RègLES DE SéCURITé déportée, il incombera à l’installateur de vérifier tous les rac- La responsabilité des opérations effectuées sur la machine, cordements, suivant les instructions fournies pour l’installa-...
- Page 39 • Installer la machine dans l’endroit prévu. 2.5.1 Branchement de l'appareil au réseau électrique. • Procéder à la mise de niveau à l’aide des vérins de réglage. Si le câble d'alimentation électrique de l'appareil est en- Pour la mise de niveau des machines plus lourdes, utiliser des dommagé, le faire remplacer par un personnel qualifié...
- Page 40 Les différentes collectes doivent 4. Vérifier les consommations électriques. être mises en place et prises en charge par le fabri- 5. Vérifier la pression standard du circuit frigorifique. quant. 6. Vérifier le raccordement eau avec la régulation de la valve Par conséquent l’utilisateur qui souhaite obtenir cet équipe-...
- Page 41 Si la machine n’est pas remplie complètement, répartir les plaques sur toute la hauteur utile. Eviter toute concentration de charge. 0.5 - 2cm. c) Placer les plaques (ou plats) dans la partie la plus interne du porte-plaques en ayant soin qu’elles soient le plus près pos- sibles de l’évaporateur.
- Page 42 4. PROgRAMMATION ET FONCTIONNEMENT 4.3 FONCTIONNEMENT EN CAS DE MAUVAIS FONCTIONNEMENT Il est conseillé de faire un pré-refroidissement de la APPELER LE TECHNICIEN BREVETé machine la première fois que l’on effectue un refroidis- sement ou une congélation. De cette façon le cycle de travail s’optimise, en réduisant le temps (voir chapitre 4.1 ACTIVATION DE LA MACHINE 4.3.7)
- Page 43 H, qui indique la sélection d’un cycle Hard. Dans la phase de conservation la température de la cellule est représentée. 4.3.5 Sélection du cycle de surgélation à temps Avec machine en mise en attente sélectionner la touche Pour augmenter ou diminuer le temps de refroidissement congélation...
- Page 44 3 sec la cellule pendant 5" et puis pendant 5" celle de la sonde de L’utilisateur pendant que le temps clignote et seulement à ce l’évaporateur si habilité (en présence de l’alarme avec signal so- moment a la possibilité...
- Page 45 Ainsi chaque fois que le fichier est plus grand. • En conséquence, le temps d'enregistrement du fichier sur la 5.3 gESTION DégIVRAgE (seulement dans les modèles pré- clé (voir le point 2.) va augmenter de quelques secondes à vus) plusieurs minutes, selon la quantité...
- Page 46 6 LA gRANDE VALEUR DE LA TECHNOLOgIE DU PROCESSUS • Il est erronné de mettre les aliments à peine cuits dans le 6.3 SURgéLATION RAPIDE conservateur ! Le refroidissement est statique et peu puis- De +70°c à -18°c au cœur du produit le plus rapidement pos- sant, le temps de refroidissement trop long, et les bactéries sible et dans un délai de 4 heures, avec température de l’air se développent rapidement en grande quantité.
- Page 47 7 LISTE DES ALARMES Alarme grande aiguille non insérée Remarque: Pannes sonde Une fois la sonde substituée, l'alarme Cause: Insertion manqué de la sonde à grande aiguille à l’in- disparaît après 10 secondes. Les alarmes sondes à -50°C sont in- térieur du produit pendant l’exécution d’un refroidis- hibées pendant la congélation à...
- Page 48 8 MAINTENANCE COURANTE Les bords du condenseur sont coupants. Por- CES OPERATIONS DOIVENT ETRE ter toujours de gants et lunettes de protec- EFFECTUEES UNIQUEMENT PAR tion et des masques pour effectuer ces opérations. PAR UN INSTALLATEUR AgREE Les informations et les instructions de ce chapitre sont de- 8.3 NETTOYAgE DE LA CELLULE stinées à...
- Page 49 Nettoyage de l'evaporateur 8.5 EVACUATION DE L’EAU DE DEgIVRAgE • Il est necessaire d'effectuer periodiquement un nettoyage • Pour garantir la salubrité des produits alimentaires traités, le a l'interieur de l'evaporateur et de l a facon suivante: nettoyage intérieur de la cellule doit être effectuée fré- quemment, et cela en fonction du type d’aliments conser-...
- Page 50 Gentile Cliente, Sehr geehrter Kunde! La ringraziamo per aver preferito uno dei Wir danken Ihnen für Ihre Wahl eines nostri prodotti, frutto di lunga esperienza unserer Produkte, welches das Ergebnis e di una continua ricerca per un prodotto einer langen Erfahrung und stetiger superiore in termini di affidabilità, Forschungsarbeit ist.
- Page 51 TASTEN UND LED-ANZEIGEN Start/Stop Zykluszustand Taste positive Reduzierung (+3°c) Soft/Hard Gefriertaste (-18°c) / Blast Freezing Taste Reduzierungsmodalität Taste Werte Senken Tast Werte Erhöhen FUNKTIONSSYMBOLE Led-Anzeige Türalarm Led-Anzeige Zeitzyklus (gelb) Led-Anzeige Temperaturzyklus (gelb) Led-Anzeige Reduzierungszyklus positiv (grün) Led-Anzeige Reduzierungszyklus Hard (gelb) Led-Anzeige Reduzierungszyklus negativ (grün) Led-Anzeige Konservierungszyklus (grün) Led-Anzeige Auftauphase (grün)
- Page 52 VORWORT ACHTUNG • Das vorliegende Handbuch ist ein wesen- tlicher Bestandteil der Maschine und liefert alle erforderlichen Informationen für die DIE AUSFÜHRUNG DER DURCH DAS NEBENSTEHENDE SYMBOL vorschriftsmäßige Installation, den sachge- GEKENNZEICHNETEN ARBEITEN IST DEM mäßen Gebrauch und die Wartung der Ma- BENUTZER STRENGSTENS UNTERSAGT schine.
- Page 53 3.2.1 Vorkühlung ........
-
Page 54: Allgemeine Dokumentation
Installation nur unter Beachtung der Anweisungen des vorlie- genden Handbuch durch zugelassene und ausgebildete Fach- kräfte der Firma. 1.5 SICHERHEITSVORSCHRIFTEN Falls die Maschine mit einer abgesetzten Kondensatoreinheit Die Verantwortung für alle Arbeiten, die in Missachtung der geliefert wird, ist es die Aufgabe des Installateurs, die Überein- Anweisungen des vorliegenden Handbuchs ausgeführt wer-... -
Page 55: Installation
Das Gerät mit den Stellfüßen ausrichten. Benutzen Sie bei tung der gültigen gesetze zurückzuführen sind. schweren Maschinen geeignete Hebevorrichtungen (fig. A - Cap. 1.3). 2.5.1 Anschluss des Geräts an das Stromnetz • Schlechte Ausrichtung beeinträchtigt den Gerätebetrieb und Bei einer eventuellen Beschädigung des elektrischen Strom- den Abfluss des Kondenswassers. -
Page 56: Kühlschrank Anschluss Ferneinheiten
Für Bestimmungen zur 4. Kontrolle der Stromaufnahmen. Mülltrennung dieser Geräte ist der Hersteller zu- 5. Standard - Druckkontrolle des Kältekreislaufs. ständig. 6. Kontrolle des Wasseranschlusses mit Einstellung des Druck- Demnach muss sich der Benutzer, der das Gerät entsorgen reglerventils während des Betriebs und des Kühlwasserflus-... -
Page 57: Ratschläge Für Den Einwandfreien Betrieb
Falls die Maschine nicht vollständig gefüllt wird, sind die Be- hälter und die Belastung auf die gesamte Nutzhöhe zu ver- teilen und Konzentrierungen zu vermeiden. 0.5 - 2cm. c) Stellen Sie die Backbleche möglichst auf den hinteren Teil der Abstellroste in der Nähe des Verdampfers. -
Page 58: Programmierungs Und Betriebsanweisungen
4. PROGRAMMIERUNGS UND BETRIEBSANWEISUNGEN 4.3 FUNKTIONSWEISE IM FALL VON BETRIEBSSTÖRUNGEN Wenn man das erste Mal eine Schnell- oder Schockfro- QUALIFIZIERTEN TECHNIKER KONTAKTIEREN stung vornimmt, wird empfohlen eine Vorabkühlung der Maschine auszuführen. Auf diese Weise optimiert man den Arbeitszyklus und reduziert die Dauer (siehe 4.1 EINSCHALTEN DER MASCHINE Kap. -
Page 59: Reduzierungszyklus Positiv Hard Nach Zeit
Zeit auf der START/STOP Taste drücken, nach dem Start des Zyklus beginnt die Zeit abzunehmen. Die Pfeile auf 4.3.5 Wahl Blast Freezing nach Zeit der linken Seite blinken während der Reduzierung und Mit der Maschine in Stand-By die Taste Gefrieren wählen,... -
Page 60: Schnellwahl Reduzierungszyklus Positiv
Durch Drücken der Taste Down während eines Reduzier- der Buchstabe t und es blinkt die für den Härtungszyklus vor- zyklus wird 5 Sekunden lang blinkend der Wert der vergan- geschlagene Timerzeit (vom Parameter Pt4 vorgegebene genen Zeit angezeigt. Zeit), es startet auf jeden Fall sofort ein Gefrierzyklus auf Zeit •... -
Page 61: Parameter
- Die auf dem USB-Stick gespeicherte Datei öffnen 2=positiv auf Zeit, 3=positiv Hard auf Zeit, 4=ne- flag gativ auf Zeit, 5=positiv nach Temperatur - “Begrenzte” Datei auswählen 6=positiv Hard nach Temperatur, 7=negativ nach - Als Begrenzung den Strichpunkt “;” auswählen Temperatur, •... -
Page 62: Die Grosse Bedeutung Von Technologie
6 DIE GROSSE BEDEUTUNG VON TECHNOLOGIE UND ABLAUF • Es ist falsch soeben zubereite Gerichte sofort in den Konser- 6.3 SHOCKFROSTEN vierer zu geben! Die Abkühlung ist statisch und wenig lei- Nur bei einigen Modellen verfügbar. stungsstark, die Reduzierzeit zu lang und Bakterien Von +70°C auf 18°C im Produktkern sind auf jeden Fall entwickeln sich schnell und in großen Mengen. -
Page 63: Alarmverzeichnis
Alarm von einem Signalton beglei- Auswirkung: Das Display zeigt den Alarm AL4 an, das Tempera- tet (falls vorhanden). Der Signalton besteht aus einem Piepton von 5 tursymbol e blinkt und der Signalton ertönt Sekunden, der alle 15 Sekunden wiederholt wird. Das Symbol für den vorliegenden Alarm wird abwechselnd mit der laufenden Anzeige Rücksetzen:... -
Page 64: Ordentliche Wartung
8 ORDENTLICHE WARTUNG Der Kondensator verfügt über scharfe Kanten. DIESE VORGÄNGE DÜRFEN AUSSCHLIESS Während der oben genannten Vorgänge LICH DURCH EINEN FACHLICH immer Schutzhandschuhe, Schutzbrille und Atemschutzmaske tragen. AUSGEBILDETEN INSTALLATEUR ERFOLGEN Die Informationen und Anweisungen dieses Kapitels sind für das 8.3 REINIGUNG DER KÜHLZELLE gesamte Personal bestimmt, das mit der Maschine arbeitet: Der •... -
Page 65: Abfluss Abtauwasser
Reinigung des Verdampfers 7.5 ABFLUSS ABTAUWASSER • Regelmäßig ist eine Reinigung im Innenbereich des Verdamp- • Die Anlage ist für automatische (bei den vorgesehenen Model- fers durchzuführen. Dabei wie folgt vorgehen: len) und falls erforderlich auch für manuelle Abtauvorgänge aus- gerichtet. - Page 66 Gentile Cliente, Sehr geehrter Kunde! La ringraziamo per aver preferito uno dei Wir danken Ihnen für Ihre Wahl eines nostri prodotti, frutto di lunga esperienza unserer Produkte, welches das Ergebnis e di una continua ricerca per un prodotto einer langen Erfahrung und stetiger superiore in termini di affidabilità, Forschungsarbeit ist.
- Page 67 PULSADORES Y LED Start/Stop Estado de ciclo Tecla abatimiento positivo (+3°c) soft/hard Tecla sobrecongelación (-18°c) / Ciclo helado Tecla modalidad abatimiento Tecla decremento valores Tecla incremento valores ICONOS DE ESTADO Led alarma puerta Led ciclo de tiempo (amarillo) Led ciclo de temperatura (amarillo) Led ciclo (verde) abatimiento positivo Led ciclo abatimiento hard (amarillo) Led ciclo abatimiento negativo (verde)
- Page 68 PRÓLOGO ATENCIÓN • Este manual es parte integrante del pro- ducto y contiene las instrucciones para rea- lizar correctamente la instalación, el uso y LAS SIGUIENTES OPERACIONES, Y LAS QUE ESTÁN IDENTIFICADAS POR EL SÍMBOLO QUE APARECE A el mantenimiento del equipo. LA IZQUIERDA DE ESTAS LÍNEAS, QUEDAN TERMI- NANTEMENTE VEDADAS AL USUARIO DEL EQUIPO.
- Page 69 RECOMENDACIONES DE USO ..... .5 3.2.1 Preenfriamiento ........5 3.2.2 Carga de la máquina .
-
Page 70: Documentación General
Si el equipo está dotado de condensador remoto, el instala- dor debe controlar todas las conexiones de acuerdo con las 1.5 NORMAS DE SEGURIDAD instrucciones del fabricante del equipo. Toda operación realizada de manera no conforme con las in- strucciones dadas en el manual será... -
Page 71: Instalación
(fig. A - Cap. 1.3). 2.5.1 Conexión del equipo a la red eléctrica • La falta de nivelación del equipo puede comprometer el fun- Si el cable de alimentación eléctrica del aparato se estropea, cionamiento general y el flujo de los condensados. -
Page 72: Notas Para El Instalador
útil, debe 4. Controle las absorciones eléctricas. ser recogido separadamente del resto de otros re- 5. Controle la presión nominal del equipo frigorífico. siduos. 6. Controle la conexión de agua regulando la válvula presostá- La recogida selectiva del presente equipo al final de su vida tica durante el funcionamiento, y la circulación del agua de... -
Page 73: Preenfriamiento
Si no carga el equipo por completo, reparta las bandejas y la carga en toda la altura útil, evitando amontonarlas. 0.5 - 2cm. c) Coloque las bandejas en la parte más interna del soporte, lo más cerca posible del evaporador. -
Page 74: Instrucciones De Programacióny Funcionamiento
4. INSTRUCCIONES DE PROGRAMACIÓN Y FUNCIONAMIENTO 4.3 FUNCIONAMIENTO EN CASO DE MAL FUNCIONAMIENTO Se aconseja enfriar siempre previamente la máquina la CONTACTE AL TéCNICO HABILITADO primera vez que se realiza una bajada rápida de la tem- peratura o una congelación. De esta forma se optimiza el ciclo de trabajo reduciendo el tiempo (ver cap. - Page 75 Para aumentar o disminuir el tiempo de abatimiento selec- cione las teclas Up y Down 4.3.5 Selección ciclo de sobrecongelación de tiempo con la máquina en standby seleccione la tecla sobreconge- Para iniciar el ciclo de abatimiento positivo de tiempo pre- lación...
-
Page 76: Ciclo De Secado
3 sec 5" y luego por 5" el de la sonda del evaporador si está habi- El usuario, mientras el tiempo parpadea, y sólo en este mo- litada (en presencia de alarma con buzzer, silencia también la mento, tiene la posibilidad de modificar el tiempo de ciclo alarma). -
Page 77: Parámetros
5. PARÁMETROS 5.1 ACCESO MODIFICACIÓN PARÁMETROS 5.12 GRABADOR DE DATOS USB (OPTIONAL) El acceso a los parámetros se puede realizar sólo con la mo- • El grabador de datos USB registrará en un archivo .txt todos dalidad de la máquina off. Si presiona por 3" la tecla modali- los datos durante los ciclos de la máquina: Enfriamiento rápido... -
Page 78: El Grande Valor De La Tecnologíay Del Proceso
6 EL GRAN VALOR DE LA TECNOLOGÍA Y DEL PROCESO • Es erróneo meter la comida apenas cocida directamente en 6.3 CONGELACIÓN RÁPIDA el conservador. El enfriamiento es estático y poco potente, Función disponible sólo en algunos modelos. el tiempo de abatimiento demasiado largo y las bacterias se Desde +70°c hasta -18°c al centro del producto el más rápi- desarrollan rápidamente en gran cantidad. -
Page 79: Lista De Alarmas
7 LISTA DE ALARMAS Alarma agujón no introducido Nota: Averías en las sondas Una vez sustituida la sonda la Causa: falta introducción de la sonda de agujón en el in- alarma desaparece después de 10 segundos. Las alarmas sonda terior del producto durante la ejecución de un a -50°c están inhibidos durante la sobrecongelación a -18°c y abatimiento de temperatura durante la función de endurecimiento superficial helado. -
Page 80: Mantenimiento Ordinario
8 MANTENIMIENTO ORDINARIO Los bordes del condensador son cortantes. ESTAS OPERACIONES DEBEN SER Realice la limpieza con guantes de seguri- REALIZADAS ExCLUSIVAMENTE POR dad, gafas y mascarilla. UN INSTALADOR MATRICULADO 8.3 LIMPIEZA DE LA CÁMARA Los contenidos de este capítulo están destinados a todas las •... - Page 81 Cómo acceder al evaporador para realizar la limpieza 8.5 DESCARGA DEL AGUA DE DESESCARCHE • Se puede ingresar a la parte interna del evaporador para rea- • El equipo puede realizar desescarches automáticos y ma- lizar la limpieza: nuales. •...
- Page 82 ISTRUCCIONES ABATIDORES 05/2014...
- Page 83 05/2014 ISTRUCCIONES ABATIDORES...
Need help?
Do you have a question about the 5 and is the answer not in the manual?
Questions and answers