Advertisement
Quick Links
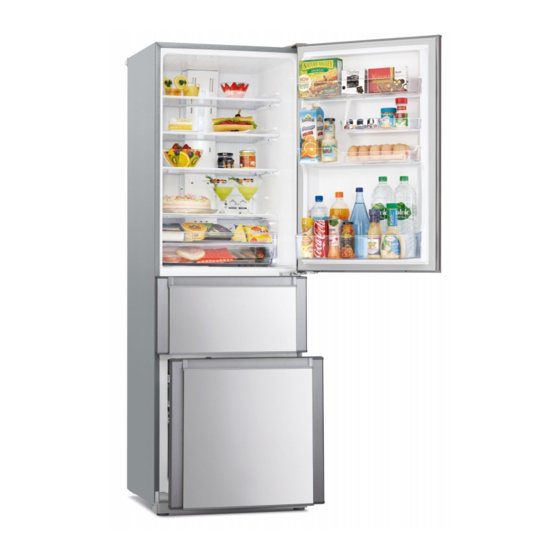
Refrigerator-Freezer
OPERATING INSTRUCTIONS
Non-Freon Refrigerators
This refrigerator uses non-Freon refrigerant (isobutane) and non-Freon foam insulation (cyclopentane).
These materials are harmless to the environment, which does not affect the ozone layer and global warming.
Maintenance work shall only be carried out at workshop by well-trained maintenance worker.
MR-CDX41EK,
MR-CDX46EK
SERIES MODEL
MR-CDX41EK
MR-CDX46EK
Contents
For your safety, please be sure to follow
these instructions
From installing to running your refrigerator
Using each compartment
Refrigerator / Sliding case / Vegetable and Freezer Compartments
How to adjust the temperature
Automatic Ice-Maker
How to remove and clean accessories
How to maintain your automatic ice-maker
What to do in these situations
Troubleshooting
Accessories
MEMO
MR-CDX46EK
MR-CDX46EK
目錄
MR-CDX46EK
MR-CDX41EK
Page
2 - 3
4 - 5
6 - 7
8
9 - 1 0
1 1 - 1 2
1 3
1 4 - 1 5
1 5 - 1 7
1 8
1 9
Advertisement

Related Manuals for Mitsubishi Electric MR-CDX41EK


Summary of Contents for Mitsubishi Electric MR-CDX41EK
- Page 1 SERIES MODEL MR-CDX41EK Refrigerator-Freezer MR-CDX46EK OPERATING INSTRUCTIONS Contents 目錄 Page For your safety, please be sure to follow 2 - 3 these instructions From installing to running your refrigerator 4 - 5 Using each compartment 6 - 7 Refrigerator / Sliding case / Vegetable and Freezer Compartments...
- Page 2 If the power cord is damaged call Mitsubishi Electric a person responsible for their safety. Children should be Service Centre for a technician to replace power cord.
- Page 3 When something abnormal or unusual occurs, turn off immediately and consult with “the store where you purchased the unit” or with a “MITSUBISHI ELECTRIC SERVICE CENTRE or Customer Service representative.” Caution Warning About using your refrigerator Installing and Transporting Do not use in a shed or a garage.
- Page 4 From installing to running your refrigerator From installing to running your refrigerator Installation Turning on the power / installing an earth wire 5 cm. or more Lower back section To get the refrigerator cooled down faster, plug 10 cm. or more it in right after installing.
- Page 5 (to provide half-opened Adjustment and affixing Start using door/noise/move/vibrate) It takes time to cool down. ● Turn the adjustable legs to get Put in warm food items or ice Turn in the direction of them to touch the floor, then affix. the arrows and lower cream after the refrigerator has the adjustable legs to...
- Page 6 It makes a large space when set up Air blowing outlet Install a space to accommodate tall by overlapping back of the shelf. stuffs in front. MR-CDX41EK has 6 places, MR-CDX46EK To prevent odors? has 8 places. We are recommend you to wrap or store the foods in airtight containers.
- Page 7 Vegetable compartment Vegetable compartment Approx. 3℃〜9℃ Please insert fruit, vegetables and drinks. If you wrap fruit and vegetables, they will stay fresh longer. Sliding Case For smaller items that get damaged easily such as tomatoes and fruit. Vegetables Case LED light in the vegetable case The LED light with specially selected light spectrum installed in the Vegetable compartment can increase the Vitamin C and preserve freshness in green vegetables...
- Page 8 How to adjust the temperature How to adjust the temperature You can stop ice-making, adjust the temperature in refrigerator/freezing compartment, and set the lower freezing storage by operation unit in back of the refrigerator compartment. Ice-making stop setting Illustration of MR-CDX46EK Ice-making stop light (red) ※...
- Page 9 Automatic Ice-Maker Automatic Ice-Maker You can make ice cube in ice storage corner by put the water in water supply tank of the refrigerator compartment. Please do periodically maintain to make a good ice cube by cleaning. Please drain the water in water supply tank when you do not making ice. About the first batches of ice.
- Page 10 Press button Press button Red light To stop To restart when the ice-making when the ice-making Press ice-making ice-making stop light (red) is off. stop light (red) is on. The ice-making stop The ice-making stop light (red) will turn on. light (red) will turn off.
- Page 11 How to remove and clean accessories How to remove and clean accessories Do not take apart, repair or convert. Unplug the electrical plug. Do not continue to use with damaged parts. If it is not unplugged, it will This can cause injury, an electric shock cause an electric shock.
- Page 12 Use reverse procedures to put accessories back in place. Glass shelf / One-two shelf Lift up the front side by both hands. Pull forward and take out. If forcefully pull in front, it may cause damage to door side. ※ Please slowly pull and take out.
- Page 13 How to maintain your automatic ice-maker How to maintain your automatic ice-maker Please do periodic care to prevent the occurrence of water Do not use dishwasher or dryer ※ scale, mold, etc. Please remove water when not made the ice. because it may cause deformation.
- Page 14 What to do in these situations What to do in these situations When there’s a power failure Minimize opening/closing of doors and avoid putting in more food. ・ When not in use for a long time (Remove the power plug) Clean the auto ice-maker.
- Page 15 What to do in these situations What to do in these situations (continue) (continue) When alarm non-stop ringing Make sure that each door closing without a gap. Inspection is required due to a possibility that the abnormality has occurred. Please contact the store where you purchased. How to stop alarm (PiPi continuous sound) You can stop alarm sound temporarily.
- Page 16 Troubleshooting Troubleshooting (continue) (continue) If this happens… Please check this out. Please do this. This is the reason. Is it just a short time after It takes about 12 hours to make the first batch of ice. It doesn’t make installation? In the summer, it may take about 24 hours.
- Page 17 Troubleshooting Troubleshooting (continue) (continue) If this happens… Please check this out. Please do this. This is the reason. Please close the door properly. Did you open the door frequently, Dew attached in the outer Dews and frost wi l l come out when the moi s ture i n the ai r i s cool e d. or is there a gaps? or inside the refrigerator Dews and frost are attach when the humidity is high.
- Page 18 HONG KONG CAUTION 1. This appliance is designed for use in ambient temperature listed below. MODEL NAME AMBIENT TEMPERATURE RANGE CLIMATIC CLASS MR-CDX41EK, CDX46EK-P C ~ 43 MR-CDX41EK, CDX46EK-ML C ~ 43 MR-CDX41EK, CDX46EK-H C ~ 38 The internal temperatures could be affected by such factors as the location of the refrigerating appliance, ambient temperature and the frequency of door opening, and, if appropriate, a warning that the setting of any temperature control device might have to be varied to allow for these factors.
- Page 19 MEMO MEMO...
- Page 20 ➡ ➡ ➡ ➡ ・ ・ ➡...
- Page 21 ➡ ➡...
- Page 22 ※ ● ● ● ● ● ※ ● ● ※...
- Page 23 ● ● ※ ● ● ● ※ ●...
- Page 24 ➡ 約0℃〜6℃ ※ ➡...
- Page 25 約 3℃〜9 ℃ ● ● ● ● ● ● 約 -21℃〜 -17 ℃ ➡ ● ● ※...
- Page 26 ※ ➡ Yogurt ・ ・ ➡...
- Page 27 ➡ OPEN CLOSED ● OPEN CLOSED ● ●...
- Page 28 ● ※ ● ● ● ➡ ● ● ● ● ● ● ● ● ●...
- Page 29 ※ ● Q. ● ● ● ● Q. ➡...
- Page 30 ※ ※ ※ ※ ※...
- Page 31 ※ ● ● ● ① ② ※ ① ② ※ ※ ※ Water receptacl e ● ● ● ● ● ●...
- Page 32 ・ ➡ ※ ➡ ➡ ※ ※ ※ ・ ・ ・ ・ ➡ ※...
- Page 33 ※ ➡ ※ ※ ➡ ・ ・ ➡ ・ ・ ➡ ➡...
- Page 34 ➡ ➡ ➡ ➡ ➡ − ➡ ➡...
- Page 35 ➡ ■...
- Page 38 MITSUBISHI ELECTRIC BUILDING SINGAPORE 159943 Head Office: Tel. (65) 6473-2308 SOLE AGENT in Malaysia MITSUBISHI ELECTRIC SALES MALAYSIA SDN. BHD. (CO.NO.:11098W) LOT 11, JALAN 219, PO BOX 1036, 46860, PETALING JAYA, SELANGOR DARUL EHSAN, MALAYSIA. Head Office: Tel. (603) 7955-2088 (10 lines)
Need help?
Do you have a question about the MR-CDX41EK and is the answer not in the manual?
Questions and answers