Table of Contents
Advertisement
Quick Links
MITSUBISHI
ELECTRIC
HOME REFRIGERATORS
SERVICE MANUAL
Models
MR-CR46G-ST-R
MR-CR46G-OB-R
MR-CR46G-HS-R
R...................RUSSIA
R...................RUSSIA
CONTENTS
1. SPECIFICATIONS............................................................................
2. OUTLINES AND DIMENSIONS.......................................................
3. WIRING DIAGRAM..........................................................................
4. REFRIGERANT CIRCUIT................................................................
5. NAME OF THE PARTS....................................................................
6. TROUBLE SHOOTING....................................................................
6.1 TROUBLE CRITERION OF MAIN PARTS..........................
6.2 FUNCTION OF OPERATION PANEL..................................
6.3 FLOW CHART OF SELF CHECK........................................
7. DISASSEMBLY INSTRUCTIONS...................................................
8. PARTS LIST....................................................................................
Changes for the Better
2014
NO.SM-RE-1410
1
3
4
6
7
8
8
11
12
15
16
21
Advertisement
Table of Contents

Related Manuals for Mitsubishi Electric MR-CR46G-R


Summary of Contents for Mitsubishi Electric MR-CR46G-R
-
Page 1: Table Of Contents
Changes for the Better MITSUBISHI ELECTRIC 2014 HOME REFRIGERATORS NO.SM-RE-1410 SERVICE MANUAL Models MR-CR46G-ST-R MR-CR46G-OB-R MR-CR46G-HS-R CONTENTS 1. SPECIFICATIONS................2. OUTLINES AND DIMENSIONS............3. WIRING DIAGRAM................4. REFRIGERANT CIRCUIT..............5. NAME OF THE PARTS..............6. TROUBLE SHOOTING..............6.1 TROUBLE CRITERION OF MAIN PARTS......6.2 FUNCTION OF OPERATION PANEL........ -
Page 2: Specifications
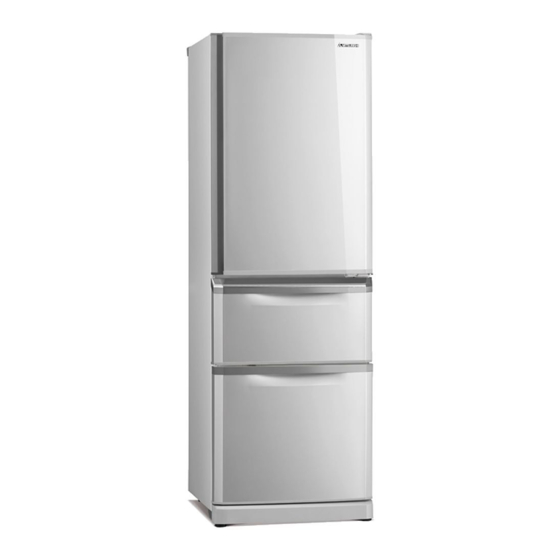
SPECIFICATIONS 1-1 SPECIFICATIONS MR-CR46G-R Power supply 220V 50Hz Total capacity 406 (R : 229 V : 74 F : 103) Dimensions (HXWXD) 1798 x 600 x 656 Cabinet Acrylic resin coated steel Food liner ABS resin Cabinet Foamed cyclopenthane Refrigerator door... - Page 3 1-2 ELECTRICAL PARTS SPECIFICATION MR-CR46G-R Model Model DHS66C10RAW DHS66C10RAW Power supply 220/240V, 50Hz Rated input 113/113.5(220/240V 50Hz) Compressor Starting current 7.78/8.55(220/240V 50Hz) Rated current 0.70/0.64(220/240V 50Hz) 18.4 (Main) / 18.5 (Aux) Winding resistance (A.T. 20 PTC RELAY PTC RELAY...
-
Page 4: Outlines And Dimensions
OUTLINES AND DIMENSIONS Unit : mm MR-CR46G-R PLUG CORD LENGTH REQUIRED SPACE FOR INSTALLATION... -
Page 5: Wiring Diagram
WIRING DIAGRAM (SKELETON WIRING DIAGRAM) MR-CR46G-R... - Page 6 (ACTUAL WIRING DIAGRAM) MR-CR46G-R Remark GY = GRAY BK = BLACK BR = BROWN = PINK W = WHITE OR = ORANGE LG = LIGHT GREEN LB = LIGHT BROWN = RED = YELLOW BY = BRIGHT YELLOW V = VIOLET...
-
Page 7: Refrigerant Circuit
REFRIGERANT CIRCUIT MR-CR46G-R Muffler Evaporator Cabinet pipe Capillary tube Suction pipe Compressor Charge pipe Charge pipe (High pressure side) (High pressure side) Dryer Dryer Charge pipe (Low pressure side) - Page 8 NAMES OF PARTS MR-CR46G-R...
-
Page 9: Trouble Shooting
TROUBLE SHOOTING 6.1 TROUBLE CRITERION OF MAIN PARTS MR-CR46G-R Parts Components Check Method and Criterion Mounted / Part Name Position Compressor in Model DHS66C10RAW the machine Rated input 113/113.5(220/240V 50Hz) chamber at the Starting current 7.78./8.55(220/240V 50Hz) rear side of Rated current 0.70/0.64(220/240V 50Hz) - Page 10 Components/ Check Method and Criterion Parts Mounted Position Part Name In the fan grille of Model FBA12J12VXC the refrigerator Type DC brushless compartment. Measure the resistance with a tester.(Ambient temperature:Room temperature 15 C ~ 25 Normal Abnormal (faulty) Between 3-1 : open( ) Between 3 - 1 (GND Refrigerator and Vcc): About 25k...
- Page 11 Components/ Parts Mounted Check Method and Criterion Part Name Position Measure the resistance with a tester.(Ambient temperature:Room temperature 15 C ~ 25 Black At the left bottom of vegetable compartment Normal Abnormal (faulty) Black Water pipe 1.3 kW (Approx.) Open (W) heater The heater is turned on when the temperature of tray Operation...
-
Page 12: Function Of Operation Panel
6.2 FUNCTION OF OPERATION PANEL (1) Normal operation (2) Ice making test / Self-check 2.1 Setting Press the switch for 5 seconds 2.2 Operation and display During automatic ice making test,ice making stop LED blink. When somthing is faulty, the trouble is indicated with blinking number of ice making stop LED.(See page 6.3 (3)) ... -
Page 13: Flow Chart Of Self Check
6.3 FLOW CHART OF SELF-CHECK (1) Trouble shooting with self-check This refrigerator has self-check feature to clarify and indicate where & what the trouble is. It can be checked that there is something wrong with electronic circuit and electric parts. Ice making Self-check Refrigerator Freezer... - Page 14 (3) LED trouble display and the check point Ice making Refrigerator Freezer (3.1) LED trouble display : follow the procedure of "self check method Refrigerator room and its operation" at 6.3(1). Trouble is indicated by the blinking number of ice making stop LED. Slide room Ice maker off When several troubles occur, smaller blinking number of LEDs has to be indicated first.
- Page 15 Function Explanation Detecting method and corrective NG points Display function of LED Thermistor (R) NG 4 Blinks 1. The Thermistor (R) connector lead wire 1. Check all points of Thermistor (R) connector 1 Cycle isn't orderly. lead wire, may be unlock and struck insert. 2.
-
Page 16: Test Point Diagram Of Main Control Board
6.4 TEST POINT DIAGRAM OF MAIN CONTROL BOARD MR-CR46G-R CN4K Lead color Parts Name 1 Light Brown LED Light Board in R-room 2 Red Damper 3 Gray Ice Maker Positon SW 4 Bright Yellow Damper 5 Pink Ice Maker Forward... -
Page 17: Disassembly Instructions
DISASSEMBLY INSTRUCTIONS MR-CR46G-R l Plug out before work. l Check the automatic ice-maker by pressing ice making stop switch. l In assembling & disassembling parts use several kind of screws and rivets. Do not mistake to use them. Rivet Rivet... - Page 18 OPERATING PROCEDURE PHOTOS 3. Detachment the Vegetable case parts Photo 6 (1) Detach parts inside vegetable compartment (Vegetable case, Fruit case). Catches Vegetable (2) Detach the door of vegetable compartment. case cover (3) Detach rivet (C) at the right and unhooking 2 catches at front, (center and left).
- Page 19 OPERATING PROCEDURE PHOTOS Defrost heater, Drip tray Photo 9 Aluminium Drip tray (7) Peel off the tape that fixes lead wires on the side wall of the vegetable compartment. Then take out defrost heater Tape Tape together with heater roof. Detach heater roof and Heater cover from Defrost heater.
- Page 20 OPERATING PROCEDURE PHOTOS Detachment the vegetable compartment parts Photo 12 (1) Detach the door of the vegetable compartment. Water pipe (lower) (2) Detach a rivet (C), pipe cover and connector. Then Pipe cover remove the water pipe lower. Water tank tray Water pipe Vegetable case room (3) Pull Tank tray to R-room upper and take it out together...
- Page 21 OPERATING PROCEDURE Compressor cover (1) Remove 7 screws for compressor cover at the back of the refrigerator. Fan motor of compressor compartment (2) Detach the Elect cover (3) Detach the Connector. (4) Remove a screw that fixed bell mouth. Pull out the whole fan motor and disconnect the terminals. (5) Pull out the fan from the fan motor.
-
Page 22: Parts List
PARTS LIST DOOR, BODY PARTS MR-CR46G-R... - Page 23 Q'TY/UNIT PART NO. RoHS PART NAMES SPEC MR-CR46G-R PRICE HS OB ST KIER67000 <G> DOOR R KIER68000 <G> KIER71000 <G> KIEPQ8002 <G> DOOR V KIEP90002 <G> KIEP91002 <G> KIEPQ8001 <G> DOOR F KIEP90001 <G> KIEP91001 <G> KIEE94746 <G> DOOR STOPPER (R) KIEP89118 <G>...
- Page 24 BODY PARTS MR-CR46G-R...
- Page 25 BODY PARTS Q'TY/UNIT PART NO. RoHS PART NAMES SPEC MR-CR46G-R PRICE KIEP94858 CONTROL PANEL <G> KIEHJ3305 THERMO DIAL (R) <G> KIEP89802 DUCT V ASSY <G> KIEP89818 COVER DUCT V <G> KIEP89503 WATER TRAY ASSY <G> KIEP89808 CONNECTOR COVER <G> KIEP94663 FAN GRILLE ASSY <G>...
- Page 26 ELECTRICIAL PARTS MR-CR46G-R...
- Page 27 ELECTRICIAL PARTS Q'TY/UNIT PART NO. RoHS PART NAMES SPEC MR-CR46G-R PRICE KIEHJ3313 THERMISTOR (R) <G> KIEW73360 LED LIGHT BOARD ASSY <G> KIEW73361 LED BOARD ATTACH <G> KIEHJ3365 WATER PUMP MOTOR <G> KIEP89312 THERMISTOR (DEF) <G> KIEHJ3378 THERMISTOR (F) <G> KIEHJ3469 GEAR BOX (IM) <G>...
- Page 28 ACCESSORY AND UNIT PARTS MR-CR46G-R...
- Page 29 ACCESSORY AND UNIT PARTS Q'TY/UNIT PART NO. RoHS PART NAMES SPEC MR-CR46G-R PRICE KIEP89420 GLASS SHELF R ASSY <G> KIEHJ3427 SLIDE SHELF (REAR) <G> KIEHJ3428 SLIDE SHELF (FRONT) <G> KIEP89413 SLIDE CHILLED CASE <G> KIEP89409 VEGEATABLE CASE COVER <G> KIEP89406 FRUIT CASE <G>...
- Page 30 PACKING PARTS MR-CR46G-R NO STEP ON C.F.B TOP COVER C.F.B BOX ASSY TOP CUSHION PACKING COVER C.F.B PALLET BOTTOM CUSHION...
- Page 31 PACKING PARTS Q'TY/UNIT PART NO. RoHS PART NAMES SPEC MR-CR46G-R PRICE KIEWX0970 <G> C.F.B BOX ASSY KIEWX1970 <G> KIEWX2970 <G> KIEP89979 TOP CUSHION <G> KIEHJ3973 PACKING COVER <G> BOTTOM CUSHION KIEP89978 <G> C.F.B PALLET KIEP89974 <G> C.F.B TOP COVER KIEP89975...
- Page 32 KANG YONG ELECTRIC PUBLIC COMPANY LIMITED. 67 Moo 11, Bangna-Trad Road Km.20, Bangplee, Samutprakarn 10540 Thailand. TEL : 0-2337-2900 FAX : 0-2337-2954 http://www.mitsubishi-kye.com e-mail: information@kye.meap.com Printing Date : MAY 2014...
Need help?
Do you have a question about the MR-CR46G-R and is the answer not in the manual?
Questions and answers