Table of Contents
Advertisement
Advertisement
Table of Contents

Related Manuals for PurePro TRIO PC6230


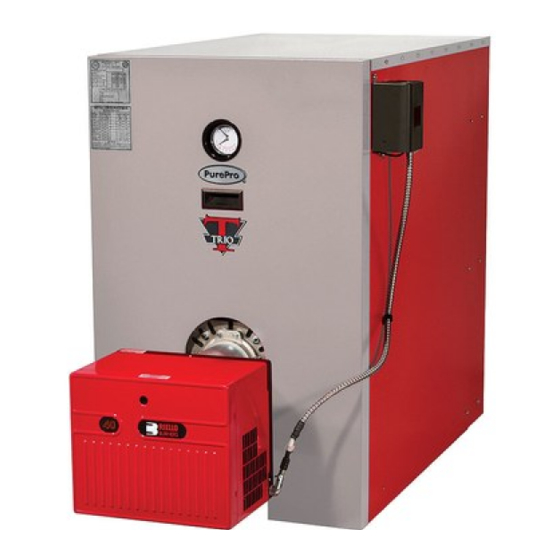
Summary of Contents for PurePro TRIO PC6230
- Page 1 PC6230 T PC1259 RON BOILERS PC6230-PC12590 INSTALLATION AND OPERATOR’S MANUAL Keep these instructions with the boiler at all times for future reference OYERTOWN URNACE PO Box 100 PA 19512 OYERTOWN, 1-610-369-1450 www.boyertownfurnace.com 10-1-15...
- Page 2 Be Aware of Hazard Definitions Danger: Denotes presence of a hazard which, if ignored, will result in severe personal injury, death or property damage Warning: Denotes presence of a hazard which, if ignored, could result in severe personal injury, death or substantial property damage. Caution: Denotes the presence of a hazard which, if ignored, could result in minor personal injury or property damage Notice: Intended to bring attention to information, but not related to personal injury or...
- Page 3 Warning: Any Appliance that burns natural gas, propane gas or fuel oil is capable of producing carbon monoxide (CO). Carbon monoxide (CO) is a gas which is odorless, tasteless and colorless but is very toxic. If your boiler is not vented properly or is not working properly, dangerous levels of CO may accumulate.
- Page 4 Warning If You Smell Gas: Close the Gas shut-off valve If you hear gas leaking evacuate the affected area immediately Open all Windows Do not operate any electrical switches or equipment such as phones, power plugs and doorbells Extinguish all open flames Do smoke Do not use lighters Warn all occupants of the building, but do not use door bells...
-
Page 5: Table Of Contents
Table of Contents Ratings and Data Clearances Ventilation and Combustion Air Boiler Block Assembly Boiler Trim Piping System Piping Jacket Installation Venting Burner Installation Fuel Piping Wiring Operation Burner Settings Maintenance Warranty Installation and Service Check List... -
Page 6: Ratings And Data
Ratings and Data Ratings Boiler Model No. PC6230 PC7290 PC8350 PC9410 PC10470 PC11530 PC12590 Firing Rate - #2 Fuel 2.30 2.90 3.50 4.10 4.70 5.30 5.90 Input BTU/HR 322,000 406,000 490,000 574,000 658,000 742,000 826,000 Output BTU/HR #2 Fuel 276,000 352,000 426,000 501,000... -
Page 7: Clearances
Boiler Components INSPECT FOR DAMAGE. All equipment is carefully manufactured, inspected, and packaged by experienced workers. Our responsibility ceases upon delivery of the skidded boiler and component boxes to the carrier in good condition. ANY CLAIMS FOR DAMAGE OR SHORTAGES IN SHIPMENT MUST BE FILED IMMEDIATELY against the carrier by the consignee. -
Page 8: Boiler Block Assembly
When a boiler is located in an unconfined space in a building of conventional frame or masonry construction infiltration may provide adequate air for combustion and ventilation. If there is any doubt, install air supply provisions for combustion and ventilation air. When a boiler is located in a confined space and air for combustion and room ventilation is from inside buildings, the confined space shall be provided with two permanent openings, one starting 12 inches from the top and one 12 inches from the bottom of the enclosed space. - Page 9 To assemble the boiler body you will need two clamping units, pry bar and a plastic or wooden mallet. Assemble the blocks as follows: 1. Place the rear boiler element vertical. Clean and inspect the twin-taper nipple seats and the connection surface.
- Page 10 11. Introduce tie-rods into their seats, placing them as illustrated. The short tie rods are to be installed in the lower positions with the short threaded part towards the front of the boiler. The tie rods in the rear of the boiler will need to be cut so as not to extend more than 2-1/2 inches past the nut so as not to interfere with the jacket installation.
-
Page 11: Boiler Trim Piping
6. Tighten the door using the remaining brass hinge nuts provided. Final adjustment of the door on the hinge side is to be made using the brass hinge nuts. 7. Inspect for proper seal between boiler and door. Hinge Pin Brass Hinge Nuts Cleanout Door Assembly 1. -
Page 12: System Piping
System Piping Important… INSTALLATION MUST BE PERFORMED BY A TECHNICALLY QUALIFIED SERVICEMEN. TRIO COMMERCIAL BOILERS HAVE A MAXIMUM OPERATING PRESSURE OF 58PSI NOTE: If normal operating pressures are greater than 30psi please contact the manufacturer for required trim. Pipes that are connected to boiler fittings must be supported and placed so that they do not create stresses on the boiler fittings themselves. - Page 14 Mounting Bracket Installation Attach four jacket mounting brackets to the boiler. Note there are two different jacket brackets which end up on opposite corners facing outward. Slide the slots in the mounting brackets over the boiler tie rods between the two 12 x 1.75 mm nuts located on each end of the tire rods. Tighten the outer nuts to secure the brackets into position.
- Page 15 Assemble Side Panels The boiler side panels are designed to telescope to the appropriate length in order to fit any size boiler. See Figure 2 below for front side and Figure 3 for rear side jacket panels. Figure 2 Figure 3...
- Page 16 On a flat surface place the rear side upside down with the bottom channel facing up. Place the bottom channel of the front panel over the channel of the rear panel and adjust the overall length of the side panel as shown in Figure 4 below.
- Page 17 Figure 5 Temperature Sensor Installation 1. Install (2) SB875-11 black anti short bushings into the upper holes in the mounting brackets along the right hand side of the boiler. 2. Install (1) SB875-11 black anti short bushing into the 7/8” hole in the right front jacket panel. 3.
-
Page 18: Venting
Figure 7 Name Plate Installation Install nameplate provided in the upper left jacket corner. Install Commercial label on upper right corner of the jacket covering slots. Transfer the boiler serial number which is rivited to the front leg of the boiler to the nameplate. - Page 19 material that will withstand flue gas temperatures up to 1000 F is required. Masonry and metal chimneys shall be constructed in accordance with applicable building code requirements. Masonry chimneys shall be lined with an approved clay tile liner or a listed chimney lining system installed in accordance with manufacturers’...
-
Page 20: Burner Installation
designed for the use in chimney connectors such as automatic dampers. The vent pipe should be joined with metal screws and supported by straps. A thimble should be used to connect the vent connector pipe to the chimney so the pipe may be readily removed in case of inspection or replacement. No chimney connector shall pass through any floor or ceiling. -
Page 21: Fuel Piping
Burner Swing Door Opening the Door 1. Turn off power to boiler. More than one disconnect may be required. 2. Allow boiler to cool down. 3. Lift the front jacket panel up and off the boiler. Disconnect fuel lines as required. 4. -
Page 23: Operation
Operation Warning: Before proceeding read and fully understand the instructions contained in this manual. Do not attempt to operate this boiler if it has not been installed in accordance with the guidelines as set forth in this manual. Never attempt to start the boiler if the combustion chamber contains excess oil, gas, or when the boiler is full of vapors. -
Page 24: Burner Settings
Burner Adjustments Warning: Before proceeding read and fully understand the instructions contained in the burner manual. Failure to comply can result in an explosion causing extensive property damage, severe personal injury, or death. Preliminary Oil Burner Settings Boiler Burner Nozzle Pump Press Smoke PC6230... -
Page 25: Maintenance
Preliminary Gas Burner Settings Riello Input Orifice Air Gate Combustion Manifold Boiler Burner Type Btu/Hr Inlet Head Pressure Riello 322,000 1” 9.0% PC6230 G400 322,000 1” 11.0% 406,000 1” 9.0% Riello PC7290 G900 406,000 1” 11.0% Riello 490,000 1” 9.0% PC8350 G900 490,000... - Page 26 9. Install the front upper cleanout cover plate. 10. Close swing door following previously described procedure. Check to ensure a proper seal between the door and the boiler has been made. 11. Install jacket front panel. 12. Connect Molex plug for burner power. Burner Consult oil burner manufacturer’s instructions for additional maintenance requirements.
-
Page 27: Warranty
Limited Warranty Trio Commercial Cast Iron Water Boilers not assume any liability of unsatisfactory performance – First Year Through Tenth Year Warranty for Trio Series caused by improper installation. Commercial Hot water boilers: Boyertown Furnace warrants Any cost for labor to remove or replace the faulty that its cast iron boiler and casing are free from defects in component. -
Page 28: Installation And Service Check List
Installation and Service Check List Boiler Model: _______________________ Serial No.: ____________________ Installation Date: ______________________ Installer Name: ________________________ Phone No.: ____________________ Boiler Installation Boiler level and in solid contact with floor? Boiler and burner wired per wiring diagram and National Electric Code? 120VAC wiring Type_____ Size _____ AWG Burner sealed to boiler? Mounting nuts tight? Space is large enough to provide required clearances? - Page 32 -----------------Cut and Return This Form or register online at www.boyertownfurnace.com----------------- Warranty Registration Boyertown Furnace Co. P.O. Box 100 Boyertown, PA 19512 Date Installed: ___________________________ Boiler Model No._________________________ Serial Number: ________________________ Name of Purchaser: _________________________________________________________________________ Purchaser’s Address: ________________________________________________________________________ Dealer’s Name: _____________________________________________________________________________ Dealer’s Address: ___________________________________________________________________________...
Need help?
Do you have a question about the TRIO PC6230 and is the answer not in the manual?
Questions and answers