Table of Contents
Advertisement
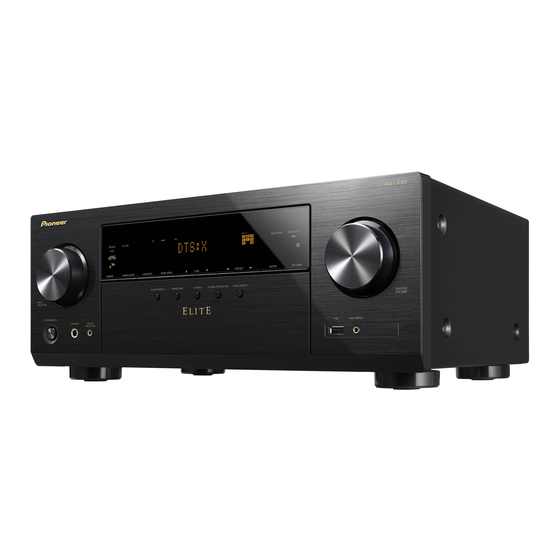
VSX-LX102 / AV RECEIVER
Before Start ....................................................................2
What's in the box ..............................................................2
Part Names .....................................................................3
Part Names.......................................................................3
Install ...............................................................................7
Installation procedure .......................................................7
Step1: Speaker Layout......................................................8
Step2: Connect the Speakers .........................................14
Step3: Connect the TV & AV Components .....................16
Initial Setup ..................................................................21
Initial Setup with Auto Start-up Wizard ...........................21
Playback .......................................................................23
AV Component Playback ................................................23
®
Playback ................................................23
Network Functions ..........................................................24
USB Storage Device .......................................................25
Listening To the AM/FM Radio........................................26
Listening Mode ...............................................................28
For details about the Network Functions and listening modes,
and information regarding the advanced settings, refer to the
"Advanced Manual" available on our website.
http://jp.pioneer-audiovisual.com/manual/vsxlx102/adv/en.html
Advertisement
Table of Contents

Related Manuals for Pioneer Elite VSX-LX102


Summary of Contents for Pioneer Elite VSX-LX102
-
Page 1: Table Of Contents
Network Functions ............24 USB Storage Device ............25 Listening To the AM/FM Radio........26 Listening Mode ...............28 For details about the Network Functions and listening modes, and information regarding the advanced settings, refer to the "Advanced Manual" available on our website. http://jp.pioneer-audiovisual.com/manual/vsxlx102/adv/en.html... -
Page 2: Before Start
> Before Start > Part Names > Install > Initial Setup > Playback What's in the box 1. Main unit (1) 2. Remote controller (RC-957R) (1), Batteries (AAA/R03) 3. Speaker setup microphone (1) 0 Used during Initial Setup. 4. Indoor FM antenna (1) 5. -
Page 3: Part Names
> Before Start > Part Names > Install > Initial Setup > Playback Part Names Front Panel 9. Cursor buttons ( / ... - Page 4 > Before Start > Part Names > Install > Initial Setup > Playback 18.Listening mode button: Press "AUTO/DIRECT", "SURROUND" or "STEREO" to switch the listening mode (P28). (*) 19.SOUND RETRIEVER button: Turns on/off the Sound Retriever function that provides better sound quality for compressed audio.
- Page 5 > Before Start > Part Names > Install > Initial Setup > Playback 90° 180° Rear Panel 8. 12V TRIGGER OUT jack: Allows you to connect a device with 12V trigger input jack to enable link operation between the device and the unit.
- Page 6 > Before Start > Part Names > Install > Initial Setup > Playback Remote Controller 1. Í STANDBY/ON button 2. Input selector buttons: Switches the input to be played. 3. 21 button: Select the input to be played. (AV ADJUST) button: Press during play to display the AV ...
-
Page 7: Install
> Before Start > Part Names > Install > Initial Setup > Playback Installation procedure This unit can be used in a number of ways, depending on the layout of the speakers you are installing, and the connections made to external devices. Read the following to help make the installation process smoother. -
Page 8: Step1: Speaker Layout
> Before Start > Part Names > Install > Initial Setup > Playback Step1: Speaker Layout 7.1 Channel System Front speakers output front stereo sound and a center speaker outputs center sound such as dialogs and vocals. Surround speakers create back sound field. Powered subwoofer reproduces bass sounds and creates rich sound field. - Page 9 > Before Start > Part Names > Install > Initial Setup > Playback 5.1.2 Channel System-1 (Front High Speakers/Rear High Speakers) This is a basic 5.1 channel system consisting of front speakers, a center speaker, surround speakers, and a powered subwoofer, with the addition of front height speakers or rear high speakers, which are both types of height speakers.
- Page 10 > Before Start > Part Names > Install > Initial Setup > Playback 5.1.2 Channel System-2 (Ceiling Speakers) This is a basic 5.1 channel system consisting of front speakers, a center speaker, surround speakers, and a powered subwoofer, with the addition of top front speakers, top middle speakers, or top rear speakers, which are types of height speakers.
- Page 11 > Before Start > Part Names > Install > Initial Setup > Playback 5.1.2 Channel System-3 (Dolby Enabled Speakers (Dolby Speakers)) This is a basic 5.1 channel system consisting of front speakers, a center speaker, surround speakers, and a powered subwoofer, with the addition of Dolby enabled speakers (front) or Dolby enabled speakers (surround), which are both types of height speakers.
- Page 12 > Before Start > Part Names > Install > Initial Setup > Playback Bi-Amping the Speakers It is possible to connect front speakers supporting bi- amping to improve quality of the bass and treble. The maximum number of channels available with this connection is 5.1 because Bi-Amping speakers require one amplifier for the tweeter jacks and one amplifier for the woofer jacks.
- Page 13 > Before Start > Part Names > Install > Initial Setup > Playback Speaker combinations 0 In any of the combinations, up to two powered subwoofers can be connected. SURROUND Speaker Channels FRONT CENTER SURROUND BACK HEIGHT Bi-Amp 2.1 ch 3.1 ch 4.1 ch 5.1 ch...
-
Page 14: Step2: Connect The Speakers
> Before Start > Part Names > Install > Initial Setup > Playback Step2: Connect the Speakers Standard Connections (Pages 8 to 11) Make correct connection between the unit's jacks and speaker's jacks (+ to + and – to –) for each channel. If connection is wrong, reverse phase may make bass output poor. - Page 15 > Before Start > Part Names > Install > Initial Setup > Playback Connecting with Bi-Amping Speakers (Page 12) 0 Refer to "Standard Connections (Pages 8 to 11)" (P14) to connect the center speaker, surround speakers, and powered subwoofer. Make sure you remove the jumper bar fitted between the woofer jacks and tweeter jacks of the front speakers.
-
Page 16: Step3: Connect The Tv & Av Components
> Before Start > Part Names > Install > Initial Setup > Playback Step3: Connect the TV & AV Components 1. Connect the TV To ARC TV For a TV that supports the ARC (Audio Return Channel) (*) feature, use an HDMI cable and connect according to illustration "a". - Page 17 > Before Start > Part Names > Install > Initial Setup > Playback 2. Connect the HDMI AV Component This is an example of connection with an AV component that has an HDMI jack. With connection to an AV component that conforms with the CEC (Consumer Electronics Control) standard, you can use features such as the HDMI CEC feature (*) that links with the input selector, and the HDMI Standby Through feature which allows you to...
- Page 18 > Before Start > Part Names > Install > Initial Setup > Playback 3. Connect the Non-HDMI AV Component This is an example of connection with an AV component that does not have an HDMI jack. Make the connections to the AV component to match the jacks it has.
- Page 19 > Before Start > Part Names > Install > Initial Setup > Playback 4. Connect the Audio Component Example of a connection with an audio component. Connect a CD player using a digital coaxial cable. You can also connect a turntable that has an MM-type cartridge to the PHONO jack.
- Page 20 > Before Start > Part Names > Install > Initial Setup > Playback 5. Connect Other Cables Antenna Hookup Move the antenna around while playing the radio to find the position with the best reception. Use a thumb tack or similar to attach the indoor FM antenna to a wall.
-
Page 21: Initial Setup
> Before Start > Part Names > Install > Initial Setup > Playback Initial Setup with Auto Start-up Wizard Initial Setup Starts Automatically When you turn the unit on for the first time after purchasing it, Initial Setup is automatically shown on the TV to enable you to make settings required for startup using simple operations following onscreen guidance. - Page 22 > Before Start > Part Names > Install > Initial Setup > Playback 0 Calibration takes between 3 and 12 minutes to be "Use iOS Device (iOS7 or later)": Share the iOS device's completed. The speakers emit the test tone at high Wi-Fi settings with this unit.
-
Page 23: Playback
"0000". jack on the front panel, press 21 (b) sound produced on this unit may slightly 0 This unit is displayed as "Pioneer repeatedly to select the input. be behind the sound played on the VSX-LX102 XXXXXX". -
Page 24: Network Functions
> Before Start > Part Names > Install > Initial Setup > Playback Network Functions INPUT Basic Operations Spotify application on your smartphone to display a list of Network Functions on or tablet and create a Spotify premium the TV. By connecting this unit to the network you account. -
Page 25: Usb Storage Device
> Before Start > Part Names > Install > Initial Setup > Playback USB Storage Device INPUT Basic Operations are displayed. Select the folder with the cursors and press ENTER to confirm You can play music files stored on a USB your selection. -
Page 26: Listening To The Am/Fm Radio
> Before Start > Part Names > Install > Initial Setup > Playback Listening To the AM/FM Radio You can receive AM and FM radio stations tuned into an FM radio station, the on this unit with the built-in tuner. Perform "STEREO"... - Page 27 > Before Start > Part Names > Install > Initial Setup > Playback ∫ Presetting a Radio Station all of your favorite AM/FM radio stations. Selecting a Preset Radio Station You can preset up to 40 stations. Registration Procedure 1. Press TUNER (a) on the remote controller.
-
Page 28: Listening Mode
> Before Start > Part Names > Install > Initial Setup > Playback Listening Mode Checking the Input Format and This unit is equipped with a variety of AUTO/DIRECT button (a) STEREO button (d) listening modes. The basic operations are Listening Mode Press repeatedly and the listening modes You can select the "Stereo"... - Page 29 License and Trademark ® The BLUETOOTH word mark and logos are registered trademarks owned by Bluetooth SIG, Inc. The Spotify software is subject to third party licenses found here: Manufactured under license from Dolby Laboratories. Dolby, Dolby Atmos, www.spotify.com/connect/third-party-licenses Dolby Surround, Dolby Vision and the double-D symbol are trademarks of Dolby Laboratories.
- Page 32 (Canada) © 2017 Onkyo & Pioneer Corporation. All rights reserved. © 2017 Onkyo & Pioneer Corporation. Tous droits de reproduction et de traduction réservés. http://pioneer-audiovisual.com/privacy/ F1711-1 “Pioneer” and “ELITE” are trademarks of Pioneer Corporation, and are used under license.
Need help?
Do you have a question about the Elite VSX-LX102 and is the answer not in the manual?
Questions and answers