Advertisement
Quick Links
Advertisement

Related Manuals for Doufit EM-01


Summary of Contents for Doufit EM-01
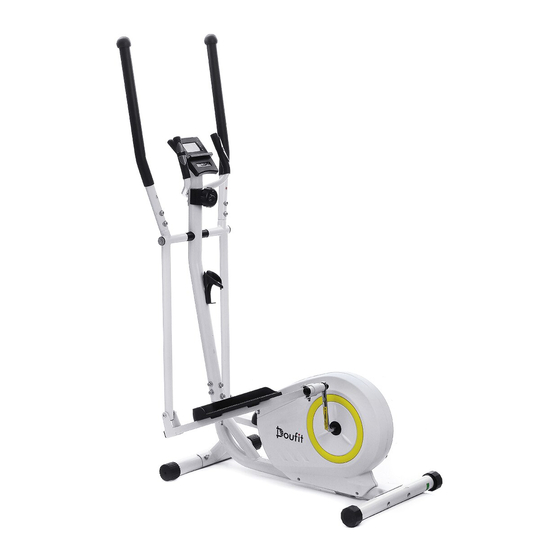
- Page 1 EM-01 Elliptical Machine Instruction Manual * Please read the instruction manual carefully and follow it. * Please keep the instruction manual for your later use. * If you want to give this product to your friends, don't forget to bring them the instruction manual.
- Page 2 Catalogue Precautions--------------------------------------------------------------------------------------------------------- - - - - Exploded Diagram(A)---------------------------------------------------------------------------------------------- - - - Exploded Diagram(B)---------------------------------------------------------------------------------------------- - - - Parts List ----------------------------------------------------------------------------------------------------------- - - - - Accessories Chart-------------------------------------------------------------------------------------------------- - - - - Assembly Method-------------------------------------------------------------------------------------------------- - - - - Details of Monitor------------------------------------------------------------------------------------------------- - - - - Possible Problems &...
- Page 3 Exploded Diagram(A) Page 2...
- Page 4 Exploded Diagram(B) Page 3...
-
Page 5: Parts List
Parts List Key No. Qty. Description Key No. Qty. Description Frame M3*7mm Self Tapping Screw Main Pipe M4*20mm Screw Front Foot Pipe M4*20 Self Tapping Screw Rear Foot Pipe Right Pedal Joint Monitor M8*60mm Allen bolt Senor Handlebar M8*60mm Allen bolt Below Motion Sensor Cable M6 Lock Nut Clamp... -
Page 6: Accessories Chart
The first number is the code of the part in the Parts List. Attention: If a part isn't in the accessories kit, please check if it was assembled. service@doufit.net If any part is missing, distorted or broken when you receive the package, please contact enclosing your order number, we will send the replacement part to you as soon as possible. -
Page 7: Assembly Method
Assembly Method For the assembly video, please visit Doufit Youtube: www.youtube.com/channel/UCorBKk34KZgI96OyGSkjFdA Attention:Don’t tighten all bolts until you finish all assembly steps. Step 1: Assemble the foot pipes To assemble both foot pipes, please prepare front foot pipe (No.3), rear foot pipe(No.4), four M8 curved washers (No.65), four M8*65mm carriage bolts(No.73), four M8... - Page 8 Step 3: Assemble the main pipe To assemble the main pipe, please prepare eight M8 curved washers(No.65), four M8*65mm Allen bolts(No.78), four M8 lock nuts(No.84), four M8 split washers(No.86), socket wrench(No.94), and M6 Allen wrench(No.95). Insert the main pipe into the frame. Insert a M8 Allen bolt and a M8 curved washer into every hole of the joint.
- Page 9 Step 5: Assemble the swing arms For this step, please prepare left swing arm(No.10), right swing arm(No.11), two pivot caps(No.39), two spacers (No.46), two pivot wave washers(No.57), two pivot washers(No.67), two M8*20mm Hex bolts(No.77), two Grease M8 split washers(No.86), and socket wrench(No.94). Attention: These spacers, washers and bolts were pre-attached to the horizontal pipe.
- Page 10 Step 7: Assemble the pedals Take the right pedal(No.33) as an example. The assembly of the left pedal(No.32) is in the same way. Attention: The baffles of pedals face inward. Put the pedal(No.33) on the right pedal arm(No.15) and insert two M10 Hex bolts(No.76). Then Screw two M10 washers(No.72) and two M10 lock nut(No.83).
- Page 11 Step 9: Assemble the sensor handlebar Attach the sensor handlebar(No.6) to the main pipe(No.2). Screw two M8*16mm Allen bolts(No.74), two M8 split washers(No.86) and two M8 curved washer(No.65) with M6 Allen wrench(No.95). Step 10: Assemble the monitor Unscrew two M5*12mm bolts(No.80) from the back of the monitor(No.5) with the socket wrench(No.94).
-
Page 12: Operation
Details of Monitor Parameters Time(TIME) 00:00-99:59 DIST SCAN Speed(SPD) 0.0-99.9ML/H TIME Distance(DIST) 0.0-99.99ML Calories(CAL) 0.00-999.9KCAL Odometer(ODO) 0-9999ML Pulse(PUL) 40-240BPM Operation Turn on/off The monitor will automatically turn on when you start to exercise, and you can also turn on it manually by pressing those buttons. - Page 13 We will confirm the problem and solve it for you. Service If the item is damaged or you have any other question or problem, please contact service@doufit.net with your order number, we will try our best to solve it for you ASAP. Page 12...
Need help?
Do you have a question about the EM-01 and is the answer not in the manual?
Questions and answers