Subscribe to Our Youtube Channel
Summary of Contents for SDJ FASTER 4 RGBW
- Page 1 FASTER 4 RGBW CONTROLLER DMX 16 CH Order code: SG FASTER4 MANUALE UTENTE USER MANUAL...
- Page 2 Rev. 01-04/19 INDICE: 1. INTRODUZIONE p. 3 2. ISTRUZIONI DI SICUREZZA p. 4 3. APERTURA CONFEZIONE E CONTROLLO p. 6 4. INSTALLAZIONE, ACCENSIONE ED USO p. 6 5. MANUTENZIONE p. 10 6. SPECIFICHE TECNICHE p. 10 INDEX: 1. INTRODUCTION p. 11 2.
- Page 3 1. INTRODUZIONE Grazie per avere scelto un nostro prodotto! Vi preghiamo di fare riferimento alle istruzioni e alle avvertenze contenute nel presente manuale per l’utilizzo del dispositivo e di conservarlo per future consultazioni. Il presente manuale contiene informazioni riguardanti l’installazione e l’utilizzo del dispositivo. Le informazioni contenute in questo documento sono state attentamente redatte e controllate.
-
Page 4: Istruzioni Di Sicurezza
2. ISTRUZIONI DI SICUREZZA Attenzione! Questo prodotto non è adatto ad un uso domestico. Leggere il presente manuale prima di installare e dare corrente all’apparecchiatura, seguire le precauzioni di sicurezza elencate di seguito ed osservare tutti gli avvertimenti indicati nel presente manuale e stampati sull’apparecchiatura. -
Page 5: Manutenzione
MANUTENZIONE Prima di iniziare qualsiasi operazione di manutenzione o pulire il prodotto, togliere la tensione dalla rete di alimentazione e scollegare il cavo dal dispositivo. Parti danneggiate, devono essere sostituite con ricambi originali. IMPORTANTE: danni provocati dalla noncuranza di questo manuale, non sono soggetti a garanzia. -
Page 6: Installazione
3. APERTURA DELLA CONFEZIONE E CONTROLLO Aprire con cura la confezione, verificare il contenuto e assicurarsi che tutte le parti siano presenti e siano in buone condizioni. Nel caso in cui alcune parti non siano presenti o siano danneggiate, contattare immediatamente il proprio fornitore e conservare l’imballaggio per la verifica. - Page 7 SCHEMA DI CONNESSIONE DEI CAVI DMX: DMX-output DMX-input presa XLR spina XLR 1: terra 1: terra 2: segnale (-) 2: segnale (-) 3: segnale (+) 3: segnale (+) In caso di necessità, è possibile variare la polarità attraverso il selettore di polarità DMX, posto sul pannello posteriore.
-
Page 8: Preset Colors
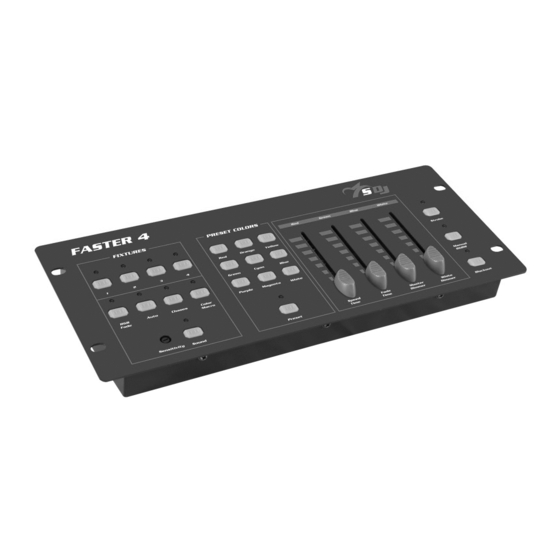
DESCRIZIONE DEI PULSANTI Selezione di 4 proiettori 1 = DMX 001 - 004 Tasti FIXTURE 1-4 2 = DMX 005 - 008 3 = DMX 009 - 012 4 = DMX 013 - 016 Attivano diverse modalità di effetti già preimpostate, Tasti RGB Fade, Auto, Color Macro. - Page 9 In modalità “RGB Fade, Auto, Chases e Color Macro”: Controlla il tempo di Fade tra una memoria e l’altra. In modalità “PRESET COLORS”: Controlla il tempo di Fade tra un Preset color ed un altro. Slider “Green, Fade Time” In modalità “Strobe”: Controlla il tempo di Fade del Master Dimmer.
-
Page 10: Specifiche Tecniche
5. - MANUTENZIONE Per garantire ottime prestazioni, l’apparecchio deve essere pulito frequentemente. Disconnettere l’alimentazione prima di effettuare operazioni di pulizia e manutenzione. Utilizzare un’aspirapolvere o compressore e una spazzola morbida o un panno per rimuovere la polvere depositata. Qualsiasi parte eventualmente danneggiata, deve essere sostituita con ricambi originali. - SPECIFICHE TECNICHE •... - Page 11 1. - INTRODUCTION Thank You for choosing one of Our products! Please refer to the instructions and warnings contained in this user manual, please retain it for future reference. This manual contains information about the installation and use of the device. The information contained in this publication has been carefully prepared and checked.
-
Page 12: Safety Instructions
2. - SAFETY INSTRUCTIONS Caution! This product is not suitable for household use. Please read this manual before installing and applying power to the equipment, follow the safety precautions listed below and observe all warnings in this manual and printed on. Please contact a PROEL distributor for assistance with any questions about how to activate the equipment safely. -
Page 13: Maintenance
MAINTENANCE Before starting any maintenance or cleaning the product, disconnect the power from the mains and disconnect the power cable from the device. Damaged parts, must be replaced with original spare parts. IMPORTANT: damages caused by the disregard of this user manual are not subject to warranty. Keep away from heaters and other heating sources. -
Page 14: Opening And Control
3. - OPENING AND CONTROL Carefully open the package, check the content and make sure that all the parts are present and are in good condition. In cases where some parts are not present or are damaged, immediately contact Your supplier and retain the packaging for verification. WARNING! If the product has been exposed to drastic temperature changes, let the unit turned off until it reaches room temperature because the... - Page 15 The wires must not come into contact with each other, otherwise the fixtures will not work at all, or will not work properly. Only use a stereo shielded cable and 3-pin XLR plugs and connectors, in order to connect the controller with the fixture or one fixture with another.
-
Page 16: Buttons Description
BUTTONS DESCRIPTION SELECT 4 PROJECTOR 1 = DMX 001 - 004 FIXTURE 1-4 buttons 2 = DMX 005 - 008 3 = DMX 009 - 012 4 = DMX 013 - 016 Enable different built-in programs, adjustable with the RGB Fade, Auto, Color Macro buttons sliders 1 –... - Page 17 In “RGB Fade, Auto, Chases e Color Macro” mode: Adjusts the fade time between the built-in memory. In “PRESET COLORS” mode: Adjusts the Fade time between the Preset colors. Slider “Green, Fade Time” In “Strobe” mode: Adjusts the fade time of dimmer. In “Manual RGBW”...
-
Page 18: Technical Specifications
5. - MAINTENANCE To ensure optimal performance, the unit must be frequently cleaned. Unplug the device from the mains. Use a vacuum cleaner or an air compressor and a soft brush to remove the dust deposited. Any damaged part, must be replaced with original spare parts. 6.


Need help?
Do you have a question about the FASTER 4 RGBW and is the answer not in the manual?
Questions and answers