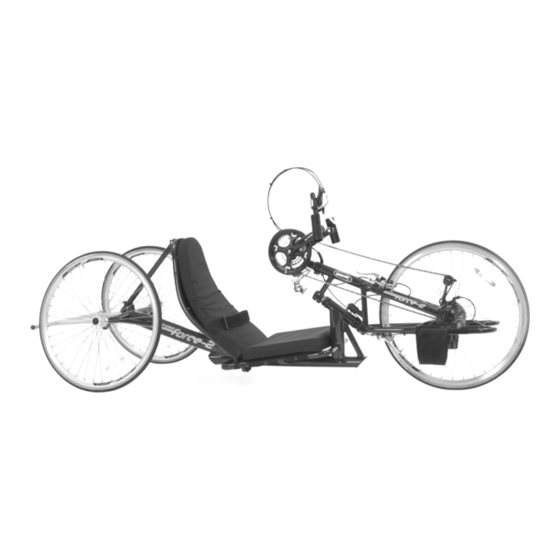
Invacare Top End Force-2 Assembly Instructions Manual
Hide thumbs
Also See for Top End Force-2:
- Specification (2 pages) ,
- User manual (80 pages) ,
- User manual (90 pages)
Advertisement
Quick Links
Advertisement

Summary of Contents for Invacare Top End Force-2
- Page 1 Tools you will need ½” box wrench 10mm box wrench Metric Allen wrench...
- Page 2 What’s in the box? Force-2 Frame assembly...
- Page 3 Hardware...
- Page 4 Fork assembly and 2 rear wheels...
- Page 5 Footrest and strap x 2...
- Page 6 Drafting bumper...
- Page 7 Leg guard and 2 zip-ties...
- Page 8 Chainguard, safety flag and flag holder...
- Page 9 Seat and back cushion 2” foam seat cushion and seat restraint. Back cushion...
- Page 10 Step 1 Tighten camber tube clamps before attaching rear wheels...
- Page 11 Step 2 Insert axle into rear wheel Repeat for other wheel...
- Page 12 Step 3 Secure each rear wheel to frame with 6 mm wrench. Tighten so there is no play or threads showing.
- Page 13 Step 4 Set frame with rear wheels attached on table with cushion to support the front frame as shown below...
- Page 14 Step 5 Attach plate to rubber dampener by threading bolt into dampener.
- Page 15 Step 6 Place fork clamp loosely over lower part of fork.
- Page 16 Step 7 Slide lower half of clamp over lower section of the front of the frame.
- Page 17 Step 8 Place second clamp over the frame and the fork/frame attachment plate.
- Page 18 Step 9-Tighten both clamps Firmly tighten both upper and lower clamps. Make sure they are evenly tightened side-to-side.
- Page 19 Step 10 Loosely tighten dampener bolt to hold fork in place Tighten again after front wheel is aligned see step 11...
- Page 20 Step 11 To center front wheel, with dampener bolt slightly loose, tighten set screws on side of dampener plate. Then tighten dampener screw.
- Page 21 Step 12 Loosen footrest clamp if needed. Slide footrest in to end of fork.
- Page 22 Step 13: Attach footrest strap as pictured below. 4” of hook & loop overlap is required...
- Page 23 Step 14 Place leg guard against frame aligned with hook and loop fastener on bottom of leg guard.
- Page 24 Step 15 Secure with one zip Carefully trim zip tie with scissors...
- Page 25 Step 16 Remove protective backing from sticky back hook and loop fastener on back of the back cushion.
- Page 26 Step 17 Align the back cushion with the back rest Carefully press the back cushion to the back rest so that the sticky back hook and loop fastener is in contact with back rest.
- Page 27 Step 18 Place seat cushion on top of the seat upholstery as pictured left. The hook and loop fastener will secure the cushion to the seat upholstery.
- Page 28 Step 19 The clamp-on chain guard attaches to the crank assembly Remove the bottom clamp with a 5mm allen wrench as shown on left...
- Page 29 Step 20 Place clamp around the bottom bracket and tighten screw on the right side...
- Page 30 Step 21 Tighten clamp assembly on left side Make sure it does not rub on chain...
- Page 31 Step 22 Remove backrest support bar from clamp on frame It is much easier to install the top first. (believe us)
- Page 32 Step 23 Remove bolt, nut and washer Hold curved spacers firmly and insert into space You may need to widen this slightly so it fits.
- Page 33 Step 24 Curved spacers and back support should look like this...
- Page 34 Step 25 Use small wrench to align holes Slide bolt through holes Slide washer onto bolt and thread nut to secure...
- Page 35 Step 26: Tighten the top of backrest support bar to top of backrest using 5mm wrench and 10mm box wrench...
- Page 36 Step 27 Slide backrest support bar through clamp located on frame. Tighten with 5mm allen wrench. Adjust back angle to comfortable position before you ride...
- Page 37 Step 28 Remove left drafting bumper clamp...
- Page 38 Step 29 Slide flag holder over bumper receiver in the place of clamp you just removed Slide drafting bumper into bumper receivers and tighten with 4mm wrench...
- Page 39 Step 30 When finished should look like this Insert flag...
- Page 40 Step 31 VERY IMPORTANT Tighten crank support with a Allen wrench...
- Page 41 Step 32 Adjust footrests to proper length Tighten footrests with 5mm wrench. Make sure it is tight enough to prevent turning.
- Page 42 Step 33 Place caps over outside of rear wheel axles. You are done! Do not ride until you have read the owner’s manual, especially the operating instructions. Call 1-800-532-8677 if you have any questions.


Need help?
Do you have a question about the Top End Force-2 and is the answer not in the manual?
Questions and answers