Table of Contents
Advertisement
Quick Links
Advertisement
Table of Contents

Related Manuals for The Fire Brick D105

Summary of Contents for The Fire Brick D105
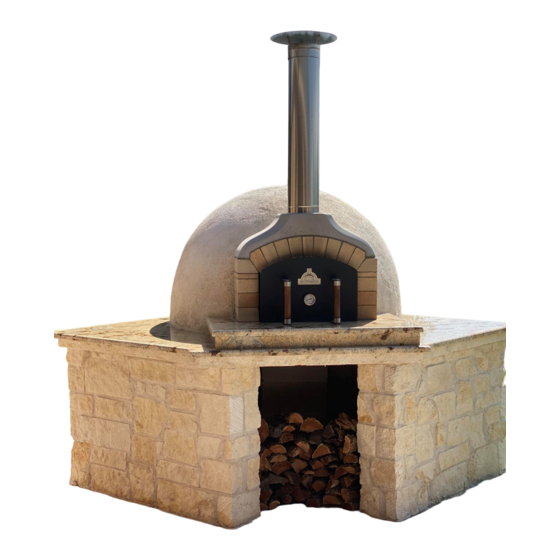
- Page 1 D105 Brick Oven D105 PRECUT BRICK OVEN KIT Instruction Booklet...
- Page 2 Our Wood Fired Brick Oven Kits are as authentic as you can get. With all the fire bricks cut to size, with custom formwork and tooling, building a quality Brick Oven has never been so simple.
-
Page 3: Table Of Contents
Table of Contents CONTENTS INTRODUCTION � � � � � � � � � � � � � � � � � � � � � � � � � � � � � � � � � � � � � � � � � � � � � � � � � � � � � � � � � � 5 BEFORE YOU BEGIN �... - Page 4 You really don’t need to be a skilled bricklayer to put this kit together - we have done all of the difficult work for you. You get the fun part, of putting it all together.
-
Page 5: Introduction
Introduction Introduction Firstly, our congratulations and gratitude for the purchase of your D105 PreCut Brick Oven Kit! We have spent years crafting and perfecting our PreCut Brick Oven Kits, taking suggestions from customers and mentors, to create a product that we are truly proud of. -
Page 6: Before You Begin
Before You Begin Before You Begin COLD CLIMATES - WARNING If you’re building a Wood Fired Oven in a region that experiences ‘freeze-thaw’ conditions, where the frost is so severe that it penetrates deep into the ground, this is something that you need to be aware of when deciding on where and how to build your Wood Fired Oven. -
Page 7: Notes & Updates
Updates Notes & Updates We are on a continuous search for ways to improve our products, so that we’re always giving our customers the very best product that we can. These changes are always small and incremental - tested by us before being rolled out to our customers. -
Page 8: Safety Information
Safety Information Safety Warning A MAJOR CAUSE OF UNINTENDED OVEN-RELATED FIRE IS FAILURE TO MAINTAIN REQUIRED CLEARANCES (AIR SPACES) TO NEARBY COMBUSTIBLE MATERIALS. IT IS OF THE HIGHEST IMPORTANCE THAT THIS OVEN BE INSTALLED ONLY IN ACCORDANCE WITH THESE INSTRUCTIONS. IF THIS OVEN IS NOT PROPERLY INSTALLED, AN UNINTENDED FIRE MAY RESULT. - Page 9 Clearances to Combustible Materials A major cause of oven-related property fire is failure to maintain the required clearances (air spaces) between the oven and combustible materials. When planning the location for your oven, ensure that you maintain clearances to all combustible materials, including but not limited to nearby walls, posts, ceiling structures and vegetation.
- Page 10 Safe Installation Instructions DUST EXPOSURE – RESPIRABLE CRYSTALLINE SILICA Inhalation of airborne dust may cause irritation to the mucous membrane and upper airways. Symptoms can include coughing, sneezing and breathing difficulties. Repeated exposure to respirable silica may result in pulmonary fibrosis (silicosis). Silicosis is a fibronodular lung disease caused by deposition in the lungs of fine respirable particles of crystalline silica.
- Page 11 Safe Usage Instructions WARNING: PLEASE READ ALL OF THE INSTRUCTIONS BEFORE INSTALLING AND USING YOUR WOOD FIRED OVEN� FAILURE TO FOLLOW INSTRUCTIONS MAY RESULT IN FIRE, CARBON MONOXIDE POISONING OR EXPLOSION LEADING TO PROPERTY DAMAGE, BODILY INJURY, OR EVEN DEATH� SAVE THESE INSTRUCTIONS� If your oven is not installed properly, an unintended fire may result.
-
Page 12: Limited Warranty
HOW TO REGISTER A CLAIM AGAINST WARRANTY In order for any claim under this Warranty to be valid, The Fire Brick Company must be notified of the claimed defect in writing or by telephone to The Fire Brick Company, Factory 11/167 Princes Hwy Hallam, Victoria 3803, Australia. Claims against this Warranty in writing... -
Page 13: Layout Drawing
Layout Drawing D105 Layout Drawing 50 mm Perlite Render Insulation 50 mm Ceramic Fibre Insulation 115 mm Fire Brick Dome Wall 7 inch PreCast Flue Gallery 525 mm Internal Dome Height 335 mm 345 mm 50 mm 25 mm 50 mm... - Page 14 All of the bricks come cut and ground to size. We provide you with templates, CNC machined formwork, a trammel tool, fibreglass dome form and much more. Your job is to assemble the kit like a big Lego set.
-
Page 15: What's In The Kit
Refractory Castable is premixed high temperature concrete, which you’ll use to form the sub-floor heat bank under the Fire Brick Floor Tiles, and for pouring the dome keystone. The 6kg bag is extra, just in case. FIRE BRICKS - OVEN DOME All bricks for the Oven Dome are provided, carefully cut to keep the internal gaps on the inside face of the oven to a minimum. - Page 16 Dry Airset Refractory Mortar: 1 x 20kg bag This is the mortar you will use to lay the fire brick tiles that make up the oven floor. Please be aware that you will need to mix the Airset mortar with General Purpose Cement, Hydrated Lime and Washed Sand* in the ratio shown on the bag.
- Page 17 What’s In the Kit ACRYLIC ROLL-ON BASECOAT RENDER 1 x 5L MAC ‘Rustic Roll-On’ Acrylic Render (White Basecoat) This is the membrane coating that you will apply over the outer dome, once the oven has been completely cured and all moisture has been driven out. It gives the dome a good waterproof basecoat which can be rolled over with more roll-on render, or other similar exterior acrylic coating.
-
Page 18: Additional Tools & Materials Required
Addition Tools & Materials Required Additional Tools & Materials Required ADDITIONAL MATERIALS REQUIRED • 3 x 20kg Bags GP (General Purpose) Cement • 1 x 20kg Bag Hydrated Lime • 3 x 20kg Bags Washed Sand • Household aluminium foil •... -
Page 19: Subfloor Insulation
Subfloor Insulation 1. Subfloor Insulation The first step in building your oven is to prevent the heat in the oven floor from being conducted into your concrete slab, and from there into the surrounding air to be lost forever. We use Calcium Silicate (CalSil) board to do this, as it has excellent insulating properties, great compressive strength and is easy to work with. -
Page 20: Castable Heat Bank
2. Castable Heat Bank As the brick dome of the D105 is significantly larger than the D95, we need more thermal mass in the oven floor to balance the increased thermal mass of the dome. To this end you’ll pour a 25mm slab of refractory castable on top of the CalSil Board as an additional heat bank, which you will bed the fire brick tiles onto afterward. -
Page 21: Laying The Floor Tiles
Laying the Floor Tiles 3. Laying the Floor Tiles Fire bricks are very porous and will absorb a significant amount of water, so if you apply wet mortar to a dry fire brick this mortar will dry out and will not develop a good bond. To overcome this, soak your fire bricks in water for at least 10 minutes before you lay them. - Page 22 3. Laying the Floor Tiles Reminder - you need to watch the instructional videos to get a full understanding of the process, please don’t rely on these written instructions alone. Don’t feel like you need to watch them all at once - just watch the section that you’re about to do before you do it, so that it’s fresh in your mind.
-
Page 23: Building The Dome
Building the Dome 4. Building the Dome To lay the fire bricks for the dome and opening of the oven, you’ll use our two-part Refractory Mortar. Remember, fire bricks are very porous, so if you apply wet mortar to a dry fire brick this mortar will dry out immediately, and will not bond well to the brick. - Page 24 4. Building the Dome IDENTIFYING BRICKS FOR THE OVEN DOME There are five different types of brick in your kit for building the oven dome. Our kits are shipped around the world, so we make sure there are more bricks in the kit than you need. You’ll have several left at the end! TYPE 1 TYPE 2 Type 1 Bricks are tapered in only one plane, with a...
- Page 25 4. Building the Dome IDENTIFYING THE ENTRY AND VENT ARCHES The bricks that make up the walls of the Entry and Vent Arch are shown below. Put these aside to avoid damage, as there are no spares for these. The Entry Arch column bricks are marked L1 to L5 and R1 to R5. The Vent Arch Column bricks are not numbered but should be easy to identify if you have seen the video instructions.
- Page 26 4. Building the Dome BUILDING THE DOME You will build the dome one complete layer at a time, including the Vent and Entry Arch columns. You don’t have to complete a full row before you stop for the day, nor do you need to wait between courses. Build the dome at your own pace, taking your time and making sure you’re happy with the placement of each brick.
- Page 27 4. Building the Dome 4E: COURSE 1 Lay Dome Course 1, starting at the left or right of the Entry Arch. You will note a gap of around 6mm between the bottom inside edge of these bricks and the oven floor, this is part of the design. This course is made up entirely of Type 1 bricks.
- Page 28 4. Building the Dome 4H: ENTRY & VENT COLUMN COURSE 4 Lay bricks L4 and R4, followed by the two 25mm thick ‘split’ bricks for the next layer of the vent arch columns. 4I: ENTRY & VENT COLUMN COURSE 5 Lay bricks L5 and R5, followed by the two ‘springer’...
- Page 29 4. Building the Dome 4J: COURSE 4 Lay Dome Course 4, starting at the back in the center. This is made up of Type 1 bricks, and two small ‘stagger’ bricks to keep the vertical joints in the dome brickwork offset as shown. 4K: COURSE 5 Lay Dome Course 5.
- Page 30 4. Building the Dome Allow at least 12 hours for the Entry Arch bricks to set. You can leave the formwork in place for longer, however you will need to remove it before you set up the fibreglass dome formwork. When you’re ready, pull the plastic strips from under the formwork, which will allow you to carefully remove it.
- Page 31 4. Building the Dome 4O: COURSE 8 Lay Dome Course 8. This course is made up of Type 2 bricks, with two large and two small stagger bricks needed as shown. Beyond this row there is no need to stagger the brick joints, we are now laying complete rings of brick and they’re no longer visible from the mouth of the oven.
- Page 32 We prefer to use the Refractory Castable; it sets just as hard and strong as the fire brick, and it makes the perfect keystone because it has complete surface contact with the surrounding ring of bricks.
- Page 33 4. Building the Dome 4T: CLEANING THE MORTAR JOINTS Next you need to ‘point’ the mortar joints on the inside face of the oven, and remove any excess mortar that has bled through onto the fiberglass formwork. To do this, you will need to slide into the oven on your back… Not much fun, but a very important part of the process! Take a small tub of wet mortar mix, several scourers, a sponge, a small bucket of clean water and a small metal paint scraper in with you.
- Page 34 4. Building the Dome 4U: LAYING THE VENT ARCH You have reached the last step in your brickwork! Time to lay the Vent Arch – position the #2 Formwork at the very front of the oven, in line with the front edge of the two vertical columns. Remember to use the plastic strips which will help with removing the formwork after the arch has been laid.
-
Page 35: Installing The Flue Gallery
Installing the Flue Gallery 5. Installing the Flue Gallery Now, it’s time to install the PreCast Flue Gallery. This is a job for two, due to the weight. Take your time and get this right, it’s hard to remove and do again. We recommend doing a dry run first. 5A: Wet the upper surfaces of the Vent Arch and Entry Arch bricks where the PreCast Flue Gallery is going to land. -
Page 36: Insulating The Dome
Insulating the Dome 6. Insulating the Dome You’ll now wrap the Oven Dome in Ceramic Fibre Blanket, which is the insulation material to prevent heat escaping from your brick dome. We provide you with green ‘Vet Exam’ gloves to protect your arms from the itchy fibres, also remember to wear the appropriate safety equipment. - Page 37 6. Insulating the Dome 6D: TIE WIRE Use the 125mm nails, hammering them into the CalSil board around the perimeter, 25mm above the base at roughly 300mm spacing. Leave about 20mm hanging out, as a fixing point for your tie wire. Use the heads of the nails as tie points to lash the blanket down against your dome using the tie wire provided.
-
Page 38: Oven Landing & Surrounds
Oven Landing & Surrounds 7. Oven Landing and Surrounds Before you render the dome, finish the top of your concrete slab with tiles or stone, and seal off the exposed CalSil board at the sides and front of the Vent area using either our Stainless Steel Wrap, or an Oven Landing. If you do this now, it will be much easier to cut the tiles to fit as they don’t have to be cut very accurately. -
Page 39: Perlite Render
Perlite Render 8. Perlite Render To render over the Ceramic Fibre Blanket you’ll be using LiteFill Perlite – this is a lightweight aggregate that you’l use to make an insulating render mixture. The Perlite render layer serves two purposes – it forms a thick, hard shell over the insulation blanket, and it provides additional insulation to your oven dome. -
Page 40: Installing The Standard Flue
Installing the Standard Flue 9. Installing the Standard Flue If you’ve built your oven outdoors and the flue will be well clear of any combustible materials as per the diagram on page 9, you can install the standard flue for the oven following the steps detailed below. 9A: INSTALL THE FLUE Place the flue cowling (hat) on the plain end of the flue pipe, this is meant to be a snug, tight fit. -
Page 41: Flue Installation Tips
Flue Installation Tips Flue Installation Tips EXTENDING THE FLUE It’s very common to need to make your flue higher, and there’s no problem with that, in fact it will make the flue draw even better! Something to consider is how you will support the extra lengths. -
Page 42: Curing The Oven
Curing the Oven 9. Curing the Oven CURING THE OVEN Regardless of the weather conditions during your build, when you are finished your oven will still be holding water. Each brick was soaked before being laid, so your oven will be holding water in the walls, floor and CalSil board. -
Page 43: Painting
Painting 10. Painting PAINTING THE FLUE GALLERY The PreCast Flue Gallery comes in the kit in a plain cast finish, which is a light grey colour. You can leave it in this finish if you want a more natural look, or coat it with high temp paint which sets it off against the bricks. Make sure the oven is fully cured before you paint the flue gallery, to avoid blistering when the oven is fired. - Page 44 Examples...
- Page 45 Examples...
- Page 46 From the whole team at The Fire Brick Company, thank you for choosing us. You’re not only a customer, you’re now a part of The Fire Brick Co. family and we’re here to support your wood fired endeavours in whatever way we can. We have a number of videos and other resources to help you with using your oven, now that you have it built, and will be adding to them on a regular basis.
- Page 47 Contact THE FIRE BRICK CO. Ph: (03) 9703 1758 Email: sales@melbournefire bricks.com.au www.melbournefire bricks.com.au...
Need help?
Do you have a question about the D105 and is the answer not in the manual?
Questions and answers