Table of Contents
Advertisement
Quick Links
Advertisement
Table of Contents

Subscribe to Our Youtube Channel
Related Manuals for TiTLEY Scientific CHORUS


Summary of Contents for TiTLEY Scientific CHORUS
- Page 1 CHORUS User Manual Version 1.0...
- Page 2 This manual was written by Julie Broken-Brow & Dean Thompson. We greatly appreciate the time, comments and assistance given by those people who were beta testers for the Chorus and this manual. The testing and troubleshooting have improved the new recorder and increased the clarity of the manual.
-
Page 3: Table Of Contents
CONTENTS GETTING STARTED ..............................6 FEATURES OF THE CHORUS ..........................6 GETTING TO KNOW THE CHORUS ........................6 EXTERNAL FEATURES ............................. 7 INTERNAL FEATURES ............................8 DASHBOARD ..............................8 MICROPHONES ..............................9 POWER REQUIREMENTS ..........................10 DATA STORAGE REQUIREMENTS ......................... 12 USB CONNECTION ............................ - Page 4 Time Format ..............................26 Check Sunset/Sunrise Times ........................27 RESET SETTINGS ..............................27 RECORDER STATUS/INFO ............................ 27 TESTING YOUR CHORUS ............................28 FLASHING STATUS ICONS OR CHECK LED ....................29 PASSIVE DEPLOYMENT CONSIDERATIONS ....................32 WEATHERPROOFING ............................32 MOUNTING & PLACEMENT ..........................33...
- Page 5 DOWNLOADING DATA ............................35 HOW TO DOWNLOAD FROM AN SD CARD ....................35 FILE NAMES ................................. 35 DIAGNOSTIC LOG FILES ..........................36 SOFTWARE ................................36 CREATING SCHEDULES ............................ 36 CHECKING SCHEDULES ........................... 42 METADATA ................................43 TROUBLESHOOTING & FAQS ..........................43 How do I set up the detector for ultrasonic bat re cording? ............
-
Page 6: Getting Started
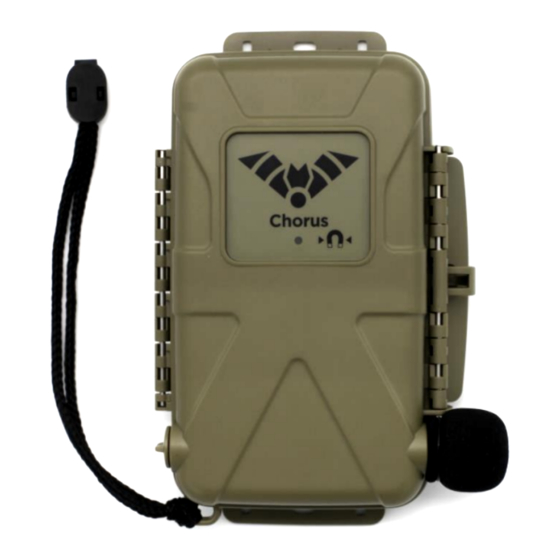
Headphone output to check microphone performance GETTING TO KNOW THE CHORUS The outside of your Chorus case has a lockable latch, multiple mounting points (including a tripod mount), two microphone sockets, a check LED and lanyard with a magnet. Inside the Chorus case is the control panel, battery compartment, SD slot, headphone jack and basic instructions on use. -
Page 7: External Features
EXTERNAL FEATURES... -
Page 8: Internal Features
SD card, GPS, microphone(s), and the clock. You can use the left and right arrow buttons on the f ront of the Chorus to select one of the icons, then press K button to see more information and settings. -
Page 9: Microphones
Both microphone types can be used with our flexible-gooseneck microphone extender accessory. The Chorus has two channels, so you can customise your microphone setup to record in mono acoustic, mono ultrasonic, dual acoustic and ultrasonic (not simultaneously), or stereo... -
Page 10: Power Requirements
(they just need to be louder or closer to the microphone). POWER REQUIREMENTS The Chorus is powered by 4 AA batteries. The Low Power Symbol will appear at the top of the dashboard when the battery voltage is low. The recorder switches itself off when battery voltage becomes too low. - Page 11 removed from the battery holder immediately after use otherwise the batteries will slowly discharge and may leak, damaging the recorder and voiding warranty. AA batteries can be alkaline, NiMh rechargeable, or lithium (1.5V). Make sure all batteries are fresh and of the same type. Mixing old & new batteries or different types of batteries can cause erratic detector behaviour and also cause batteries to leak.
-
Page 12: Data Storage Requirements
Please note: In all modes except Schedule mode, when there is an SD card present, the Chorus will periodically display the remaining recording time for your SD card in the top-left of the display, based on the currently chosen sample rate. -
Page 13: Usb Connection
USB CONNECTION The Chorus can be used with a micro-USB cable (not supplied) for connection to your computer. You can use this cable to upgrade the firmware using Anabat Insight (see Software). Firmware updates can also be performed using the SD card . See Update Firmware for more information. - Page 14 Ultrasonic mic Acoustic mic only Acoustic mic Align jack and locking tabs Turn 1/8 turn to stop 2. Insert an SD card with sufficient memory for your recording period and fresh batteries. Ensure the SD card is unlocked and correctly orientated as per the diagram on the control panel when inserting.
- Page 15 You can use the magnet to check the recorder is functional after final deployment (see Testing Your Chorus). Do not deploy the chorus if the check led is flashing, recording may not occur. 9. Retrieve your recorder. After the deployment is complete, observe the following precautions when retrieving the recorder: If it is wet, dry the unit off before opening it to avoid water entering the unit.
-
Page 16: Turning The Recorder On/Off & Sleep
Sleep UPDATING FIRMWARE It is important to keep the firmware on the Chorus up to date to ensure trouble -free operation. The Chorus firmware is updated by using an SD card with the update copied onto it. It is highly recommended that you subscribe to receive email alerts of new Chorus firmware updates using this website: http://eepurl.com/czjGxD. -
Page 17: Recording Modes
2. Insert the SD card and fresh batteries into your Chorus then turn it on. After a few moments a message will appear: Update available. Select (left soft key) to start the update. Do not remove the batteries or power off the recorder while the update is being installed. -
Page 18: Day-Only Recording Mode
No GPS fix is required for this mode, but the Chorus will still at tempt a fix to geotag recordings and ensuring the clock is accurate. -
Page 19: Recording Settings
192ksps. Ultrasonic zero crossing sampling is also available. Please note: The Chorus comes with an acoustic microphone, however to record ultrasonically, you will need to purchase the Omnidirectional Ultrasonic Microphone . Different recording options will be available depending on whether you select an ultrasonic or acoustic sample rate. -
Page 20: Select The Microphone
• While recording, the selected file type will be indicated by an icon above the corresponding microphone VU meter on the dashboard: (ultrasonic WAV), (acoustic WAV), and/or (ultrasonic ZC). SELECT THE MICROPHONE The options available for the microphone change depending on the Sample Rate selected. Acoustic sample rates let you choose between: •... -
Page 21: Ultrasonic Recording Settings
Constant, or Trigger. If you choose Constant, your Chorus is always recording whenever it is active. If you choose Trigger, then your Chorus is waiting for certain sounds before it will record to the card (see Trigger Settings listed below: sensitivity, minimum & maximum frequency etc.). -
Page 22: Minimum Frequency
the sensitivity. Use the up/down arrow buttons to select Sensitivity and then use the left/ right arrow buttons to choose the sensitivity that you want . Default is 16, and is suitable for most purposes. Minimum Frequency This is the minimum frequency that will trigger a recording. Any sound below this will not trigger a recording, but may be recorded after a trigger occurs. -
Page 23: Maximum File Time
Maximum File Time The maximum file time represents the maximum length of a file and can be up to 1 hour. When a recording is triggered, the recorder will record files up to the specified length in time before starting a new file. Typically, a file length of 10 seconds is used for ultrasonic recording and 1 hour is used for acoustic recording. -
Page 24: Gps Settings
GPS SETTINGS The Chorus attempts a GPS fix once the recorder is turned on, and whenever it is in the GPS Settings menu. If left on/sleeping, it will attempt a GPS fix every 24 hours. When the recorder is attempting a fix, it will try for up to 10 minutes. If it is unable to acquire a GPS fix, it will use the last known location. -
Page 25: Check Location
CHECK LOCATION To check the GPS information for your location, use the left/right arrows to navigate to the GPS Settings and press the K button. The following information will be displayed (use the up/down arrows to navigate the menu): • GPS location;... -
Page 26: Other Settings
OTHER SETTINGS FILENAME PREFIX You are able to choose between using the recorder serial number or the recording type as a filename prefix, or have no prefix. The recording type refers to whether the files are ultrasonic and is dependent on your sample rate. You can choose the prefix in the Recording Settings menu or in the SD Card menu. -
Page 27: Check Sunset/Sunrise Times
Check Sunset/Sunrise Times Use the down arrows to scroll below Reset to Defaults, the sunset and sunrise times will be displayed for your location (see below). Sunset Sunrise RESET SETTINGS You can reset settings to factory defaults for microphone settings and clock schedule settings, to do this, use the left/right arrows to navigate to either the Recording Settings or the Clock Settings menu, then press the K button to select. -
Page 28: Testing Your Chorus
TESTING YOUR CHORUS There are a number of ways to test the recorder. 1. To test the microphone/s before deployment, open the case, wake the recorder and rub/click your fingers in front of the microphone; the VU Meter (on the side of the screen relative to the microphone) will move up/down to confirm that an audio signal is being detected. -
Page 29: Flashing Status Icons Or Check Led
Chorus logo facing skywards then enter the GPS Settings menu to reactivate the GPS. It may take several minutes to secure a fix. If the Chorus cannot secure a new fix, it will revert to the last known location . - Page 30 Microphone This indicates an issue with your microphone/s. • Check Mics: There is no microphone attached for the recording type selected. Resolve by connecting either an acoustic or ultrasonic microphone , or change the Recording Settings to match the microphone attached. Points to note when connecting the microphone Check Microphone...
- Page 31 Other Batteries Low: The batteries are below 4.5V, replace the batteries before starting recording. Clock Battery Low: The CR2032 Coin Cell battery has dropped below 2.6V, replace the clock battery. Leave AA batteries installed while changing the clock battery to avoid loss of your settings.
-
Page 32: Passive Deployment Considerations
PASSIVE DEPLOYMENT CONSIDERATIONS WEATHERPROOFING The Chorus is designed as a weatherproof recorder, which means the recorder can be left in the field during rain, sunshine and snow without any additional weatherproofing. However , if the device is left in the rain, please consider the following advice: 1. -
Page 33: Mounting & Placement
The Chorus case is designed so that the device can be padlocked closed. A lockable metal security box is also available for purchase from Titley Scientific. - Page 34 COLLECTING YOUR RECORDER Best practice is to take the recorder to a clean, dry place out of the weather. Then dry it off as best as possible if it is wet. If the unit is taken inside, there could be a large temperature difference, let it equilibrate to room temperature before opening the case.
-
Page 35: Downloading Data
2. Insert the SD card into your computer (if it has a SD card slot) or into an external SD card reader (available from Titley Scientific). 3. Open the SD card folder in Windows Explorer. 4. Copy/cut the files from the SD card folder into the desired folder/storage device. Make sure to include the log file with the recording files. -
Page 36: Diagnostic Log Files
CREATING SCHEDULES In Anabat Insight, you can create a custom schedule for your Chorus as follows: 1. Open Anabat Insight. Go to Devices > Chorus Scheduler Tool. This will bring up the Schedule Manager. 2. Click the + button to create a new schedule task, give it a name and choose a task colour. - Page 37 3. This task will be shown in the schedule manager, and you can edit the task on the right. The calendar and daily schedule will display what tasks are running and when (see below). The sunset and sunrise times displayed below the calendar are based on your computer location if you are connected to the internet.
- Page 38 Zero Crossing (requires an ultrasonic microphone). Please note: Once you have created your schedule, ensure you have connected the appropriate microphone/s to the correct sides of the Chorus. b. Choose the settings appropriate to your microphone and survey goals. Task Settings...
- Page 39 10kHz HP Filter Enable or disable the 10kHz High Pass Filter Optional metadata fields: Metadata Key You can add a custom metadata key to be added to every file recorded in this schedule task (e.g. Survey Type) Metadata Value - You can add a custom metadata value to be added under the Metadata Key (specified above) to every file recorded in this sched ule task (e.g.
- Page 40 Please note: schedule.csv be recognized by the Chorus as a schedule. 10. You can copy this schedule onto multiple SD cards to use on Example schedules are shown on the following pages. Example 1: The above schedule will record daily from 8 22 October, from 1hr before sunset to 2hrs after sunset, in ultrasonic full spectrum, default settings.
- Page 41 Example 2: The above schedule will record daily from 8 22 October, from 90mins before sunrise to 90mins after sunrise, in acoustic stereo, default se ttings. Every file recorded will include the metadata Bird Survey: Dawn. Example 3: The above schedule will record Monday, Wednesday, Friday and Sunday nights from 8 October for 1 month, from 2hrs after sunset to 90 mins before sunrise, in ultrasonic zero crossing (sensitivity 17;...
-
Page 42: Checking Schedules
(gain +6dB). Every file recorded will include the metadata Bird Survey: Midday Calls. CHECKING SCHEDULES Once you have schedules saved to the SD card, you can check them on the Chorus. To check the schedule: 1. Insert the SD card with the schedule.csv saved on it. -
Page 43: Metadata
METADATA All metadata recorded on the Chorus is saved to files in the GUANO (Grand Unified Acoustic Notation Ontology) format. This format is now the standard across bat acoustic fields. For recordings from a Chorus, it includes the following: •... -
Page 44: How Do I Set Up The Recorder For Acoustic (Audible Sound) Recording
How do I set up the recorder for acoustic (audible sound) recording? If you are using the Chorus with an acoustic microphone/s to record audible frequencies (e.g. birds, frogs, other vocalising wildlife), you will need to ch eck the following settings: 1. - Page 45 & right. This gives the recordings a sense of a spatial soundscape when played back, or you can set different microp hone gain for the left & right channels to capture both loud and soft sounds without distortion. The Chorus is capable of recording stereo acoustic files.
- Page 46 How far away can a bat be detected usi ng the Chorus? Detection distances will vary with frequency and loudness (amplitude) of the bat calls, atmospheric attenuation, and the directional characteristics and sensitivity of the bat recorder.
- Page 47 Can I use the Chorus as an active recorder? While the Chorus is designed as a passive recorder, it can be used as an active recorder by connecting your headphones. You can also use the built-in GPS to log your track using the...
-
Page 48: Further Information
Can I power the recorder using solar panels or external battery? No, the Chorus cannot be powered externally. FURTHER INFORMATION For further information please visit the Titley Scientific website: www.titley-scientific.com...
Need help?
Do you have a question about the CHORUS and is the answer not in the manual?
Questions and answers