
Subscribe to Our Youtube Channel
Related Manuals for SEABOB RAVEJET


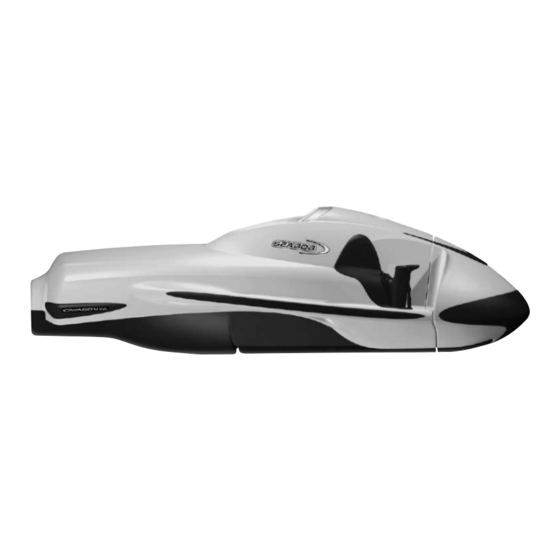
Summary of Contents for SEABOB RAVEJET
- Page 1 Operation Manual SEABOB RAVEJET SEABOB JET 4.12 SEABOB CAYAGO VX2 SEABOB CAYAGO F7...
- Page 3 – before operating the SEABOB. So get ready to dive into a fascinating new world! We wish you many hours of fun with your SEABOB! The following symbols are used in this Operation Manual to bring your attention to important information: Caution! Danger of injury and / or death.
-
Page 4: Table Of Contents
2.2 Diving ................................22 3. Included in delivery ..........................23 4. Description of the device ........................24 4.1 SEABOB housing (SEABOB RAVEJET and SEABOB JET 4.12 models) ..............24 4.2 SEABOB ACS housing (SEABOB CAYAGO VX2 and SEABOB CAYAGO F7 models) ........25 4.3 Accumulator box ACS (ACS = Accumulator Change System) - Page 5 9. Disposal ..............................75 10. Replacement parts ..........................76 11. Accessories ............................77 12. Service ..............................78 13. Imprint ..............................79 These chapters only relate to the SEABOB CAYAGO VX2 and SEABOB CAYAGO F7 models with Accumulator Change System (ACS).
-
Page 6: Safety Information
/ or other persons. In addition, the SEABOB and other property of the operator or other persons may be damaged or destroyed. -
Page 7: Special Safety Information
1.1 Special safety information Please pay particular attention to the very important safety information below! This information is also provided on safety labels that are directly attached to the SEABOB, accumulator box and charger for easy reference: Special safety information on the SEABOB •... - Page 8 • Heats up during charging process! Allow to cool before handling! Never expose the SEABOB, accumulator box and charger to high temperatures (max. 60 °C / 140 °F) caused e.g. by open fire, direct sunlight or by storage inside a closed motor vehicle or boot. If exposed to heat, flaming gases can be discharged through the accumulator cells‘...
-
Page 9: General Safety Information
• Use the SEABOB only if you are completely healthy. Diving even if you only have a light head cold may cause problems when you try to equalise the pressure in your ears. - Page 10 • Moor the SEABOB safely if you decide leave it in the water for a short time. En- sure that the SEABOB cannot become unattached, injure others or obstruct their path.
- Page 11 Never open the sealing cap on the accumu- lator box charging socket while the SEABOB is in the water. Wet and / or dirty plug connections may cause a short circuit while the accumulator box is being charged or even before this process is begun.
- Page 12 Always check the weather forecast before you set out, and pay close attention to local weather conditions. • Do not use the SEABOB in a heavy swell (significant wave heights up to 0.3 m maximum and occasional waves of 0.5 m maximum height). The SEABOB may seriously injure you or other persons.
- Page 13 SEABOB may also approach quickly or appear suddenly. Keep an eye on what is happening farther up ahead. Beware of collisions! • The SEABOB is not equipped with lights and, for this reason, is not suitable for operation at night. Do not operate the craft after sunset or before sunrise. Doing so can lead to collisions with other watercraft or obstacles.
-
Page 14: Safety Information For Diving To A Depth Of Up To 2.5 M
• Only skilled and experienced swimmers should be allowed to use the SEABOB for diving to a depth of up to 2.5 m. • Only use the SEABOB for diving if you are completely healthy. Consult a doctor if you are in doubt. -
Page 15: Safety Information For Diving To A Depth Of More Than 2.5 M
• Only divers with a valid diving licence or accompanied by a certified diving in- structor are allowed to use SEABOB for diving to a depth of more than 2.5 m. • Only use the SEABOB for diving if you are completely healthy. Consult a doctor if you are in doubt. - Page 16 • You must always ensure that you are able to resurface and return to the shore or boat by yourself without the assistance of the SEABOB. • Regardless of whether you are using the SEABOB while scuba diving, you should always adhere to the recommended descent and ascent rates and maximum div- ing duration in line with applicable diving association guidelines.
-
Page 17: Safety Information Concerning The Accumulator Box
In addition to the special safety information on the accumulator box given in Chapter 1.1, be sure to ob- serve the following safety information: • Never expose the SEABOB or accumulator box to high temperatures (max. 60 °C / 140 °F) caused e.g. by open fire, direct sunlight or by storage inside a closed mo- tor vehicle or boot. - Page 18 • Before transporting the device, in particular before transporting by aircraft, be sure to read the safety information on the transport of the Lithium-Ion accumu- lator cells used in the accumulator box of the SEABOB (see Chapter 5.13 "Air transport / transport of the SEABOB and accumulator box ACS").
-
Page 19: Safety Information Concerning The Seabob Cayago F7 Model
1.6 Safety information concerning the SEABOB CAYAGO F7 model • In order to fully utilise the performance potential of the SEABOB CAYAGO F7, the use of the optionally available pilot belt system is recommended. This ensures comfortable driving, even at high power. Before using the pilot belt system, it is important that you read the "Information Sheet for Pilot Belt System". -
Page 20: Proper Use
The craft is intended for • Minors 16 and over may only operate the SEABOB use in water that is at least 1 m deep. The SEABOB is under the supervision and responsibility of an adult. - Page 21 Operation out of the water can cause • Take your time to learn how to use the SEABOB prop- overheating due to the lack of water to cool the de- erly.
-
Page 22: Diving
• Only divers with a diving licence or accompanied by a certified diving instructor should be allowed to use SEABOB for diving to a depth of more than 2.5 m. • The maximum diving depth (depth limit) of all SEA- BOB models is factory set to 2.5 m. -
Page 23: Included In Delivery
Also, please check that the serial numbers on the SEA- delivery of the SEABOB: BOB and accumulator box match the numbers shown on 1. SEABOB RAVEJET and SEABOB JET 4.12 models with your SEABOB certificate. To view the serial numbers, use integrated accumulator box the menu provided on the display (see Chapter 5.4.11... -
Page 24: Description Of The Device
4. Description of the device 4.1 SEABOB housing (SEABOB RAVEJET and SEABOB JET 4.12 models) Note: On SEABOB RAVEJET and SEABOB JET 4.12 models, the accumulator box is attached permanently to the SEABOB housing and cannot be changed. 1. SEABOB housing 2. -
Page 25: Seabob Acs Housing (Seabob Cayago Vx2 And Seabob Cayago F7 Models)
4.2 SEABOB ACS housing (SEABOB CAYAGO VX2 and SEABOB CAYAGO F7 models) Note: On the SEABOB CAYAGO VX2 and SEABOB CAYAGO F7 models with Accumulator Change System (ACS) the accumulator box ACS can be detached from the SEABOB housing and changed. -
Page 26: Accumulator Box Acs (Acs = Accumulator Change System)
4.3 Accumulator box ACS (ACS = Accumulator Change System) 1. Accumulator box ACS 2. SEABOB bow 3. Front bumper 4. Attachment bolts 5. High-current contact plate (connecting plate) 6. Quick locking system 7. Sealing frame 8. Charging socket 9. Sealing cap 4.4 Right Controlgrip... -
Page 27: Left Controlgrip
4.5 Left Controlgrip 1. Red button 2. Blue button 4.6 Drive unit 1. Protective lamellas (front) 2. Electronics box 3. Motor 4. Impeller wheel with impeller blades 5. Stator 6. Protective lamellas (back) -
Page 28: Operation
System) can be charged separately or after it has al- The accumulator box is delivered in a partially ready been attached to the SEABOB. The LED display on charged state. To avoid total discharge of the ac- the charger shows the activity of the charger. The exact cumulator box, you should charge the accumulator box charge state is shown on the SEABOB display. - Page 29 5. Ensure that the charging plug of the charger is po- lows: sitioned correctly (the red dot on the charging plug should be pointing to the bow of the SEABOB) before 1. Place the SEABOB and accumulator box on a sturdy plugging it into the charging socket of the accumula- and dry surface that will not damage the compo- tor box.
- Page 30 Differences of the accumulator box is shown by the accumulator between the cells are compensated for and balanced symbol on the right side of the SEABOB display. As the (Cell-Balance). charge state increases, more bars appear in the ac- Charge an accumulator box which is discharged / cumulator symbol.
- Page 31 To cool off the accumulator box ACS more quickly, at- twisting or pulling on the charging cable. Always tach it correctly to the SEABOB and place the SEABOB hold on to the locking ring of the charging plug (see together with the installed accumulator box properly...
-
Page 32: Installing The Accumulator Box Acs (Accumulator Change System)
When connecting the accumulator For this reason, you should always check to make sure box and SEABOB housing, blades of grass may get in that the charging socket and charging plug are perfectly between the sealing surfaces, reducing the effectiveness clean and dry before plugging the charging plug into the of the seal. - Page 33 SEABOB ACS on accumulator box ACS the effectiveness of the seal. Ensure that the seals on the SEABOB and the sealing frame on the accumulator box ACS are clean, free of scratches and scoring and undamaged. Check this ad- ditionally if necessary by taking your finger (your finger...
- Page 34 SEABOB has been inserted into the sealing frame of the accumulator box. When there is about one centimetre left to go, press the accumulator box and the SEABOB firmly together to overcome the light pressure that has built up within the seal system. If you have difficulty pushing the components together,...
-
Page 35: Operating The Seabob
5.4 Operating the SEABOB 5.4.1 Controls and display panel Never run the motor out of the water for longer 1. Green button = plus button than approx. 10 seconds. The seals of the motor 2. Red button = minus button and the hard-coated motor shaft are designed exclu- 3. -
Page 36: Arrangement Of The Controls
Regardless of how long or hard you press the buttons, they always react by emitting a single short pulse. A pulse may also be emitted if the SEABOB falls hard to the ground or is struck hard by another object, if the SEABOB is hit hard or the buttons are inadvertently touched. -
Page 37: Display (Operation Display)
> "0:00"). bol and temperature display flashing) ➞ Power is lim- ited to 30 % Stop symbol • SEABOB not ready for operation • Accumulator discharged ➞ Charge accumulator box! • When timer has been activated: operating time elapsed •... -
Page 38: Off Mode (Air Transport / Storage) - Switching On / Off
For safety rea- • Power can be changed by tapping the sons, the SEABOB cannot be switched back on when it is green button (+10 %) or red button in Off mode by tapping the device‘s buttons. It can only (-10 %). -
Page 39: Sleep Mode - Switching On / Off
1. Tap the blue button. transport, you will have to perform a discharge by run- ning the accumulator box to empty in a controlled fash- 2. The display is switched on, and the SEABOB logo ap- ion as described in Chapter 5.13. pears. -
Page 40: Stand-By Mode
5.4.7 Stand-by mode Manual switching off to Sleep mode: You can also switch the SEABOB to Sleep mode manually. In this mode, the display and control panel are active and To do so, proceed as follows: ready for a command from the user. The display illumina- 1. -
Page 41: On Mode
Charge mode using a connected and active charger. Note: If the charger is disconnected from the device, thereby interrupting the charging voltage, the SEABOB switches off after 1 minute (system check) and switches to Off mode (if programmed to partial charging) or to... -
Page 42: Charge Display
"0:00", the accumulator box is and then to a power source, the system / accumulator fully charged and the SEABOB is ready for operation. box first performs a system check and then automatically 7. If, when programmed to partial charging, the charger switches to Charge mode. -
Page 43: Displaying Serial Numbers
SEABOB serial number Accumulator box serial number User-PIN: 1. The SEABOB is in Sleep mode. The display is switched off. This PIN (Personal Identification Number) of the user is used to switch on the device (if PIN prompt has been 2. -
Page 44: Settings
Note: If you do not want to limit the operating time, leave the Timer deactivated (setting: operating time = "0:00"). If the Timer has been activated, the SEABOB switches to the greatly reduced emergency mode imme- diately after the operating time has elapsed, regardless of the remaining accumulator charge state. -
Page 45: Operation
5.4.14 Operation 5.4.15 IrDA (infrared interface) 1. Switch on the SEABOB. The operation display appears The system uses a built-in IrDA interface to communicate in the display. with another IrDA device (such as a notebook or PDA). The built-in IrDA transceiver is located in the centre, di- 2. -
Page 46: Before Starting
Switch on the SEABOB. SEABOB in the water and take it out (in particular, in We recommend that you switch on the SEABOB and per- waves). Ensure that no one is under the SEABOB. Danger... -
Page 47: Operation On The Water Surface
• The water must be at least 1 m deep. Operating the craft in water that is less than 1 m deep may cause injury to you or damage to the SEABOB as a result of hitting underwater objects (particularly if there are rocky bottoms, reefs and stones). - Page 48 SEABOB sharply to the side and straightening up without letting go of the craft. This Green helps you to maintain control of the SEABOB and in- button button creases the water resistance considerably, so that you can come to a complete stop as quickly as possible.
-
Page 49: Accumulator Box Charge State And Emergency Reserve
5.6.2 Accumulator charge state and Always take into account the limited power of the craft when timing your return to the shore emergency reserve or boat. Always keep an eye on the charge state of the accumulator box. Always take into account the amount of time required to return to your starting point. -
Page 50: Diving To A Depth Of Up To 2.5 M
• Only skilled and experienced swimmers are allowed to goes down into the water. The speed of the SEABOB use the SEABOB for diving to a depth of up to 2.5 m. allows the craft to overcome its own buoyancy and •... -
Page 51: Diving To A Depth Of More Than 2.5 M
SEABOB for diving to a depth of more than 2.5 m. 2.5 m with the purpose of diving to a greater program- •... -
Page 52: Adjusting The Buoyancy Of The Seabob
(the buoyancy changes with the salt content of the wa- ter). The buoyancy of the SEABOB can be adjusted using optionally available weights. The benefit of the SEABOB‘s buoyancy: when the SEABOB is switched off and not fitted with additional weights, it... -
Page 53: After Use
3. Do not leave the SEABOB in the sun if it is not be- ing used. Without water to cool the device, the di- rect sunlight can heat the display to temperatures of around 70 °C / 158 °F. -
Page 54: Switching Off The Seabob To Sleep Mode
ACS can be detached from the SEABOB and will automatically switch off to Sleep mode. changed. 1. Place the SEABOB ACS and accumulator box ACS on a Automatic switch-off (Time-off): dry and sturdy surface that will not damage the com- If the user does not activate a button or the Powergrip ponents. -
Page 55: Storing The Seabob And Accumulator Box Acs
ACS Doing this will push the SEABOB away from the ac- If you do not plan to use the SEABOB / accumulator box cumulator box. ACS for an extended period, the accumulator box must be Caution! Beware of possible sharp edges on the stored at least in a partial charge state (charge state "air... - Page 56 8. Store the SEABOB and accumulator box ACS sepa- charger and accumulator management system. rately from the SEABOB ACS on a stable, level sur- face in a place that is cool, dry, well ventilated and Never expose the SEABOB, the accumulator box frostproof.
-
Page 57: Air Transport / Transport Of The Seabob And Accumulator Box Acs
flashing), you will have to reduce 1. Place the SEABOB and accumulator box on a dry and the excessive charge state for partial charging by running sturdy surface that will not damage the components. -
Page 58: Switching Off The Seabob For Storage Or Transport
SEABOB and accumulator box ACS" and Chapter switches to Off mode after 1 minute (system check). The 5.13 "Air transport / transport of the SEABOB and ac- SEABOB can only be switched back on from Off mode cumulator box ACS". -
Page 59: Care
SEABOB and accumulator box if not carried out by an authorised technician. 2. Clean the SEABOB using a soft, clean cloth. If neces- sary, you can also use a mild cleaning agent designed Never alter or modify any part of the SEABOB, ac- for plastic surfaces that will not damage the finish. -
Page 60: Changing The Seals
ACS charging socket and charging plug as well as damage and SEABOB housing by blowing them out or using to the accumulator box, the motor and the motor‘s elec- a soft cloth. In particular, look for any sand or dried tronic system on models with the Accumulator Change salt deposits that may be present (see above). - Page 61 (quad ring and spacer O-ring) and the sealing surface of the sealing frame on the accumulator box ACS with Klüber Kontasynth BA 100 special lubricant. 4. Reattach the accumulator box ACS to the SEABOB housing as described in Chapter 5.3 "Installing the accumulator box ACS".
-
Page 62: Troubleshooting
7. Troubleshooting 7.1 SEABOB cannot be switched on If you cannot switch on the SEABOB, either the accumu- Repairs and maintenance work on the SEABOB lator box is completely discharged / run to empty or the and accumulator box that go beyond the proce- SEABOB has been switched off for air transport / storage. -
Page 63: Accumulator Box Emits An Acoustic Signal
7.3 Motor does not run signal • Check the charge state of the accumulator box by checking to see if the SEABOB display functions. The Acoustic signal (beeping sound): accumulator box is discharged / run to empty when A beeping sound is the final acoustic warning that is the voltage per Li-Ion accumulator cell is 2.7 V. -
Page 64: Impeller Does Not Turn (No Thrust)
SEABOB and damaged or jammed the im- peller or stator. If this is the case, proceed as follows: 1. Switch off the SEABOB, take it out of the water and place it on a dry and sturdy surface that will not dam- age any components. -
Page 65: Stator / Impeller Blades Are Bent Or Broken (Low Thrust Or No Thrust At All)
Note: Removing the protective lamellas would not en- hance the thrust of the craft. 8. Turn the SEABOB back over, and check all components once again to ensure that they are seated properly and securely. - Page 67 8. Apply a small amount of Klüber Staburags NBU 30 The protective lamellas are attached to the SEA- PTM lubricating grease to the threads of the five M5 BOB housing and should never be removed. Be- x 16 attachment screws. Insert the impeller disc. Use fore fastening the jet channel cover in place, check that the Allen key (size 4) to retighten the screws (approx.
-
Page 68: Powergrip Does Not Function Properly
2. The Powergrip may freeze in frosty weather, causing wearing rubber water shoes and then discharges the it to stick. Place the SEABOB in the water so that frozen electricity by touching the SEABOB, in particular around components can thaw off. -
Page 69: Moisture Present On High-Current Connecting Plates (On Models With Accumulator Change System)
Regularly check the sealing surfaces on the accumulator If you detect defective sealing surfaces on the box ACS and SEABOB ACS as well as the sealing rings charging socket, you should take the SEABOB im- (quad ring and spacer O-ring) on the motor‘s electron- mediately to the manufacturer or your specialist dealer. -
Page 70: Technical Specifications
• Extremely rugged mechanical and thermal char- Thrust / tractive force: acteristics; electronic temperature monitoring • SEABOB RAVEJET with 8 accumulator cells • Direct water cooling in jet flow channel for con- (2.2 kW / 3 HP): up to 349 N tinuous output •... - Page 71 1.8 kW/h; 48 V; 40 Ah SEABOB CAYAGO VX2: Charging time 5 HP using 12 High-Energy Lithium-Ion accumu- • SEABOB RAVEJET (8 accumulator cells): lator cells; approx. 1.8 kW/h; 48 V; 40 Ah approx. 6-8 hours SEABOB CAYAGO F7: •...
- Page 72 Dimensions Speed • SEABOB RAVEJET, SEABOB JET 4.12, SEABOB Depends on the water resistance of the SEABOB user CAYAGO VX2 and SEABOB CAYAGO F7 when and the set power ready for operation (with accumulator box): SEABOB RAVEJET: L x W x H: 1,296 mm x 481 mm x 379 mm •...
- Page 73 No special maintenance is required if the instructions for care are adhered to (cleaning of the device and possible replacement of wearing parts). Recommended: Have the SEABOB (for example, the motor sealing case) checked by the manufacturer or specialist dealer after approx. 3,000 hours of motor operation.
- Page 74 Bezeichnung, Typ oder Modell, Los- oder Seriennummer / Name, type or model, batch or serial number: SEABOB RAVEJET / SEABOB JET 4.12 / SEABOB CAYAGO VX2 / SEABOB CAYAGO F7 mit den Vorschriften folgender Europäischer Richtlinie(n) übereinstimmt / complies with the requirements of the following European directive(s): EMV-Richtlinie Nr.:...
-
Page 75: Disposal
9. Disposal An accumulator box that is defective or no longer deliver sufficient performance must be disposed of in accord- ance with applicable guidelines. Lithium-Ion accumulators must be professionally dis- posed of and recycled. An accumulator box that is defec- tive or no longer deliver sufficient performance should be returned to the manufacturer or your specialist dealer for professional disposal and recycling. -
Page 76: Replacement Parts
10. Replacement parts • ACS spacer O-ring (sealing ring) • ACS quad ring (sealing ring) • Sealing cap (for charging socket) • Impeller blades • Stator... -
Page 77: Accessories
• SEABOB-Rack • SEABOB-Case • Buoyancy adjustment weight • Pilot belt system for SEABOB CAYAGO F7 model • CD with extra software and quick reference se- rial IrDA infrared adapter (used to activate the PIN prompt when switching on the device or to activate... -
Page 78: Service
12. Service For service or repairs, please contact CAYAGO AG: • by e-mail at service@seabob.com • by phone at +49 (0)7 11- 99 33 97- 0 (Mon-Fri, 9:00 a.m. to 5:00 p.m. CET, except on public holidays) or your specialist dealer. -
Page 79: Imprint
Flachter Str. 32 D-70499 Stuttgart GERMANY Phone +49 (0)7 11 - 99 33 97-0 +49 (0)7 11 - 99 33 97-33 info@seabob.com www.seabob.com As of March 2008 © 2008 CAYAGO AG Copying, transmitting, storing or translating this Opera- tion Manual in any shape or form, whether in part or whole, is not permitted without the prior written consent of CAYAGO AG. - Page 82 www.seabob.com...
Need help?
Do you have a question about the RAVEJET and is the answer not in the manual?
Questions and answers