
Related Manuals for Pryor 4000 Series

Summary of Contents for Pryor 4000 Series
- Page 1 4000 Series Marking Machines Quick Start Guide ENG124 iss 1.0 Nov 2016 Available to download at: www.pryormarking.com/products/4000-controller Tel: +44(0)114 2766044 Sales: info@pryormarking.com Technical support: support@pryormarking.com...
-
Page 3: Ec Declaration Of Conformity
DATE: ........EMPOWERED TO SIGN ON BEHALF OF THE RESPONSIBLE PERSON, MR N. ANDREW, DIRECTOR OF EDWARD PRYOR AND SON LTD AT THE ABOVE ADDRESS. Conformity 1 - Issue 5 – 07/17 Registered in England as above Reg No. 313230... - Page 5 Managing Director DATE: ........EMPOWERED TO SIGN ON BEHALF OF THE RESPONSIBLE PERSON, MR N. ANDREW, DIRECTOR OF EDWARD PRYOR AND SON LTD AT THE ABOVE ADDRESS. Incorporation 1 - Issue 5- 08/17 Registered in England as above Reg No. 313230...
-
Page 7: Health And Safety
Health & Safety 4000 Series Marking Machine This covers essential health and safety of the marking machine. It is intended to supplement and support the training given by the suppliers of the equipment and the operation manuals. Weight of Machine and Ancillary Equipment... - Page 8 Possible Hazards whilst Operating The motors are low force and inertia; they therefore present a low risk when used in accordance with manufacturer’s instructions. Care should be taken in the vicinity of the marking head whilst setting, operating or maintaining the machine. It is important when operating the machine that any object other than the work piece to be marked is kept away from the marking area.
-
Page 9: About This Manual
Guide to Effective Marking The 4000 series marking machines can mark a very wide range of work pieces using a variety of different character styles, sizes and depths. -
Page 10: Getting Started
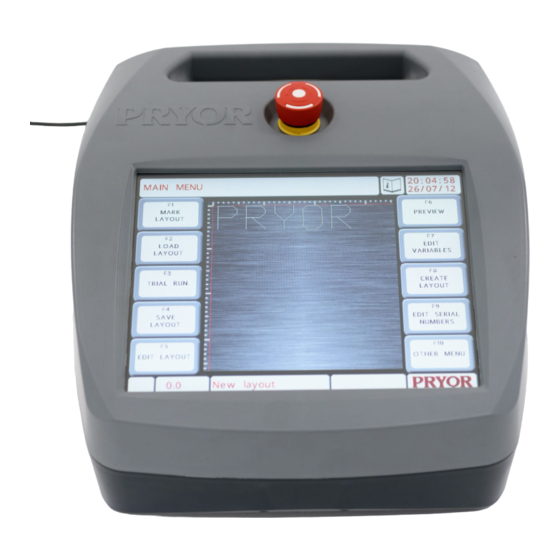
Getting Started Setting up For column mounted systems it is important to use a sturdy bench and fasten the base of the machine using the 2 mounting holes on the base. Before using the marking head for the first time fit the stylus nozzle, solenoid core (slug), stylus and spring in position and check the stylus moves freely, The system is very easy to connect, all the connectors on the rear of the controller are labelled. - Page 11 the controller is powered up and operating. This may damage the motor driving electronics. Switch the system on using the switch on the rear of the controller. The machine will not operate unless the emergency stop button is untwisted and released. The Main menu should be displayed when power is switched on: Menu options can be chosen by pressing on the menu buttons on the touch screen.
- Page 12 Creating a layout Select “F8) Create layout” from the Main menu on the touch screen. The display will then show the layout edit screen. Type some text and then press the ENTER key . The cursor will then move on to the Size column.
- Page 13 The mark may be very small. To zoom in use the cursor keys to move the green box over the text and press the button. Press ESC to go back to the zoomed out view. You can also drag the green box using the touch screen. Touch inside the green box, move across the screen, then let go.
- Page 14 (larger dots representing overmarked characters) Use the button to toggle a grid overlay. This will display a grid at 1mm or 10mm intervals, depending on the zoom level. buttons may be used to increase/decrease the magnification while zoomed in. Press the button to return to the previous view, then again to return to the Main menu.
- Page 15 Trace around the line without stopping Move object one jog step up (mm) Move object one jog step down (mm) Move object one jog step left (mm) Move object one jog step right (mm) Jog Z down by one jog step (mm) Jog Z up by one jog step (mm) Change Jog step size 0.1mm, 1mm, 10mm * Rotate clockwise by one jog step (degrees) *...
- Page 16 type). For most character styles the width of the character (including the space between characters) is equal to the Size. The Force may be 0 (no mark) to 14 (deep mark). Some marking heads may have some restriction on marking force. The X and Y position may be specified to place a mark anywhere in the available marking area with 0.025 mm (0.001”) resolution.
- Page 17 Time/date Time/date information is inserted in the Text at specified places when the layout is marked. Logo Text specifies the name of a dot logo. HPGL logo (Smooth) Text specifies the name of a HPGL logo. HPGL logo (Sharp) Text specifies the name of a HPGL logo. I/O control Text contains commands to make use of programmable digital inputs and outputs.
- Page 18 Dot fonts displayed on the mark preview screen: Scribe fonts displayed on the mark preview screen: Varidot This parameter specifies the spacing between dots. For electric solenoid dot marking the range is 5 to 255 steps. For pneumatic solenoid dot marking it is 50 to 255 steps.
- Page 19 Mode This specifies linear/arc marking for lines of text. Width Character width can be specified independently of the Size (height). The width includes the spacing between characters. If the Width parameter is set to 0.0 then it will be calculated automatically. Range is 0.00 mm to 999.90 mm (40”). Angle If the Mode parameter specifies a straight mark then Angle specifies the angle by which the mark will be rotated around its XY position.
-
Page 20: Further Information
Moves to the start of the next field. Deletes the character under the cursor. Deletes the character to the left of the cursor. Inserts a space where the cursor is. Moves to/from line parameter screen for the current line. Leave current screen / go back one menu Accesses the cut/paste menu.
Need help?
Do you have a question about the 4000 Series and is the answer not in the manual?
Questions and answers