Table of Contents
Advertisement
Available languages
Available languages
Model#
SKU#
F512C033CP
217-251
INSTALLATION AND CARE GUIDE
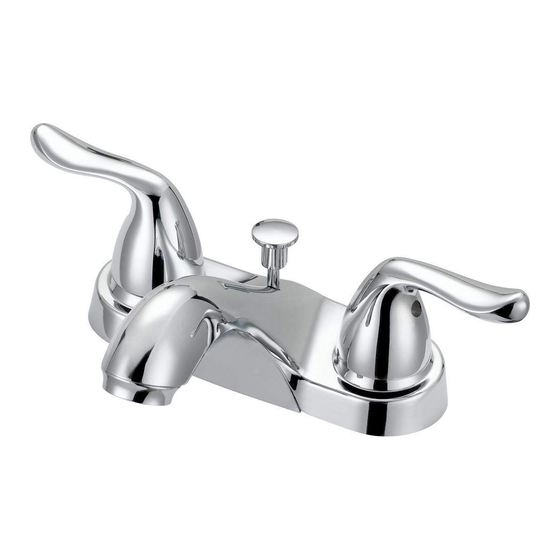
TWO-HANDLE LAVATORY FAUCET
Questions, problems, missing parts?
Before returning to the store, call Glacier Bay Customer Service
8 a.m. - 7 p.m., EST, Monday - Friday
9 a.m. - 6 p.m., EST, Saturday
1-855-HD-GLACIER (1-855-434-5224)
HOMEDEPOT.COM/GLACIERBAY
THANK YOU
We appreciate the trust and confidence you have placed in Glacier Bay through the purchase of this lavatory
faucet. We strive to continually create quality products designed to enhance your home. Visit us online to see
our full line of products available for your home improvement needs. Thank you for choosing Glacier Bay!
THD
09/2015 REV.01
Advertisement
Chapters
Table of Contents

Related Manuals for Glacier bay F512C033CP


Summary of Contents for Glacier bay F512C033CP
- Page 1 HOMEDEPOT.COM/GLACIERBAY THANK YOU We appreciate the trust and confidence you have placed in Glacier Bay through the purchase of this lavatory faucet. We strive to continually create quality products designed to enhance your home. Visit us online to see our full line of products available for your home improvement needs. Thank you for choosing Glacier Bay!
-
Page 2: Table Of Contents
Glacier Bay products are manufactured with superior quality standards and workmanship and are backed by our limited lifetime warranty. Glacier Bay products are warranted to the original consumer purchaser to be free of defects in materials or workmanship. We will replace FREE OF CHARGE any product or parts that proves defective. -
Page 3: Package Contents
Pre-Installation (continued) PACKAGE CONTENTS Faucet Assembly Drain Assembly NOTE: *Items come pre-assembled. Part Description Quantity Faucet Aerator Mounting nut Drain flange Rubber washer Lock nut Drain body Pop up stopper Lift rod Thumb screw Lift rod strap Spring clip Ball rod Bushing Ball nut Gasket... -
Page 4: Installation
Installation Preparing the pop-up assembly Installing the faucet assembly Remove the pop up stopper (H) and drain flange (D) CAUTION: Always turn off the water supply before from the drain body (G). removing an existing faucet or replacing any part of a faucet. - Page 5 Installation (continued) Installing the drain body Installing the stopper and ball rod Apply silicone sealant (not included) under the drain NOTE: In shallow cabinet installations, the ball rod (M) flange (D) and place the drain flange (D) over the may need to be shortened. Use a hack saw to cut the end of the rod, away from the ball, to the desired length.
- Page 6 Installation (continued) Installing the lift rod Attaching the ball rod and strap Insert the lift rod (I) through the faucet (A) and down Attach the ball rod (M) to the lift rod strap (K) using into the lift rod strap (K). Tighten the thumb screw (J). the spring clip (L).
-
Page 7: Operation
Installation (continued) Making the water supply connections Use 1/2 in. I.P.S. faucet connections (1), or a 3/8 in. O.D. ball-nose riser (2) with supply line coupling nuts (3) (not included). Use a wrench to tighten the connections. Do not over tighten or torque the copper supply line. -
Page 8: Care And Cleaning
Care and Cleaning To clean, wipe down with a damp cloth and towel dry. Do not use abrasive cleaners, steel wool, or harsh chemicals when cleaning this faucet, or the warranty will be voided. Troubleshooting NOTE: Refer to the service parts section in this manual for a detailed drawing showing the location of the parts listed below. -
Page 9: Service Parts
Service Parts Faucet ID Tags can be found by removing the hot water handle. Part Description Part Part Description Part Handle (C) A069439C* Seat & spring A663002 Handle (H) A069439H* Gasket A011045 Index button & set screw (C) A66G472C Mounting nut A504023 Index button &... - Page 10 Questions, problems, missing parts? Before returning to the store, call Glacier Bay Customer Service 8 a.m. - 7 p.m., EST, Monday - Friday 9 a.m. - 6 p.m., EST, Saturday 1-855-HD-GLACIER (1-855-434-5224) HOMEDEPOT.COM/GLACIERBAY Retain this manual for future use.
- Page 11 HOMEDEPOT.COM/GLACIERBAY GRACIAS Apreciamos la confianza que ha depositado en Glacier Bay por la compra de este para lavabo. Nos esforzamos por crear continuamente productos de calidad diseñados para mejorar su hogar. Visítenos en internet para ver nuestra ínea completa de productos disponibles para sus necesidades de mejorar su hogar. ¡Gracias por elegir a Glacier Bay!
- Page 12 GARANTÍA DE POR VIDA LIMITADA Los productos de Glacier Bay están fabricados con normas y mano de obra de calidad superior y están respaldados por nuestra garantía de por vida limitada. Los productos de Glacier Bay están garantizados al comprador consumidor original de estar libres de defectos en materiales o mano de obra.
-
Page 13: Pre-Instalación
Pre-instalación (continuación) CONTENIDO DEL PAQUETE Ensamblaje del Grifo Tubo de Desagüe NOTA: *Las piezas vienen preensambladas. Pieza Descripción Cantidad Grifo Aireador Tuerca de montaje Roborde del desagüe Arandela de goma Contratuerca Cuerpo del desagüe Tapón levadizo Varilla elevación Tornillo pulgar Varilla levadiza Pinza sujetadora Varilla glóbulo... -
Page 14: Instalación
Instalación Instalación del conjunto del grifo Preparación del conjunto levadizo Retire el tapón levadizo (H) y el reborde del desagüe CUIDADO: Cierre siempre el suministro de agua antes de (D) del cuerpo del desagüe (G). retirar el grifo viejo o sustituir cualquier pieza de un grifo. Abra la manija del grifo para reducir la presión del agua y Enrosque la contratuerca (F) totalmente hasta abajo y compruebe que el agua está... - Page 15 Instalación (continuación) Instalación del desagüe Instalación del émbolo y la varilla glóbulo Ponga sellante de silicona (no incluido) debajo del reborde del desagüe (D) y coloquelo sobre el orificio NOTA: En las instalaciones en armarios poco profundos puede ser necesario acortar la varilla sierra para metales del desagüe (D) del lavabo.
- Page 16 Instalación (continuación) Conexión de la varilla glóbulo y Instalación de la varilla elevación levadiza Inserte la varilla elevación (I) a traves del grifo (A) y Sujete la varilla glóbulo (M) a la correa de la varilla abajo dentro de varilla levadiza (K). Apriete el tornillo levadiza (K) con la pinza sujetadora (L).
-
Page 17: Operación
Instalación (continuación) Conexión de las líneas de suministro de agua Use conexiones para grifos I.P.S. de ½ pulgada (1) o un tubo ascendente de punta esférica con diámetro exterior de 3/8 de pulgada (2) con las tuercas de unión del conducto de alimentación (3) (no incluidas). -
Page 18: Cuidado Y Limpieza
Cuidado y Limpieza Limpie con un trapo húmedo y seque con un paño. No use limpiadores abrasivos, lana metálica ni productos químicos fuertes para limpiar el grifo o la garantía podría anularse. Solución de Problemas NOTA: Consulte la sección de piezas de repuesto de este manual para ver dibujos detallados sobre la ubicación de las piezas enumeradas abajo. -
Page 19: Piezas De Repuesto
Piezas de Repuesto Las etiquetas de identificación del grifo se encon- trarán al retirar la manija del agua caliente. Pieza Descripción Pieza No. Pieza Descripción Pieza Manija (C) A069439C* Asiento & resorte A663002 Manija (H) A069439H* Empaque A011045 Botón índice & tornillo de Tuerca de montaje A504023 A66G472C... - Page 20 ¿Tiene preguntas, problemas, o faltan piezas? Antes de regresar a la tienda, llame a Servicio al Cliente de Glacier Bay de lunes a viernes de 8 a.m. a 7 p.m., hora local del Este de lunes a viernes de 9 a.m. a 6 p.m., sábado 1-855-HD-GLACIER (1-855-434-5224) HOMEDEPOT.COM/GLACIERBAY...
Need help?
Do you have a question about the F512C033CP and is the answer not in the manual?
Questions and answers