Table of Contents
Advertisement
Quick Links
Advertisement
Table of Contents

Related Manuals for Vivitar DVR 510HD


Summary of Contents for Vivitar DVR 510HD
- Page 1 DVR 510HD Digital Video Camcorder Owner’s Manual © 2009 Sakar International, Inc. All rights reserved. Windows and the Windows logo are registered trademarks of Microsoft Corporation. All other trademarks are the property of their respective companies.
-
Page 2: Table Of Contents
Camera Mode ............................14 Playback Mode ............................. 16 TV out function ............................. 18 Install the Vivitar Experience Image Manager Software ................ 20 Connect your camcorder to the computer ..................... 23 Get photos and videos from your camcorder to your computer ............. 24 Get started! ............................ -
Page 3: Introduction
Introduction Thanks for purchasing the DVR 510HD Digital Video Camcorder. Not only can you shoot top quality Videos and Photos but the internal Nand Flash memory enables you to also use it as a Removable drive that can store any file formats. Please read this manual carefully before using. -
Page 4: What Your Camcorder Includes
TV cable Strap Built-in USB cable Vivitar Experience Image Manager software Installation CD Quick Start Guide Water resistant casing Computer System Requirement for Windows XP To be able to download photos and videos to your PC, you will need the following minimum configuration: ... -
Page 5: Computer System Requirement For Windows Vista
Computer System Requirement for Windows Vista To be able to download photos and videos to your PC you will need the following minimum configuration: Windows Vista 800MHz processor and 512 MB of system memory 20GB hard drive with at least 15GB of available space ... -
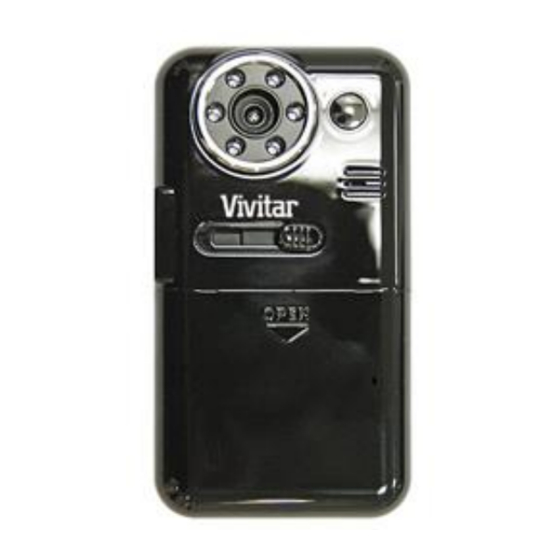
Page 6: A Quick Look At Your Digital Video Camcorder
A Quick Look at Your Digital Video Camcorder... - Page 7 Icons on your LCD screen Battery power level Full battery power Medium battery power Low battery power Modes Playback / Video Playback / Photo Digital Zoom Infrared Night Vision (3 LED on) Infrared Night Vision (6 LED on)
-
Page 8: Prepare Your Digital Camcorder For Use
Prepare Your Digital Camcorder for Use Battery Installation Your Digital Video Camera requires 4 AAA batteries (alkaline batteries are recommended). Note: Your Digital Video Camera has a 2GB Nand Flash memory, and therefore the data in your internal memory will not be lost if your player is powered off or when the batteries need to be replaced. Insert the batteries into your Digital Video Camera as directed below: Slide the battery cover down then lift to open the cover. - Page 9 SD card installation Your Digital Camcorder has a memory card slot that enables you to insert any SD compatible memory card up to 8GB. Adding a memory card will allow you to increase the capacity of your Digital Video Camcorder. After you insert an SD memory card, all the videos and photos you shoot will automatically be stored to the SD memory card.
-
Page 10: Loading Your Camcorder Into Water Resistant Casing
Loading Your Camcorder into Water resistant Casing The Water resistant casing is a special tool for you to shoot videos and photos under water. Insert the camcorder into the water resistant casing in the following steps: Unlock the water resistant casing as step 1 on diagram. Open the upper cover as step 2 on diagram. -
Page 11: Starting Your Digital Camcorder
Starting Your Digital Camcorder Power on Press and hold the Power button on the side of the camcorder for about 3 seconds. Your Digital Camcorder will sound a beep to indicate that it has power on and the LCD will light up. Power off Press and hold the Power button for about 3 seconds to power off your camcorder. - Page 12 Press the OK button to confirm and return to the setting menu Press the Down button to select “Confirm” and exit the setting mode and revert back to the DV/DSC/Playback mode Frequency setting Generally speaking, 60HZ is for the countries such as U.S. and 50HZ for countries such as Japan. The default setting is 60HZ.
-
Page 13: Video Mode
1. Press the UP button and hold for 2 Seconds to enter the setting menu. 2. Press the UP or DOWN button to select the “TV out” Option. 3. Press the OK button to enter the TV out option. 4. Press the UP or DOWN button to select the TV out option you wish PAL / NTSC 5. - Page 14 An icon will appear on the LCD (depends on the light conditions) to indicate that the LEDs that surrounded the lens of the camcorder is activated (Infrared Night Vision function is on). Press the OK/Shutter button again to stop shooting and save your video as an AVI video file in the camera `s memory.
-
Page 15: Camera Mode
Digital Zoom Your Digital Video Camcoder has 8x digital zoom function, which enables you to zoom in and enlarge your object up to 8 times. Press the Zoom-in RIGHT button to zoom into your object Press the Zoom-out LEFT button to zoom back out. Camera Mode Taking Photos: Turn on your digital camcorder. - Page 16 Resolution settings Your Digital Camcorder supports 2 resolutions – VGA and QVGA. Press the DOWN (Delete/Resolution) button to toggle and change between them. One or two stars will appear on the LCD. Two stars are for VGA mode and one star is for QVGA mode. Note: Taking photos in VGA are of a better quality than QVGA photos and therefore take up more of the camcorder’s memory.
-
Page 17: Playback Mode
Playback Mode In this mode you can playback, delete and/or format the AVI files that you captured. Playback AVI files Power on your camcorder and press the UP button to enter the Playback mode. The following icon will appear on the LCD. Press the Right/Left buttons to select a video file you want to play. - Page 18 Note: You will not be able to hear the sound-track associated with that video on the device. Playback Photos Power on your camcorder and press the UP button to enter the playback mode. The following icon will appear on the LCD for photos Press the Right/Left buttons to select a photo you want to v The number of photos saved to memory (either internal or on the external SD Card) appears on the bottom left corner of the LCD screen.
-
Page 19: Tv Out Function
Delete All - delete all files in your camera. Format - Format your internal memory (if no SD card is inserted) or format the external SD memory card if inserted. Press the Up/Down button to select your choice. Press the OK/Shutter button. - Page 20 Please follow the below steps: Power on your Digital Camcorder. Turn on your TV. Ensure that your camera and TV are set to the same mode – PAL or NTSC. Connect your Digital Camcorder to the TV with the special TV cable supplied. Connect the White cable to the Audio slot and the Yellow cable to the Video slot.
-
Page 21: Install The Vivitar Experience Image Manager Software
Install the Vivitar Experience Image Manager Software Warning: Do not plug your camcorder into the computer until the software installation is complete You must be connected to the internet to install and run the Vivitar Experience Image Manager software. Insert the installation CD into your CD-ROM drive. The installation screen should automatically... - Page 22 On PC: The Vivitar Experience Image Manager Installer window appears. If the window does not appear, open the application’s CD/DVD drive and click on “Setup.bat” to launch the installer. On Macintosh: Click the icon to install the Vivitar Experience Image Manager.
- Page 23 If you have internet access, the “Choose your language” window opens, choose your language and click “Next” to open the next window. Select your camcorder model from the list and click “Next” to open the next window. Click “Next” to confirm your camcorder model selection and to install the application. Please wait while the application is being installed on your computer.
-
Page 24: Connect Your Camcorder To The Computer
10. On PC only: Let the “Vivitar Experience Image Manager” installer create the folder to where the program will be installed, and then click “Install”. 11. Please wait while the application continues the installation process on your computer. 12. On PC: Click the “Close” button when the installation is complete. -
Page 25: Get Photos And Videos From Your Camcorder To Your Computer
Get photos and videos from your camcorder to your computer Do not disconnect the camcorder during file transfer. Doing so will cancel the transfer of any files on their way to your computer. Select the “Get Images” button from the Home window. -
Page 26: Get Started
Get started! Using the Vivitar Experience Image Manager, you can upload and manage photos and videos to and from the most popular photo sharing and social networking sites - Facebook, Flickr, MySpace, Picasa, Photobucket and YouTube. -
Page 27: Transfer Media From My Camcorder To My Computer Manually (Using Windows)
Use automatic “Geotagging” with built in Google Maps. For more details on how to use the Vivitar Experience Image Manager open the Help file or click the “Take the Tour” button on the application`s Home page. Transfer media from my camcorder to my computer manually (Using Windows) Use the USB built-in connector on your camcorder to connect your camcorder to the USB port on your computer. -
Page 28: Transfer Media From My Camcorder To My Computer Manually (Using Macintosh)
Transfer media from my camcorder to my computer manually (Using Macintosh) Use the USB built-in connector on your camcorder to connect your camcorder to the USB port on your computer. “MSDC” will appear on the LCD, indicating that your camcorder is in Mass Storage Mode. The camcorder’s device icon appears on the desktop. -
Page 29: Sakar Warranty Card
Sakar Warranty Card This warranty covers for the original consumer purchaser only and is not transferable. Products that fail to function properly UNDER NORMAL USAGE, due to defects in material or workmanship. Your product will be repaired at no charge for parts or labor for a period of one year. What Is Not Covered By Warranty: Damages or malfunctions not resulting from defects in material or workmanship and damages or malfunctions from other than normal use, including but limited to, repair by unauthorized parties, tampering,... -
Page 30: Technical Specifications
195 Carter Drive Edison, NJ 08817 TECHNICAL SUPPORT: For technical support issues please visit our website at www.vivitar.com. You can find manuals, software and FAQ’s at the website. Can’t find what you are looking for? E-mail us at support@vivitar.com and one of our technical support team members will answer your questions. -
Page 31: Troubleshooting
Lens f=4.8mm,F=2.8 Digital Zoom File Format AVI and JPEG Infrared Night Vision TV out Power saving 60 seconds Battery 4 AAA batteries (1.5V) Transmission interface USB 2.0 Working temperature 0~40℃ Computer system Window XP/Vista/Mac OS X (10.4.6 or higher) Others Water Resistant Casing Troubleshooting Power does not turn on. - Page 32 ★Format the memory card again or use a new 2. The Memory card is not formatted correctly. card. Image is blurry or out of focus. ★ Hold the video camcorder steady when 1. The video camcorder was moving when the image was captured.
Need help?
Do you have a question about the DVR 510HD and is the answer not in the manual?
Questions and answers