Edimax EW-7326Ig Quick Install Manual
Wireless 802.11b/g pci adapter
Hide thumbs
Also See for EW-7326Ig:
- Specifications (2 pages) ,
- User manual (41 pages) ,
- User manual (33 pages)
Table of Contents
Advertisement
Quick Links
Download this manual
See also:
User Manual
Advertisement
Table of Contents

Related Manuals for Edimax EW-7326Ig


Summary of Contents for Edimax EW-7326Ig
- Page 2 Multi-Languages QIG in Driver CD ================================================ Český: Českého průvodce rychlou instalací naleznete na přiloženém CD s ovladači Deutsch: Finden Sie bitte das deutsche QIG beiliegend in der Treiber CD Español: Incluido en el CD el QIG en Español Français: Veuillez trouver l’français QIG ci-joint dans le CD Italiano: Incluso nel CD il QIG in Italiano Magyar: A magyar telepítési útmutató...
- Page 3 COPYRIGHT Copyright ©2005/2006 by Edimax Technology Co. Ltd. All rights reserved. No part of this publication may be reproduced, transmitted, transcribed, stored in a retrieval system, or translated into any language or computer language, in any form or by any means, electronic,...
-
Page 4: Table Of Contents
1. Product Information ...2 2. Product Package ...2 3. Hardware Installation ...3 4. Software Installation...3 5. Connect to Wireless Access Point...7 5.1 Using Realtek Wireless Configuration Utility...7 5.2 Using Windows Zero Config... 11 6. Federal Communication Commission Interference Statement ...15 7. -
Page 5: Product Information
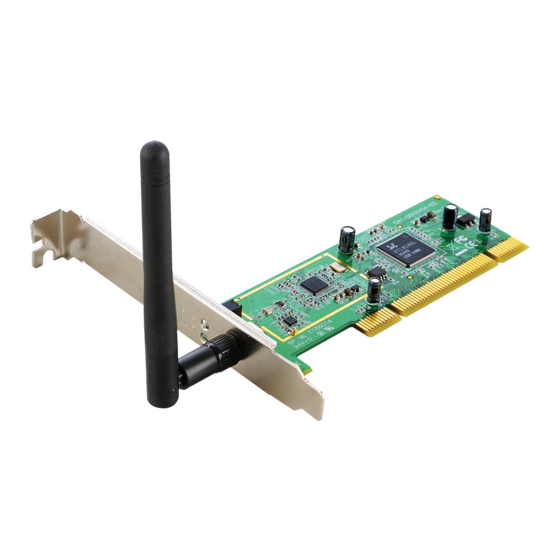
1. Product Information Thank you for your purchasing Edimax Wireless 802.11b/g PCI Adapter. This PCI adapter is designed to comply with IEEE 802.11b/g Wireless LAN standard and easy to carry with the Mini size. It is suitable for any Desktop computers. -
Page 6: Hardware Installation
3. Hardware Installation A. Turn off your computer and remove its cover. B. Insert the PCI card to an available PCI slot firmly. C. Secure this card to the rear of the computer chassis and put back the cover. D. Secure the antenna to the antenna connector of the card. E. - Page 7 3. Select the Setup Language and click “OK” to proceed. 4. Click “Next” to start installing driver and utility.
- Page 8 5. Select the Region Domain for which WLAN is authorized to use and click “Next” to continue. 6. Radio regulation warning window. Due to the Radio regulation at different area, different radio law might be applied. Please make sure your region selection is correct.
- Page 9 7. The system starts to install the driver and utility. 8. Click “Finish” to complete the driver and utility installation.
-
Page 10: Connect To Wireless Access Point
5. Connect to Wireless Access Point Using Configuration Utility to Connect to Wireless Access Point 5.1 Using Realtek Wireless Configuration Utility 1. After installation is complete, wireless configuration utility will be shown an icon at your windows desktop as below. Please click the icon by right mouse key to lunch the configuration utility. - Page 11 3. If the wireless access point uses encryption, you have to input WEP passphrase or WPA preshared key. Please ask the owner of the wireless access point you want to connect, and input the correct passphrase / preshared key at “Network key” & “Confirm network key”, then click ‘OK’. If the value you inputted here is wrong, you will not be able to connect to wireless access point.
- Page 12 4. The utility will automatically add the access point at Wireless Utility Profile.
- Page 13 5. If the wireless access point is successfully connected, you’ll see a connected icon displayed at the lower-left corner of wireless configuration utility window and click ‘Close’ to exit.
-
Page 14: Using Windows Zero Config
5.2 Using Windows Zero Config 1. After lunch wireless configuration, Please select “Windows Zero Config” and click “OK” to disable the utility of the adapter.. 2. Please lunch Windows Zero Config by double-click the wireless connection icon in the lower-left corner on Windows desktop. - Page 15 3. The Windows Zero Config Panel will pup-up. Please select the wireless access point which you want to connect and click “Connect”...
- Page 16 4. If the wireless access point without encryption, there is warning window will pup-up. Please click “Connect Anywhere”.
- Page 17 5. When you see the “Connected” shows on the Windows Zero Config window, the wireless is successfully connected.
-
Page 18: Federal Communication Commission Interference Statement
6. Federal Communication Commission Interference Statement This equipment has been tested and found to comply with the limits for a Class B digital device, pursuant to Part 15 of FCC Rules. These limits are designed to provide reasonable protection against harmful interference in a residential installation. This equipment generates, uses, and can radiate radio frequency energy and, if not installed and used in accordance with the instructions, may cause harmful interference to radio communications. -
Page 19: R&Tte Compliance Statement
Slovenia, the Netherlands, Portugal, Spain, Sweden, and the United Kingdom. The ETSI version of this device is also authorized for use in EFTA member states: Iceland, Liechtenstein, Norway, and Switzerland. EU Countries not intended for use None Please check the declaration of conformity on www.edimax.com...
Need help?
Do you have a question about the EW-7326Ig and is the answer not in the manual?
Questions and answers