Table of Contents
Advertisement
Quick Links
User manUal
14 place integrated dishwasher
TDW14I
IMPORTANT //
Please ensure that you read through this user manual prior to installation and use. This
manual contains important information to ensure optimal performance and keep you safe. Please retain your
proof of purchase, as this will be required in the event that you require warranty service. Remember to retain
this manual for future reference.
tisira | www.tisira.com
www.tisira.com
pg 1
Advertisement
Table of Contents

Subscribe to Our Youtube Channel
Related Manuals for Tisira TDW14I


Summary of Contents for Tisira TDW14I
- Page 1 Please retain your proof of purchase, as this will be required in the event that you require warranty service. Remember to retain this manual for future reference. tisira | www.tisira.com pg 1 www.tisira.com...
- Page 2 CONGRATULATIONS ON THE SELECTION OF THIS TISIRA APPLIANCE. TISIRA APPLIANCES HAVE BEEN SPECIFICALLY DESIGNED FOR AUSTRALIAN AND NEW ZEALAND KITCHENS. Please read through this user manual carefully as it contains information that will ensure that your appliance is installed correctly, important operating &...
-
Page 3: Table Of Contents
CONTENTS HELLO CONTENTS WARNINGS PRODUCT OVERVIEW OPERATING INSTRUCTIONS 7-17 MAINTENANCE 18-19 INSTALLATION 20-23 TROUBLESHOOTING 24-25 PRODUCT SPECIFICATIONS NOTES CONTACT DETAILS tisira | www.tisira.com pg 3... -
Page 4: Warnings
• young children should be supervised to ensure that they do not play with the appliance. • The door should not be left in the open position since this could present a tripping hazard. www.tisira.com | tisira pg 4... - Page 5 Select the delay start time you want by pressing the DELAY pad. 12. After selecting the desired program, Multiple pressing will increase the close the door, the dishwasher in delay hours. function status. tisira | www.tisira.com pg 5...
-
Page 6: Product Overview
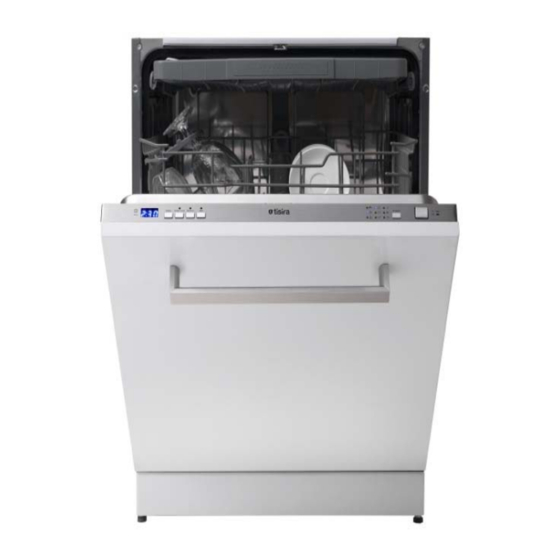
OVerView DISHWASHER FEATURES frOnt View 1. Cutlery Tray 7. filters 4. Detergent Dispenser 2. Upper Basket 8. Rinse Aid Dispenser 5. Cup Holder 3. Lower Basket 6. Spray Arms www.tisira.com | tisira pg 6... -
Page 7: Operating Instructions
3. Replace the cap by inserting it aligned with “open” arrow and turning it to the “closed” (right) arrow. ATTENTION // Clean up any rinse aid split during filling with an absorbent cloth to avoid excess foaming during the next wash. tisira | www.tisira.com pg 7... - Page 8 The rinse aid dispenser has six settings. this reason ”normal” washing programme in Always start with the dispenser set on “4” which concentrated detergents are used can www.tisira.com | tisira pg 8...
- Page 9 The marking indicates the dosing levels , as illustrated above: 1. Main washing cycle detergent dispenser. MIN means approximately 20g of detergent. 2. Pre washing cycle detergent dispenser. Approximately 5g of detergent. Close the lid and press until it locks in place. tisira | www.tisira.com pg 9...
- Page 10 , and Detergents without chlorine can only bleach the”3 in 1” indicator lights. a little. Strong and coloured spots will not be removed completely. In this case, please choose a programme with higher temperature. www.tisira.com | tisira pg 10...
- Page 11 Choose your programme according to the supply before calling a service. type of load and how dirty it is. The different programmes and their uses are described in the “washing cycle table” tisira | www.tisira.com pg 11...
- Page 12 • When using your dishwasher, you should prevent plastic items from contacting with heating element. • Do not wash plastic items unless they are marked dishwasher safe or the equivalent. for plastic items not so marked, check the manufacturer’s recommendations. www.tisira.com | tisira pg 12...
- Page 13 Position the dishes and cookware so that they do not get moved by the spray of water. tisira | www.tisira.com pg 13...
- Page 14 Using the folding racks allows for more room on the lower basket for larger items. To use the folding racks, lift them up then fold down as shown. lOwer Basket Type Item Soup Plate Dinner Plate Dessert Plate www.tisira.com | tisira pg 14...
- Page 15 • Glazed patterns may fade if machine washed frequently NOTE // Do not load items that are dirty of cigarette ash, candle wax, lacquer or paint. When buying new dishes, ensure they are suitable for dishwashers. tisira | www.tisira.com pg 15...
- Page 16 To rinse dishes that you plan Pre-wash 0.07 to wash later on that day Soak Rinse 1 For lightly and normally Rinse 2 60min soiled plates and pans for 5/20g 0.83 12.5 Hot rinse(50ºC) everyday Drying www.tisira.com | tisira pg 16...
-
Page 17: Maintenance
• By unscrewing the coarse filter, you and damage dishes and utensils. can remove the filter system. Remove any food remnants and clean the filters Never run the dishwasher WARNING // under running water. without the filters in place. tisira | www.tisira.com pg 17... - Page 18 One of the factors that cause odours to ajar so that moisture and odours are not form in the dishwasher is food that remains trapped inside. trapped in the seals. Periodic cleaning with a damp sponge will prevent this. www.tisira.com | tisira pg 18...
-
Page 19: Installation
The appliance must be connected to the Properly secure your hose firmly to the water supply network using new piping. Do drainage pipe to avoid it coming off during the washing process. not use old piping. tisira | www.tisira.com pg 19... - Page 20 It will be necessary to the fixed wiring with at least 3mm contact separation in all poles. drain excess water from hoses into a bowl or a suitable container that is held outside and lower than the sink. www.tisira.com | tisira pg 20...
- Page 21 Install the dishwasher into the cabinet 600min caBinet dimensiOns Respect the clearance requirements to allow the correct opening of the door. Dishwasher C abinet The door of Dishwasher The Minimum space for door opening is 50mm tisira | www.tisira.com pg 21...
- Page 22 3~7K G Hexnut tool 4mm position when left semi-opened. 3. If it doesn’t, adjust the crew indicated in the gure below clockwise 4. or anti-clockwise in order to balance the tension of the door spring. www.tisira.com | tisira pg 22...
- Page 23 4 holes, use wood screws ST4*26 the chart below. dishwasher xed on the cabinet (selt-tapping referenced dimension screws were matching) Serial Optional Skirting board number Stainless Steel plate 708mm 90mm 698mm 100mm 690mm 110mm 680mm 120mm 668mm 130mm 659mm 140mm tisira | www.tisira.com pg 23...
-
Page 24: Troubleshooting
Close and latch the dishwasher, suds in the tub then start the “soak” wash cycle to drain out the water... Repeat if necessary. Spilled rinse agent Always wipe up rinse agent spills immediately. www.tisira.com | tisira pg 24... - Page 25 // If overflow occurs, turn off the main water supply before calling a service. If there is water in the base pan because of an overfill or small leak, the water should be removed before restarting the dishwasher. tisira | www.tisira.com pg 25...
-
Page 26: Product Specifications
596mm x 555mm x 820mm Voltage connected load: 220 - 240V~ 50Hz water pressure: 0.04-1.0MPa power supply: 1850W capacity: 14 Place settings hot water connection: Max 60º C www.tisira.com | tisira pg 26... -
Page 27: Notes
NOTES tisira | www.tisira.com pg 27... -
Page 28: Contact Details
CONTACT DETAILS www.tisira.com | tisira pg 28...
Need help?
Do you have a question about the TDW14I and is the answer not in the manual?
Questions and answers