
Related Manuals for Ninja CT682ANZ


Summary of Contents for Ninja CT682ANZ
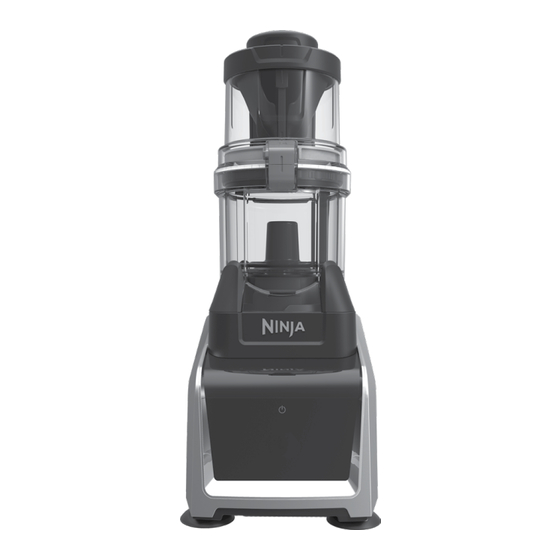
- Page 1 Intelli-Sense Kitchen System CT682ANZ INSTRUCTIONS ninjakitchen.com.au ninjakitchen.co.nz AUS 1800 099 385 NZ 0800 112 660...
-
Page 2: Table Of Contents
THANK YOU for purchasing the Ninja® Intelli-Sense Kitchen System Important Safety Instructions � � � � � � � � � � � � � � � � � � � � � � � � � � � 3 REGISTER YOUR PURCHASE Getting to Know Your Ninja®... -
Page 3: Important Safety Instructions
IMPORTANT SAFETY INSTRUCTIONS PLEASE READ CAREFULLY BEFORE USE • FOR HOUSEHOLD USE ONLY WARNING To reduce the risk of injury, fire, electrical shock or property damage, basic safety precautions must always be followed, including the following numbered warnings and subsequent instructions� This appliance shall not be used by children�... - Page 4 IMPORTANT SAFETY INSTRUCTIONS PLEASE READ CAREFULLY BEFORE USE • FOR HOUSEHOLD USE ONLY WARNING To reduce the risk of injury, fire, electrical shock or property damage, basic safety precautions must always be followed, including the following numbered warnings and subsequent instructions� This appliance shall not be used by children�...
-
Page 5: Getting To Know Your Ninja
GETTING TO KNOW YOUR NINJA® INTELLI-SENSE KITCHEN SYSTEM WELCOME! Congratulations on your purchase. Use this instruction manual to learn about the great features of your Ninja Intelli-Sense Kitchen System. From assembly to use to maintenance, you will find it all in here. -
Page 6: Before First Use
BEFORE FIRST USE FEATURES IMPORTANT: Review all Remove all packaging materials from the appliance. warnings on pages 3–6 Exercise care when unpacking blade assemblies and Blade before proceeding. Discs. All blade assemblies and Blade Discs are sharp. SMART PROGRAMS FOR THE TOTAL CRUSHING PITCHER Intelligent pre-set programs combine unique blending and pausing patterns that do the work for 2 The Chopping Blade Assembly and Stacked Blade you. - Page 7 FEATURES - CONT� SMART PROGRAMS FOR THE SINGLE-SERVE CUP SMART PROGRAMS FOR THE PRECISION PROCESSOR BOWL Intelligent pre-set programs combine unique blending and pausing patterns that do the work Intelligent pre-set programs combine unique blending and pausing patterns that do the work for for you.
-
Page 8: Total Crushing Pitcher
USING YOUR TOTAL CRUSHING PITCHER IMPORTANT: Review all warnings on pages 3–6 before proceeding. TIP: If the Stacked Blade Assembly is not fully seated, you will not be able to install and lock the lid into position. TIP: To learn more about the unit’s programs, refer to page 10. - Page 9 USING YOUR TOTAL CRUSHING PITCHER - CONT� IMPORTANT: Review all warnings on pages 3–6 before proceeding. IMPORTANT: As a safety feature, if the pitcher and lid are not properly installed, the timer will display “- --” and the motor will be disabled. If this happens, repeat step 5 on page 14.
-
Page 10: Using Your Single-Serve Cup
USING YOUR SINGLE-SERVE CUP IMPORTANT: Review all warnings on pages 3–6 before proceeding. NOTE: Pre-set programs have pauses and changes in speed throughout the cycle. TIP: To learn more about the unit’s programs, refer to page 11. NOTE: Pre-set programs have pauses and changes in speed throughout the cycle. - Page 11 USING YOUR SINGLE-SERVE CUP - CONT� IMPORTANT: Review all warnings on pages 3–6 before proceeding. NOTE: Smart Vessel Recognition can detect which container is on the motor base. Only the functions available for that’ particular container will illuminate on the touchscreen.
-
Page 12: Using Your Precision Processor Bowl
USING YOUR PRECISION PROCESSOR BOWL IMPORTANT: Review all warnings on pages 3–6 before proceeding. TIP: If the blade assembly is not fully seated, you will not be able to install and lock the lid into position. TIP: To learn more about the unit’s programs, refer to page 12. - Page 13 USING YOUR PRECISION PROCESSOR BOWL - CONT� IMPORTANT: Review all warnings on pages 3–6 before proceeding. NOTE: Please follow the same instructions to install the Dough Blade Assembly. NOTE: Smart Vessel Recognition can detect which container is on the motor base.
-
Page 14: Assembling Your Auto-Spiralizer
ASSEMBLING YOUR AUTO-SPIRALIZER IMPORTANT: Review all warnings on pages 3–6 before proceeding. IMPORTANT: As a safety feature, if the Spiralizer Bowl and Feed Chute Lid are not properly installed, the timer will display “- --” and the motor will be disabled. NOTE: To fit properly, the tabs on the sides of the Blade Disc must align with... -
Page 15: Using Your Auto-Spiralizer
USING YOUR AUTO-SPIRALIZER IMPORTANT: Review all warnings on pages 3–6 before proceeding. IMPORTANT: After spiralizing an ingredient, all leftover pieces must be removed from the Collecting Bowl and Blade Disc before spiralizing again. NOTE: To find out how to properly prep your ingredient, refer to the Food Prep section in your Quick Start Guide or your... - Page 16 USING YOUR AUTO-SPIRALIZER - CONT� IMPORTANT: Review all warnings on pages 3–6 before proceeding. 6 To remove the Spiralizer 7 To remove the Feed 8 Remove the Collecting 9 Remove the noodles from 10 Unplug the appliance Bowl from the motor Chute Lid, press the Bowl by lifting it out of the the Collecting Bowl and...
-
Page 17: Care & Maintenance
CARE & MAINTENANCE TROUBLESHOOTING GUIDE CLEANING STORING WARNING: To reduce the risk of shock and unintended operation, turn power off and unplug unit before troubleshooting� Separate all parts. Wrap the power cord around the cord wrap on the back of the motor base. Store the unit 2 Wash all containers in warm, soapy water Unit doesn’t turn on�... -
Page 18: Warranty
ONE (1) YEAR NOTES LIMITED WARRANTY The 1-Year Limited Warranty applies to purchases made from authorized retailers of SharkNinja Operating LLC. Warranty coverage applies to the original owner and to the original product only and is not transferable. SharkNinja warrants that the unit shall be free from defects in material and workmanship for a period of 1 year from the date of purchase when it is used under normal household conditions and maintained according to the requirements outlined in this instruction manual, subject to the following conditions and exclusions. - Page 19 Illustrations may differ from actual product. We are constantly striving to improve our products, therefore the specifications contained herein are subject to change without notice. NINJA is a registered trademark of SharkNinja Operating LLC. For SharkNinja U.S. Patent information, visit sharkninja.com/uspatents © 2018 SharkNinja Operating LLC CT682ANZ�IB�REV�Mv2...
Need help?
Do you have a question about the CT682ANZ and is the answer not in the manual?
Questions and answers