Advertisement
Yard Master 2 Extension Legs
Thank you for choosing the Extension Legs accessory for your Yard Master 2 portable projection screen!
Please read through this user guide before utilizing the accessory. Correct usage and maintenance will
ensure a long product life
Care & Use Instructions
◆After using the extension legs, disassemble and store them in a safe and secure location.
NOTE: Extension Legs will NOT fit in carrying bag supplied with the Yard Master 2 Series.
◆To avoid damage and injury, the screen and extension legs should only be operated by adults.
Product Description
Design: The aluminum frame is designed to be lightweight and easy to carry, assemble and disassemble.
Replacing the Yard Master 2 legs
To replace your current legs with the new extension legs on your assembled screen, please follow the
Disassembly steps on page 2. If the legs on your screen are already removed, proceed with the assembly
steps starting below. For full assembly instructions on your screen, please refer to the Yard Master 2
Series User Guide.
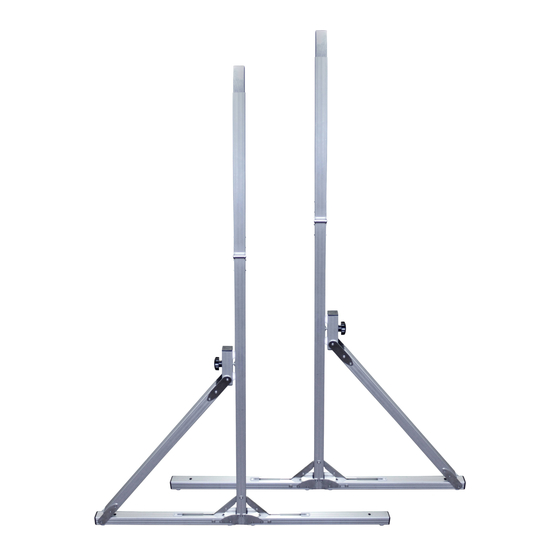
Hardware and Parts List
A. Large Knob Screw x2
D. Rope x2
Rev. 070120-BR
ZOMS2-LEGS-Z
Quick Guide
B. Left/Right folding legs x2
E. Eyebolt x2
www.elitescreens.com
C. Knob Screw x2
F. Ground Stakes x4
1
Advertisement
Table of Contents

Related Manuals for Elite Screens Yard Master 2 ZOMS2-LEGS-Z


Summary of Contents for Elite Screens Yard Master 2 ZOMS2-LEGS-Z
- Page 1 ZOMS2-LEGS-Z Yard Master 2 Extension Legs Quick Guide Thank you for choosing the Extension Legs accessory for your Yard Master 2 portable projection screen! Please read through this user guide before utilizing the accessory. Correct usage and maintenance will ensure a long product life Care &...
- Page 2 Assembly 1.After the initial assembly of the screen frame, insert the extension legs into the openings located at the left and right bottom sides of the folding frame. Secure them by fastening the knob screw into the adjacent hole. Next, screw the eyebolts into the openings located at the top of Fig.1 the frame (Fig.1)
- Page 3 All other accessories, except for extension legs, are supplied with the Yard Master 2 Series when purchased separately. □ See Yard Master 2 Series User Guide for full assembly instructions of the screen. For a local Elite Screens contact or Technical Support, please visit www.elitescreens.com Rev. 070120-BR www.elitescreens.com...
Need help?
Do you have a question about the Yard Master 2 ZOMS2-LEGS-Z and is the answer not in the manual?
Questions and answers