
Subscribe to Our Youtube Channel
Related Manuals for Sony Bravia KLV-52W450A


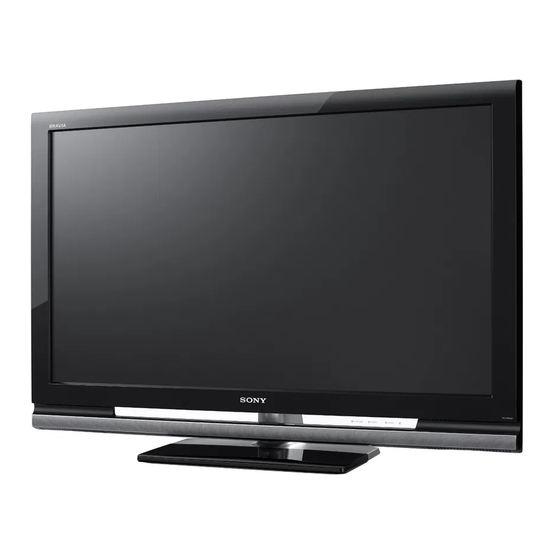
Summary of Contents for Sony Bravia KLV-52W450A
- Page 1 LCD Colour TV Operating Instructions KLV-52W450A KLV-46W450A KLV-40W450A © 2008 Sony Corporation 4-116-073-11(2)
- Page 2 Introduction Trademark information Thank you for choosing this Sony product. • HDMI, the HDMI logo and High-Definition Multimedia Interface are trademarks or registered trademarks of Before operating the TV, please read this manual HDMI Licensing LLC. thoroughly and retain it for future reference.
-
Page 3: Table Of Contents
Table of Contents Using MENU Functions Start-up Guide Navigating through menus......20 Checking the accessories ......4 Using the Favourite List ......21 Inserting batteries into the remote....4 Settings adjustment ........22 1: Attaching the stand .........4 Picture menu ........... 24 Sound menu .......... -
Page 4: Start-Up Guide
Start-up Guide Checking the 1: Attaching the stand accessories For KLV-46W450A/KLV-40W450A AC power cord Stand (1) and screws (4) (For KLV-46W450A/ KLV-40W450A) Remote RM-GA011 (1) Size AA batteries (R6 type) (2) Inserting batteries into the remote Push and lift the cover to open. •... -
Page 5: 2: Connecting An Antenna/Cable/Vcr
2: Connecting an 3: Preventing the TV antenna/cable/VCR from toppling over Connecting an antenna/cable Antenna cable (not supplied) Connecting an antenna/cable and VCR Install a wood screw (4 mm in diameter, not supplied) in the TV stand. Install a machine screw (M6 x 12, not supplied) into the screw hole of the TV. -
Page 6: 5: Performing The Initial Set-Up
Press to select the language displayed 5: Performing the initial on the menu screens, then press set-up Select language. English Press to select the country/region, then press Select country. Press to select “Home”, then press Select location. 3, 4, 5, 6, 9, 10, 11 Auto-tuning the TV Press... -
Page 7: Watching Tv
Sony strongly recommends that you select a TV channel. use the Wall-Mount Bracket model designed for your TV and the wall-mounting of your TV Press 2 +/– to adjust the volume. should be performed by Sony dealers or licensed contractors. -
Page 8: Safety Information
• Two or more people are needed to – Use only Sony supplied AC power cords, not those of transport a large TV set. other brands. • When transporting the TV set by –... -
Page 9: Precautions
Turn off the TV set and unplug the AC power cord picture distortion and/or noisy sound may occur. immediately if any of the following problems occur. Ask your dealer or Sony service centre to have it checked by qualified service personnel. When: –... -
Page 10: Overview Of The Remote
• Control for HDMI (BRAVIA Sync) is only available with the connected Sony equipment that has the BRAVIA Sync logo or is compatible with control for HDMI. • If you turn the TV off, Theatre Mode is also turned off. - Page 11 – Favourite list Displays the Favourite list that you have specified (page 21). qs PROG +/–/ • Selects the next (+) or previous (-) channel. • In Text mode: Selects the next ( ) or previous ( ) page. – Previous channel Returns to the previous channel watched (for more than five seconds).
- Page 12 For TV, Video, HD/DVD, HDMI or DIGITAL MEDIA PORT (except PC input) Wide Zoom* Enlarges the centre portion of the picture. The left and right edges of the picture are stretched to fill the 16:9 screen. Normal Displays the 4:3 picture in its original size. Side bars are shown to fill the 16:9 screen.
-
Page 13: Using The Tools Menu
Using the Tools menu Press TOOLS enables you to access various viewing options and change/make adjustments according to the source and screen mode. The options displayed vary depending on the input source. Viewing TV programme Viewing connected equipment Options Description Options Description Picture Mode... -
Page 14: Overview Of The Tv Buttons And Indicators
Overview of the TV buttons and indicators Displays or cancels the menu. – Input select / OK • Displays the connected equipment list and selects the input source (page 16). • In TV menu: Selects the menu or option, and confirms the setting. -
Page 15: Using Optional Equipment
Using Optional Equipment Connecting optional equipment You can connect a wide range of optional equipment to your TV. For service use only Home theatre system DVD player with HDMI output PC with HDMI output S VHS/Hi8/ camcorder Blu-ray disc player Headphones Digital video camera DMPORT... -
Page 16: Viewing Pictures From The Connected Equipment
720p (50/60 Hz), 1080i (50/60 Hz), 1080p (50/60 Hz) and 1080/24p. • Be sure to use only an HDMI cable that bears the HDMI logo (recommended Sony HDMI cable). • When connecting an audio system with HDMI jack, be sure to also connect to the... - Page 17 Jacks/ Description Input symbol on screen J DMPORT You can play audio or video (optional cable required) of a portable audio player that is connected to the TV using a DIGITAL MEDIA PORT adaptor. DMPORT Depending on the connected DIGITAL MEDIA PORT adaptor, you can operate the connected equipment using the TV as follows;...
-
Page 18: Viewing Twin Picture
Viewing Twin Picture Viewing PIP (Picture in Picture) You can view two pictures (external input and TV programme) on the screen simultaneously. Connect the optional equipment (page 15), and make You can view two pictures (PC input and TV sure that images from the equipment appear on the programme) on the screen simultaneously. -
Page 19: Using Bravia Sync (Control For Hdmi)
• Adjusts the volume (2 +/–) and mutes the sound (%) of a connected audio system. • You can operate the connected Sony equipment that has the BRAVIA Sync logo by the TV remote by pressing: –... -
Page 20: Using Menu Functions
Using MENU Functions Navigating through menus “MENU” allows you to enjoy various convenient features of this TV. You can easily select channels or inputs sources and change the settings for your TV. Press MENU. Press to select an option, then press To exit the menu, press MENU. -
Page 21: Using The Favourite List
Using the Favourite List The Favourite feature lets you select programmes from a list of up to 16 favourite channels that you specify. Press MENU. Press to select “Favourites”, then press Perform the desired operation as shown in the following table or displayed on the screen. -
Page 22: Settings Adjustment
Settings adjustment You are able to change the settings of your TV from “Settings” menu. F/f to select “Settings”, then press Press MENU. Press F/f to select a menu icon, then press Press F/f/G/g to select an option or adjust a setting, then press Press The following is an overview of the items that can be adjusted. - Page 23 Video Settings menu (page 27) Video Settings “Motionflow”: “High” t “Standard” t “Off” Motionflow High Cinema Drive Auto1 “Cinema Drive”: “Auto1” t “Auto2” t “Off” Game/Text Mode Video/Photo “Game/Text Mode”: “On” t “Off” x.v.Colo Photo Colour Space “Video/Photo”: “Video-A” t “Video” t “Photo” “x.v.Colour”: “Auto”...
-
Page 24: Picture Menu
Picture menu Press MENU and select “Settings”. Make sure the “Picture” icon ( ) is selected, then press Picture Mode Selects the picture mode except for PC input source. “Picture Mode” includes options best suited for video and photographs, respectively. “Vivid”: For enhanced picture contrast and sharpness. -
Page 25: Sound Menu
Advanced Settings Customises the “Picture” function in more detail. When you set “Picture Mode” to “Standard”, “Cinema”, “Photo-Standard” or “Photo-Original”, you can set/change these settings. “Adv. Contrast Enhancer”: Automatically adjusts “Backlight” and “Picture” to the most suitable settings judging from the brightness of the screen. This setting is especially effective for dark images scenes. -
Page 26: Screen Menu
Dual Sound Selects the sound from the speaker for a stereo or bilingual broadcast. The selection varies, depending on the Broadcasting. Broadcasting Selection NICAM stereo Stereo (stereo sound) Mono (regular sound) NICAM bilingual Main (main sound) Sub (sub sound) Mono (regular sound) NICAM monaural Main (main sound) Mono (regular sound) -
Page 27: Video Settings Menu
Provides suitable image quality by selecting the option depending on the input source (video or photograph data). “Video-A”: Sets suitable image quality, depending on the input source, video data or photograph data when directly connecting Sony HDMI output-capable equipment that supports “Video-A” mode. “Video”: Produces suitable image quality for moving pictures. -
Page 28: Set-Up Menu
x.v.Colour Displays moving pictures that is more faithful to the original source by matching the colour space of source. • The setting is fixed to “Normal” when the input signal is HDMI (RGB), even if “x.v.Colour” is selected. • Only available for HDMI 1, HDMI 2, HDMI 3 and Component in format 720p, 1080i or 1080p. - Page 29 HDMI. When set to “On”, the following menu items can be performed. If the specific Sony equipment that is compatible with control for HDMI is connected, this setting is applied to the connected equipment automatically when the “Control for HDMI”...
- Page 30 “Off”: Turns off the “Light Sensor” feature. • Be sure not to put anything over the sensor, as its function may be affected. Logo Illumination Lights up and turns off the Sony logo on the front of the TV. Product Information Displays your TV’s product information.
-
Page 31: Pc Settings Menu
PC Settings menu Press MENU and select “Settings”. Press to select the “PC Settings” icon ( ), then press Wide Mode Selects a screen mode for displaying input from your PC, see page 12. “Full 1”: Enlarges the picture to fill the display area, keeping its original horizontal- to-vertical aspect ratio. -
Page 32: Channel Set-Up Menu
Channel Set-up menu Press MENU and select “Settings”. Press to select the “Channel Set-up” icon ( ), then press 1 Digit Direct When “1 Digit Direct” is set to “On”, you can select a channel using one preset number button (0 - 9) on the remote. •... - Page 33 Manual Programme Before selecting “Label”/“AFT”/“Audio Filter”/“Skip”/“Colour System”/“Signal Booster”, press PROG +/- to select the programme number with the channel. You Preset cannot select a programme number that is set to “Skip” (page 33). Programme/TV System/VHF or UHF Presets programme channels manually. Select “Programme”, then press Press to select the programme number you want to manually tune...
-
Page 34: Additional Information
Sufficient expertise is required for installing these products, especially to determine the strength of the wall for withstanding the TV’s weight. Be sure to entrust the attachment of these products to the wall to Sony dealers or licensed contractors and pay adequate attention to safety during the installation. Sony is not liable for any damage or... -
Page 35: Tv Installation Dimensions Table
TV installation dimensions table SU-WL500: Screen centre point SU-WL50B: Screen centre point Unit: mm Length for each mounting angle Display Screen centre dimensions dimension Angle (0°) Angle (20°) Model Name SU-WL500 only WL500 WL50B WL500 WL50B WL500 WL50B KLV-52W450A 1262 KLV-46W450A 1120 KLV-40W450A... -
Page 36: Screw And Hook Locations Diagram/Table
Screw and Hook locations diagram/table Screw location Hook location Model Name SU-WL500 SU-WL50B SU-WL500 SU-WL50B KLV-52W450A/KLV-46W450A e, j d, g KLV-40W450A d, i SU-WL500: Screw location Hook location When installing the Mounting Hook on the TV. When installing the TV onto the Base Bracket. * Hook location “a”... -
Page 37: Specifications
Specifications Model name KLV-52W450A KLV-46W450A KLV-40W450A System Panel System LCD (Liquid Crystal Display) Panel TV System B/G, I, D/K, M Colour System PAL, PAL60, SECAM, NTSC4.43, NTSC3.58 Channel Coverage B/G: VHF: E2 to E12/ UHF: E21 to E69/ CATV: S01 to S03, S1 to S41 UHF: B21 to B69/ CATV: S01 to S03, S1 to S41 D/K: VHF: C1 to C12, R1 to R12/ UHF: C13 to C57, R21 to R60/ CATV: S01 to S03, S1 to S41, Z1 to Z39... -
Page 38: Troubleshooting
If you find any problem while viewing your TV, you can either check the Troubleshooting guide below or use the “Factory Settings” function (page 30). If the problem persists, contact your Sony dealer. Check whether the 1 (standby) indicator is flashing in red. - Page 39 • The antenna connection is loose or the antenna cable is damaged. Check the cable and connection on the TV, VCR, and on the wall (page 5). switches on and off, or is • Adjust the antenna direction for the minimum interference. Contact a Sony dealer distorted; the sound switches for advice.
- Page 40 • The antenna connection is loose or the antenna cable is damaged. Check the cable and connection on the TV, VCR, and on the wall (page 5). • Adjust the antenna direction. Contact a Sony dealer for advice. • Signal transmission is too low. Try using a booster.
- Page 44 Instructions on “Installing the Wall-Mount Bracket” are not supplied in the form of a separate leaflet with this TV. These installation instructions are included within this TV’s instructions manual. Customer support Printed in Malaysia...
Need help?
Do you have a question about the Bravia KLV-52W450A and is the answer not in the manual?
Questions and answers