Table of Contents
Advertisement
Available languages
Available languages
Quick Links
Advertisement
Table of Contents

Subscribe to Our Youtube Channel
Related Manuals for Lea LE25254 DP


Summary of Contents for Lea LE25254 DP
- Page 1 BRUSHCUTTER DECESPUGLIATORE LE25254 DP Original instructions Istruzioni originali...
-
Page 2: Table Of Contents
INDEX (GB) DETAILED DESCRIPTION OF THE PRODUCT……………………………………… TECHNICAL CHARACTERISTICS……………………………………………………... DESCRIPTION OF SYMBOLS………………………………………………………….. SAFETY INSTRUCTIONS……………………………………………………………….. SPECIAL SATETY WARNING………………………………………………………….. ASSEMBLY………………………………………………………………………………... OPERATION………………………………………………………………………………. MAINTENANCE AND CARE……………………………………………………………. TROUBLESHOOTING…………………………………………………………………… CONFORMITY DECLARATION………………………………………………………… INDICE (IT) DESCRIZIONE DEL PRODOTTO………………………………………………………. CARATTERISTICHE TECNICHE……………………………………………………….. DESCRIZIONE DEI SIMBOLI…………………………………………………………… ISTRUZIONI DI SICUREZZA…………………………………………………………….. AVVERTENZE SPECIALI………………………………………………………………... MONTAGGIO………………………………………………………………………………... -
Page 3: Detailed Description Of The Product
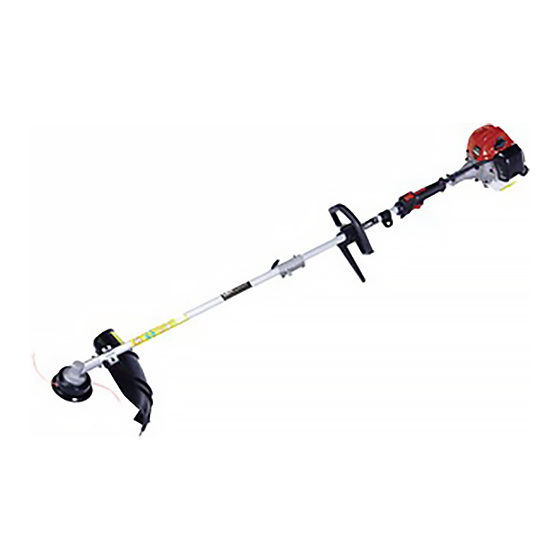
15. Nylon head. 16. Nylon cutting blade. 17. Blade. 18. Gear Box. 19. Hitch of harness. 20. Adapter TECHNICAL CHARACTERISTICS Model LE25254 DP Displacement (cm 25,4 Maximum power (kW) Engine/Fuel ratio 2Stroke /Gasoline 40 : Oil 1 Maximum engine speed(min 9000... -
Page 4: Description Of Symbols
DESCRIPTION OF SYMBOLS Symbols are used in this manual to attract your attention to possible risks. The safety symbols and the explications which accompany them must be perfectly understood. The warning themselves do not prevent the risks and can not be a substitute for proper methods of avoiding accidents. -
Page 5: Safety Instructions
Beware of thrown objects hit by cutting attachments. Never use without properly mounted blade guard. Wear head protection, hearing protection and eye protection when using the device. Wear robust footwear when using the device. Wear protective gloves when using the device. The part to refuel the “MIX GASOLINE”... - Page 6 Training Read the instructions carefully. Be familiar with the controls and the proper use of the appliance. This product has been designed for use in cutting grass, and it should never be used for any other purpose. Never allow children or people unfamiliar with these instructions to use the appliance. Local regulations may restrict the age of the operator.
-
Page 7: Special Satety Warning
· if the appliance starts to vibrate abnormally (check immediately). Maintenance and storage Keep all nuts, bolts, and screws tight to be sure the appliance is in safe working condition. Check the grass catcher frequently for wear or deterioration. Replace worn or damaged parts for safety. For rotary mowers, ensure that only replacement cutting means of the right type are used. - Page 8 screws enough. Assemble the safe guard. Fix the safe guard with hex key and wrench enclosed as stardard accessories for tighting the nuts enough. Please see the below pictures showing. Warning! Use only original manufacturer's replacement parts, accessories and attachments. Failure to do so can cause poor performance, possible injury and may void your warranty.
- Page 9 4.Assemble the cutting head. 4.1Release the nut. Line up the two holes of flange and shield, use one hex kep to hold the flange as below and turn the socket wrench clockwise, the nut will be released. 4.2 Fit the Nylon cutting head. Remove another shield after release the nuts as picture showing.
- Page 10 4.3 Release the Nylon cutting head. Use screw driver to hold flange and then rotate the Nylon cutting head clockwise, it will be replaced. 4.4 Fit the blade. Keep hex key holding on the flange then release the nuts as picture showing, then put the blade, holder B, cover and left nut according to priority as below picture.
-
Page 11: Operation
OPERATION When operating this machine, please follow the instructions for operations steps Filling with fuel Danger of injury! Fuel is explosive! DANGER! - Turn off and cool the motor down before filling the tank with fuel. - You must observe all safety instructions relating to handing fuel. Risk of device damage! The device is supplied without motor or gearbox oil. - Page 12 – Screw the tank cap on firmly by hand. Draining fuel Hold a collection container beneath the fuel drain bolt. Unscrew the tank cap and remove it. Allow the fuel to run out completely. Screw the tank cap on firmly by hand. Start on the unit Do not start the unit until it has been completely assembled.
- Page 13 2. Turn the engine switch to the "I" position. 3. Put the choke lever on the A (OFF) position 4. Pull the recoil starter handle 3-5times to start the engine, as following picture. Adjust the choke leverl to B(half open) position.
- Page 14 6. Pull the rope until engine starts When the engine is running and idling. The throttle lever on handle is as below picture. First press the lock off lever and then switch the throttle lever on, the machine will be working.
-
Page 15: Maintenance And Care
10. If meet any problem, pull the pin of safety belt, then release the brush cutter soon. If the machine is hot, the throttle level can be adjusted to ON position directly when re start the machine. MAINTENANCE AND CARE Before performing any maintenance or cleaning work, Always turn off the engine. -
Page 16: Troubleshooting
5) After the spark plug is seated, tighten with spanner to compress the washer. Clean the air filter Unclip the air filter cover and remove the sponge filter element. To avoid objects falling into the air tank, replace the air filter cover. Wash the filter element in warm soap water, rinse and allow drying naturally. -
Page 17: Conformity Declaration
……………………………………………………………………………………………………………. CONFORMITY DECLARATION The undersigned, DUNSCH EUROPE SrL, Via dell’Artigianato nr. 10, GRAGNANO TREBBIENSE (Italy). hereby certifies that the units described below: BRUSHCUTTER Model LE25254 DP(PNBC260B-3B) Power 0,7kW Brand: LEA Batch 20160201 Sound pressure level: 89.8 dB (A) Guaranteed sound power level: 112dB (A) -
Page 18: Descrizione Del Prodotto
16. Lametta taglio del filo di nylon. 17. Lama d’acciaio. 18. Scatola coppia conica. 19. Gancio dell’imbracatura. 20. Adattatore CARATTERISTICHE TECNICHE Modello LE25254 DP Cilindrata (cm 25,4 Potenza massima (kW) Motore/ rapporto di carburante 2 tempi/Benzina 40: Olio 1 Velocità massima de giro del motore (min 9000 Velocità... -
Page 19: Descrizione Dei Simboli
DESCRIZIONE DEI SIMBOLI Questo manuale utilizza una serie di simboli per avvertirvi dei possibili rischi. È necessaria un’adeguata comprensione dei simboli di sicurezza e delle spiegazioni correlate. Le stesse avvertenze non prevengono i rischi e non possono sostituire le corrette misure da prendere per evitare gli incidenti. Questo simbolo, posizionato prima di un’osservazione sulla sicurezza, indica attenzione, avvertenza o pericolo. - Page 20 Attenzione agli oggetti che possono essere lanciati se toccati con gli accessori di taglio. Non utilizzare mai senza la protezione della lama correttamente montata. Attenzione a non ferirvi con gli accessori di taglio Durante l’uso della macchina indossare accessori di protezione per testa, orecchie e occhi.
-
Page 21: Istruzioni Di Sicurezza
“O” Spento/Off “I” esercizio/On Direzione di rotazione del dispositivo di taglio ISTRUZIONI DI SICUREZZA Questo dispositivo non può essere usato da persone (inclusi i bambini) con ridotte capacità fisiche, sensoriali o mentali, o senza esperienza e conoscenze in materia, a meno che non siano sorvegliate o istruite sull’uso della macchina da una persona responsabile per la loro sicurezza. -
Page 22: Avvertenze Speciali
- Fare molta attenzione durante i cambi di direzione effettuati in pendenza. - Non usare su pendenze estremamente ripide. - Fare molta attenzione durante la retromarcia oppure quando si tira la macchina verso di sè. - Non usare mai la macchina con protezioni o schermi protettivi difettosi, o senza dispositivi di sicurezza. -
Page 23: Montaggio
4. Assicurarsi sempre di spegnere il motore se l’erba s’incastra nella lama durante l’uso o se è necessario controllare la macchina o fare rifornimento. 5. Se la lama urta un oggetto, per esempio una pietra, spegnere immediatamente il motore e controllare lo stato della lama, sostituendola se è... - Page 24 3.Montaggio del manico di guida Inserire la parte inferiore (2) dell’asta nel giunto e contemporaneamente estrarre la spina di bloccaggio (1). Inserire la parte inferiore dell’asta fino all’arresto e rilasciare la spina di bloccaggio. Quest’ultima dovrà scattare in posizione nell’apertura (3) presente sul lato della sezione inferiore dell’asta.
- Page 25 4.2 Montaggio della testina in nylon. Rimuovere un’altra protezione dopo aver tolto i bulloni, come mostrato nell’immagine. Tenere fissa la flangia, mettere la testina in nylon sull’asta e girare in senso antiorario, fissando la testina. 3.3 Rimozione della testina in nylon. Utilizzare il cacciavite per tenere la flangia e girare la testina in nylon in senso orario.
-
Page 26: Utilizzo
4.3 Rimuovere la lama. Usare il cacciavite per tenere ferma la flangia e allentare il dado, la lama può essere tolta. Avvertenza! Prima dell’uso controllare che la testina in nylon sia stata correttamente montata! Nota: L’imballo è confezionato in materiale riciclato. Smaltire gli imballi in conformità con le norme di legge. - Page 27 Le miscele non utilizzate per un mese o più possono ostruire il carburatore o causare guasti nel funzionamento del motore. Mettere gli avanzi di carburante in un contenitore a tenuta d’aria e conservarlo in un luogo buio e fresco. Miscelare una benzina normale (con o senza piombo, senza alcol) con un olio di qualità per motori a 2 tempi.
- Page 28 Controllare a vista la presenza di difetti. Controllare che tutti i componenti della macchina siano stati ben fissati. Controllare che tutti i dispositivi di sicurezza siano in buono stato. Pericolo di ferite! Prima di iniziare il lavoro controllare sempre il terreno e rimuovere gli PERICOLO! oggetti che potrebbero essere lanciati durante l’uso della macchina.
- Page 29 4. Tirare la cordicella dell’avviamento a strappo 3-5 volte per accendere il motore, come nell’immagine sottostante. 5. Regolare la leva’aria nella posizione to B (aperta a metà) . 6. Tirare la cordicella finchè il motore si accende 7. Quando il motore è in funzione a vuoto la leva dell’acceleratore posizionata sulla maniglia dev’essere come nell’immagine sottostante.
-
Page 30: Manutenzione
8. Se si usa la testina in nylon, dura per far avanzare il filo. 9. Se si riscontra qualche problema, premere il pulsante "O"del motore e la macchina si spegnerà. Se si ha la necessità di fermare la testina di taglio, rilasciare la leva dell’acceleratore. - Page 31 Programma di manutenzione 24 ore d’us 36 ore d’us 12 ore d’us Filtro dell’aria pulizia pulizia sostituzione Candela verifica pulizia sostituzione La macchina deve essere esaminata da una persona qualificata: a) Se il decespugliatore urta un oggetto b) Se il motore si ferma improvvisamente c) Se la lama è...
-
Page 32: Risoluzione Dei Problemi
RISOLUZIONE DEI PROBLEMI Prima di effettuare qualsiasi intervento di manutenzione o pulizia spegnere sempre il motore ed aspettare che la lama sia ferma 1) Il motore non funziona: ---Montare di nuovo la lama o il filo in nylon. ---Controllare il livello del carburante. 2) Calo potenza motore: ---Riaffilare/sostituire la lama (centro assistenza clienti) 3) Se la temperatura della macchina è... -
Page 33: Dichiarazione Ce Di Conformità
…………………………………………………………………………………………………………… DICHIARAZIONE CE DI CONFORMITÀ Il sottoscritto, DUNSCH EUROPE SrL, Via dell’Artigianato n. 10, 29010 GRAGNANO TREBBIENSE, certifica che il dispositivo descritto di seguito DECESPUGLIATORE Modello:LE25254 DP(PNBC260B-3B) Potenza:0,7 kW Marca: LEA Lotto 20160201 Livello di pressione sonora: 89,8 dB (A) Livello di potenza acustica garantito: 112 dB (A) procedure di valutazione della conformità...
Need help?
Do you have a question about the LE25254 DP and is the answer not in the manual?
Questions and answers
looking for the starter clutch on the shaft the rope engages with this to rotate the engine what is the part number and name