Table of Contents
Advertisement
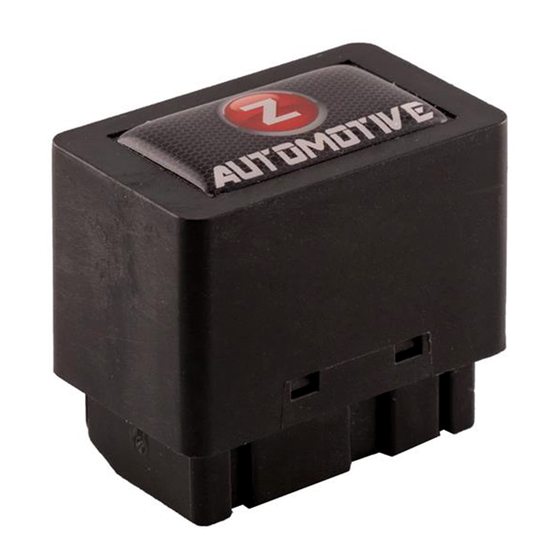
The
Tazer DT
is an electronic plug-in
device for the following vehicles:
2018-2022 Ram 1500 DT
2021-2022 Ram 1500 TRX
Firmware Updates
Use
ZPU (Z Automotive Programming
Utility), also on the website, to install the
firmware over USB.
User's Guide
For Firmware
New firmware
is available
periodically,
always free
and posted
to the Z
Automotive
website.
18.0.9-092721
Contents
C LICK
C
LICK to jump to section
CTRL + F (Windows) or ⌘ ⌘ + F
Use CTRL + F
(MacOS) to search the document
•
•
•
•
•
•
•
•
•
•
Also compatible with
Dodge Ram TRX
or
+ F
1
2
2
3
3
4
6
6
7
7
7
8
9
9
10
10
11
13
13
13
14
14
Advertisement
Table of Contents

Related Manuals for Z Automotive Tazer DT


Summary of Contents for Z Automotive Tazer DT
-
Page 1: Table Of Contents
Z • Live Settings Automotive Non-Menu Live Functions website. Updating Your Tazer Custom Light Show Config ZPU (Z Automotive Programming Unmarrying Your Tazer Utility), also on the website, to install the The Unmarry Key firmware over USB. Troubleshooting... -
Page 2: Feature List
• Live Functions are operations the Tazer DT performs live, only while it is physically connected. • “Non-Menu” Live Functions are operations the Tazer DT performs live, only while it is physically connected, and ARE NOT LOCATED IN A MENU ARE NOT LOCATED IN A MENU. -
Page 3: Live Functions
• activate 0-60 timer hood lights – works with headlights on or off. • display firmware version List of “Non-Menu” Live Functions • AutoStopStart Disable – Tazer DT will • AutoTracKill – Tazer DT will automatically automatically remember the last state of remember... -
Page 4: Installation
• Partial Reboot Installation • Unplug the SGW module above the OBD2 diagnostic connector • Plug the Tazer DT in its place. • Unplug the two connectors by pressing the tab with your index finger and gently pulling straight down on the wires. - Page 5 • The Tazer DT may be left plugged in, as many of its features (Live Functions) only work when installed. • • The Tazer DT should be Unmarried and removed before dealer service. The Tazer DT should be Unmarried and removed before dealer service.
-
Page 6: Menu Navigation
“Marry” the Tazer DT to the vehicle. When Cycles Cycles as described on you select this option, the Tazer DT will page 5 to return the to return the download your car’s current (presumably stock) settings. This should take around 15 vehicle to stock. -
Page 7: Submenu Performance
Submenu Perf: performance-based options • Set Tire Size: Use this setting to +/- buttons to raise or lower the value, change the calibration for tire size. Use then select it (left arrow and cruise on/ the left arrow and cruise +/- buttons to off) to save the new setting. -
Page 8: Submenu Lighting
Submenu Lighting: DRL and other lighting options • Set DRL Type: Choose USA (on but • Set LED CMHSL: This setting is to selectable), Canada (on all the time), configure the vehicle for LED 3rd brake or off. light. • Set DRL Location: Choose which •... -
Page 9: Submenu Off-Road
Live Menu Cont. • Firmware Version Display: Shows the current Tazer DT firmware revision. • Serial Number Display: Shows your Tazer DT’s serial number (only needed in specific tech support situations) • Unmarry Number: Displays the current one-time use Unmarry Number. -
Page 10: Live Menu
Live Menu This section explains how to use the Tazer DT’s live functions – these are activated with the same button presses as the Vehicle Settings Menu, but while the engine is These features RUNNING. will only work if the Tazer DT remains plugged •... -
Page 11: Non-Menu Live Functions
“go to 60” and the timer starts. When the vehicle reaches 60MPH, the time will be displayed. • Display Tazer DT Firmware Revision: Displays the Tazer DT’s current firmware version (ie “TZDT:18.0.X”) - Page 12 The engine assignment of “hotkeys” for quick access will rise to the RPM selected in the live to some of the Tazer DT’s functions. menu (default 2000). There may be a The cruise +/-/RES may be used for few seconds delay before it changes.
-
Page 13: Updating Your Tazer
USB cable, you can replace it with any common “USB Mini B” data/charging cable. Please see the accompanying “Light Show Configuration Guide” to configure your Tazer DT’s light show options in ZPU UNMARRYING YOUR TAZER To Unmarry your Tazer, select “Unmarry” from the Vehicle Settings Menu (not Live). -
Page 14: The Unmarry Key
Z Automotive cannot be held responsible misuse or consequential damages. If you are in doubt, email support@zautotech.com. Please be aware that modifying your vehicle in any way can affect your vehicle’s warranty, longevity, handling, etc.
Need help?
Do you have a question about the Tazer DT and is the answer not in the manual?
Questions and answers