Cosmo COS-12MWDSS Installation Manual
Microwave drawer
Hide thumbs
Also See for COS-12MWDSS:
- User manual ,
- Installation instructions manual (16 pages) ,
- User manual (22 pages)
Table of Contents
Advertisement
Quick Links
Microwave Drawer
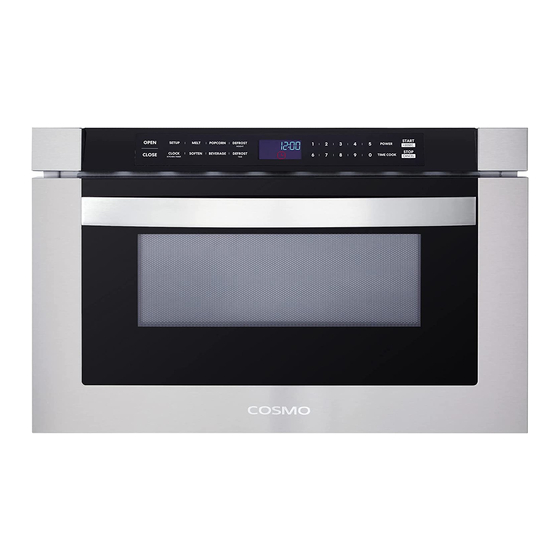
COS-12MWDSS
OPEN
CLOSE
SETUP
MELT
POPCORN
DEFROST
WEIGHT
CLOCK
SOFTEN
BEVERAGE
DEFROST
KITCHEN TIMER
TIME
Installation Manual
IMPORTANT: Read and save these instructions.
NOTICE:
Installer: Leave this guide with the homeowner
Homeowner: Keep this guide for future reference
START
1 1
2
3
4
5
POWER
POWER
+30SEC.
STOP
6
7
8
9
0
TIME COOK
CANCEL
Advertisement
Table of Contents

Related Manuals for Cosmo COS-12MWDSS


Summary of Contents for Cosmo COS-12MWDSS
- Page 1 Microwave Drawer COS-12MWDSS START OPEN SETUP MELT POPCORN DEFROST POWER POWER +30SEC. WEIGHT STOP CLOCK SOFTEN BEVERAGE DEFROST CLOSE TIME COOK CANCEL KITCHEN TIMER TIME Installation Manual IMPORTANT: Read and save these instructions. NOTICE: Installer: Leave this guide with the homeowner...
- Page 2 COSMO Appliances are designed according to the strictest safety and performance standard for the North American market. We follow the most advanced manufacturing philosophy.
-
Page 3: Table Of Contents
TABLE OF CONTENTS SAFETY & WARNINGS ..............4 Unpacking Your Microwave Drawer ........4 Important Notes to the Installer ..........4 Important Notes to the Consumer ..........4 CLEARANCES & DIMENSIONS ..........5 Microwave Drawer Measurements ..........5 INSTALLATION ...............6-7 Anti-Tip Block ................6 Electrical Outlet ................6 Grounding Instructions ............6 Electrical Outlet ................6 Drawer Installation ..............7... -
Page 4: Safety & Warnings
SAFETY & WARNINGS INSTALLATION AND SERVICE MUST BE PERFORMED BY A QUALIFIED INSTALLER. Save this installation manual for local electrical inspector's use. Read and save these instructions for future use. For safety considerations, do not install drawer in any combustible cabinetry, which is not in accord with the stated clearances and dimensions on Pages 5-6 (See Figure 1). -
Page 5: Clearances & Dimensions
CLEARANCES & DIMENSIONS S u g g e s t e d e l e c t r i c a l o u tlet l o c a t i o n A nt i T i p b loc k 4' ' F l o o t m u s t s u p p ort 1 0 0 l bs... -
Page 6: Installation
INSTALLATION ELECTRICAL OUTLET ANTI-TIP BLOCK S u gg e st e d el ect r ic a l out le t l oc a t i on A n t i T i p b l o c k 4 '' Figure 3 Figure 4 NORMAL INSTALLATION STEPS... -
Page 7: Drawer Installation
INSTALLATION DRAWER INSTALLATION Mounting flange Figure 5 Screws 1. Place the drawer adjacent to the wall or cabinet opening. Plug the power supply cord into the electrical outlet. 2. Carefully guide the drawer into the prepared opening. Avoid pinching the cord between the oven and the wall. -
Page 8: Warranty & Service
WARRANTY AND SERVICE For full warranty details on this product please visit: http://www.cosmoappliances.com/warranty TO RECEIVE WARRANTY SERVICE, YOUR PRODUCT MUST BE REGISTERED. TO REGISTER, VISIT: WWW.COSMOAPPLIANCES.COM/WARRANTY SCAN TO REGISTER... - Page 9 REQUIRED FOR WARRANTY SERVICE IMPORTANT Ne pas Réexpédier ce Produit au Magasin Pour tout problème concernant ce produit, veuillez contacter le service des consommateurs Cosmo Customer Support au +1(888) 784-3108 UNE PREUVE D’ A CHAT DATEE EST REQUISE POUR BENEFICIER DE LA GARANTIE.
- Page 10 NOTE:...
- Page 11 Cosmo is constantly making efforts to improve the quality and performance of our products, so we may make changes to our appliances without updating this manual. Electronic version of this manual is available at: www.cosmoappliances.com...
Need help?
Do you have a question about the COS-12MWDSS and is the answer not in the manual?
Questions and answers