
Subscribe to Our Youtube Channel
Related Manuals for BERG BC250


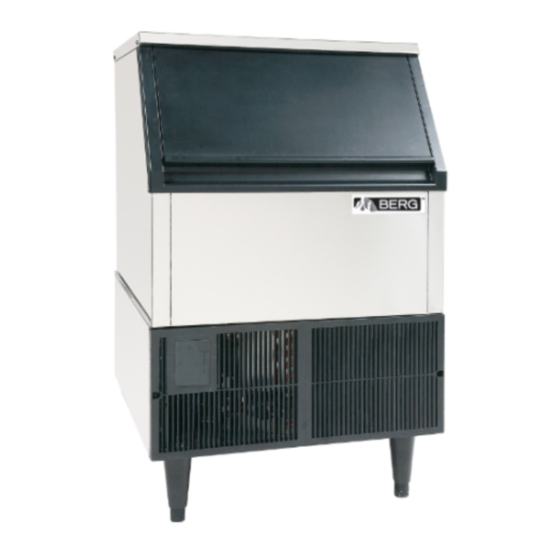
Summary of Contents for BERG BC250
- Page 1 Automatic Ice Maker User’s Manual Model: BC250 The unit must be standing upright 24 hours prior to being plugged in...
-
Page 2: Table Of Contents
TABLE OF CONTENTS Page ICE MAKER SAFETY ..................... 2 IMPORTANT SAFEGUARDS .................. 2–4 TECHNICAL INFORMATION ..................5 COMPONENT LOCATIONS ....................... ICE MAKER INSTALLATION 7-11 ....................Unpacking ......................7 Installing the Adjustable Feet ................7 Installing the Stability Brackets ................8 Location Requirements .................... -
Page 3: Ice Maker Safety
ICE MAKER SAFETY Your safety and the safety of others are very important. We have provided many important safety messages in this manual and on your appliance. Always read and obey all safety messages. This is the Safety Alert Symbol. This symbol alerts you to potential hazards that can injure or kill you and others. - Page 4 Plug into a grounded 3-prong outlet. Do not remove grounding prong, do not use an adapter, and do not use an extension cord. It is recommended that a separate circuit, serving only your ice maker, be provided. Use receptacles that cannot be turned off by a switch or pull chain. ...
- Page 5 the first batch of cubes must be discarded. If the ice maker will not be used for a long time, before the next use it must be thoroughly cleaned. Follow carefully any instructions provided for cleaning or use of sanitizing solution.
-
Page 6: Technical Information
Technical Information Model: BC250 Electrical input: 115VAC ~ 60Hz Power consumption: 9.55 kW·h /100 lbs of ice Ice-making/Ice-harvest rated current: 9.2A/12A Refrigerant: R404A, 22.9oz High/Low side pressure: 350psig/190psig Unit width x depth x height: 24” x 24” x 39” Unit weight:... -
Page 7: Component Locations
Component Locations Top panel Door Evaporator (ice mold) Bin full probe Water tank Water tank screw nut Ice storage bin Front bottom louver Control panel cover Adjustable foot Power switch Top view Back view Water inlet 3/8” FPT Power supply line Drain 1/2”... -
Page 8: Ice Maker Installation
Ice Maker Installation Unpacking Remove packaging materials IMPORTANT: Do not remove any permanent instruction labels or the data label on your ice maker. Remove tape and glue from your ice maker before using, To remove any remaining tape or glue, rub the area briskly with your thumb. Tape or glue residue can also be easily removed by rubbing a small amount of liquid dish soap over the adhesive with your fingers. -
Page 9: Installing The Stability Brackets
Installing the stability brackets This operation requires at least two persons. If you wish to install the ice maker in a free-standing mode rather than enclosed, it is necessary to attach the two metallic stability brackets that can be found packed inside the ice storage bin. -
Page 10: Electrical Requirements
Choose a well-ventilated area with temperatures above 50ºF (10ºC) and below 100ºF (38ºC). This unit MUST be installed in an area protected from the elements, such as wind, rain, water spray or drips. The unit should not be located next to ovens, grills or other sources of high heat. ... -
Page 11: Leveling The Ice Maker
ice maker, be provided. Use receptacles that cannot be turned off by a switch or pull chain. The fuse (or circuit breaker) size should be 15 amperes. Recommended grounding method For your personal safety, this appliance must be grounded. It is equipped with a power supply cord having a 3-prong grounding plug. -
Page 12: Installation Types
4. Check for leaks after connection. Tools required: 3/8″ open-end wrench, Phillips screwdriver Connecting the water line: 1. Turn off main water supply. 2. Find a water supply line near the installation location. The distance should be less than the length of the water supply hose. 3. -
Page 13: Operation
Operation Final Check List before Operation 1. Have all packing materials and tape been removed from the interior and exterior of the ice maker? 2. Did you clean the ice storage bin? (See pages 15 - 17.) 3. Have the installation instructions been followed, including connecting the machine to water and electricity? 4. -
Page 14: How The Machine Makes Ice
IMPORTANT: Although the unit has been tested and cleaned at the factory, due to long-term transit and storage, the first batch of cubes must be discarded. Never turn the water supply tap off when the ice maker is working. ... -
Page 15: Normal Sounds
Normal Sounds Your new ice cube machine may make sounds that are unfamiliar to you. Most of the new sounds are normal. Hard surfaces like the floor and walls can amplify the sounds. The following describes the kinds of sounds that might be new to you and what may be causing them. -
Page 16: Exterior Cleaning
1. The exterior 2. The interior 3. Water distribution tube 4. The ice-making system cleaning Exterior Cleaning The door and cabinet may be cleaned with a mild detergent and warm water solution such as 1 oz of dishwashing liquid mixed with 2 gallons of warm water. Do not use solvent-based or abrasive cleaners. -
Page 17: Water Distribution Tube Cleaning
Water Distribution Tube Cleaning When you find that the ice cubes are incompletely formed or the output of ice cubes is low, the water distribution tube may be blocked. Set the power switch to OFF. Unscrew the six screws holding the top panel and remove the panel. You will see the water distribution tube. -
Page 18: Control Panel
water. 4. Keep the ice maker connected to the water supply. Fill the water tank with the sanitizing solution. 5. Turn the power switch ON. Within 3 minutes, press the CLEAN button. The machine will run the Automatic Clean mode. The yellow Ice Harvest and the red Bin Full LEDs will blink. - Page 19 Push the control panel cover to open it. The control panel includes two buttons and four indicator lights. Operation of the control panel: 1. When the unit is plugged in and the power switch is turned on, the power indicator and the other three indicator lights are all on.
-
Page 20: Troubleshooting
minutes after the power has been turned ON, the ice maker will enter the cleaning mode. If press the Clean button and hold it for more than six seconds, the machine will enter the draining mode. The red, green and yellow LEDs will be blinking together. Ice Size Adjustment Guide: 1. - Page 21 Problem Possible Cause Probable Correction The machine The ice maker is unplugged. Plug the ice maker in. doesn't operate. The fuse is blown. Replace fuse--if it happen, call for service to check for a short circuit in the ice maker. The ice maker power switch Turn the ice maker power switch to ON is OFF.
Need help?
Do you have a question about the BC250 and is the answer not in the manual?
Questions and answers