Table of Contents
Advertisement
Quick Links
Advertisement
Table of Contents

Related Manuals for Pioneer AVH-Z9190BT


Summary of Contents for Pioneer AVH-Z9190BT
- Page 1 AVH-Z9190BT MONITOR RDS AV RECEIVER Owner’s Manual...
-
Page 2: Table Of Contents
■ Selecting the video for the rear display ..... 51 Starting procedure............ 30 Bluetooth ......11 Thank you for buying this Pioneer Setting the anti-theft function ......51 Using the keyboard (for iPhone users)....31 product. Restoring this product to the default Bluetooth connection .......... -
Page 3: Precaution
• If you notice smoke, a strange noise or odour from this product, or any other abnormal signs on the LCD screen, turn off the power immediately and consult your dealer or the nearest authorised Pioneer Service Station. Using this product in this condition may result in permanent damage to the system. -
Page 4: To Ensure Safe Driving
Before using this product, be sure to read and fully understand the following safety If you attempt to watch video image while driving, the warning “Viewing of front seat information: video source while driving is strictly prohibited.” will appear on the screen. To watch •... -
Page 5: Handling The Usb Connector
This manual uses diagrams of actual screens to describe operations. However, the recover the data. Pioneer accepts no liability for damages, costs or expenses arising from data loss or screens on some units may not match those shown in this manual depending on the corruption. -
Page 6: Parts And Controls
Press to activate the voice recognition mode with a connected iPhone or Parts and controls smartphone. Press and hold to display the connectable device list screen or device search screen. Main unit RESET Press to reset the microprocessor (page 7). SD card slot Refer to Inserting and ejecting an SD memory card (page 24). -
Page 7: Basic Operation
RETURN Press to return to the specified point and start playback from there. Basic operation Press to pause or resume playback. For audio: Press and hold to perform fast reverse or fast forwards. For video: Press to perform fast reverse or fast forwards. Press to return to the previous track (chapter) or go to the next track (chapter). -
Page 8: Preparing The Remote Control
Preparing the remote control Important • Do not store the remote control in high temperatures or direct sunlight. • Do not let the remote control fall onto the floor, where it may become jammed under the brake or Remove the insulation sheet before use. accelerator. -
Page 9: Using The Touch Panel
Restore the default setting (page 52). Operating the time bar Using the touch panel You can operate this product by touching the keys on the screen directly with your fingers. NOTE You can change the playback point by dragging the key. To protect the LCD screen from damage, be sure to touch the screen only with your finger gently. -
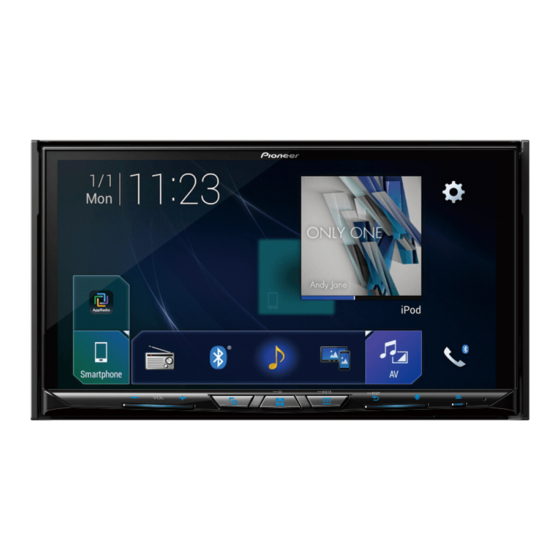
Page 10: Top Menu Screen
The hidden function keys appear. Top menu screen NOTE This key does not appear for some AV sources. Operating the on-screen keyboard Favourite source icons TIPS • When you connect the external navigation system to this unit, the navigation mode key is displayed at the middle of the right side of the display. •... -
Page 11: Bluetooth
Connected device key Bluetooth Displays connected device. Switches the source or application with connected devices such as AppRadio Mode +, external navigation system, Apple CarPlay, Android Auto. TIPS Bluetooth connection • When a device with a compatible application is connected, the favourite application key appears. -
Page 12: Hands-Free Phoning
Menu Item Description [Connection] Connect, disconnect, or delete registered Bluetooth device manually. Touch to delete registered device. To connect a registered Bluetooth device manually, touch the name of the device. To disconnect the device, touch the name of the connected device in the list. - Page 13 Using the preset dial lists Voice recognition function ▶Registering a phone number You can use the voice recognition function of iPhone or smartphone. You can easily store up to six phone numbers per device as presets. NOTES Press • When an iPhone running iOS 6.1 or higher is used, Siri Eyes Free Mode is available with this product. •...
-
Page 14: Bluetooth Audio
• The registered name will appear if the phone number is already registered in the Setting the private mode phone book. When the same phone number is registered under different names, only the phone number will be displayed. During a conversation, you can switch to private mode (talk directly on your mobile ▶The received call and dialled number histories phone). - Page 15 Touch Bluetooth audio playback screen 2 The AV source screen appears. Touch [Bluetooth Audio]. The Bluetooth audio playback screen appears. Basic operation Bluetooth audio playback screen 1 Sets a repeat play range. Plays files in random order. Switches between playback and pause. Skips files forwards or backwards.
-
Page 16: Wi-Fi
Wi-Fi audio Wi-Fi Before using the Wi-Fi audio player, connect the device to this product via Apple CarPlay (page 32) or Android Auto wirelessly (page 34). You can connect your Wi-Fi certfied mobile device to this product via Wi-Fi connection. Press then touch Touch [Wi-Fi Audio]. -
Page 17: Av Source
Recalls equaliser curves (page 45). AV source Selecting a source Supported AV source You can play or use the following sources with this product. Source on the AV source selection screen • Radio • CD Press then touch • ROM (compressed audio or video files on discs) •... -
Page 18: Adjusting The Range Of Favourite Source Icons Area
Adjusting the range of favourite source icons area Setup for iPod/iPhone or NOTE smartphone This function is available only when you stop your vehicle in a safe place and apply the handbrake. Press Touch and hold When using an iPod/iPhone or a smartphone with this product, configure settings of this appears at the top left of the favourite source icons. -
Page 19: Smartphone (Android™ Device)
Touch [Smartphone-related Settings]. Radio Touch [Smartphone Setup]. Touch [iPhone/iPod]. The available function icons are displayed. Starting procedure Touch [OK]. Press then touch Smartphone (Android™ device) Touch [Radio]. The Radio screen appears. Compatible smartphones Compatibility with all smartphones is not guaranteed. For details about smartphone Basic operation compatibility with this product, refer to the information on our website. -
Page 20: Searching By Pty Information
Searches for a broadcast by PTY information (page 20). Radio settings Press TIPS • By pressing then touch , you can also switch the preset channels. Touch then • By pressing then touch and hold and releasing it, you can also perform seek tuning. The system setting screen appears. -
Page 21: Disc
*1 This setting is available when the source is turned off. Disc *2 This function is available only when you receive the FM band. Inserting and ejecting a disc You can play a normal music CD, Video-CD, or DVD-Video using the built-in drive of this product. - Page 22 Audio source Video source CAUTION Audio source screen 1 For safety reasons, video images cannot be viewed while your vehicle is in motion. To view video images, stop in a safe place and apply the handbrake. Video source screen 1 Switches between playback and pause.
- Page 23 Searches for the part you want to play. Displays the DVD menu keypad. Touch [Title], [Chapter], [10key], or [Track] then input the desired number from [0] If items on the DVD menu appear, the touch panel keys may overlay them. If so, to [9].
-
Page 24: Compressed Files
Touch to open the LCD panel. Compressed files Insert an SD memory card into the SD card slot. Press Inserting and ejecting media NOTES • This system is not compatible with the Multi Media Card (MMC). You can play compressed audio, compressed video, or still image files stored in a disc or •... -
Page 25: Starting Procedure
Unplugging a USB storage device Audio source Pull out the USB storage device from the USB cable. Audio source screen 1 (Example: USB) NOTES • Check that no data is being accessed before pulling out the USB storage device. • Turn off (ACC OFF) the ignition switch before unplugging the USB storage device. Starting procedure For Disc Insert the disc (page 24). - Page 26 Audio source screen 2 (Example: USB) Once the database is created in the USB storage, there is no need to create the database again as long as the same contents are saved. To enter the Music Browse mode directly, touch and then touch [Tag] before selecting the song.
- Page 27 Sets a repeat play range for all files/the current folder/the current file. Switches between playback and pause. Switches the following media file types. [Music]: Compressed audio files [Video]: Compressed video files Switches the audio/subtitle language. [Photo]: Image files Skips files forwards or backwards. Selects a file from the list.
-
Page 28: Ipod
Audio source iPod Audio source screen 1 Connecting your iPod When connecting an iPod to this product, the settings are automatically configured according to the device to be connected. NOTES • Depending on the generation or version of the iPod, some functions may not be available. •... - Page 29 Audio source screen 2 Apple Music Radio screen Switches between playback and pause. Changes the audiobook speed. Normal—Fast—Slow Displays the pop-up menu for Apple Music Radio. • Touch [Play More Like This] to play back songs similar to the current song. NOTE •...
-
Page 30: Appradio Mode
• Press then touch to hide the AppRadio Mode + SideControlBar. • PIONEER IS NOT RESPONSIBLE AND DISCLAIMS LIABILITY FOR THIRD PARTY (NON-PIONEER) APPS • Press then touch again to display the AppRadio Mode + SideControlBar again. AND CONTENT, INCLUDING WITHOUT LIMITATION ANY INACCURACIES OR INCOMPLETE INFORMATION. -
Page 31: Using The Keyboard (For Iphone Users)
Press Using the audio mix function Touch You can output the audio mixing AV source and an application for iPhone or Touch [AppRadio Mode]. smartphone when AppRadio Mode + is used. Touch desired icon in the tab. NOTE Depending on the application or AV source, this function may not be available. The AppRadio app is launched. -
Page 32: Using Apple Carplay
Apple CarPlay in the Bluetooth setting menu of the device (page 11). while driving. • PIONEER IS NOT RESPONSIBLE AND DISCLAIMS LIABILITY FOR THIRD PARTY (NON-PIONEER) APPS Turn on the Wi-Fi function on the device. AND CONTENT, INCLUDING WITHOUT LIMITATION ANY INACCURACIES OR INCOMPLETE INFORMATION. -
Page 33: Adjusting The Volume
• Android Auto allows access to applications other than those listed that are subject to limitations while driving. • PIONEER IS NOT RESPONSIBLE AND DISCLAIMS LIABILITY FOR THIRD PARTY (NON-PIONEER) APPS AND CONTENT, INCLUDING WITHOUT LIMITATION ANY INACCURACIES OR INCOMPLETE Touch to mute. -
Page 34: Starting Procedure
Touch a desired device on the screen. Touch [Smartphone-related Settings]. The unit configures the connection then start the application. Touch [Driving Position]. [Left] You can use voice recognition function by pressing once Android Auto is activated. Select for a left-hand drive vehicle. NOTES [Right] •... -
Page 35: Hdmi
NOTE HDMI Android Auto will launch automatically only when an Android Auto compatible device is correctly connected to this product. Press CAUTION Touch then For safety reasons, video images cannot be viewed while your vehicle is in motion. To view video Touch [Smartphone-related Settings]. -
Page 36: Aux
Basic operation AUX screen You can display the video image output by the device connected to video input. CAUTION For safety reasons, video images cannot be viewed while your vehicle is in motion. To view video images, stop in a safe place and apply the handbrake. NOTES •... -
Page 37: Av Input
Basic operation AV input AV source screen You can display the video image output by the device connected or the camera to video input. For details, refer to Using AV input (page 57). CAUTION For safety reasons, video images cannot be viewed while your vehicle is in motion. To view video images, stop in a safe place and apply the handbrake. -
Page 38: Wireless Mirroring
Basic operation Wireless Mirroring Wireless Mirroring screen (Example) (This function is available only for Android device.) Wireless Mirroring is a wireless display designed to mirror your mobile device on this product screen via Wi-Fi connection. Starting procedure Wireless Mirroring operations and procedures vary depending on the connected mobile device. -
Page 39: Settings
CAUTION [Android Auto Auto- Select [On] to automatically launch Android Auto when an Pioneer recommends the use of a camera which outputs mirror reversed images, otherwise the screen launch] Android device is connected to the unit. image may appear reversed. - Page 40 • Immediately verify whether the display changes to the rear view camera image when the gearstick is Menu Item Description moved to REVERSE (R) from another position. [Parking Assist Guide Adjusting the guidelines by dragging or touching • When the screen changes to full-screen rear view camera image during normal driving, switch to the opposite setting in [Reverse Gear Setting.].
- Page 41 In this case, contact your dealer or an authorised PIONEER [On] [Off] pressed or the screen is touched. Service Station. • Please use a PIONEER wiring harness for each car model when [With Adapter] mode is engaged, otherwise select [W/o [Dimmer Settings] Adapter].
- Page 42 Menu Item Description Menu Item Description [Day/Night] Setting the dimmer duration by day or night. [Hue]* Adjust the tone of colour (which colour is emphasised, red, You can use this function when [Dimmer Trigger] is set to [-24] to [+24] or green).
-
Page 43: Theme Settings
Menu Item Description Menu Item Description [Firmware Update] [Connection Status] Check that the leads are properly connected between this CAUTION product and vehicle. • The external storage device for updating must contain only the [GPS Antenna] Displays the connection status of the GPS aerial ([OK] or correct update file. - Page 44 Menu Item Description Menu Item Description [Background] Select the wall paper from the preset items in this product [Splash Screen] Select the splash screen from the preinstalled image in this [Home] [AV] or original pictures via the external device such as USB product or external devices such as USB storage devices storage device and SD memory card.
-
Page 45: Audio Settings
▶Importing Theme settings Menu Item Description Set the external storage device (page 24). [Source Level Adjuster] Adjust the volume level of each source to prevent radical [-4] to [+4] changes in volume when switching between sources other A message confirming whether to import the stored setting data appears. than FM. - Page 46 Menu Item Description Menu Item Description [Time Alignment] Select or customise the time alignment settings to reflect [Rear Speaker Output] Select the rear speaker output. [On] [Off] the distance between the listener’s position and each [Rear] [Subwoofer] NOTES Listening position*1*2 speaker.
- Page 47 – When the speakers are incorrectly connected. (For example, when a rear speaker is connected as a NOTE subwoofer output.) If driving restrictions are detected during measurement, the measurement is cancelled. – When a speaker is connected to a power amp delivering output higher than the speaker’s Fix the microphone for acoustical measurement (sold separately) in the centre of maximum input power capability.
-
Page 48: Video Settings
Menu Item Description Adjusting the cutoff frequency value [Menu Language]*1*2 Set a menu language preference. When you select [Others], You can adjust the cutoff frequency value of each speaker. a language code input screen is shown. Input the four-digit The following speakers can be adjusted: code of the desired language then touch [Standard Mode]: Front, Rear, Subwoofer. - Page 49 Menu Item Description Menu Item Description [Parental] Set restrictions so that children cannot watch violent or [DVD Auto Play] Set to display the DVD menu automatically and start adult-oriented scenes. You can set the parental lock level in [On] [Off] playback from the first chapter of the first title when a DVD steps as desired.
-
Page 50: Favourite Menu
Favourite menu Other functions Registering your favourite menu items in shortcuts allows you to quickly jump to the Setting the time and date registered menu screen by a simple touch on the [Favorites] screen. NOTE Touch the current time on the screen. Up to 12 menu items can be registered in the favourite menu. -
Page 51: Selecting The Video For The Rear Display
Important Selecting the video for the rear display If you forgot your password, contact the nearest authorised Pioneer Service Station. You can choose either to show the same image as the front screen or to show the Setting the password selected source on the rear display. -
Page 52: Restoring This Product To The Default Settings
WARNING resulting in considerable danger. Pioneer does not recommend that you • It is extremely dangerous to allow cables install this product yourself. This product is to become wound around the steering designed for professional installation only. -
Page 53: Before Installing This Product
• Make sure that the cables and wires will connected to metal parts of the car’s • For connecting a power amp or other Rear panel (main not interfere with or become caught in body. The earth wire of the power amp devices to this product, refer to the any of the vehicle’s moving parts, and the one of this unit or any other... -
Page 54: Speaker Leads
The position of the speed detection circuit Grey and the position of the handbrake switch Grey/black vary depending on the vehicle model. For Green details, consult your authorised Pioneer Green/black dealer or an installation professional. Violet Violet/black Speaker leads Subwoofer (4 Ω) When using a subwoofer of 2 Ω, be sure... -
Page 55: Power Amp (Sold Separately)
Middle range output (NW) Power amp (sold separately) Yellow/black (MUTE) If you use an equipment with Mute function, wire this lead to the Audio Mute lead on that equipment. If not, keep the Audio Mute lead free of any connections. Important This product The speaker leads are not used when this connection is in use. -
Page 56: Ipod/Iphone And Smartphone
• The image area of full-screen images iPod/iPhone and Smartphone (Android™ displayed while backing or checking the smartphone device) rear of the vehicle may differ slightly. NOTES • For details on how to connect an external Connecting via the USB port device using a separately sold cable, refer to the manual for the cable. -
Page 57: External Video Component
• Some appropriate settings are required NOTE NOTE NOTE to use rear view cameras. For details, refer The appropriate setting is required to use The appropriate setting is required to use When you connect the High Speed HDMI® to [Camera settings] (page 39). the external video component. -
Page 58: Rear Display
passengers in the rear seats to watch the Rear display Installation video source. features, including airbags, hazard lamp Precautions before buttons or installation (iii) impair the driver’s ability to safely operate the vehicle. • Never install this product in front of or CAUTION next to the place in the dashboard, door, or pillar from which one of your vehicle’s... -
Page 59: Installation Using The Screw Holes On The Side Of This Product
– Places exposed to direct sunlight, such Position this product so that its screw Installing the GPS as on top of the dashboard. holes are aligned with the screw holes – Places that may be exposed to rain, of the bracket, and tighten the screws at aerial such as close to the door or on the three locations on each side. -
Page 60: Installing The Microphone
Installing the When installing the aerial inside the vehicle (on the dashboard or rear shelf) microphone WARNING • Install the microphone in a place where Do not install the GPS aerial over any sensors or vents on the dashboard of the vehicle, as its direction and distance from the driver doing so may interfere with the proper functioning of such sensors or vents and may make it easiest to pick up the driver’s... -
Page 61: Appendix
– Connect the handbrake lead correctly, here, contact your dealer or the nearest and apply the handbrake. authorised Pioneer service facility. Double-sided tape → The handbrake interlock is activated. Clamps – Park your vehicle in a safe place and... -
Page 62: Error Messages
– Update the iPod software version. check the screen on the smartphone. – Stop playback once, then restart. → An error has occurred. dealer or your nearest Pioneer service centre. – Reconnect the iPod with the USB The screen is displayed, but operation The picture is stretched, with an incorrect interface cable for iPod/iPhone. - Page 63 – Select a file that can be played. – Check that the files in the external switch to OFF, then to ACC or ON and authorised Pioneer Station for storage device (USB, SD) are then connect a compliant USB storage Video resolution not supported assistance.
-
Page 64: Handling And Care Of Discs
→ This type of file is not supported on this disc contact your dealer or an authorised product. Pioneer Service Station. Handling and care of – Select a file that can be played. • At extremely high temperatures, a temperature cutout protects this product... -
Page 65: Detailed Information For Playable Media
Codec High Definition) format. Do not characteristics, scratches or dirt on the SD memory cards Detailed information insert in AVCHD discs. If inserted, the disc disc, or dirt, scratches or condensation on • For details about SD memory card may not be ejected. for playable media the lens of the built-in drive. - Page 66 • Some USB storage devices connected to • Up to 64 characters can be used for the and folder name. Depending on the USB storage device/SD memory card this product may generate noise on the name of the subtitle file, including the display area, this product may try to CODEC FORMAT MP3, WMA,...
-
Page 67: Bluetooth
Bluetooth prohibited because of the composition of 320 kbps (CBR), .mov SIG, Inc. and any use of such marks by PIONEER DivX files. CORPORATION is under license. Other Disc: 5 kbps to • Files with high transfer rates may not be Compatible video codec MPEG4, H.264,... -
Page 68: Flac
DivX logo, you know you have the freedom disclaimer. to play your favorite videos. – Redistributions in binary form must • Pioneer accepts no responsibility for data DivX®, DivX Certified® and associated logos are iOS is a trademark on which Cisco holds reproduce the above copyright notice,... -
Page 69: Using App-Based Connected Content
For details about the open source licenses service by its provider. commercial or public viewing purposes for the functions that this product is • Pioneer is not liable for any issues that connected content may constitute an infringement on the equipped with, please visit may arise from incorrect or flawed app- author’s rights as protected by the... -
Page 70: Specifications
LCD visible. In that case, please consult your Preout output level (max): 4.0 V screen, and cool air from the cooler may dealer or the nearest authorised Pioneer Equaliser (13-Band Graphic Equaliser): Slope: cause moisture to form inside this Service Station. - Page 71 Frequency response: WMA decoding format: <SD image> +16 dBm Max (2.4 GHz) 5 Hz to 44 000 Hz (with DVD, at sampling WMA 10 Std, WMA 10 Pro, WMA 9 JPEG decoding format: +13 dBm Max (5 GHz) frequency 96 kHz) Lossless JPEG Signal-to-noise ratio:...
- Page 72 © 2018 PIONEER CORPORATION. All rights reserved. <CRB5090-B> ID...
Need help?
Do you have a question about the AVH-Z9190BT and is the answer not in the manual?
Questions and answers