Table of Contents
Advertisement
Quick Links
Advertisement
Table of Contents

Related Manuals for Zopu SL122

Summary of Contents for Zopu SL122
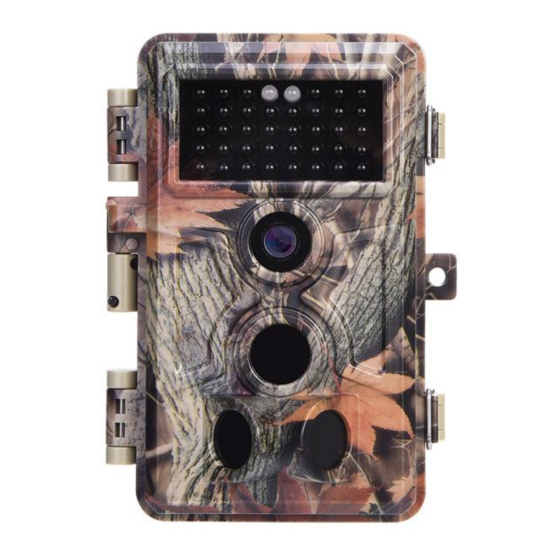
- Page 1 Digital Trail Camera SL122 USER MANUAL V2.0...
-
Page 2: Table Of Contents
TABLE OF CONTENT 1. IMPORTANT NOTE...........1 2. INTRODUCTION............1 2.1. ABOUT THE CAMERA........1 2.2. APPLICATIONS..........3 3. PARTS AND CONTROLS......... 3 4. INSTALLING THE BATTERIES AND SD CARD.. 6 4.1. LOADING BATTERIES........6 4.2. INSERTING THE SD CARD......7 5. USING THE CAMERA..........8 6. -
Page 3: Important Note
1. IMPORTANT NOTE Congratulations on your purchase of one of the best trail cameras on the market! We appreciate your business and want to earn your trust. Please refer to the notes below and the instructions in this manual to ensure that you are completely satisfied with this product. - Page 4 eight AA alkaline batteries. Once motion in the monitored area is detected, the digital camera unit will be triggered at once (typically approx. 0.2~0.6 second) and then automatically take photos or videos according to previously programmed settings. The camera is equipped with built-in infrared LEDs that function as a flash (invisible to human eyes), so that it delivers clear photos or videos (in black &...
-
Page 5: Applications
mode with 8 AA batteries (user supplied) 2.2. APPLICATIONS The camera can be used as follows: For hunting, trail animals’ trace or habit For wildlife observing and researching, captures pictures and videos of wild animals As sports camera, for riding, driving, camping or exploring ... - Page 6 The camera provides the following connections for external devices: Mini USB port and SD card slot (Figure 2). Tripod Screw Nut SD Card Slot Mini USB Port DC Port Figure 2: Bottom View The camera has two strap holes on the back. The strap can be put through the strap holes and fastened securely around the tree trunk by pulling the end of the strap firmly(Figure 3).
- Page 7 supported (Figure 4). LCD Screen Keypad Battery Slot Figure 4: Inside View UP Key as Video Mode OK Key as Playback Mode RIGHT Key as Manual Shutter ("SHOT") DOWN Key as Camera Mode Figure 5: Keypad and Shortcut A 3-way power switch is used to select the main operating modes: OFF, ON, and SET(Figure 5).
-
Page 8: Installing The Batteries And Sd Card
button of the camera and the OK key switches the camera to the Playback ("REPLAY") mode. These secondary functions are indicated by icons or text above the key as show in Figure 5. 4. INSTALLING THE BATTERIES AND SD CARD Before you begin learning how to use your camera, you will first need to install a set of batteries and insert an SD card. -
Page 9: Inserting The Sd Card
Figure 6: Loading the Batteries 4.2. INSERTING THE SD CARD Insert the SD card (with the camera's power switch in the OFF position) before beginning to operate the camera. Don't insert or 一 remove the SD card when the power switch is in the ON position. The camera uses a standard SD (Secure Digital) memory card to save photos (in .jpg format) and/or videos (in .avi format). -
Page 10: Using The Camera
Please make sure that the write-protect switch on the side of the card is "OFF" (NOT in the "Lock" position). The following describes how to insert and remove the SD card: Insert the SD card into the card slot with its label side upwards. ... -
Page 11: The Off, On, And Set Modes
6. THE OFF, ON, AND SET MODES The camera has three basic operational modes: OFF mode: Power switch in the OFF position. ON mode: Power switch in the ON position (LCD screen is off.) SET mode: Power switch at SET position (LCD ... -
Page 12: Set Mode
doing so. NOTES: When the power switch is set to ON position, the camera requires 30-60 seconds for PIR Sensor warming up, and then begin working (sensing motion event). 6.3. SET MODE In the SET mode you can check and change the settings of the camera with the help of its built-in LCD. - Page 13 directly playback them on the screen. In the SET mode, press the OK key to playback the photo or video, press the DOWN key to the last photo or video, and press UP key to the first one. And continue to press UP or DOWN key to scroll the history photo or video if you want.
-
Page 14: Advanced Settings
7. ADVANCED SETTINGS The trail camera comes with preset manufacturer settings. You can change the settings to meet your requirements. Please make sure that the camera is in the SET mode. Once the camera screen is on, press MENU key to enter/exit the menu. Press the UP/DOWN key to move the marker, Press the LEFT/RIGHT key to change the setting, and press the OK key to confirm the change. - Page 15 only) files that take more of the SD card capacity. NOTE: Gray out in Camera Mode. Picture Select the number of photos taken in 01 Photo, sequence per trigger in Camera mode. (affects 02 Photo, Please also refer to the Interval 03 Photo still photos parameter.
- Page 16 YYYY – Year MM – Month DD – Day YYYY/MM HH – Hour Date/Time mm – Minute HH:mm Notes: Use "LEFT/RIGHT" key to switch parameters, use "UP/DOWN" to set current date and time. Select Date/Time if you want the date &...
- Page 17 battery power and then reduce battery life. When Time Lapse is ON, please check the PIR enable (next parameter) and set to ON or OFF as you want. Password Set up a password to protect your camera from unauthorized users. Select On to assign a serial number to each camera you have.
-
Page 18: Mounting And Positioning The Camera16
MOUNTING AND POSITIONING THE CAMERA 8.1. MOUNTING After you've set up the camera's parameters to your personal preferences at home or in your trunk, you're ready to take it outside and slide the power switch to "ON". When setting up the camera for scouting game or other outdoor applications, you must be sure to mount it in place correctly and securely. -
Page 19: Sensing Angle And Distance Test
Figure 8: Mounting the Camera 8.2. SENSING ANGLE AND DISTANCE TEST To test whether the camera can effectively monitor the area you choose, this test is recommended to check the sensing angle and monitoring distance of the camera. To perform the test: Switch the camera to the SET mode. -
Page 20: Switching On The Camera
heat source or nearby tree branches or brush (especially on windy days). DO NOT install the camera behind the glass window as that is not possible to sense any motion. Avoid the camera toward to glass object. 8.3. SWITCHING ON THE CAMERA Once you switch to the ON mode, the motion indicator LED (blue) will blink for about 15 seconds. -
Page 21: Troubleshooting / Faq
file names like DSCF0001.JPG and videos like DSCF0001.AVI. The AVI video files can be played back on most popular media players, such as Windows Media Player, QuickTime, etc. There are several different ways this can be done. You can directly review the photos or videos on the camera screen (see the instructions in Section 6.4) Or in the OFF mode, you can use the provided USB cable to download the files to a computer. - Page 22 probably an electronic component issue. If this is the case, please contact our customer service to send the camera back for repair. Battery life is shorter than expected 1. Battery life will vary with operating temperature and the number of images taken over time. Typically, the camera will be able to capture several thousand images before the batteries die.
- Page 23 6. If you have used an SD card in another device before inserting it in your camera, you might want to try formatting the card using the "Format" parameter in SET mode (make sure you have backed up any important files first, as formatting will erase all previous files).
- Page 24 camera, allowing less time for the flash to fully recharge before firing again. 2. Night photos or videos appear too bright a. You will get the best results when the subject is within the ideal flash range, no closer than 10'(3m) from the camera.
- Page 25 1. Check the "Sensor Level" (PIR sensitivity) parameter setting. For warm environmental conditions, set the Sensor Level to "High" and for cold weather use, set the sensor for "Low". 2. Try to set your camera up in an area where there is not a heat source in the camera's line of sight.
-
Page 26: Technical Specifications
11. TECHNICAL SPECIFICATIONS Element Description Max. Pixel 4608x3456 Size Lens F=2.0; FOV=90°; Auto IR-Cut 65ft/20m with 38pcs no glow 940nm IR LEDs IR Flash (Invisible to Human Eyes) LCD Screen 2.4" TFT color screen Keypad 6 Keys, 1 Switch Memory SD Card (Up to 32GB) Picture Size 16MP;... - Page 27 Camera + Take picture firstly then video Video Playback 1~8 Times Zoom In Time Stamp On /Off Timer On /Off; Timer Set Password 4-Digit Numbers Device Serial 4-Digit Numbers Time Lapse 1 Min. ~ 24 Hours English/Chinese/French/Norwegian/Deutsch/Spa Language nish/Portuguese/Japanese/Russian/Finnish/Italian /Cezch/Romanian/Svenska Power 4xAA;...
-
Page 28: Warranty
Operation 5% ~ 95% Humidity Certificate FCC & CE & RoHS 12. WARRANTY We take great pride in our products. We always stand behind our promises. We provide a leading warranty term and service. Buying our product, you are covered under a limited warranty. We guarantee our products to be free of defects in materials and workmanship for a limited warranty of the original purchase date. -
Page 29: Fcc Compliance Statement
13. FCC COMPLIANCE STATEMENT This equipment has been tested and found to comply with the limits for a Class B digital device, pursuant to part 15 of the FCC Rules. These limits are designed to provide reasonable protection against harmful interference in a residential installation.
Need help?
Do you have a question about the SL122 and is the answer not in the manual?
Questions and answers
help getting pictures from sd card to my laptop. when i connect the cable to a USB port the camera says:browsing sd card storage